Chiltern

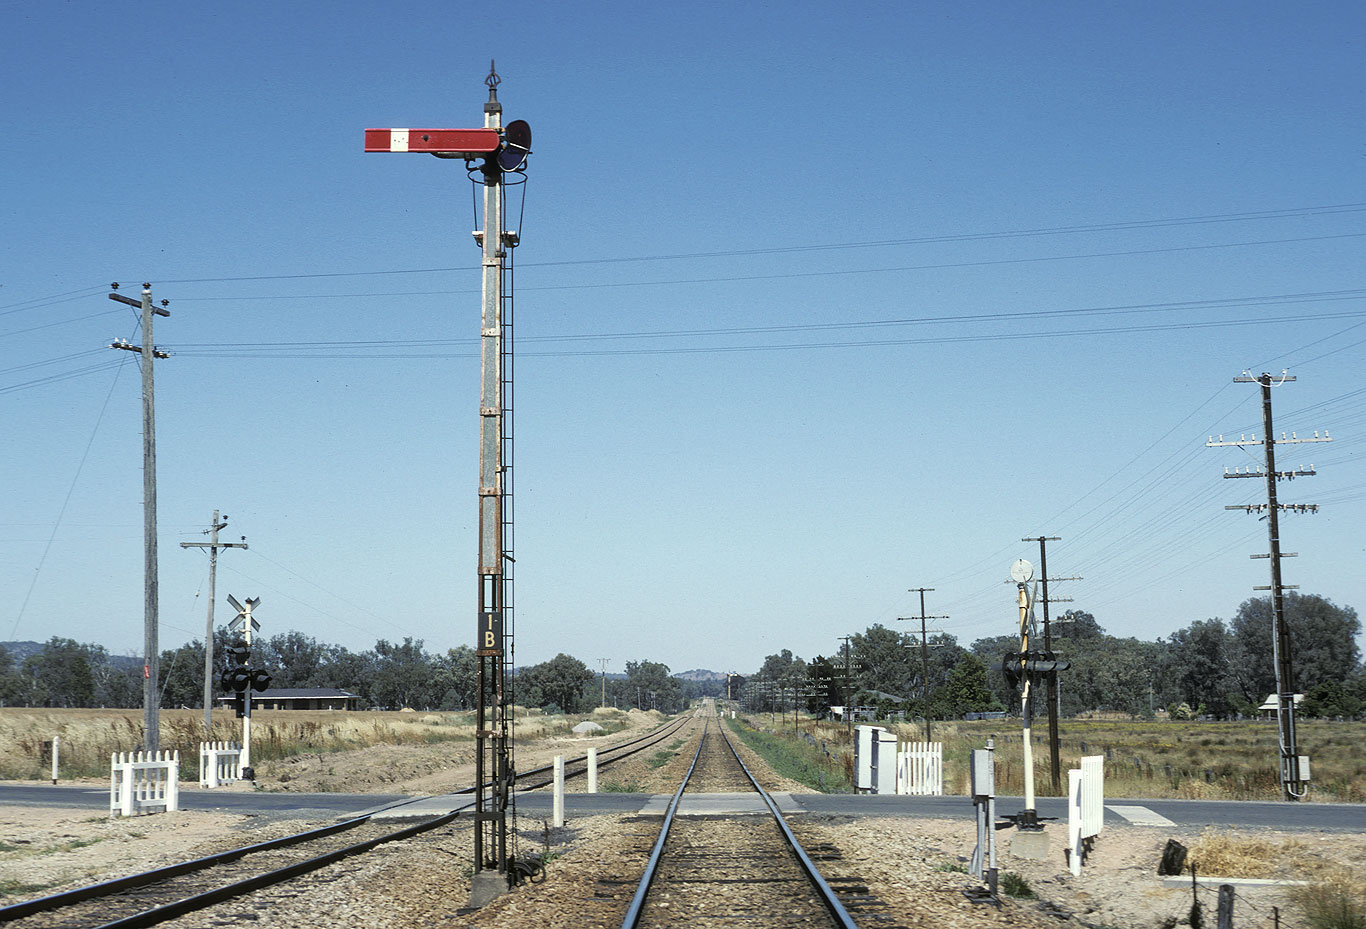
ABOVE: The signal diagram calls this up signal a starting signal even though, strictly speaking, starting signals were only used on Double Line block. It was installed on Nov 27 1960 in conjunction with the installation of flashing lights at the Beechworth Road level crossing. This was common when flashing lights were installed as it allowed trains to pull up to the level crossing but not activate the flashing lights until the train was ready to depart. Dec 1 1984.
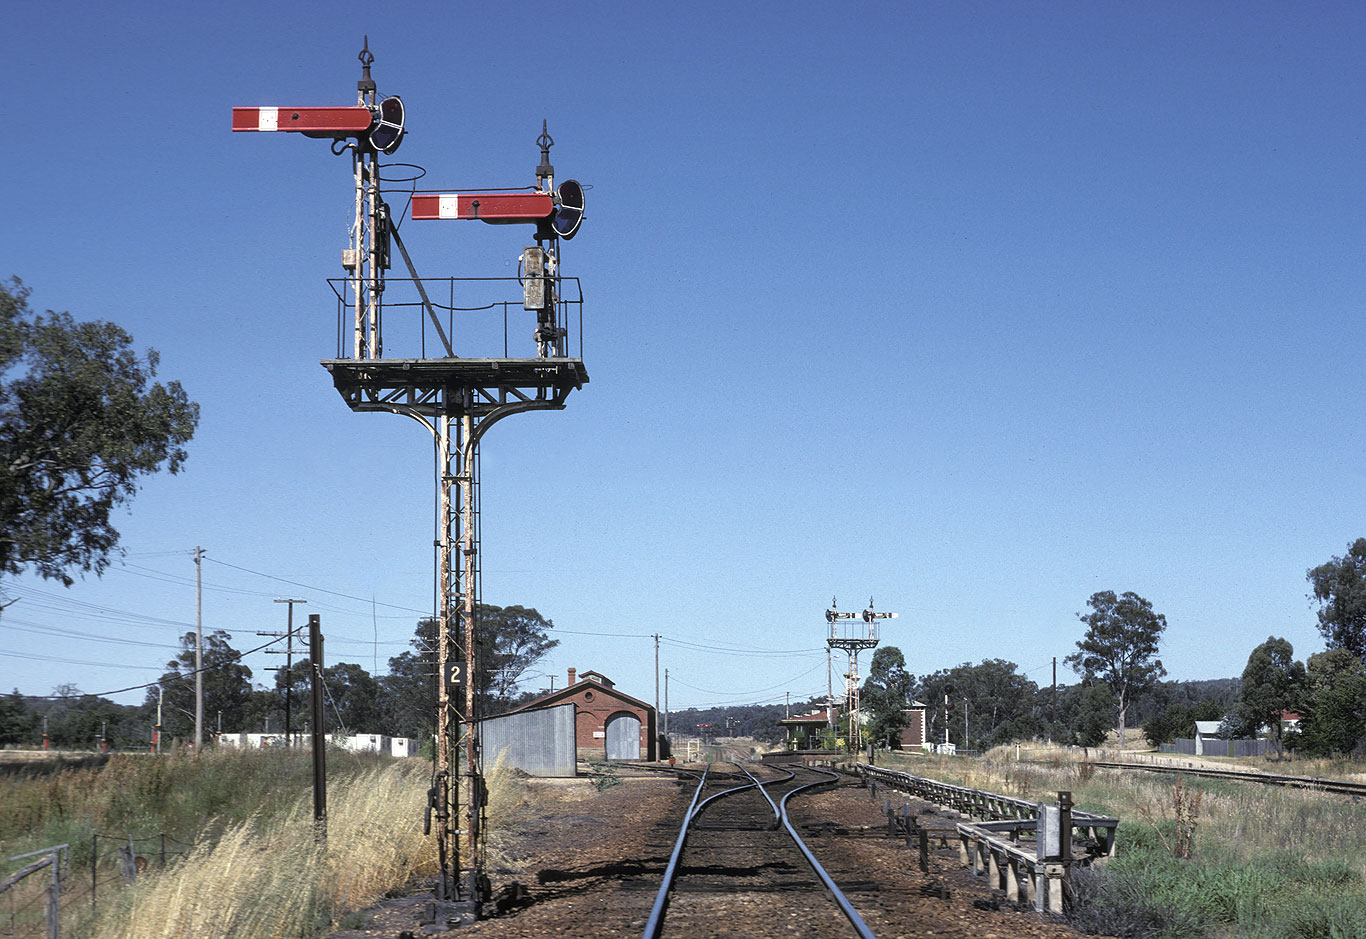
ABOVE: The down arrival home. Unlike many interlocked stations, Chiltern had no signals into or out of the yard, moves were controlled by hand signals from the signalman. Dec 1 1984.
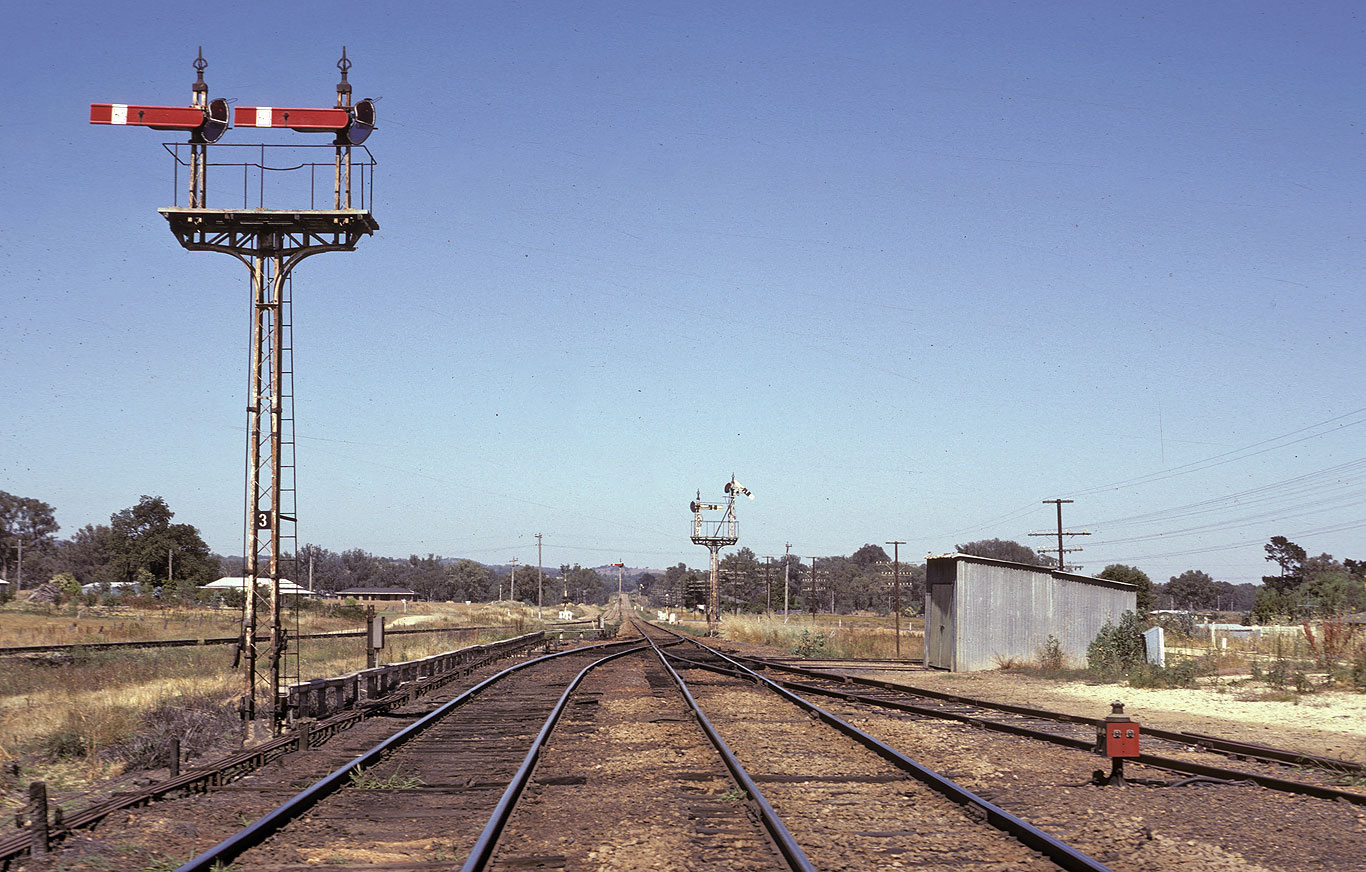
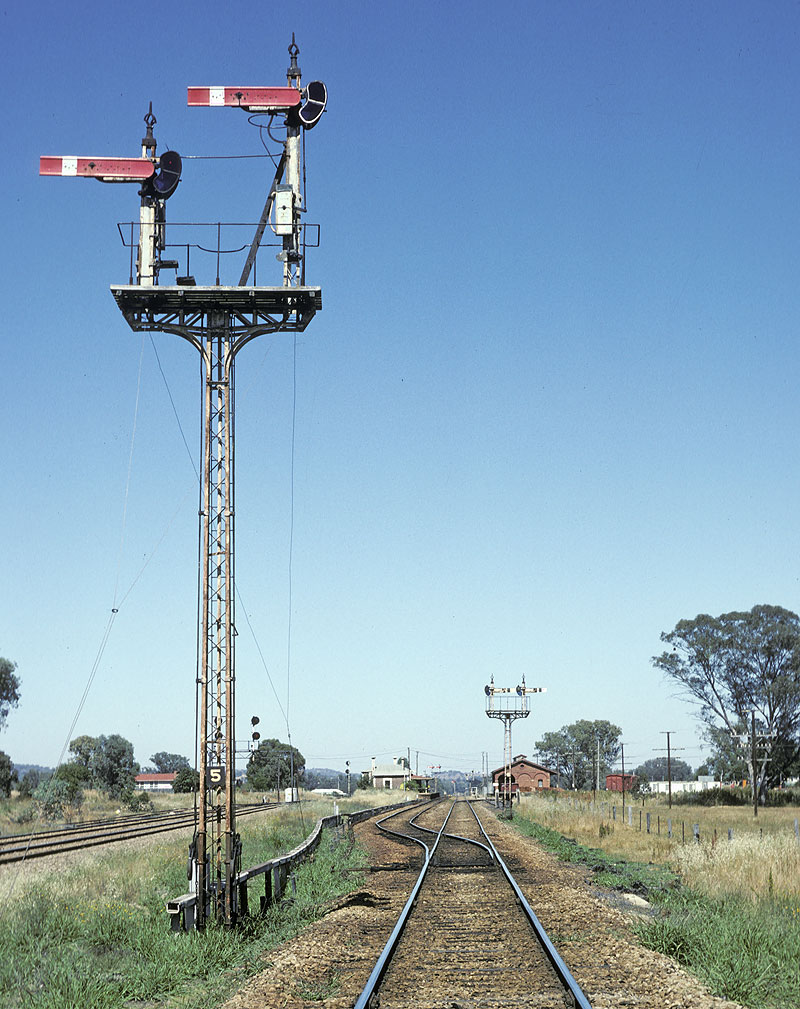
ABOVE: The up departure homes, post 3, looking towards Melbourne. Moves out of the yard track on the right required the catch point indicator to be green in addition to a green hand signal from the signalman. Dec 1 1984.
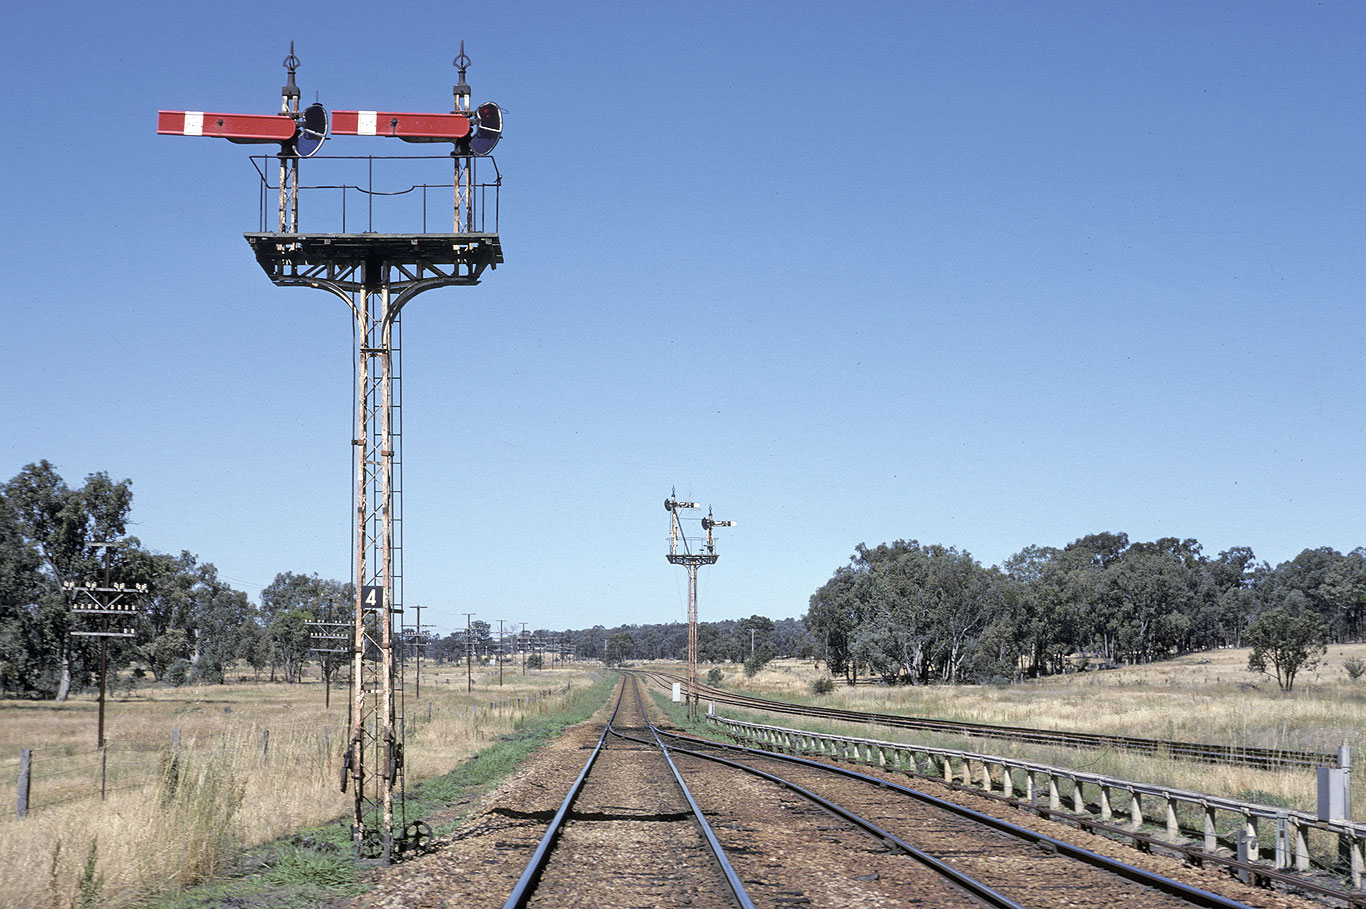
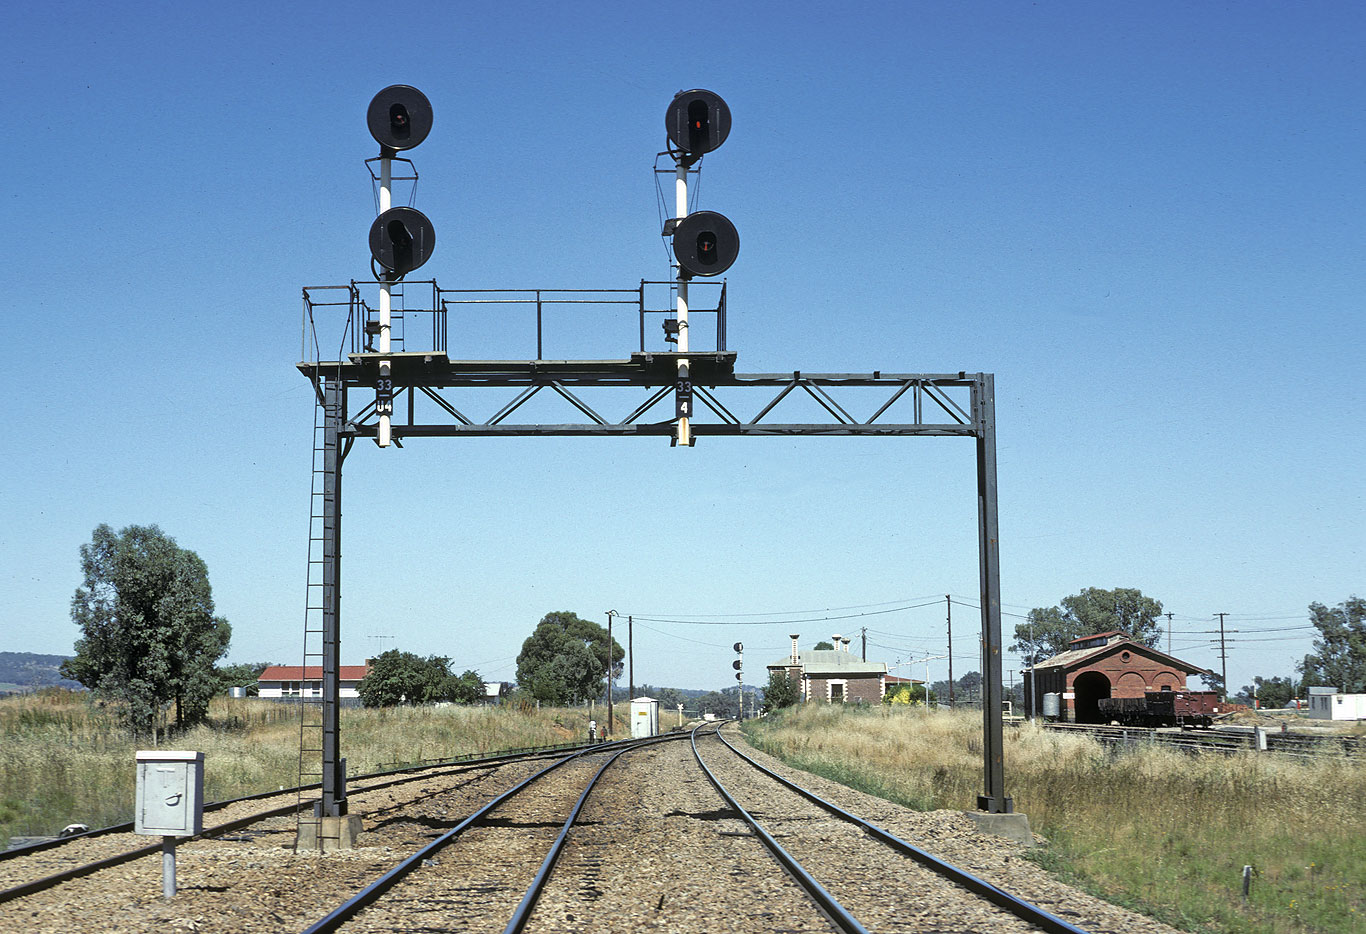
ABOVE: Post 4, the down departure home signals, looking north, towards Wodonga. Dec 1 1984.
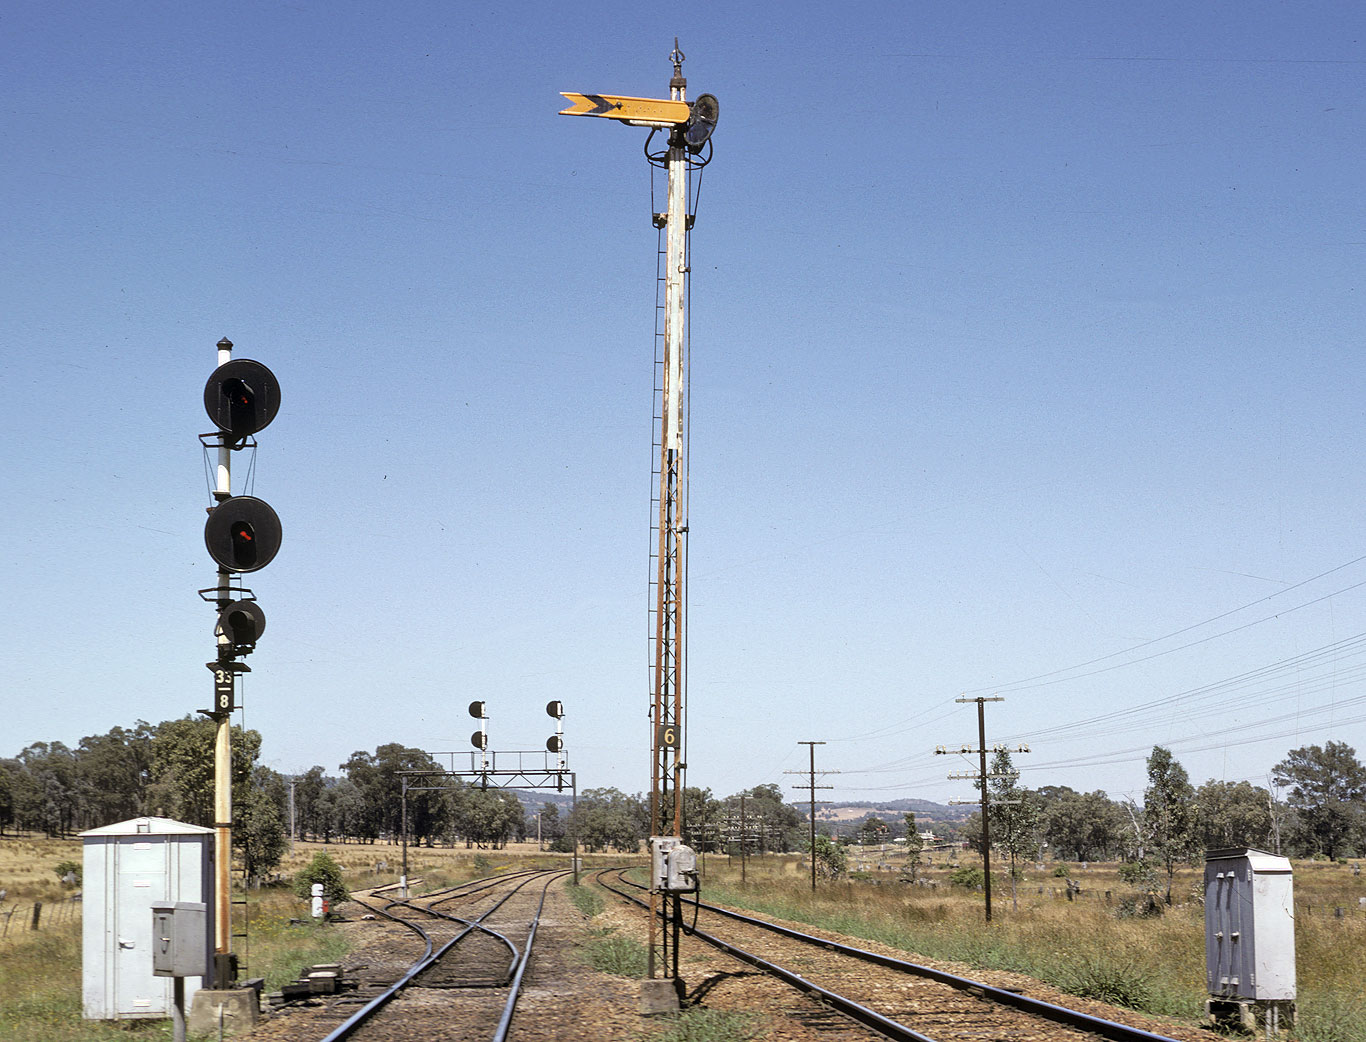
ABOVE: Post 6, the up distant signal, alongside post 33/8, the standard gauge up home arrival for Chiltern loop. Dec 1 1984.
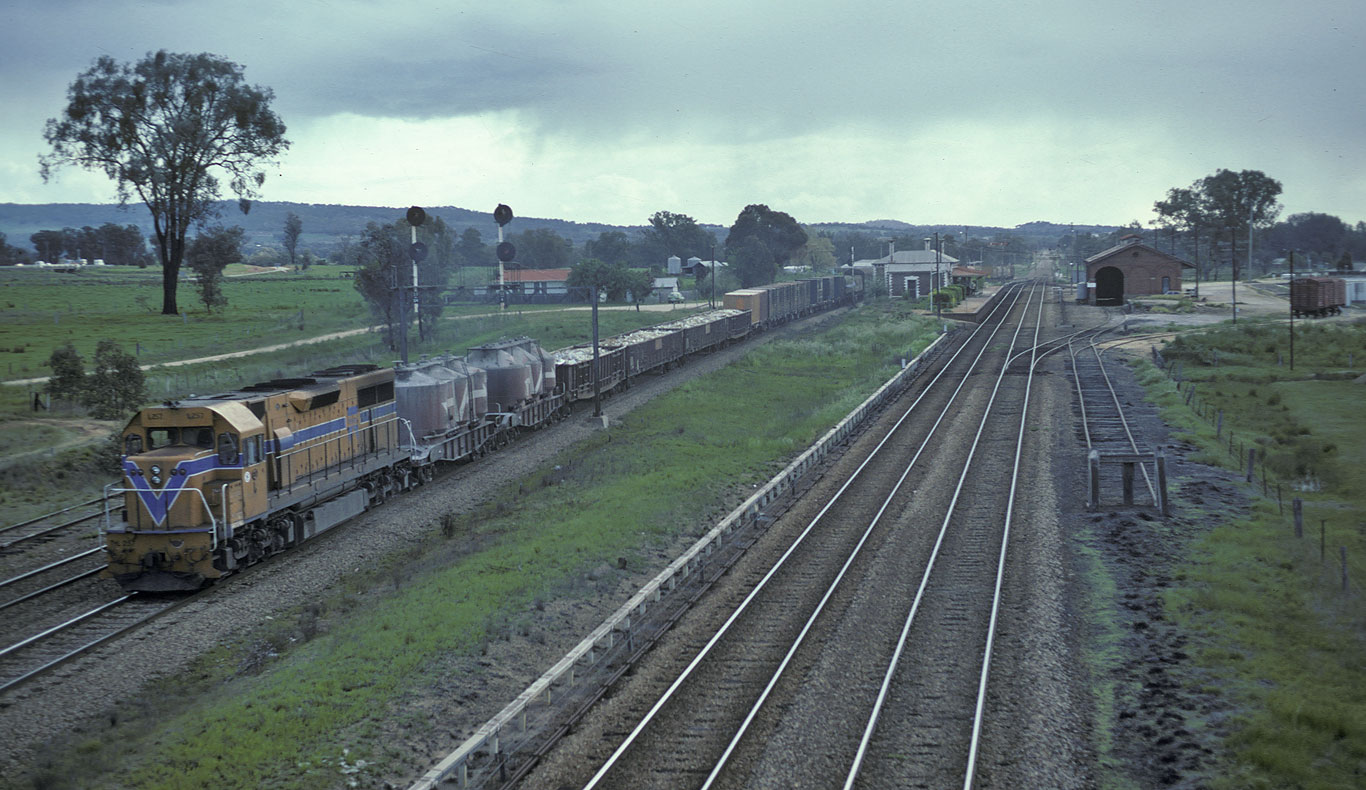
ABOVE: A West Australian L class heads a down standard gauge goods through Chiltern loop, Oct 17 1984. (photo courtesy Noel Bamford)
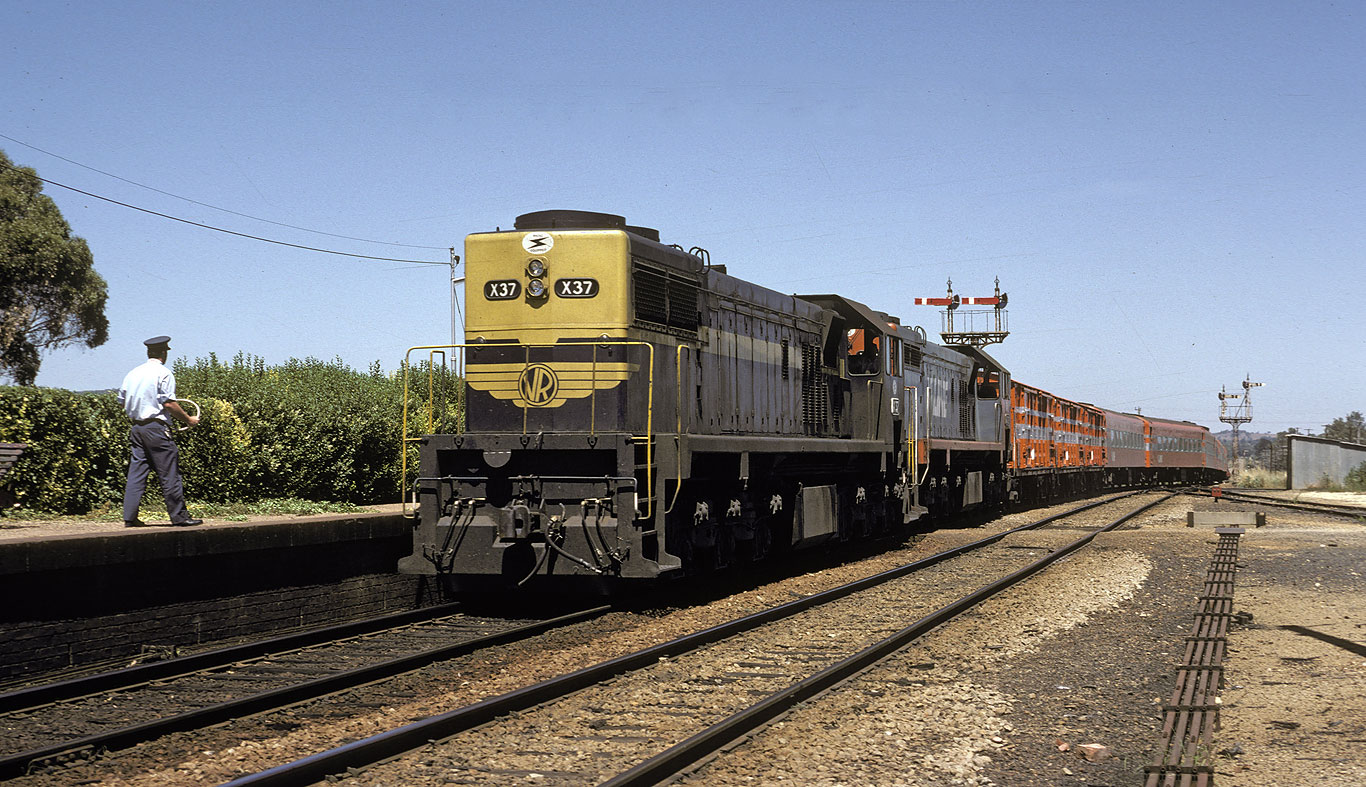
ABOVE: The morning down Albury arrives Chiltern, the extra parcel vans were associated with the "Great Victorian Bike Ride" and were full of bicycles. Dec 1 1984.
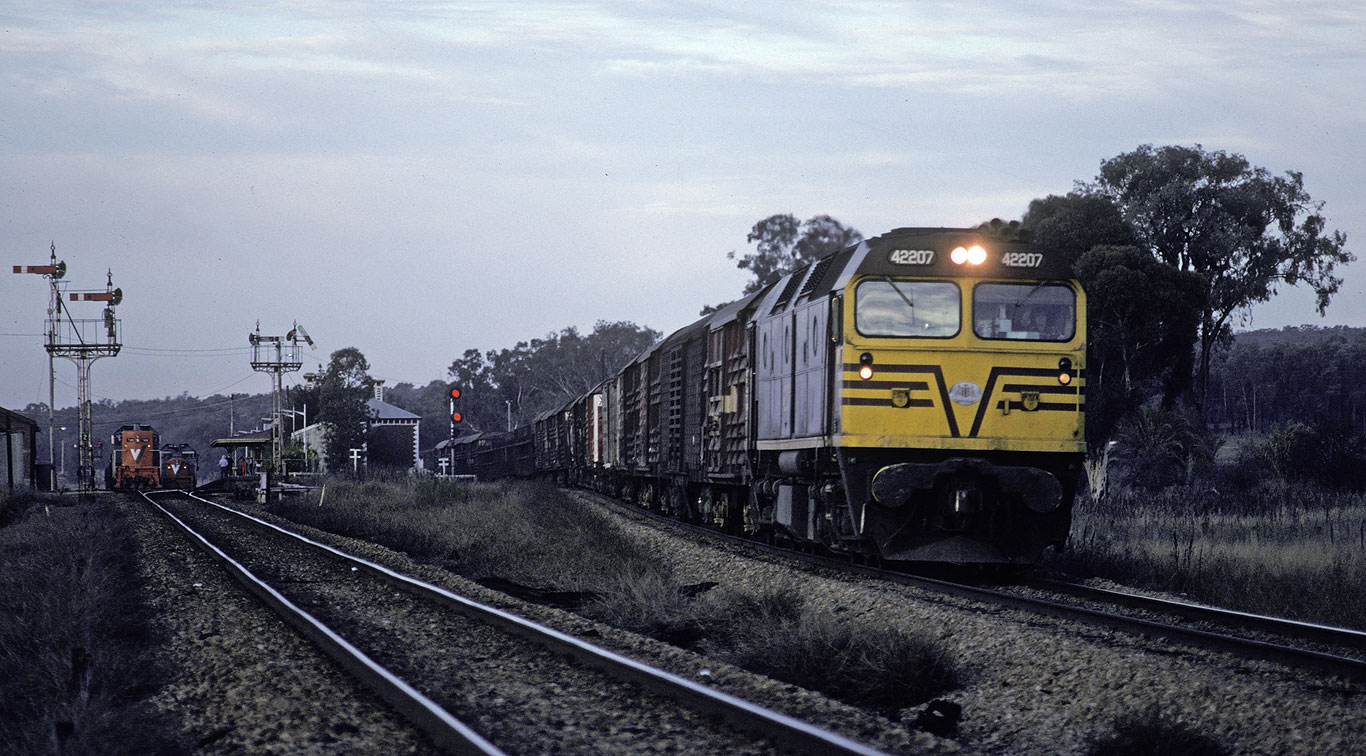
BELOW: A busy scene at Chiltern sees an up broad gauge goods in #2 road as the up Albury pass. overtakes it. Meanwhile an up standard gauge goods roars through Chiltern loop. Dec 1 1984.
