Deep Lead - Dimboola
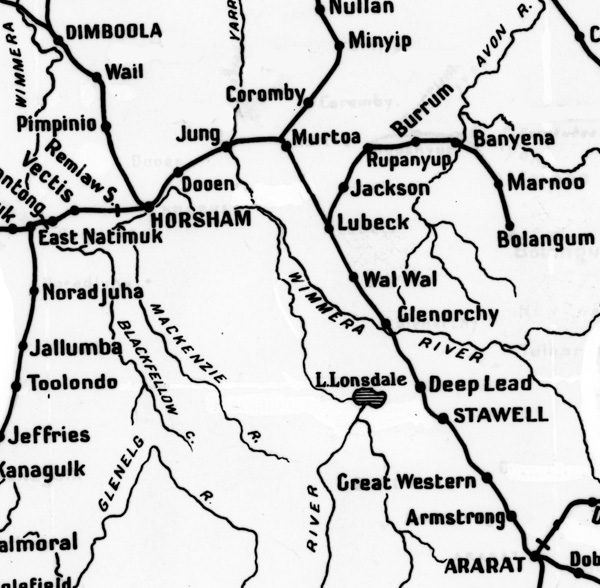
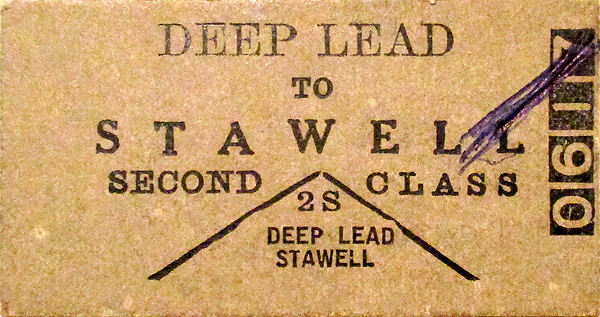
Deep Lead
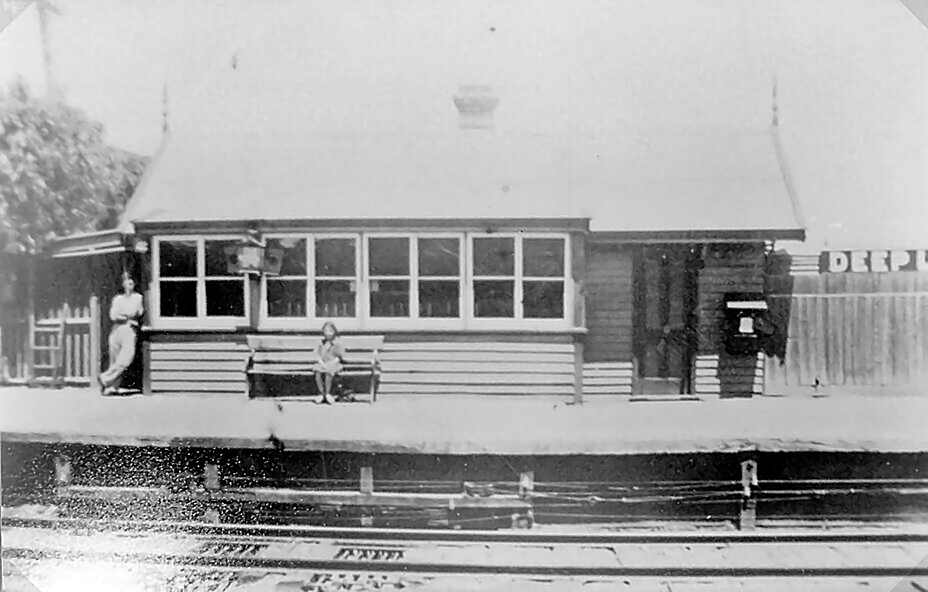
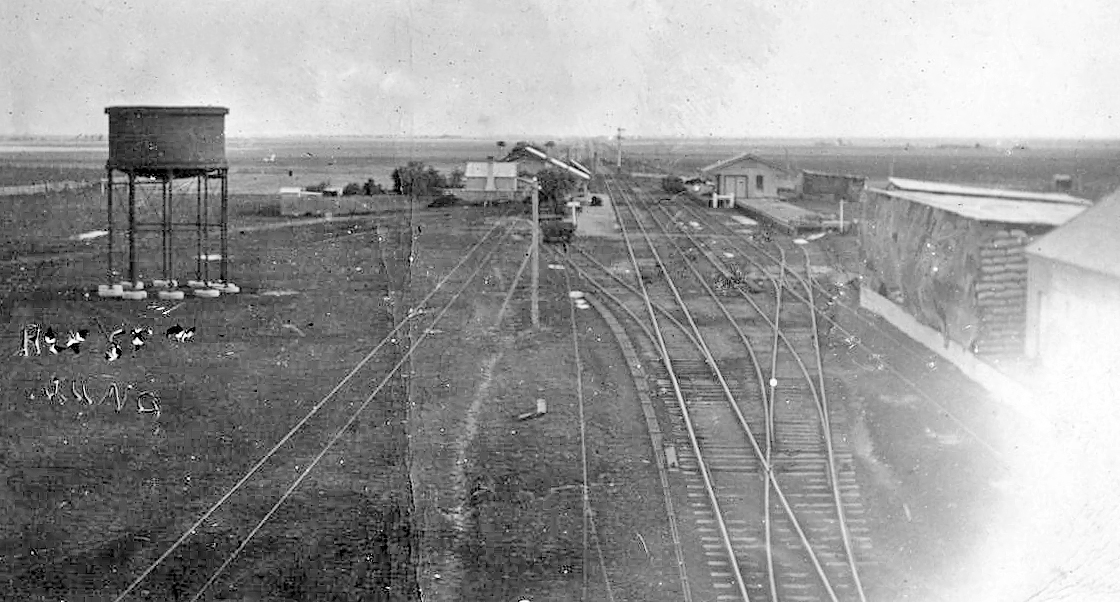
ABOVE: A very early, undated photo of Deep Lead.
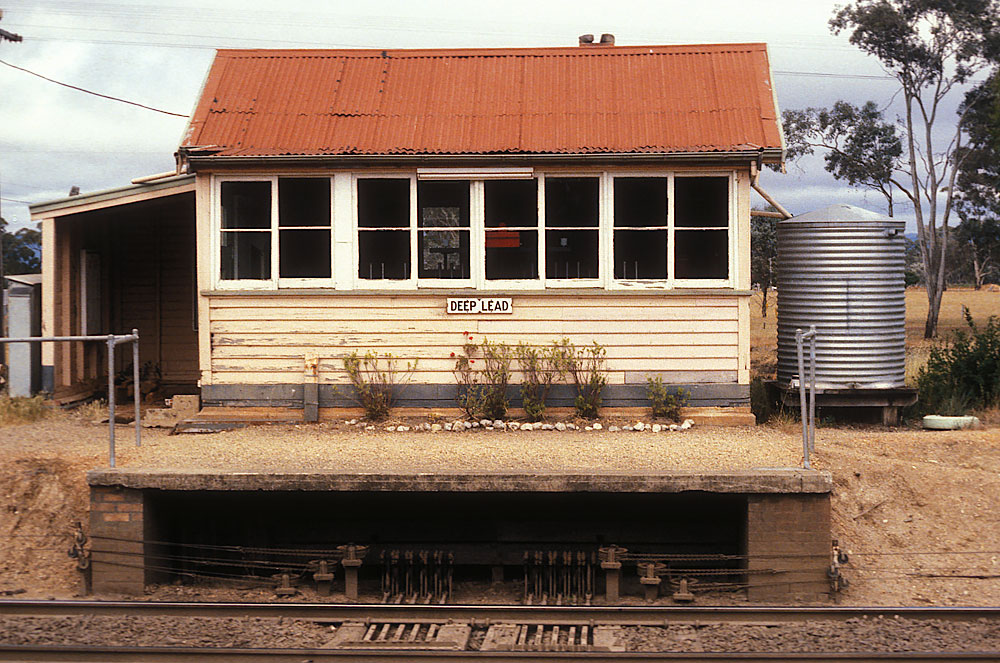
ABOVE: The station building/signalbox after the platform had been cut back, 1981.
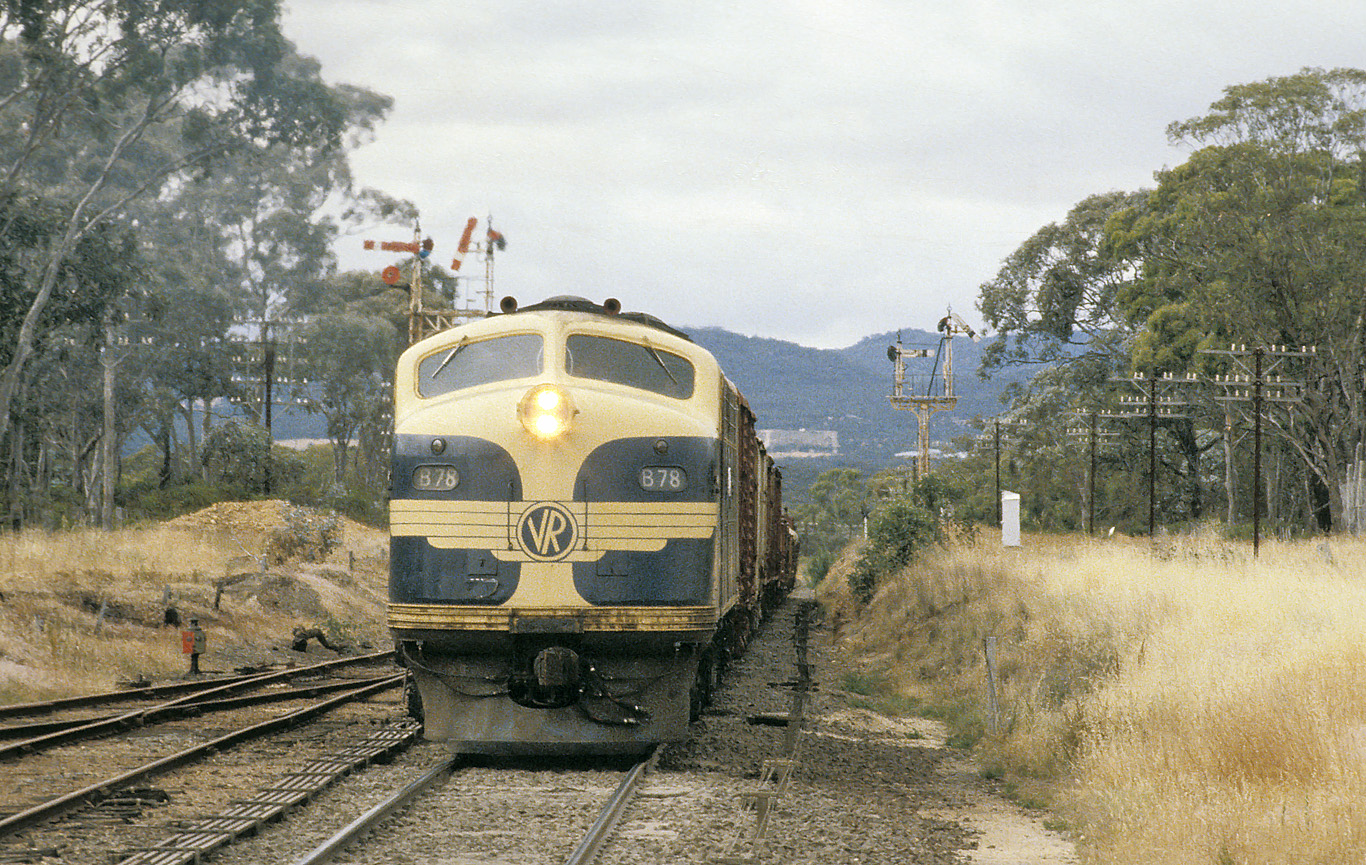
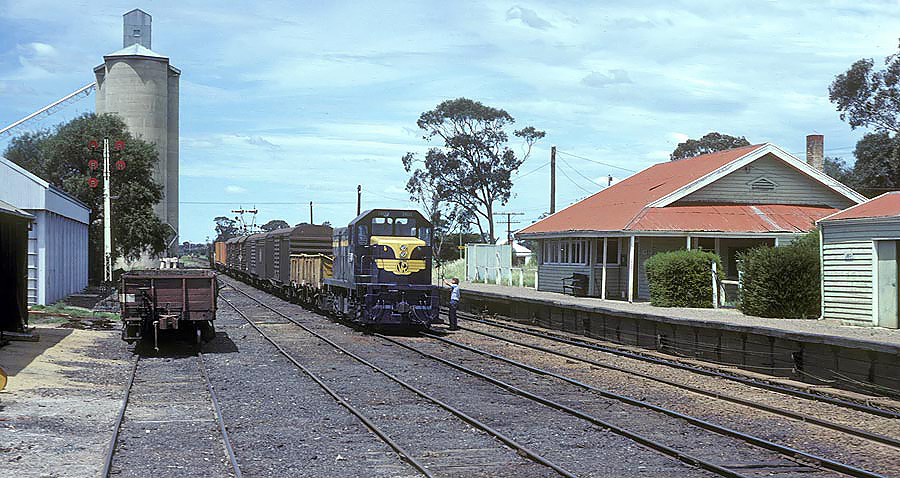
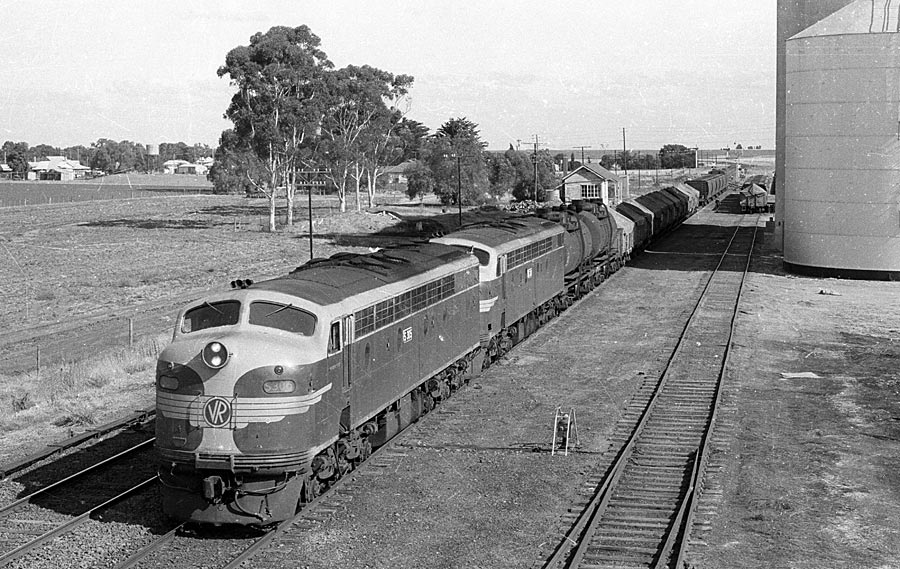
ABOVE: B 78 climbs the 1 in 75 grade into Deep Lead on a down goods, Dec 29 1980.
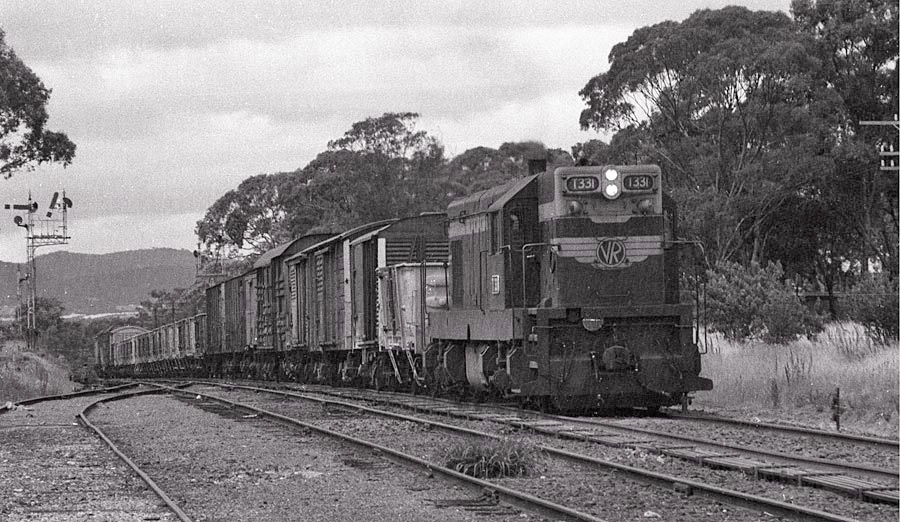
ABOVE: T 331 heads a down goods, consisting of mainly SAR wagons, through Deep Lead. 1981
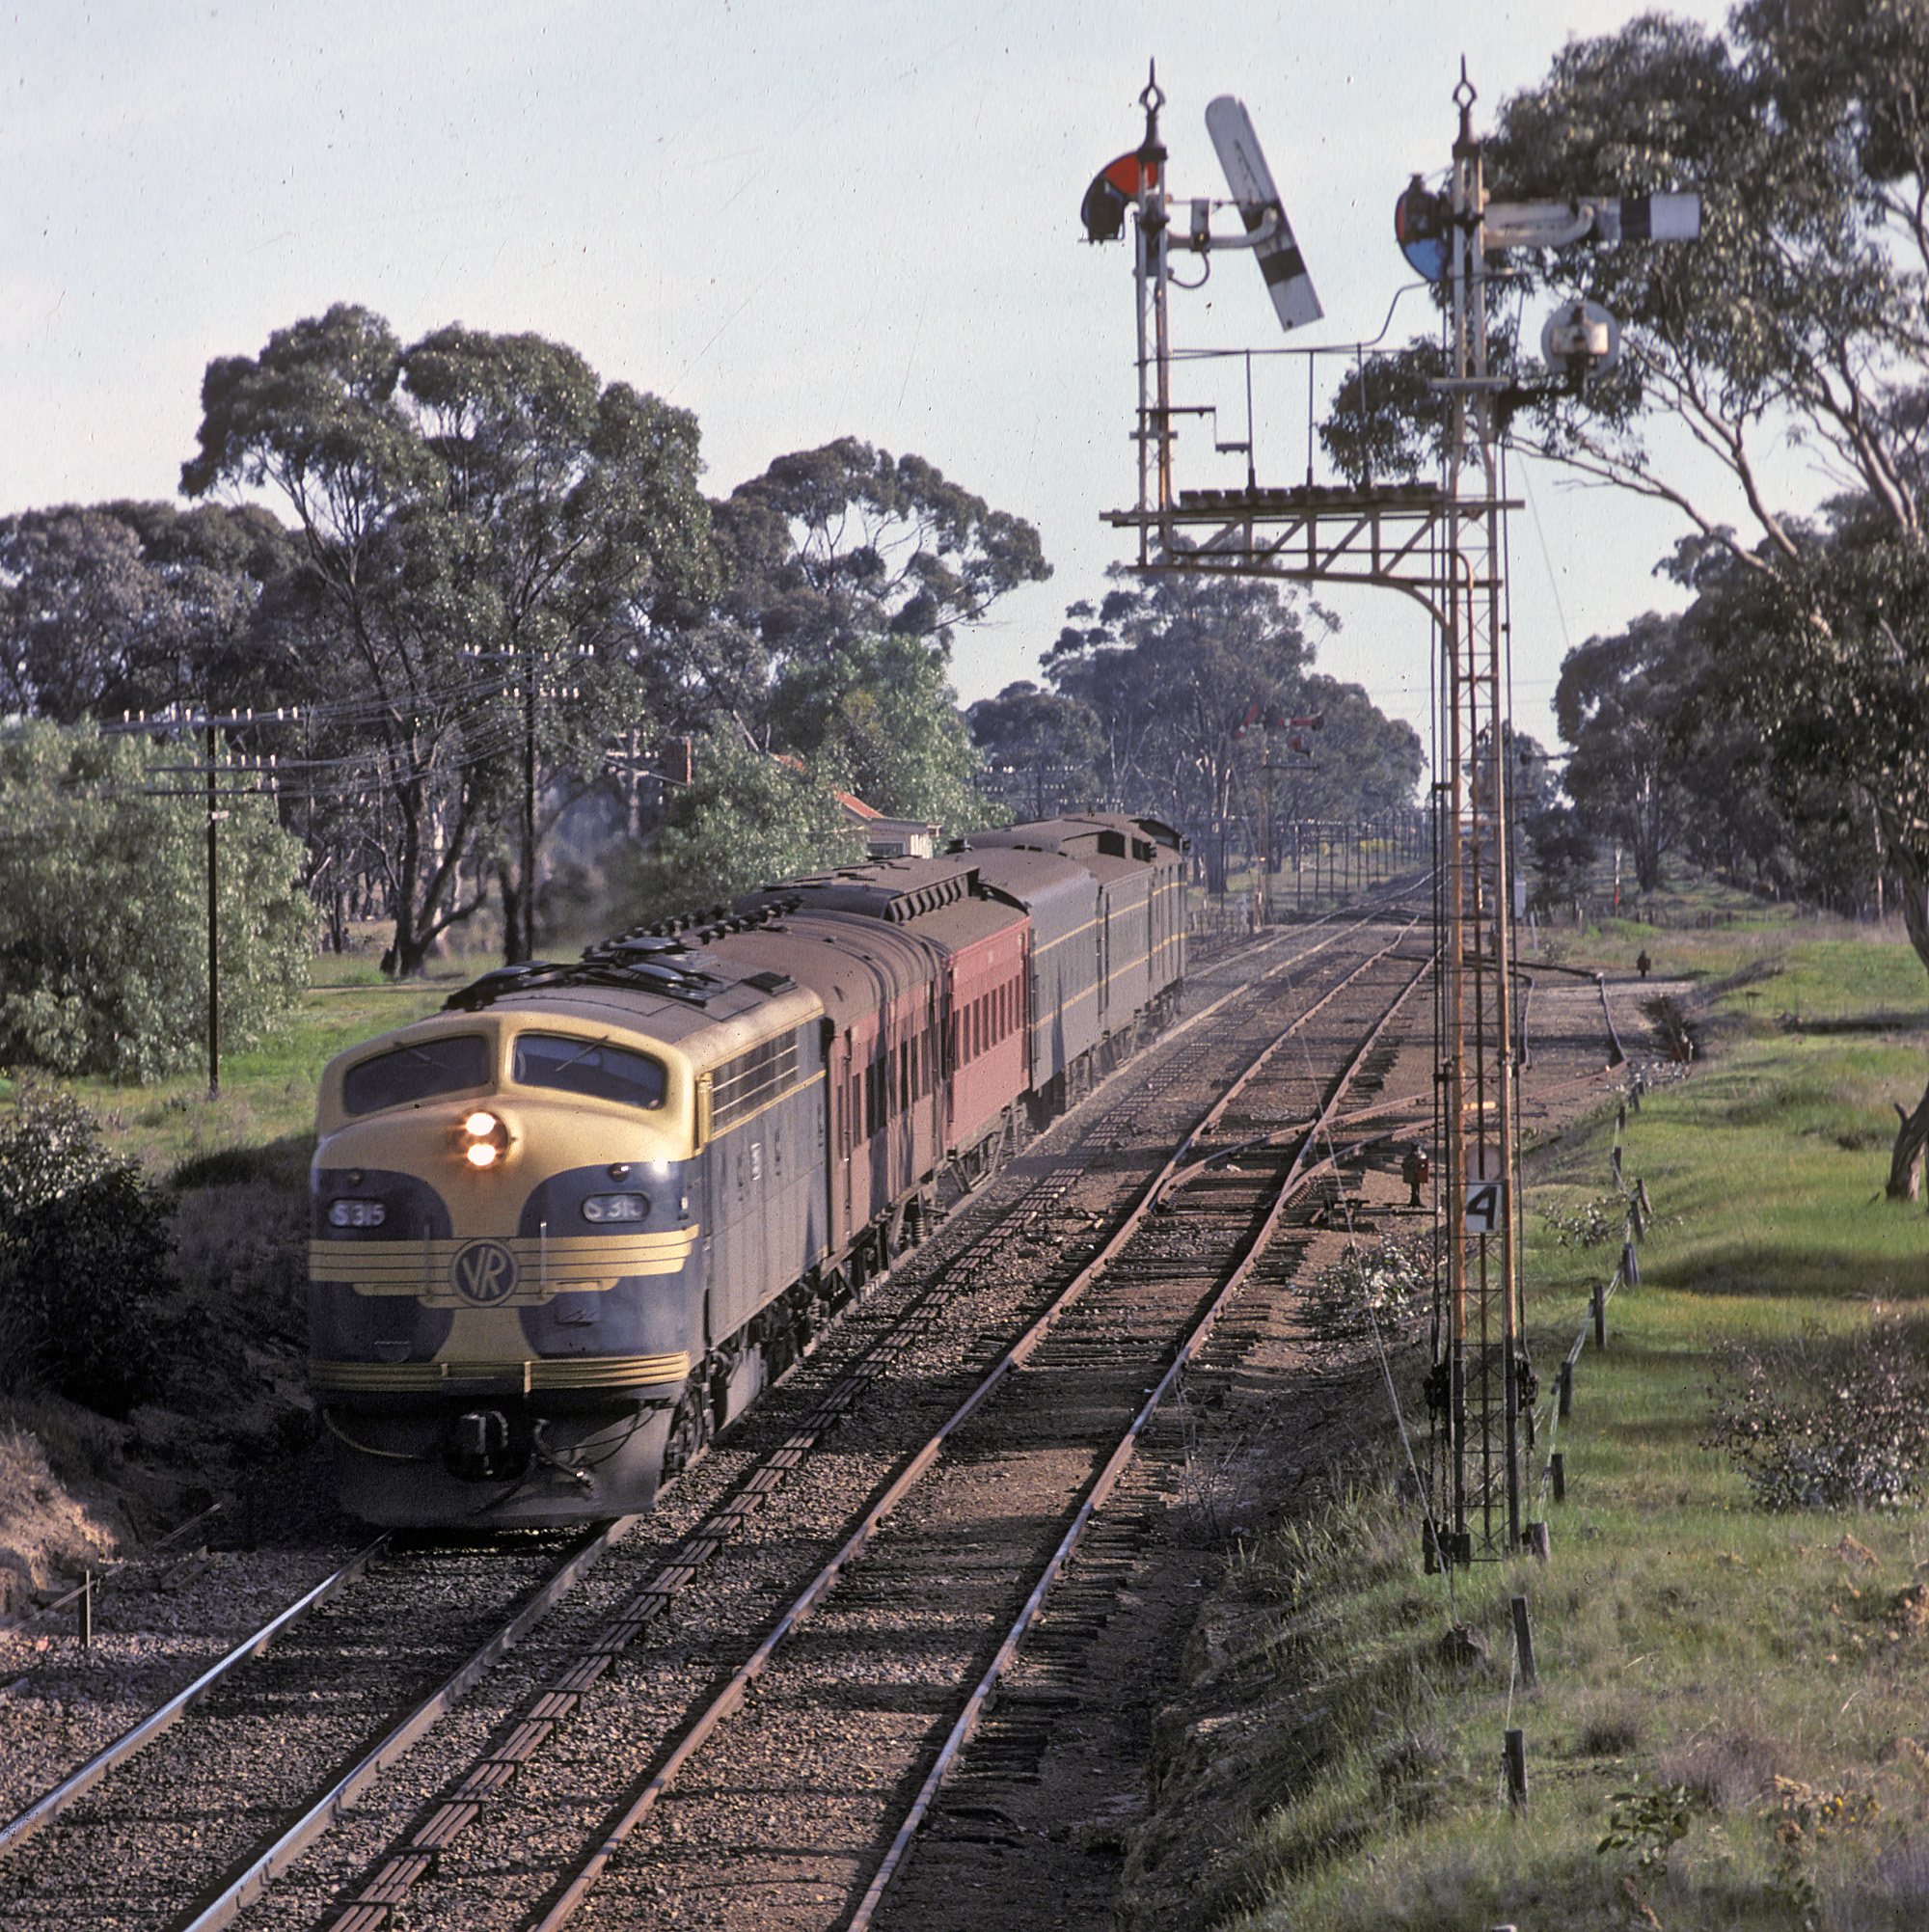
ABOVE: S 315 flys through Deep Lead (pronounced Deep Leed) on the 0655 Dimboola to Spencer St. pass. 1981. As a fireman at Ararat I often rode this train back from Dimboola after having run a train from Ararat. It always seemed like their were 2 or 3 crews "travelling per" on this train. S 315 was withdrawn from service in 1988 and was scrapped in 1992.
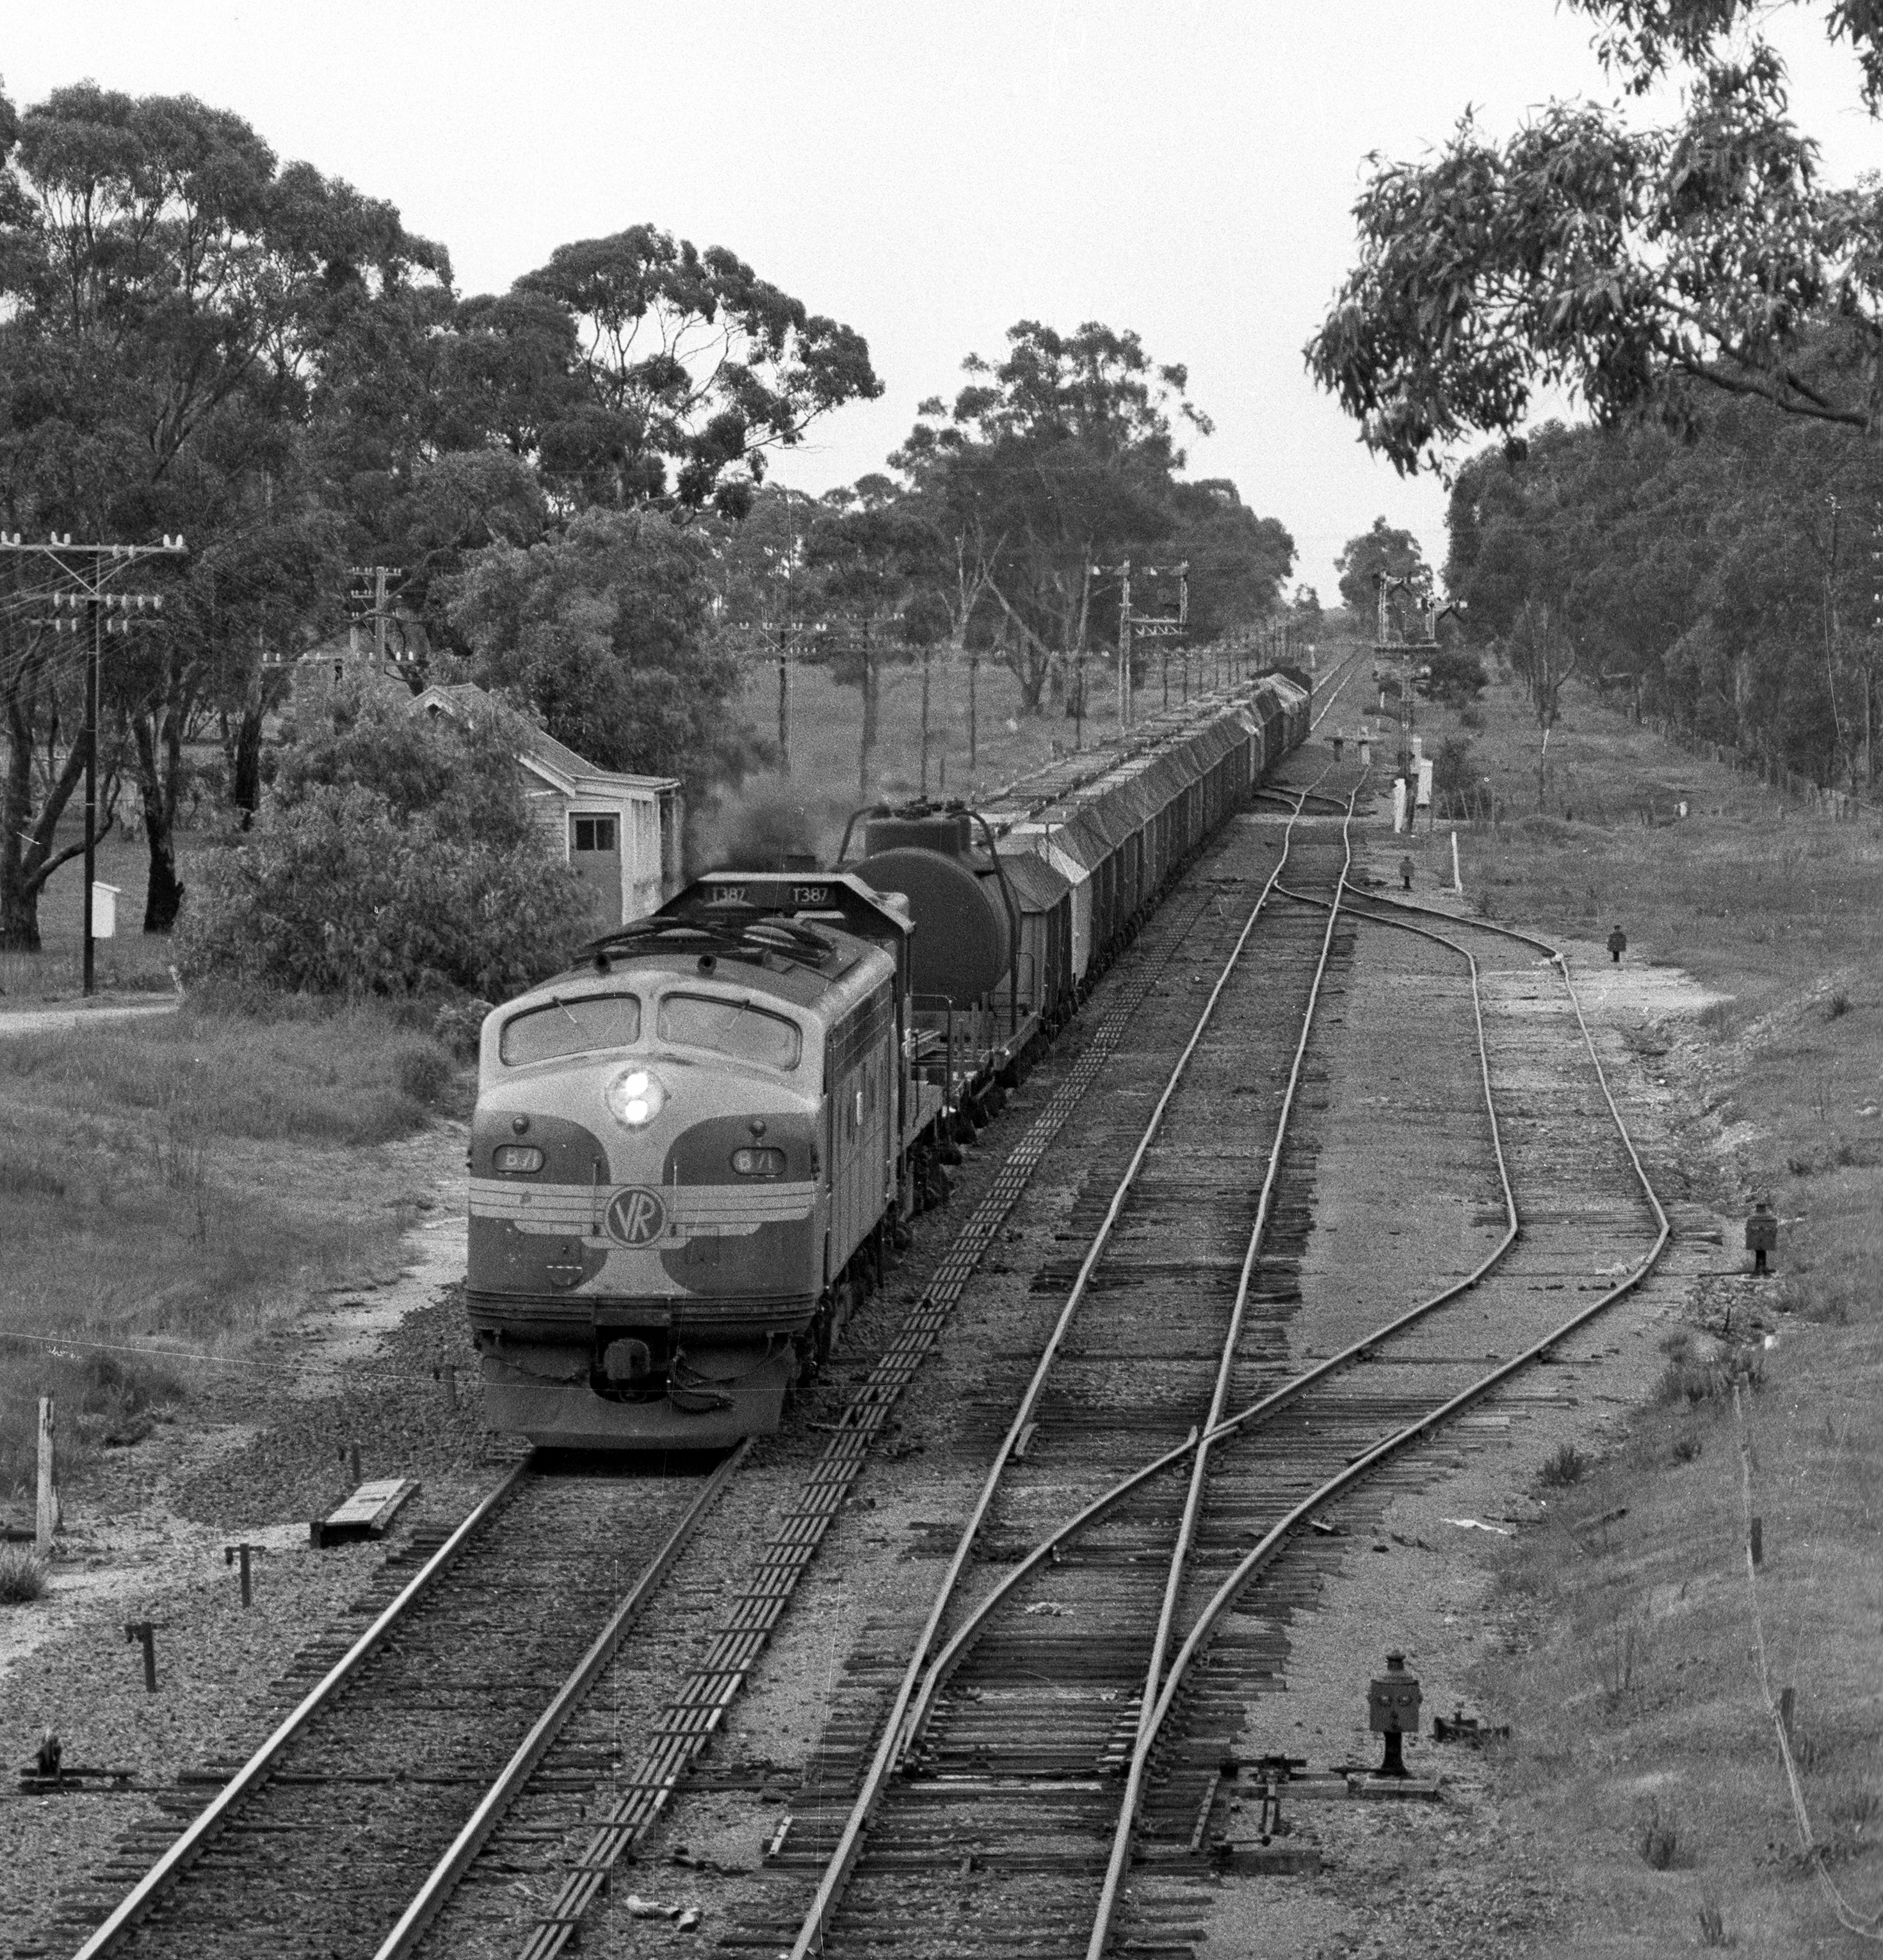
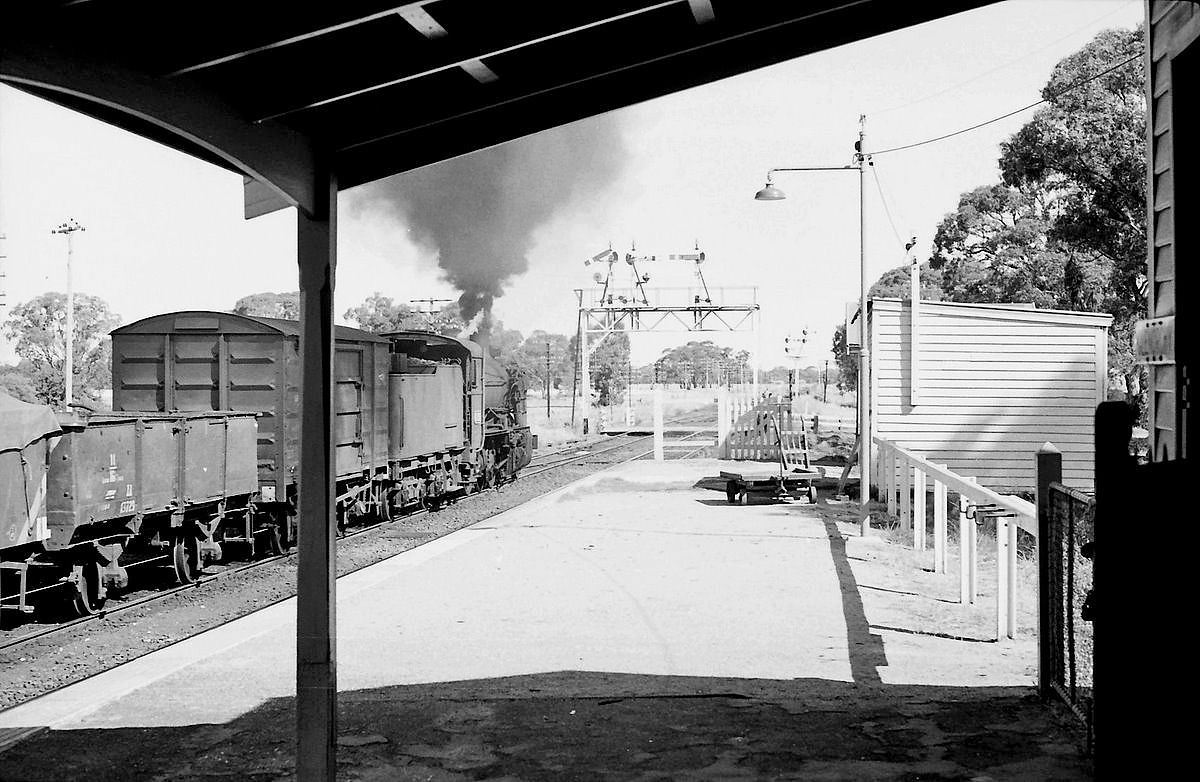
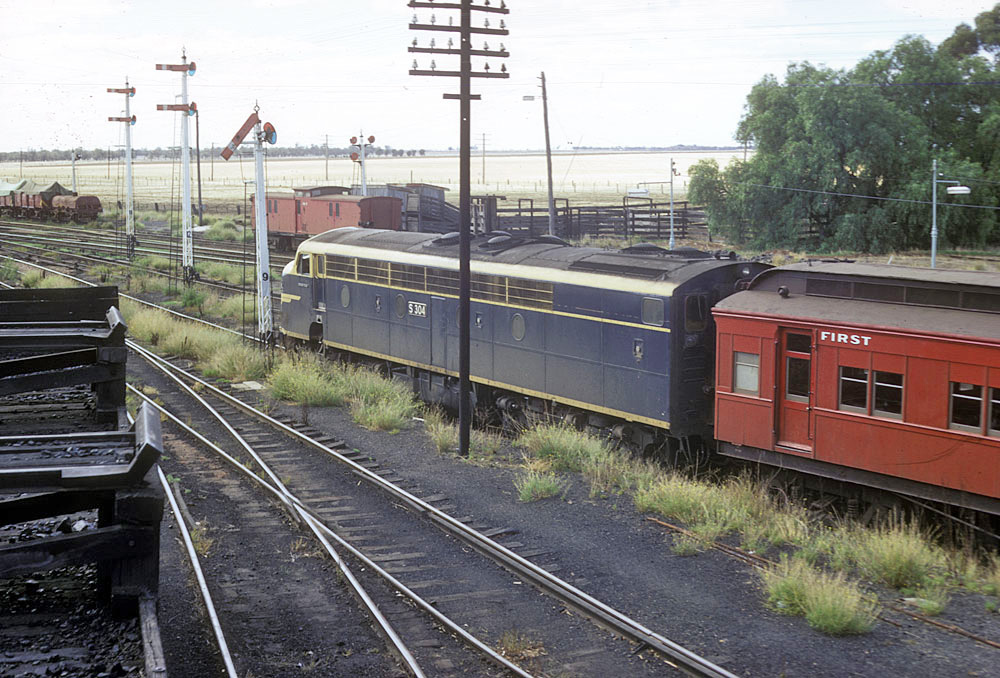
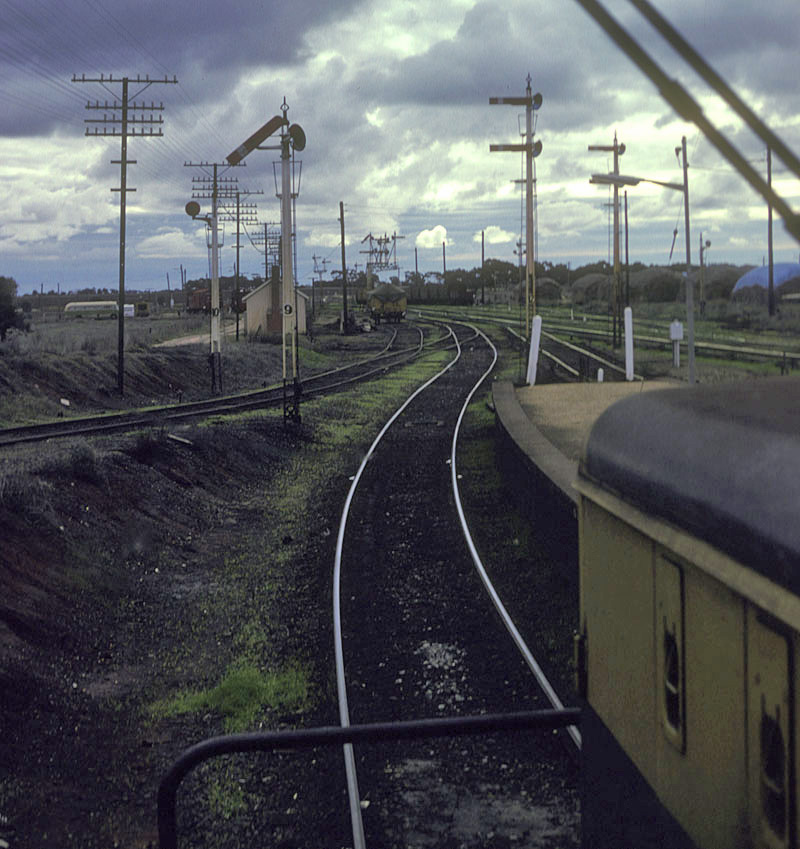
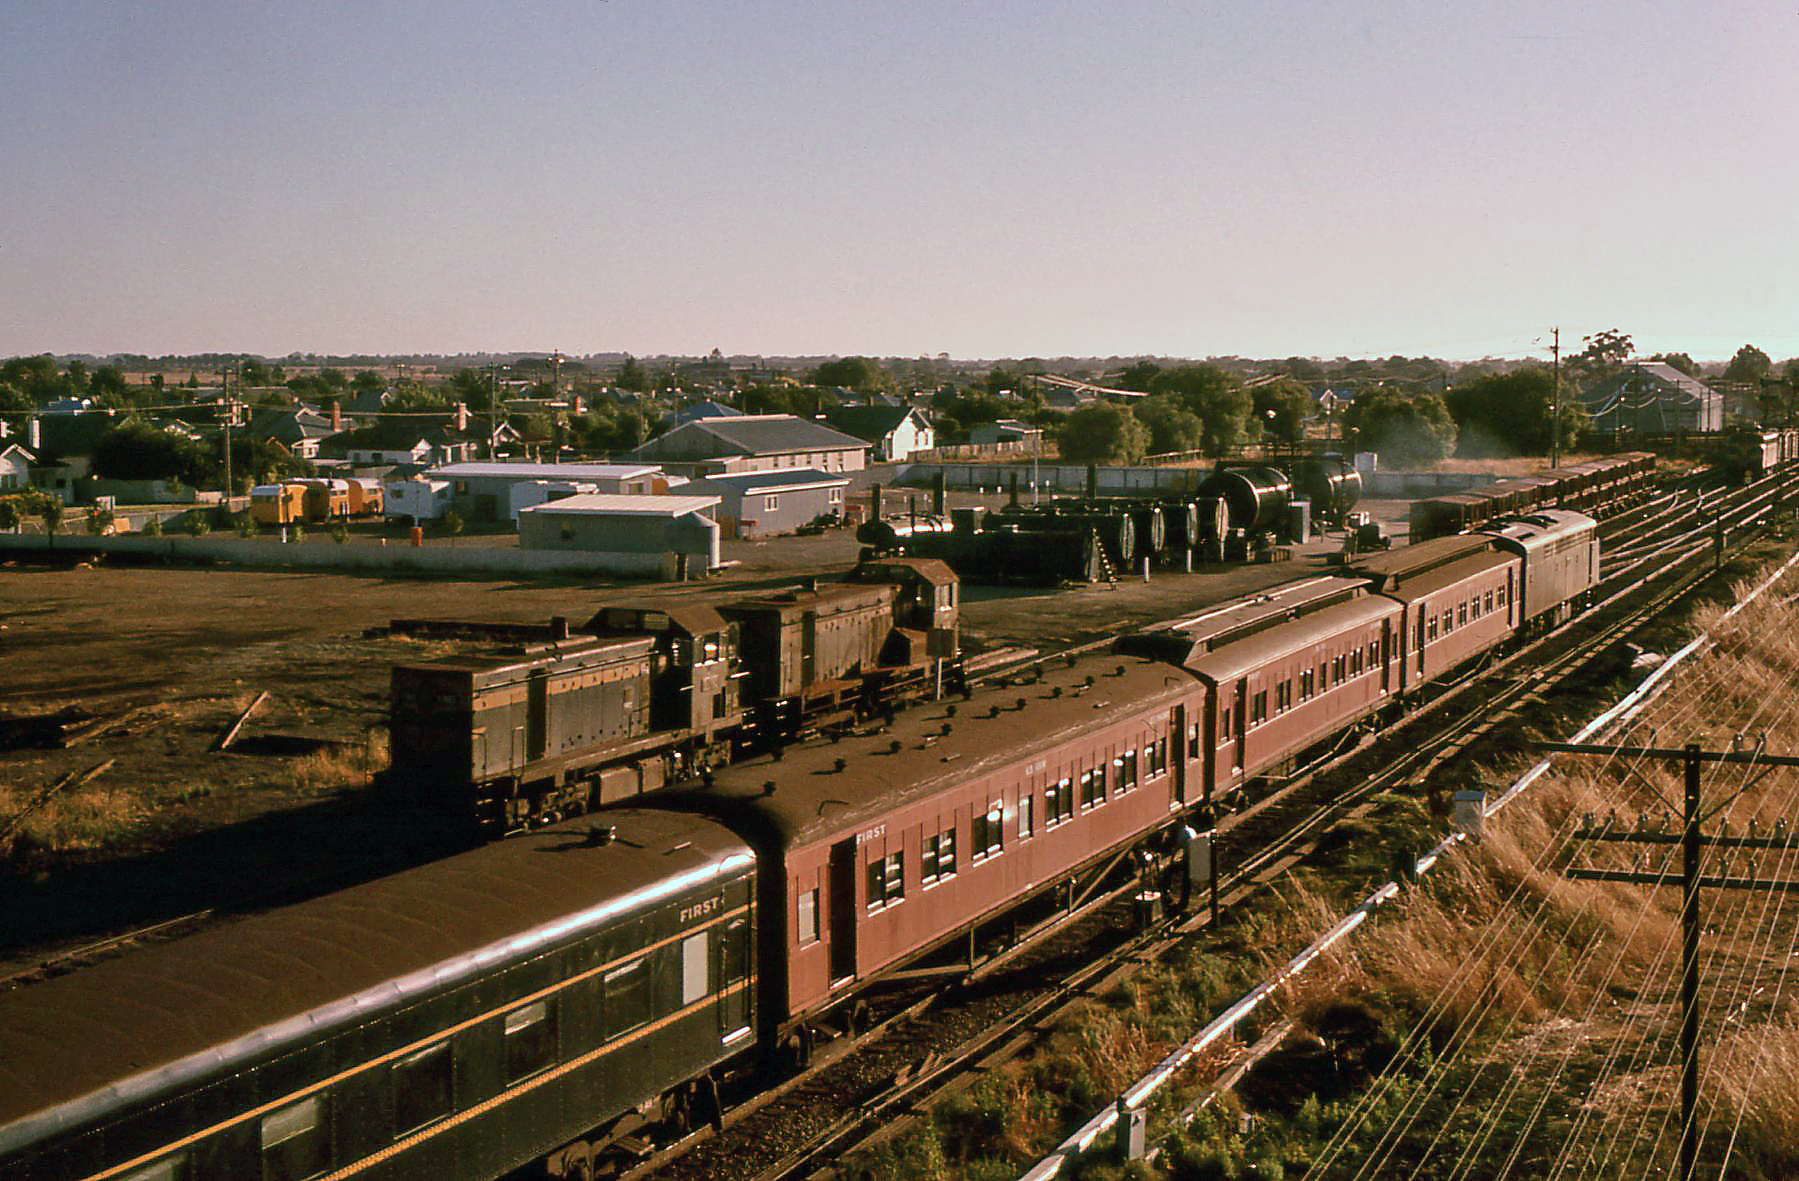
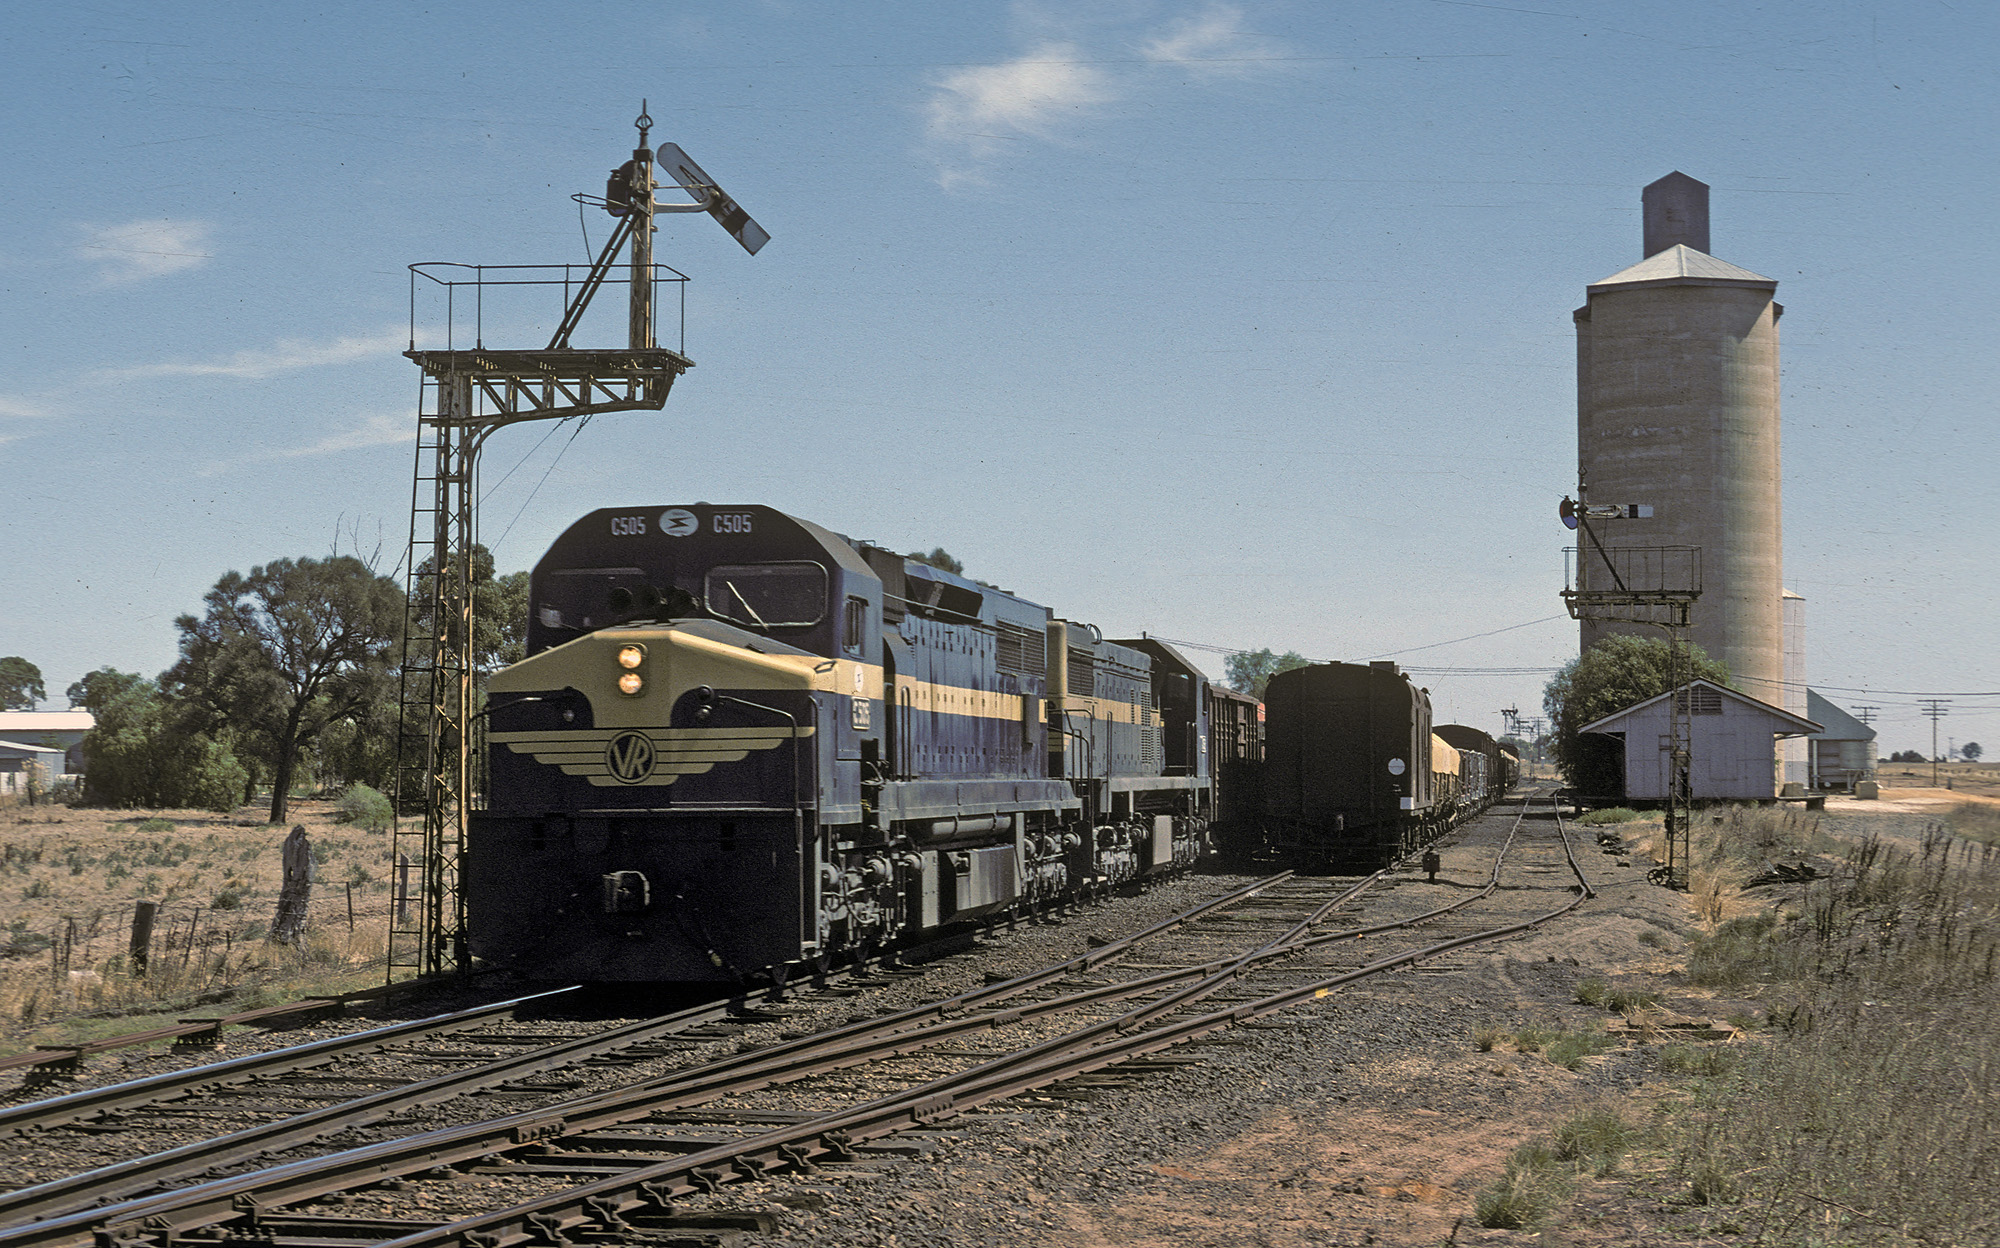
ABOVE & BELOW: The end was near for Deep Lead in these photos showing the signals crossed "out of use", it would never be switched in again. Here we see B 71 and T 387 on an up goods consisting almost entirely of GH wagons loaded with wheat. 1981.

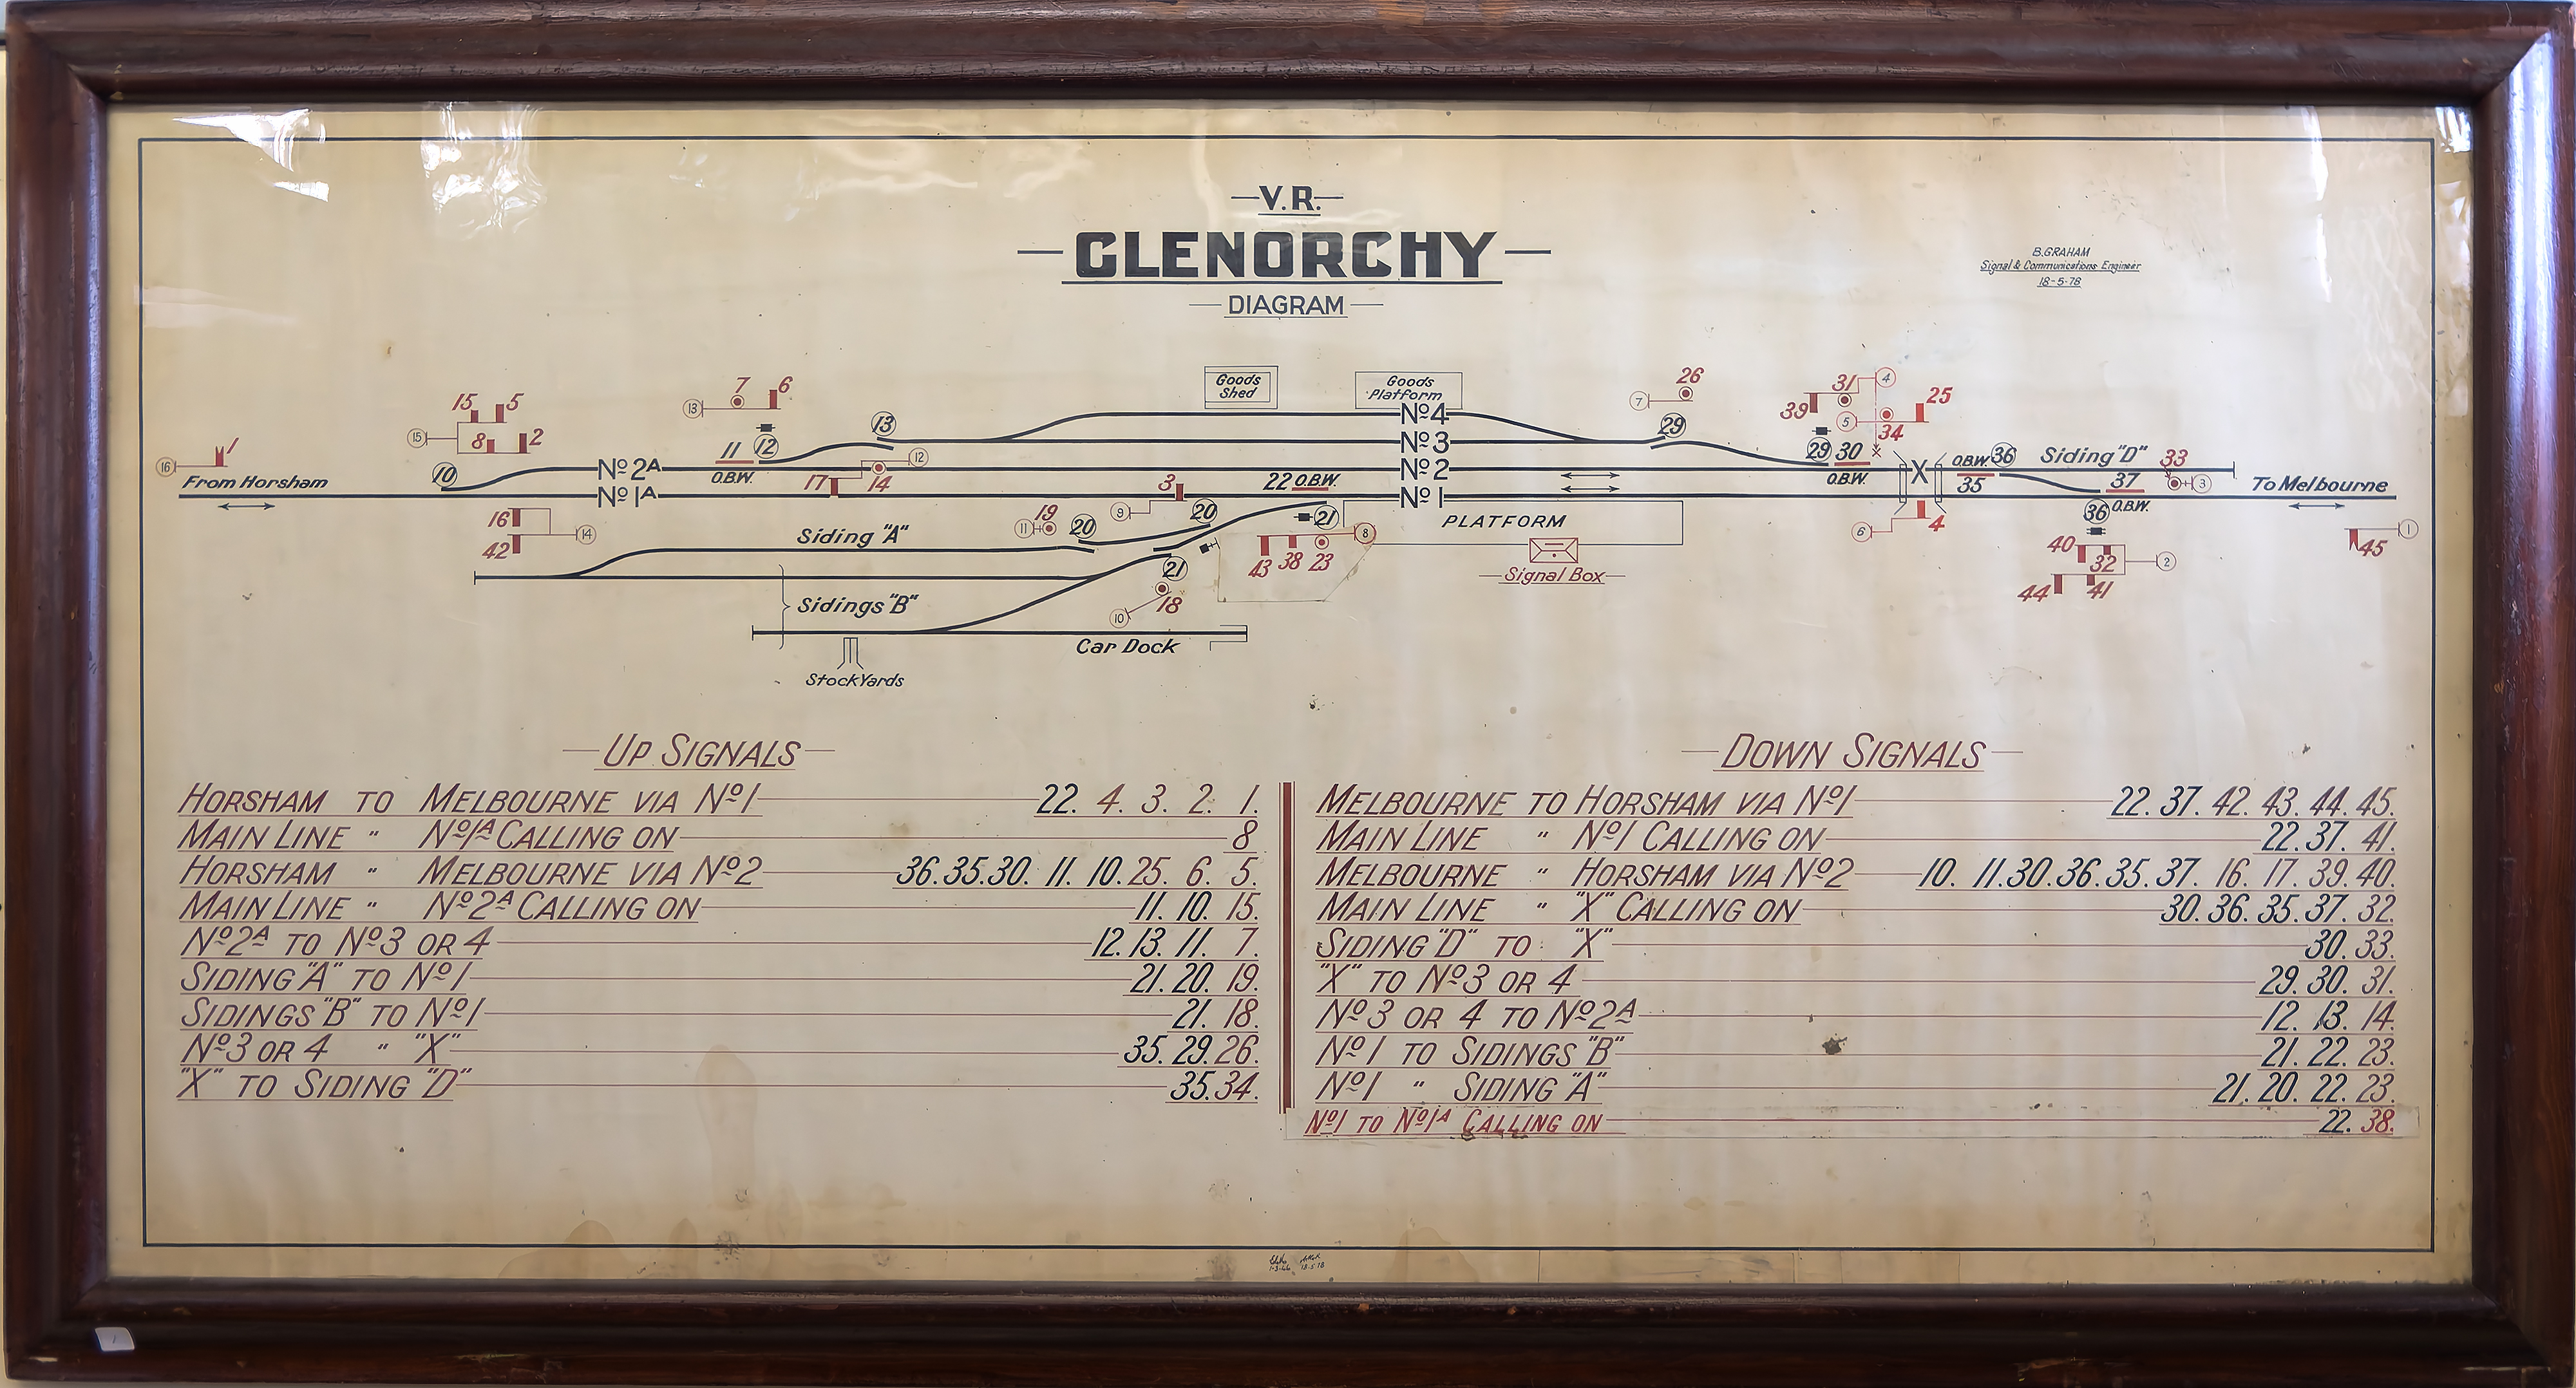
GLENORCHY
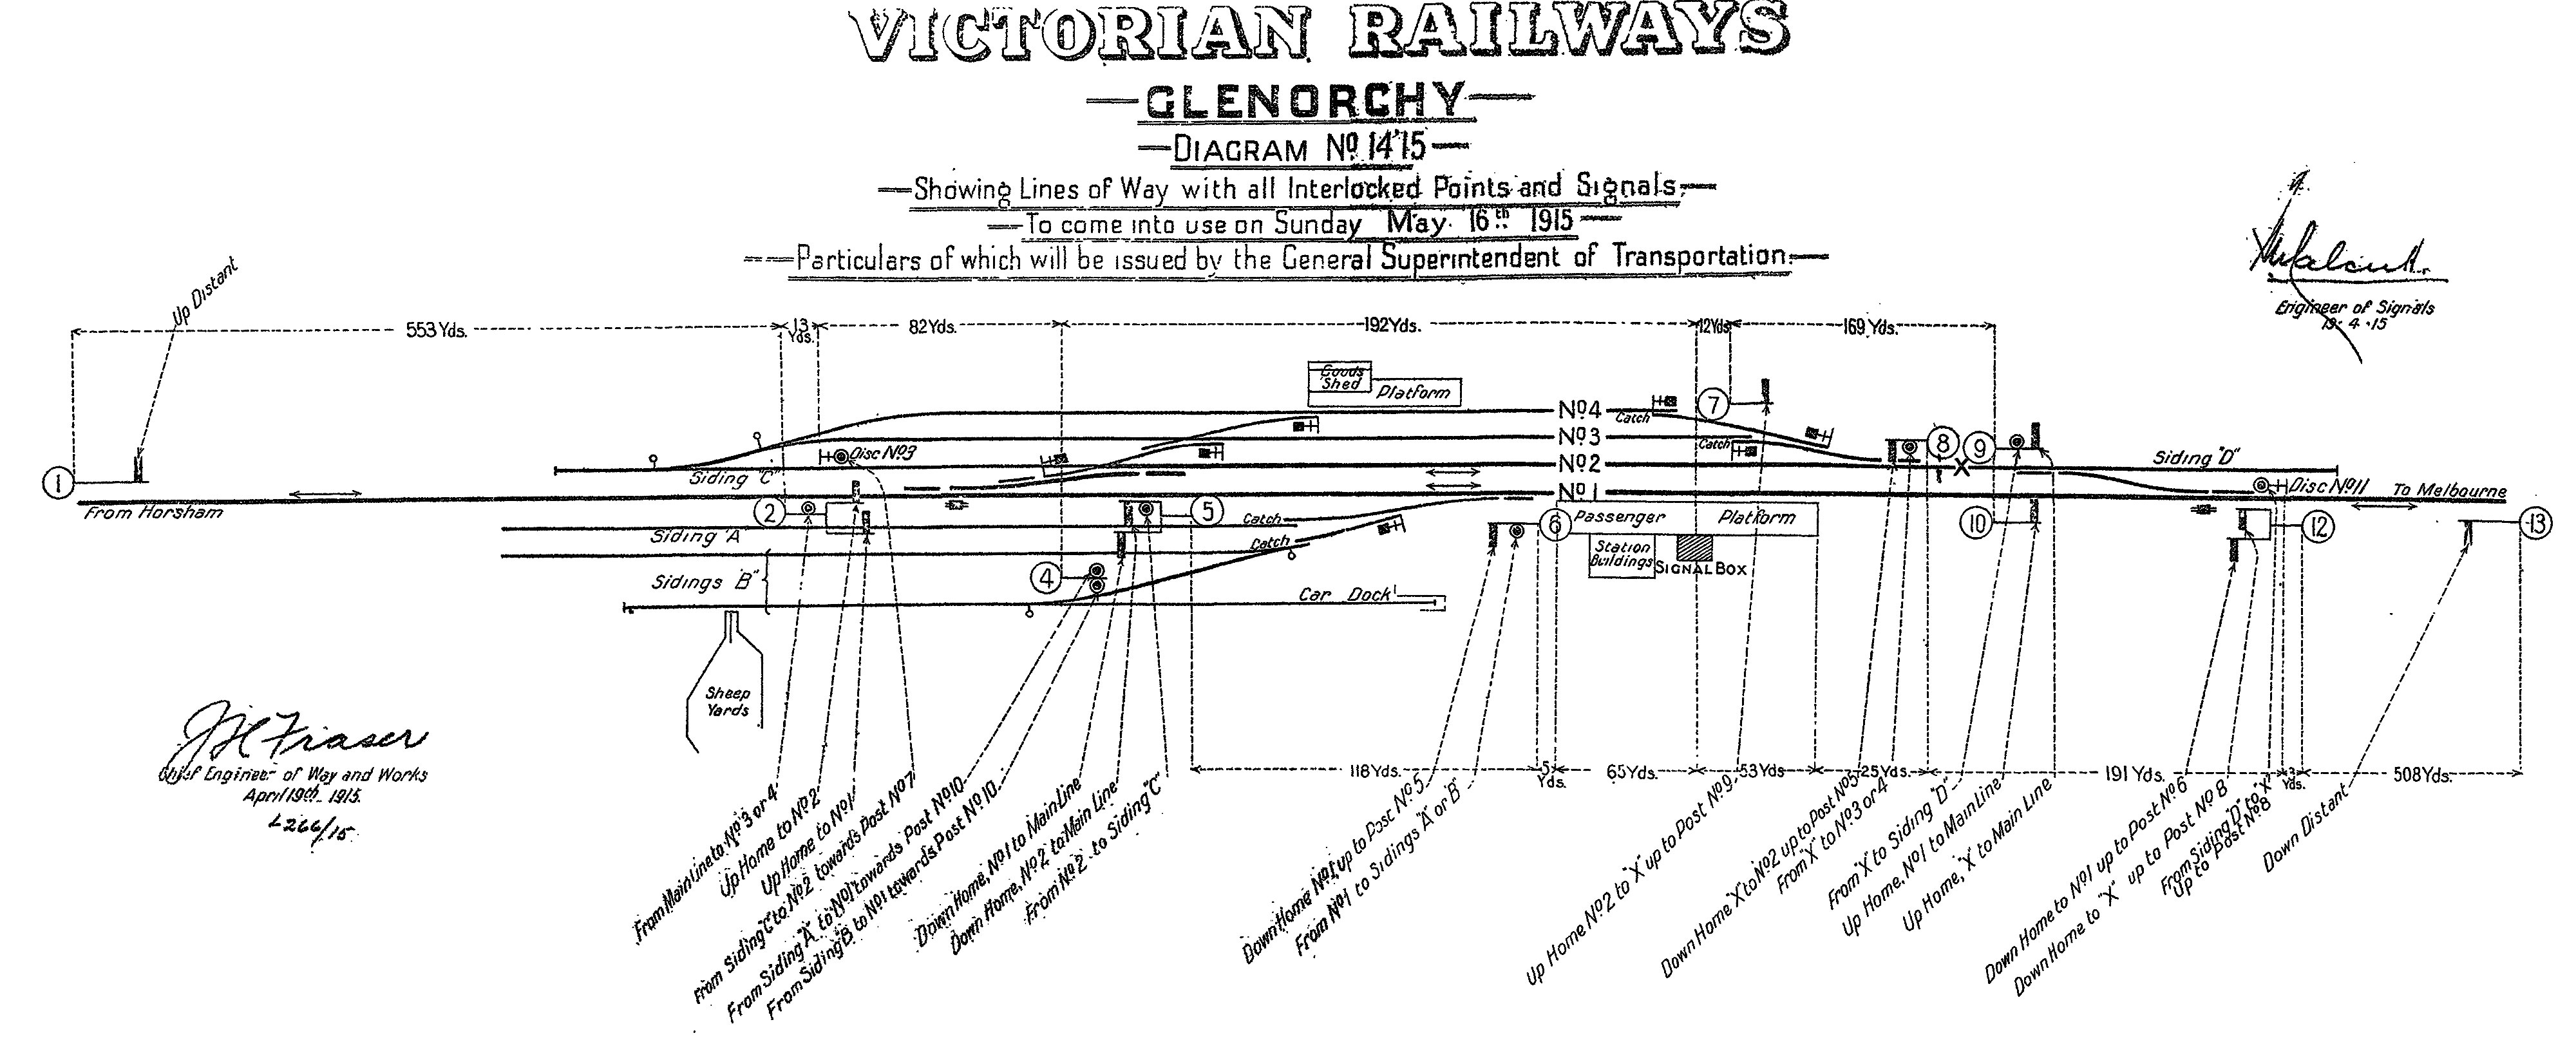
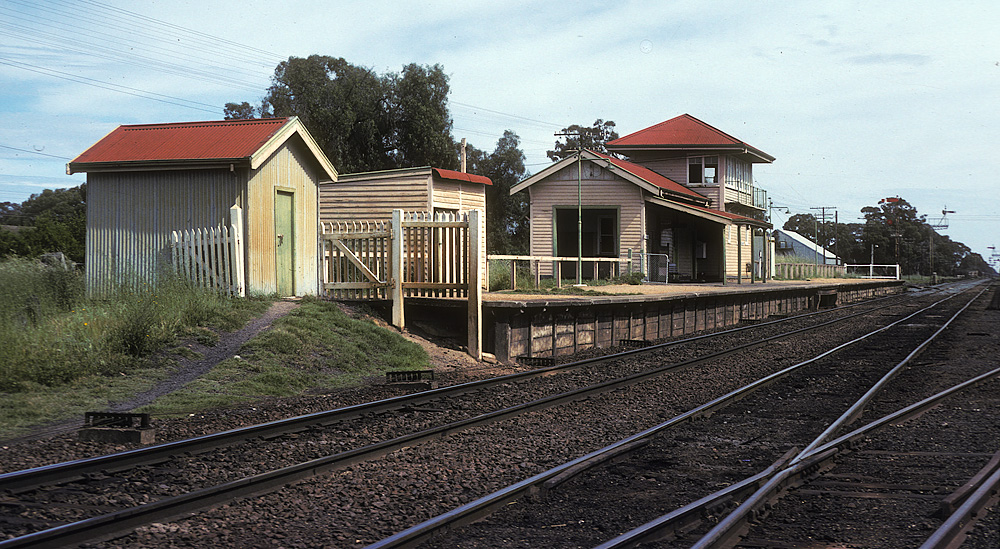
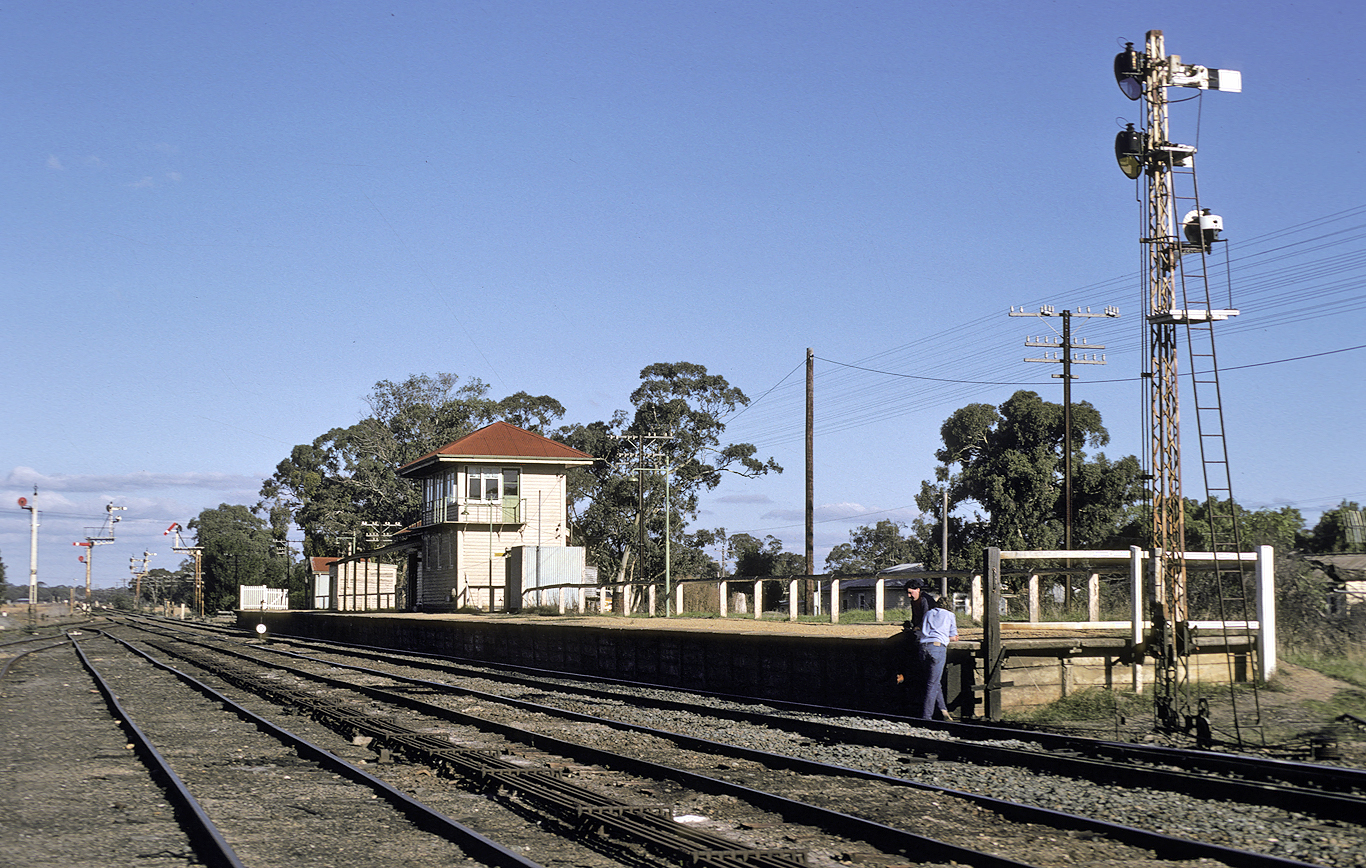
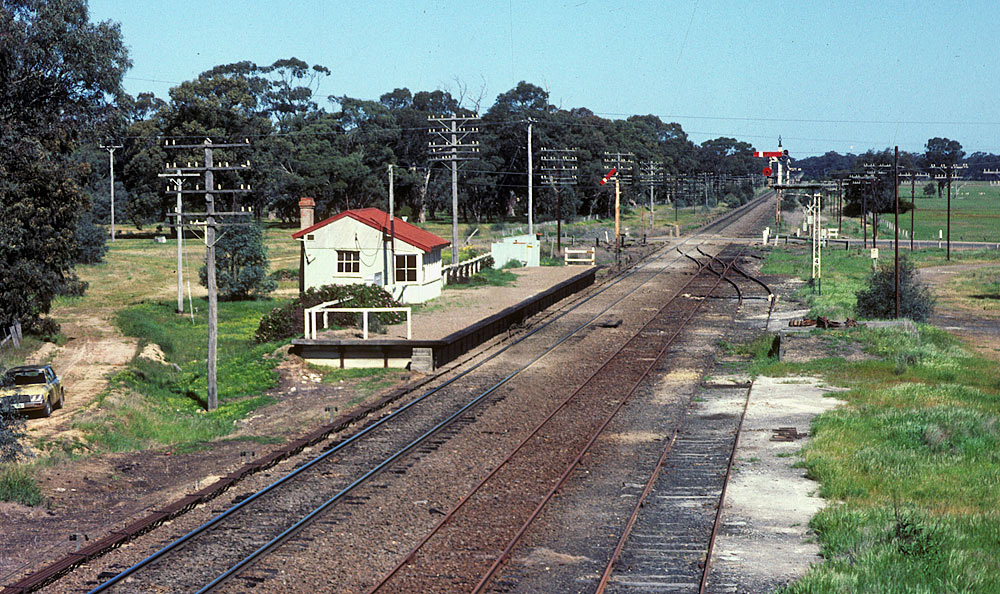
ABOVE: Glenorchy station Nov 3 1981, looking west. BELOW: Looking east, May 1983. (photo courtsey Noel Bamford)
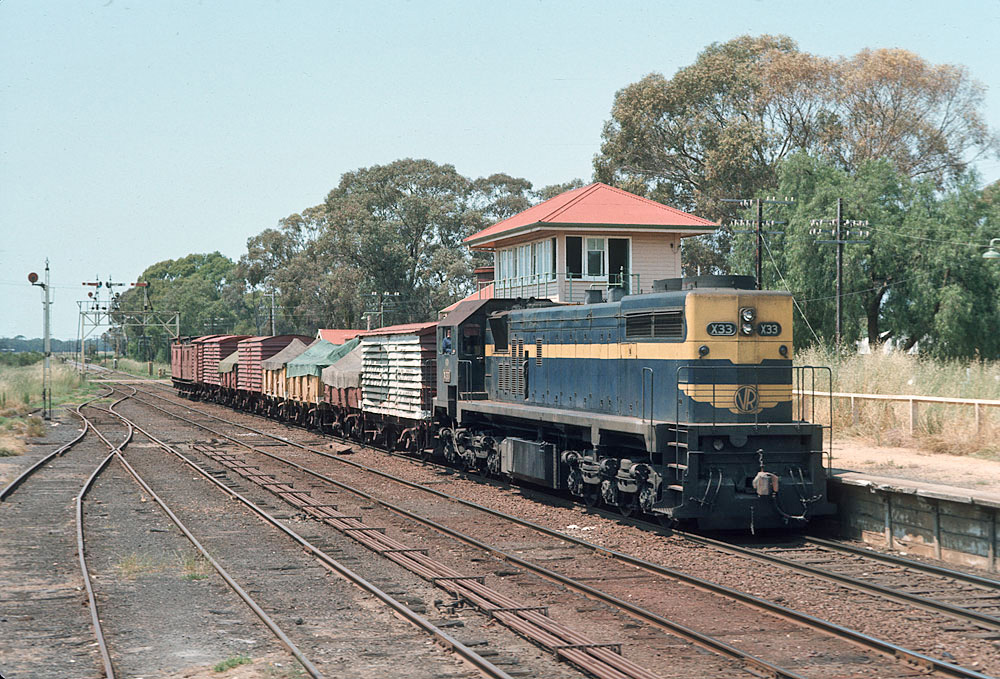
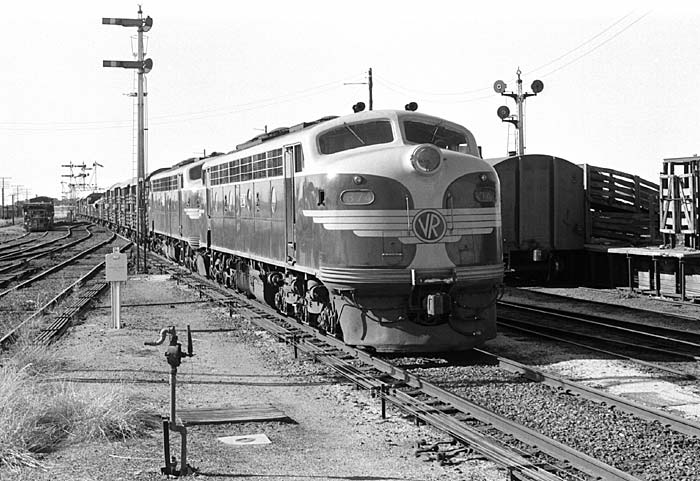
ABOVE: X 33 on a down Ararat to Dimboola goods passes through Glenorchy in broad gauge days. 1975. (photo courtesy Trevor Penn)

ABOVE: X 38 is sitting in No. 2 road on an up Murtoa to Portland wheat train as T 325 on a down goods is signalled into the dead end siding on the down side of the mainline. BELOW: The stage is now set for the arrival of the up Horsham pass which is about to do a hand staff exchange. March 29 1980. (both photos courtesy Chris Wurr.)
ABOVE: Post 8, Armstrong's up distant signal, 1981.
ABOVE: S 308 is running a down Ararat to Dimboola (9103) goods as it arrives into No. 2 road at Glenorchy. Nov. 3 1981
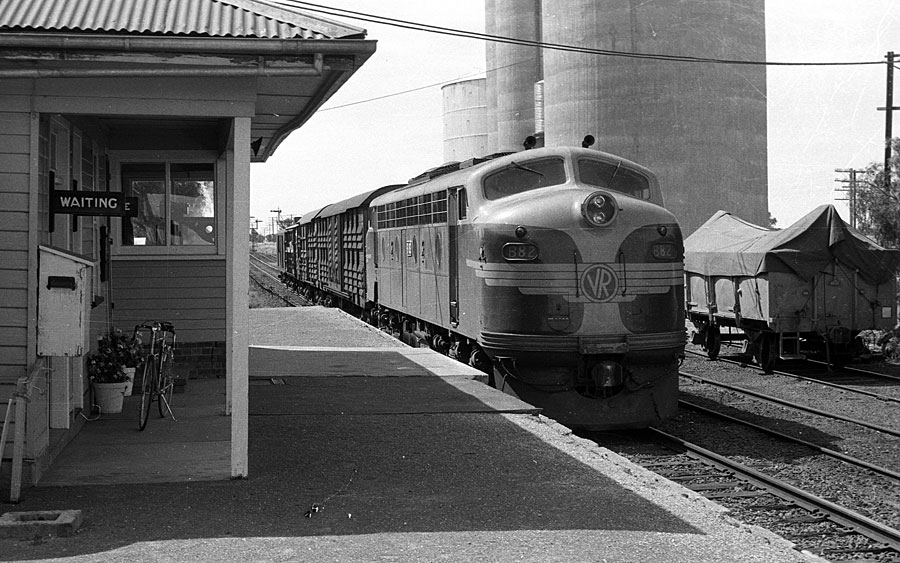
ABOVE: Freshly painted X 39 arrives Glenorchy on an up "bughut" train which consisted of W and WW workmens sleepers with a good measure of GY's thrown in for braking, Feb 1982.
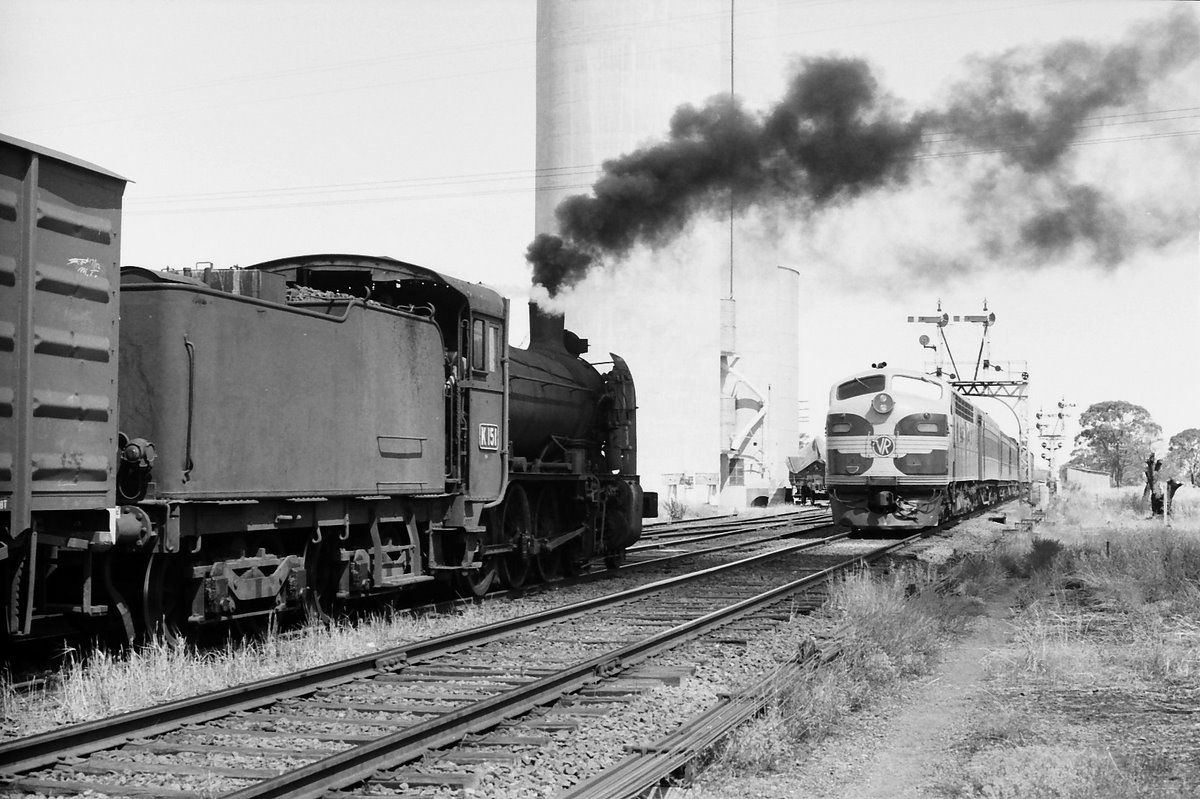
ABOVE: K 151 in No 2 road on an up goods. Feb. 1968. (photo courtesy Bob Wilson)
ABOVE: A Portland to Murtoa empty grain train waits at Glenorchy to cross an "up" loaded grain train, Feb. 2 1982.
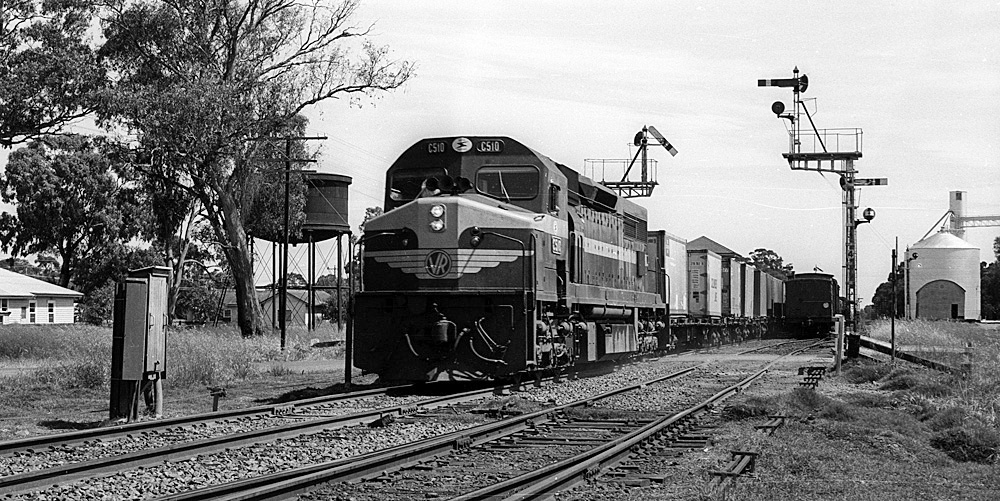
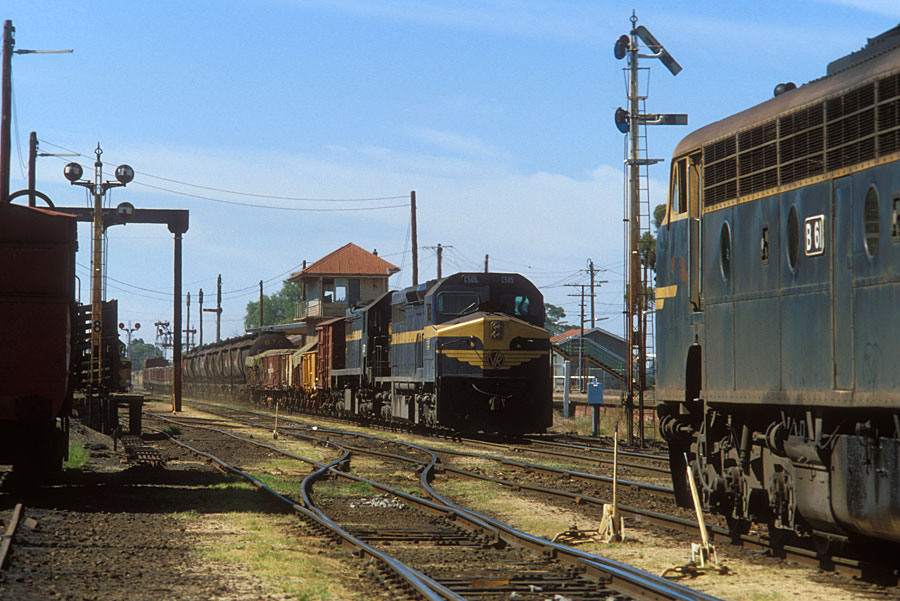
ABOVE: C 510 on an up "jet" crosses a down goods at Glenorchy, 1981.
Wal Wal
ABOVE & BELOW: Wal Wal looking towards Ararat, 1981
BELOW: Goods shed and station, looking east, circa 1960. (SLV collection)
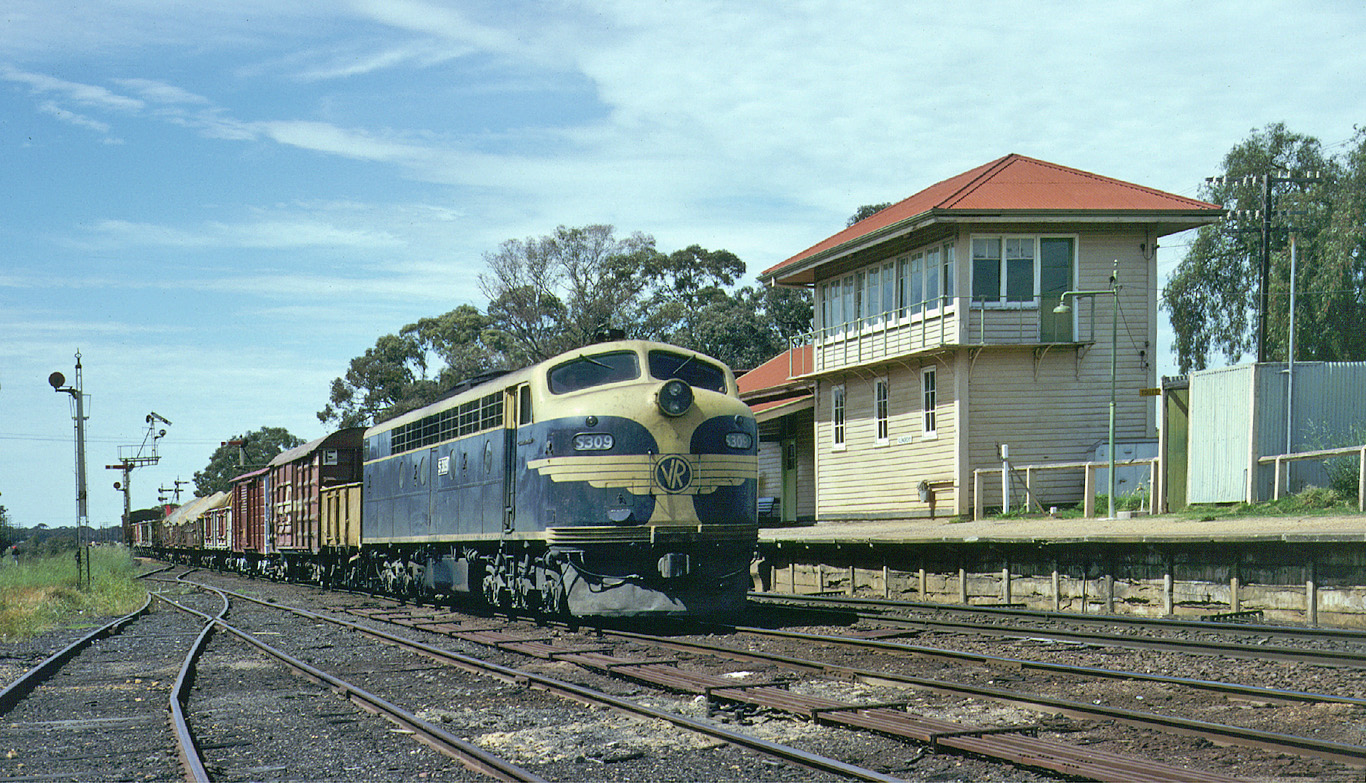
ABOVE: S 309 passes through Wal Wal on a down Ararat to Dimboola goods, Nov 1981. By this time the tracks had been ripped up and the signal blades removed, the platform and buildings would soon follow. The widening embankment seen going off to the left was the remains of a ballast line.
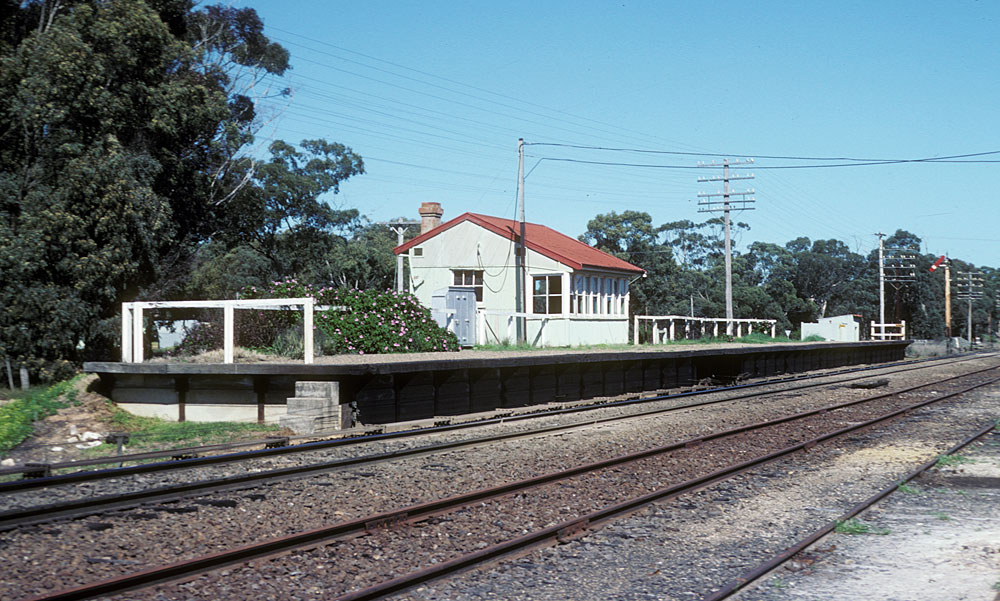
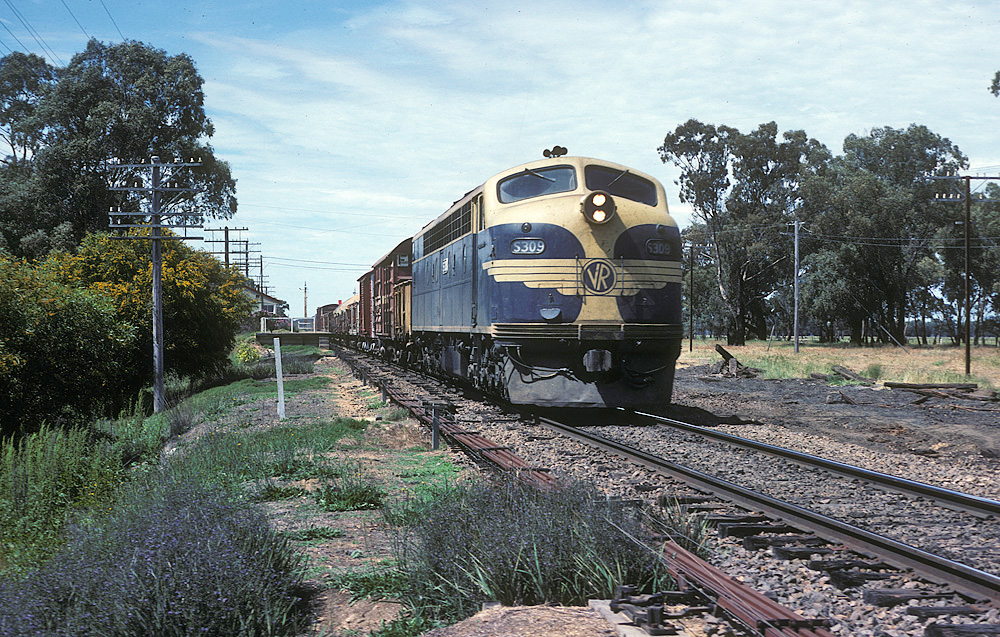
Lubeck
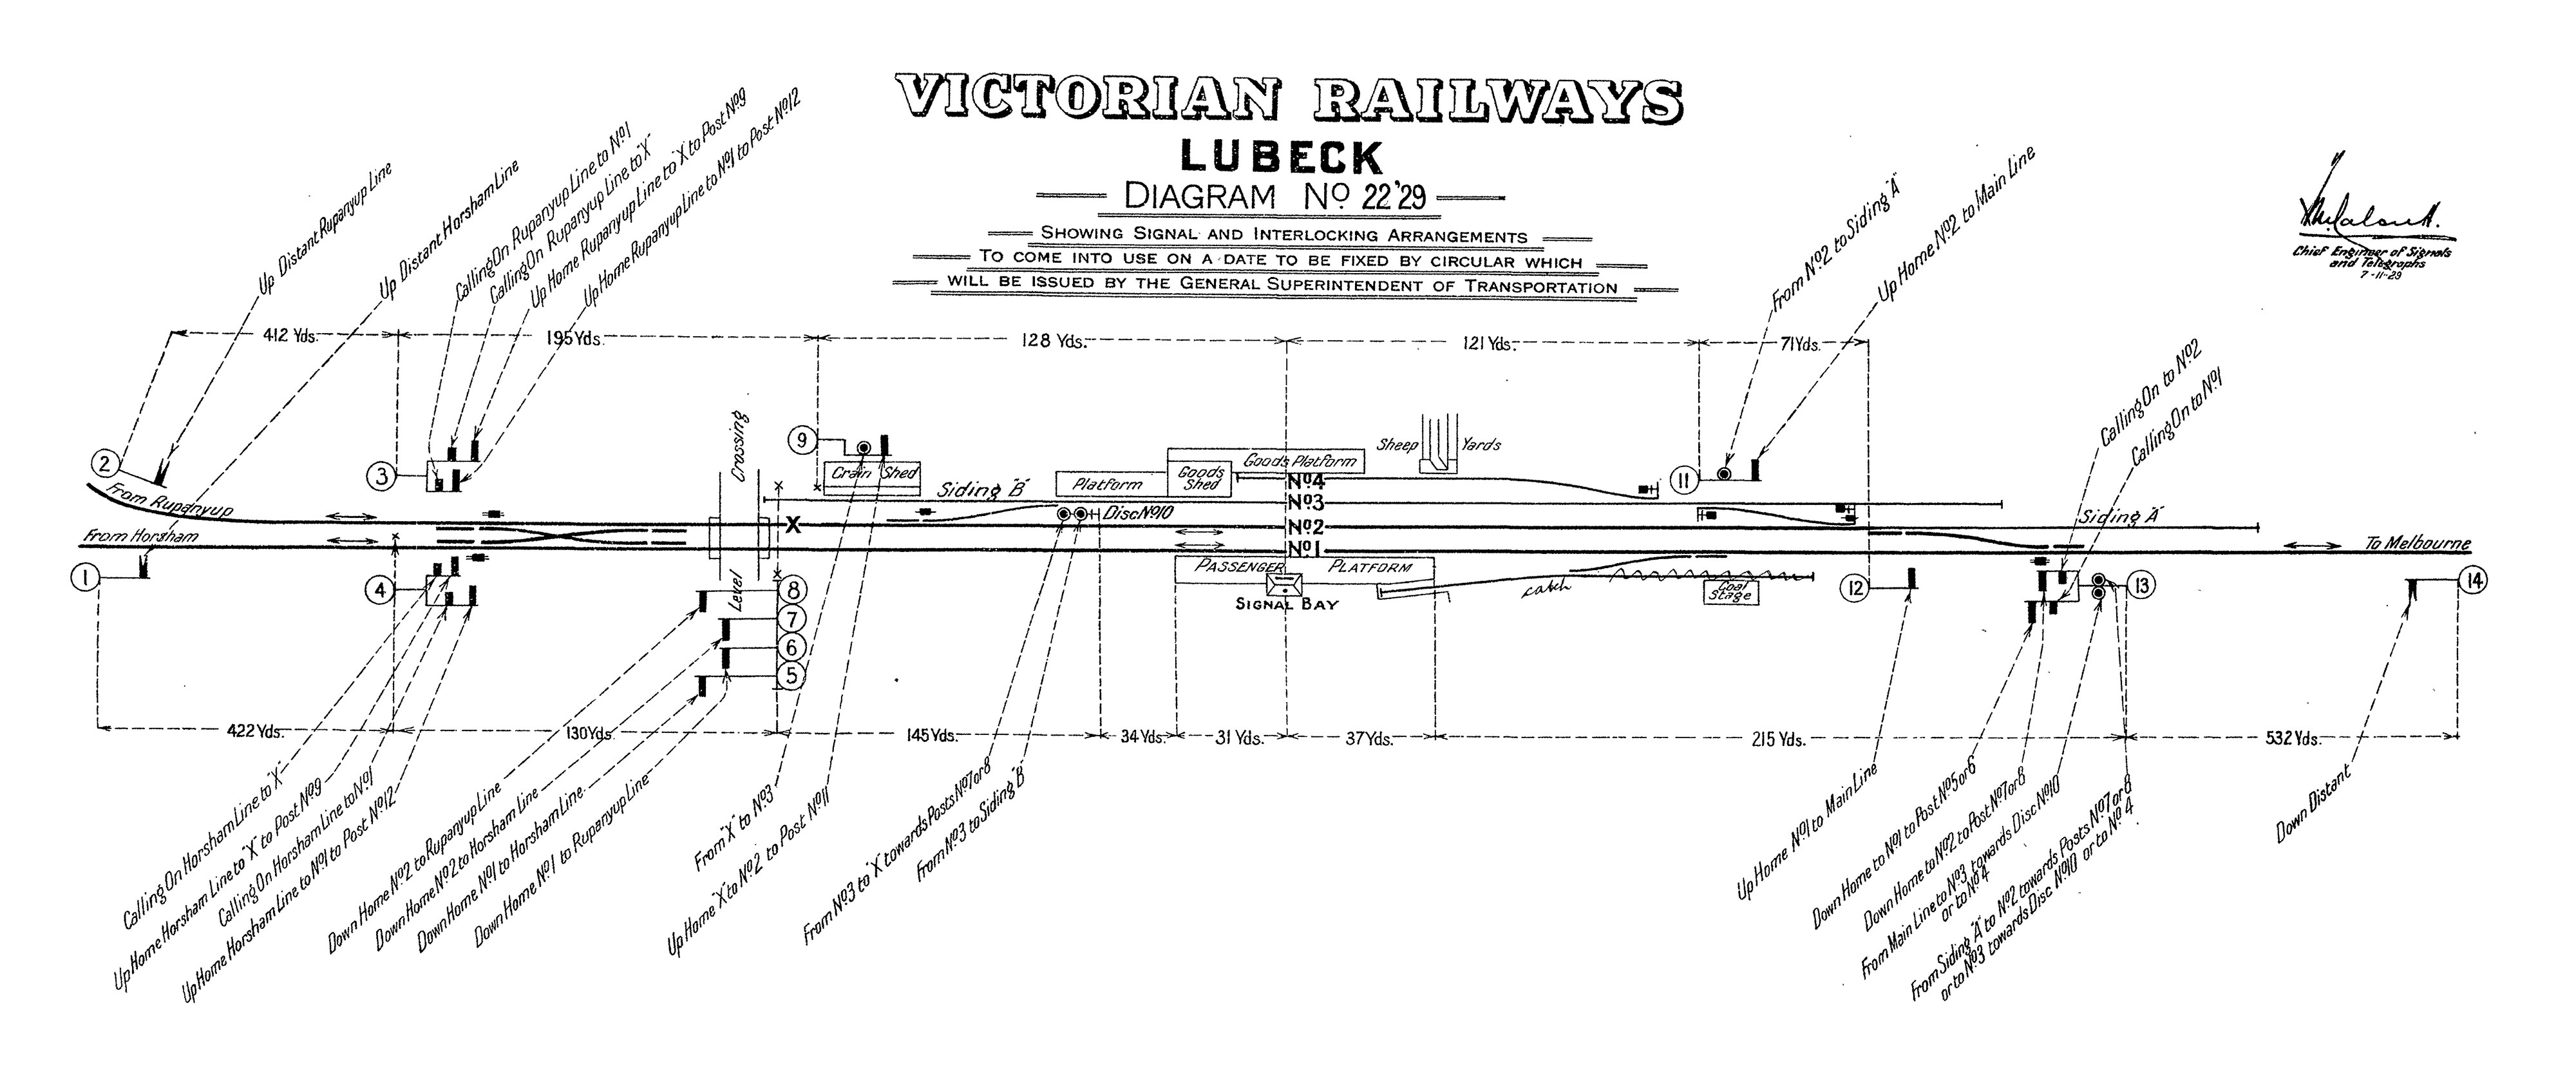
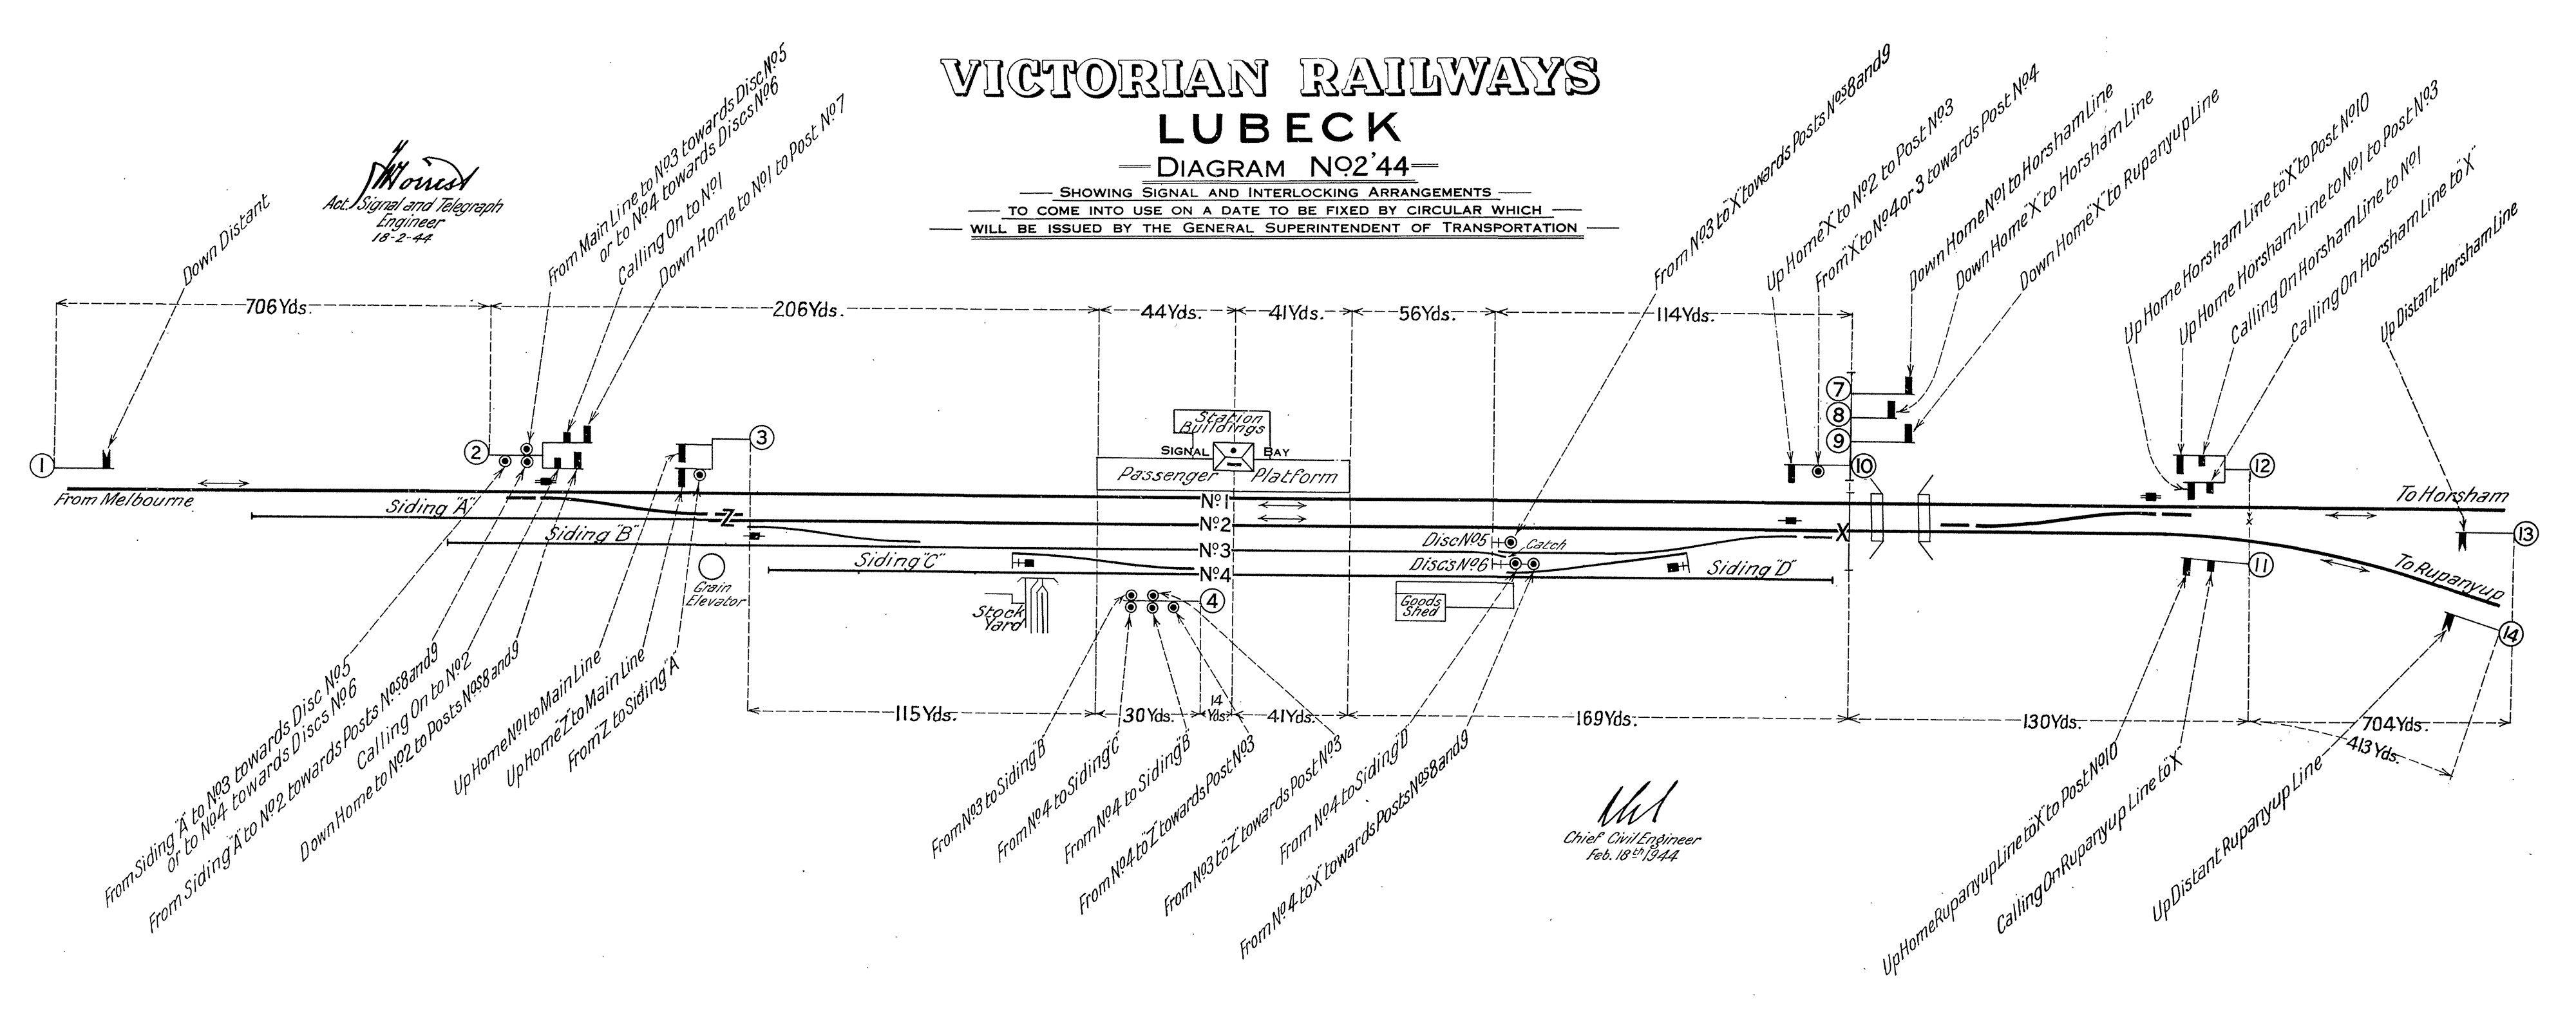
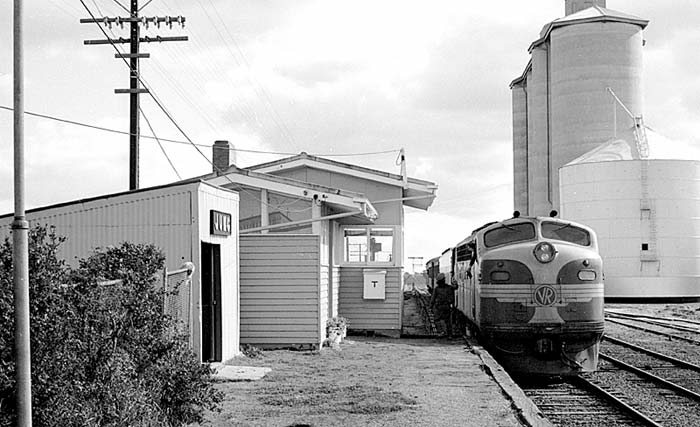
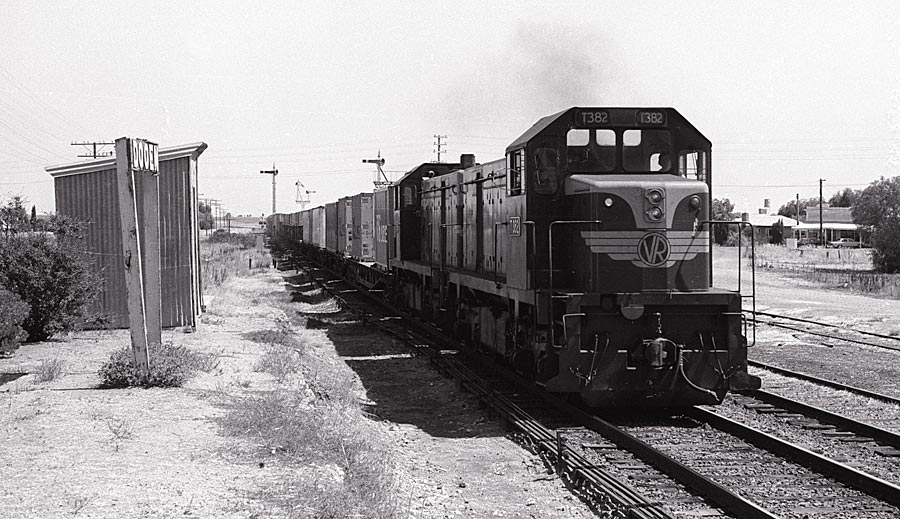
ABOVE; The signalman recieves the electric staff from the fireman on T 400 as it arrives in #2 road at Lubeck on 9193 goods. Nov 3 1981.
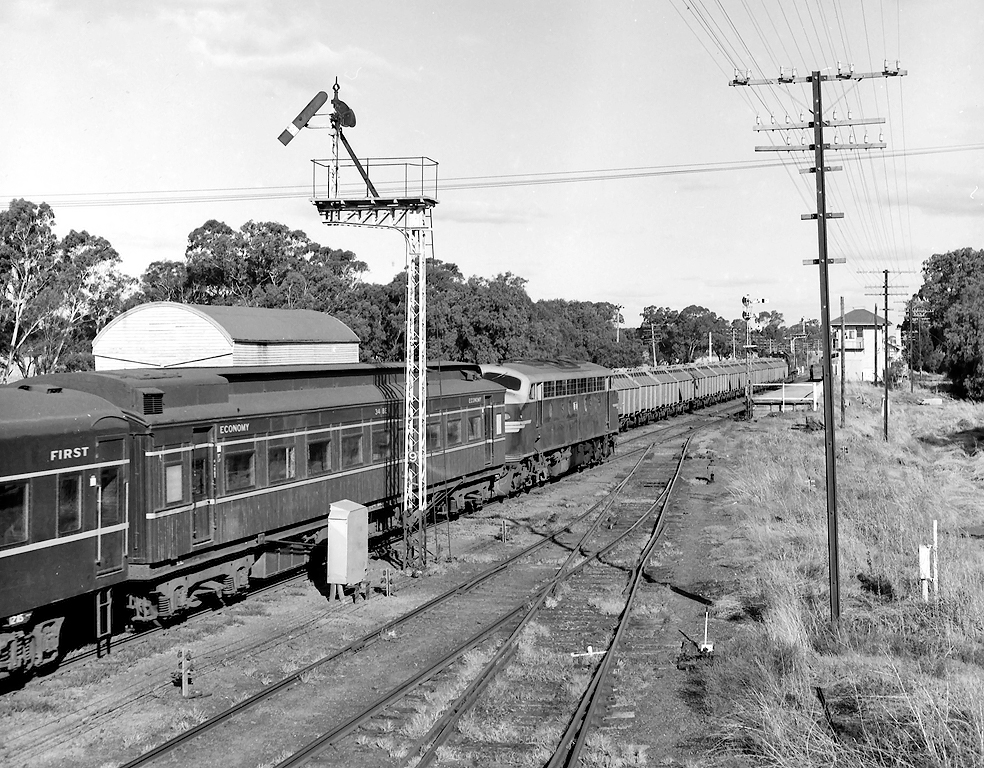
ABOVE: An up goods has been put into No. 2road to cross a down pass. Dec 21 1968. (photo courtesy John Ward)
ABOVE:The 8.30am Spencer Street to Horsham pass speeds through Lubeck. I was standing on the roof of a C class on an up "jet" that was backed onto the Bolangum line to take this photo. August 7th 1982
ABOVE: X 34 - T 367 - Y 149 (2107 tonnes) on an up wheat special from Murtoa is put away at Lubeck in the extension of #2 road. Feb. 3 1982

ABOVE: C 510 on a down Jet arrives into # 2 road at Lubeck, 1981
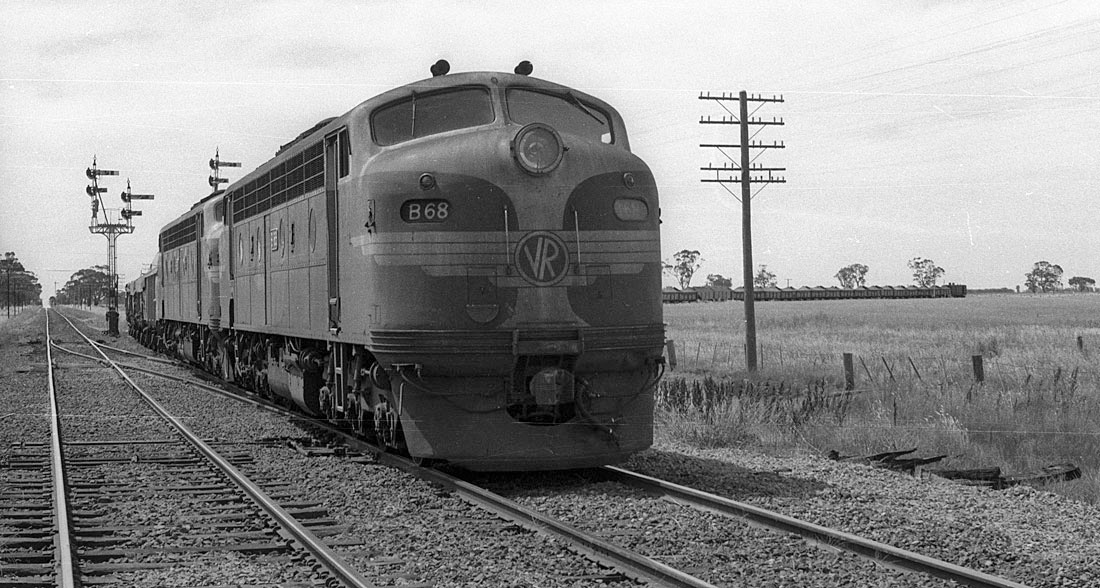
ABOVE: B 68 and B 62on a Murtoa to Portland goods. The train consisted of 60 GY/GH and a ZLP van for 1596 tons, the train has been backed onto the Bolangum branch at Lubeck to allow the up pass to run through it.This was common practice at Lubeck when a train was too long for No. 2 road. Jan 1 1980
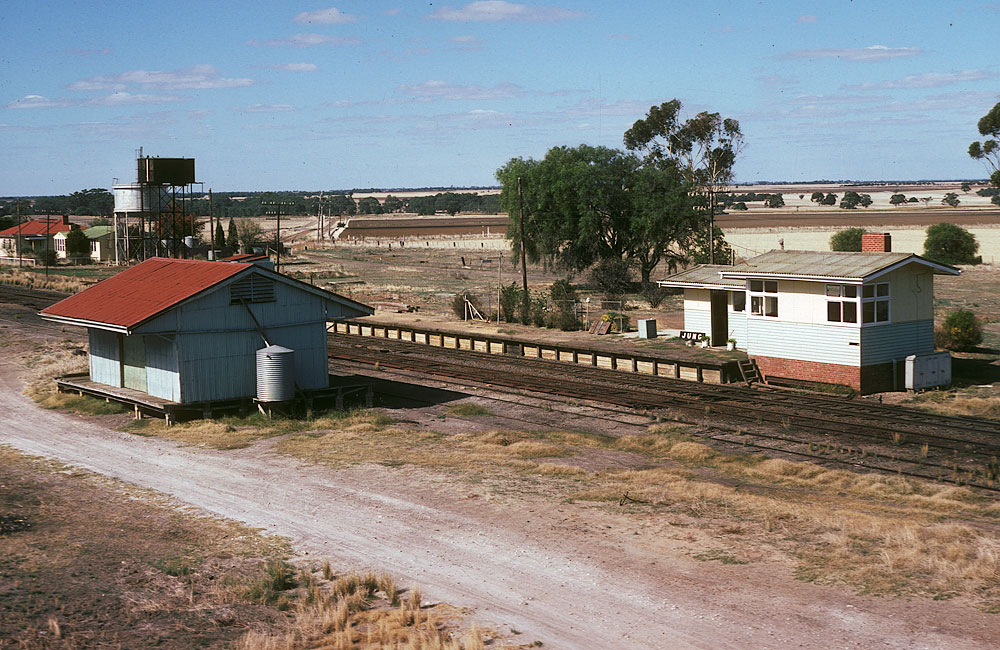
ABOVE: A good view of the east side of the station building circa 1980. (photo courtesy Barry Cooper)
Murtoa
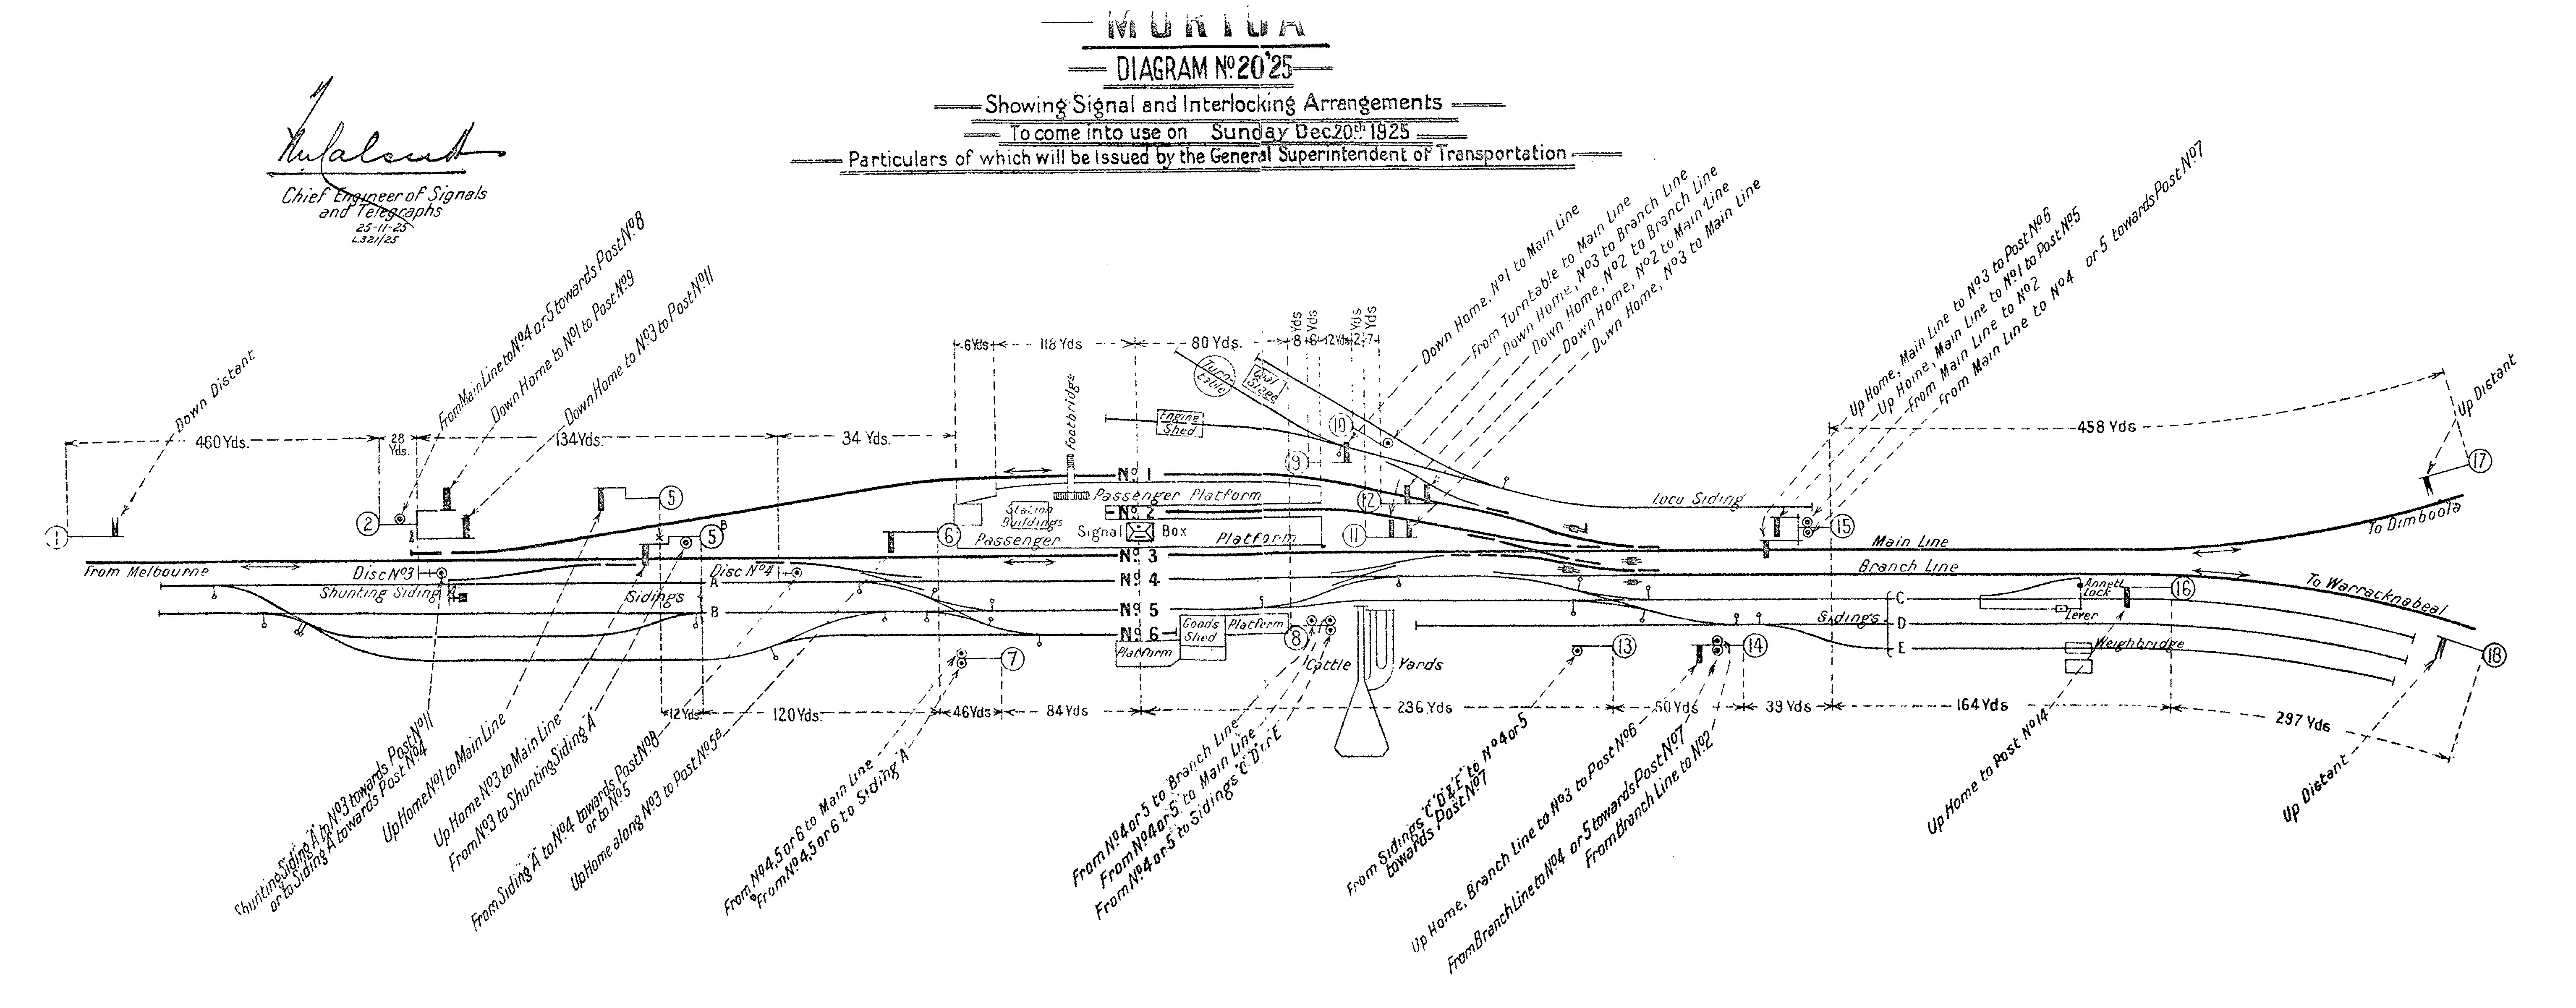

ABOVE: Murtoa, looking towards Melbourne. circa 1910. The signalbox shown was replaced by a much larger one (shown below) in 1913.
ABOVE: Looking towards Melbourne, I would say the new signal box was quite new which would date this photo circa 1915.
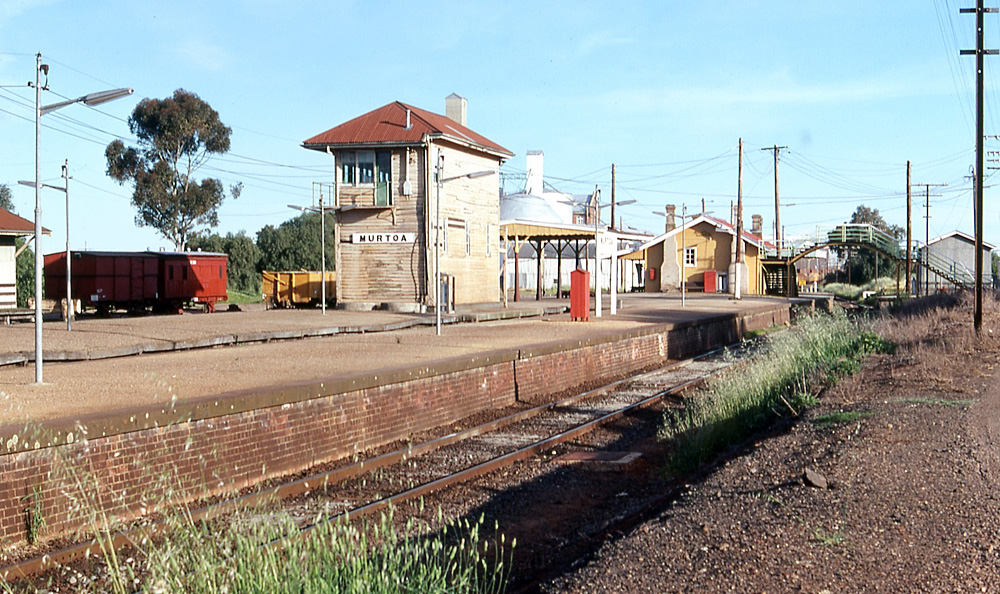
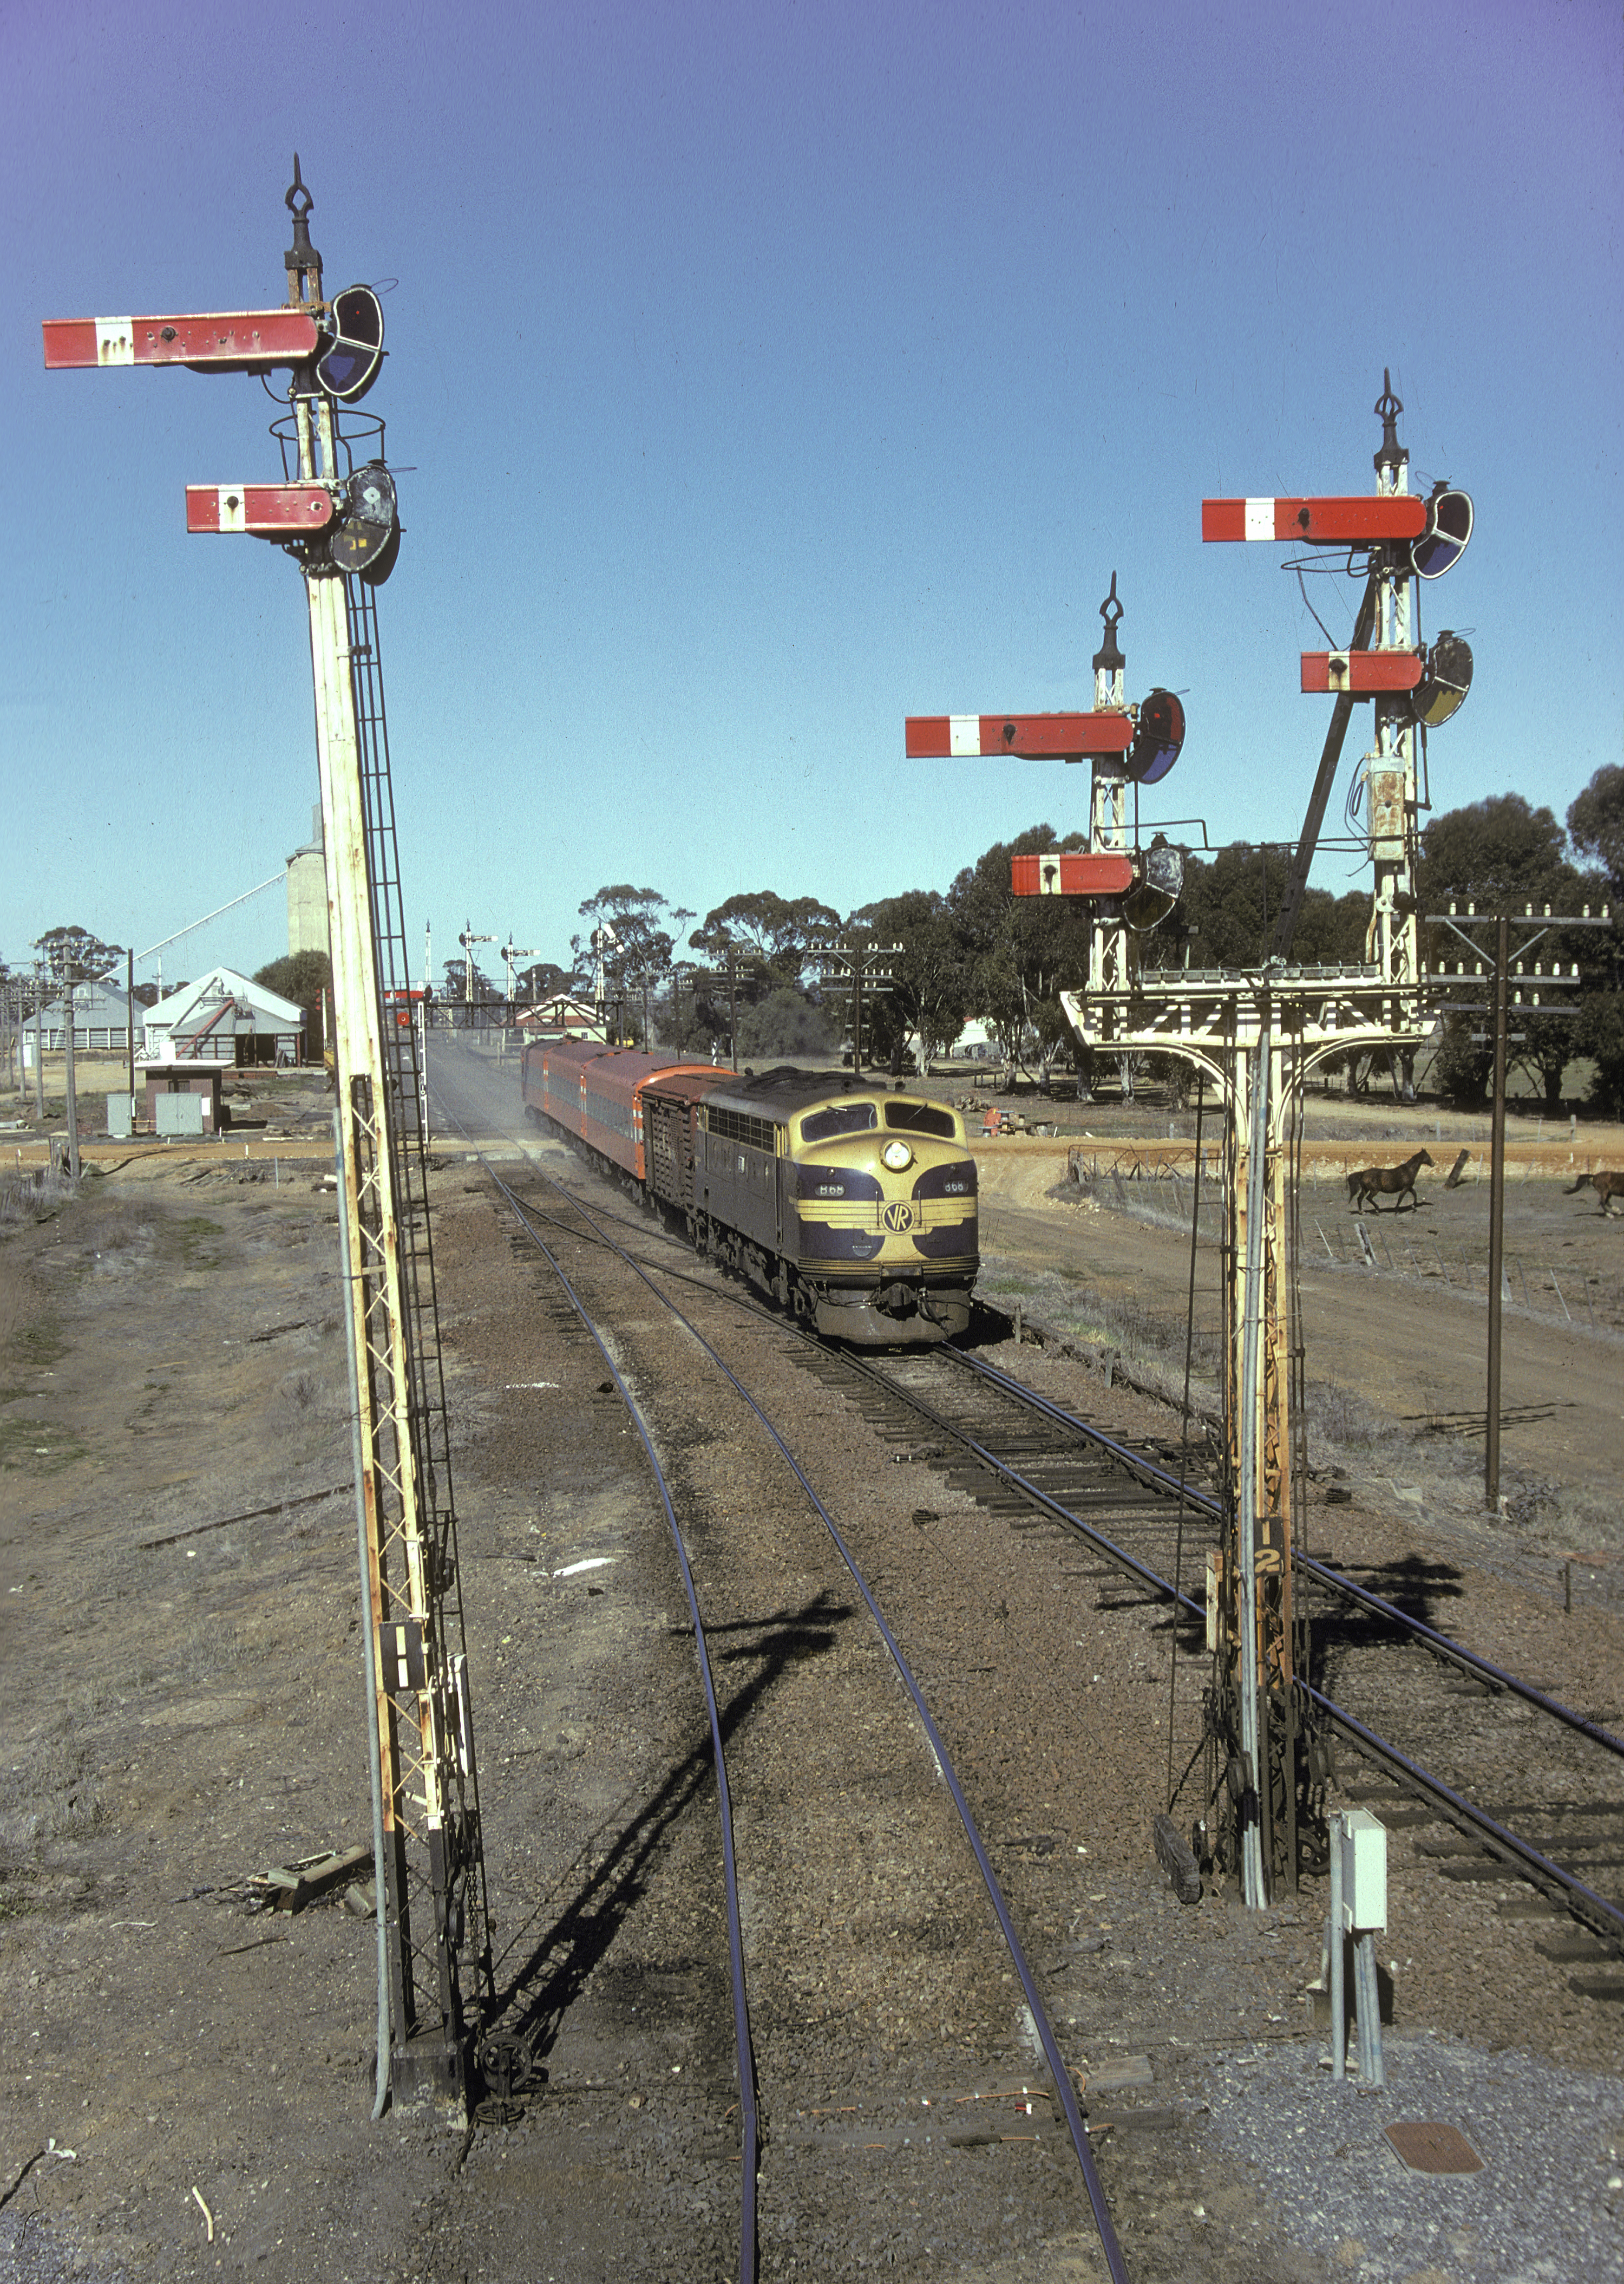
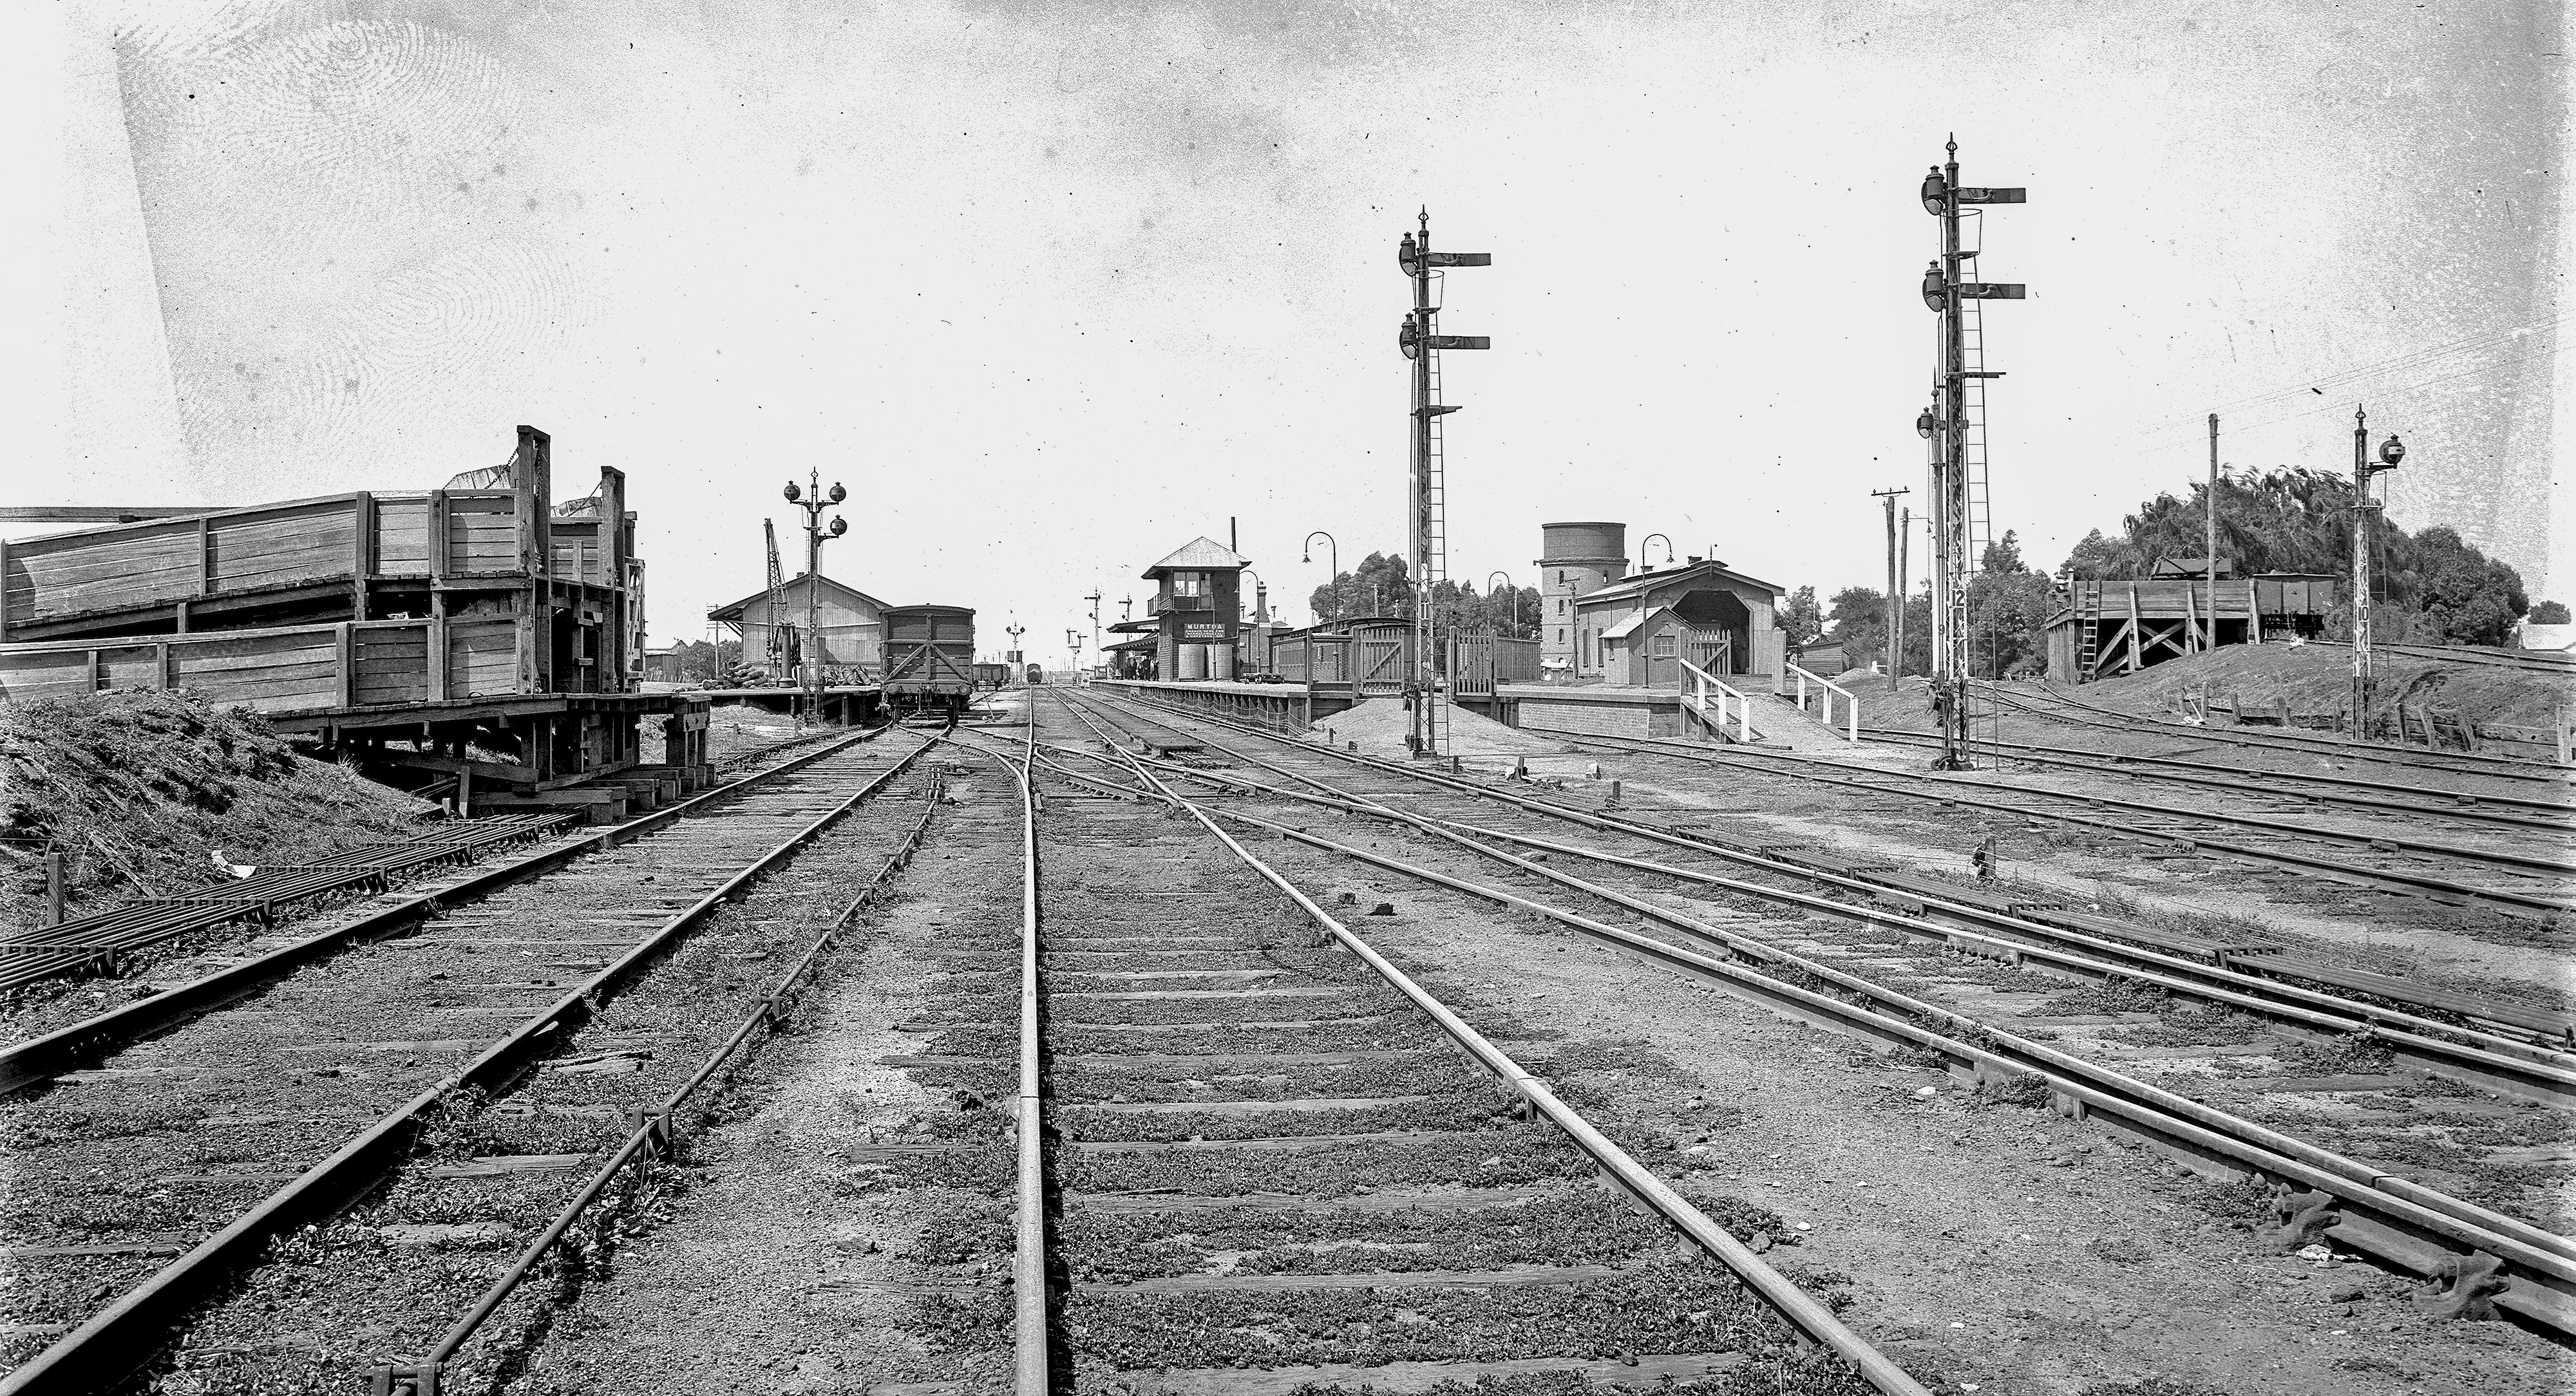
ABOVE: Taken in Oct. 1981, just before the Ararat to Wolseley CTC project went through. (photo courtesy Keith Lambert)
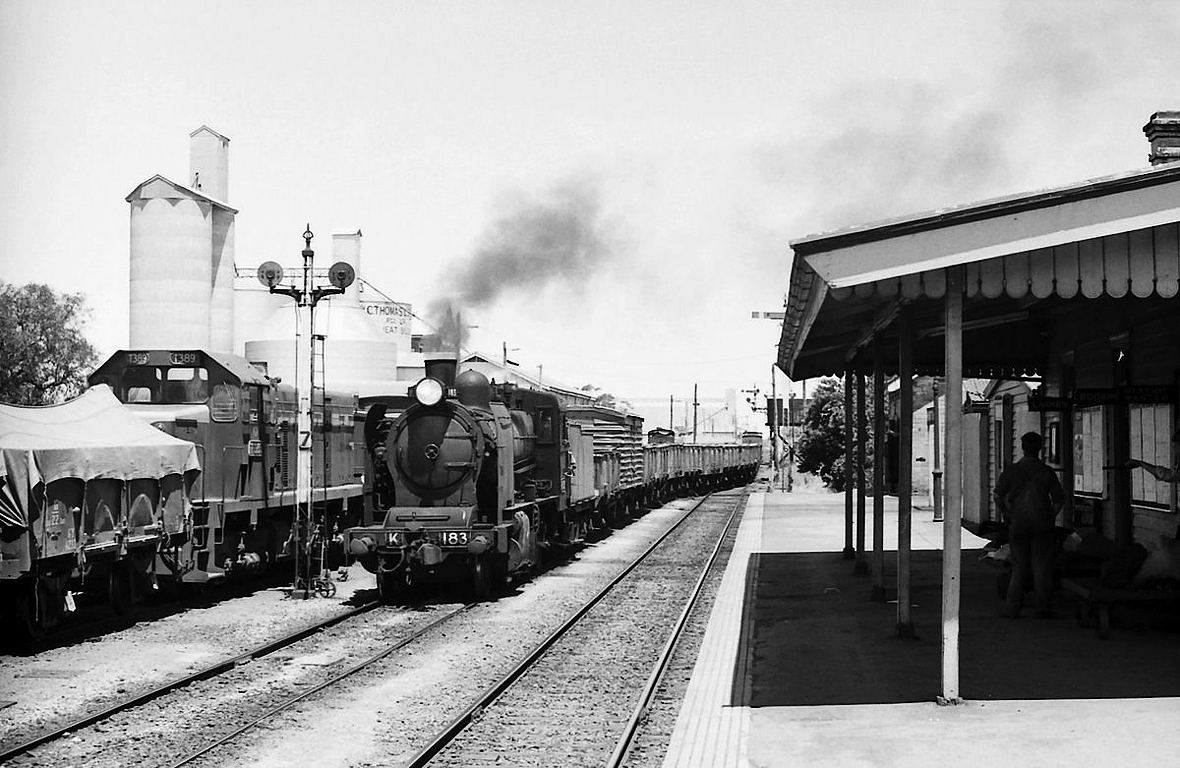
ABOVE: A down goods arrives No. 2 road, Dec. 1968 (photo courtesy John Ward)
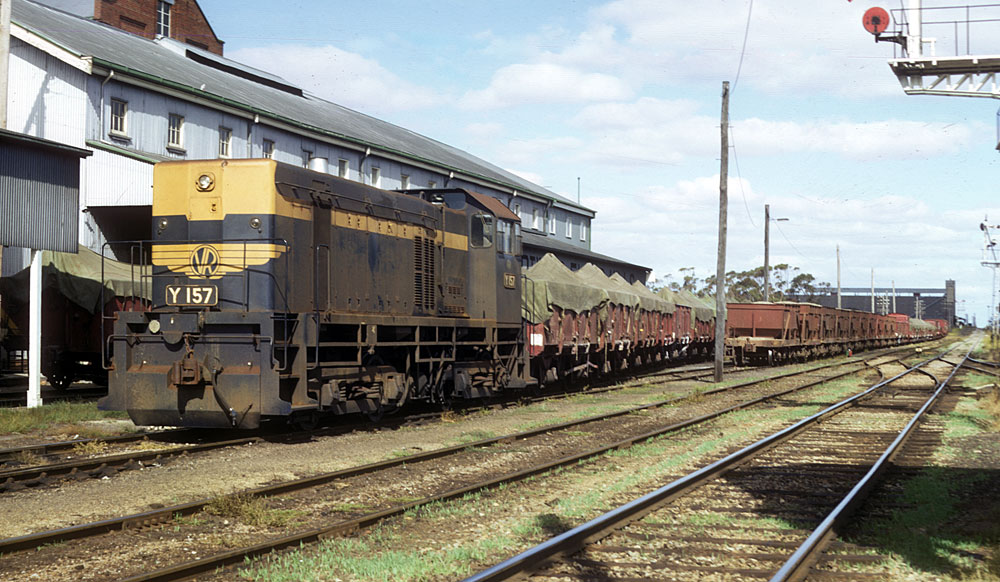
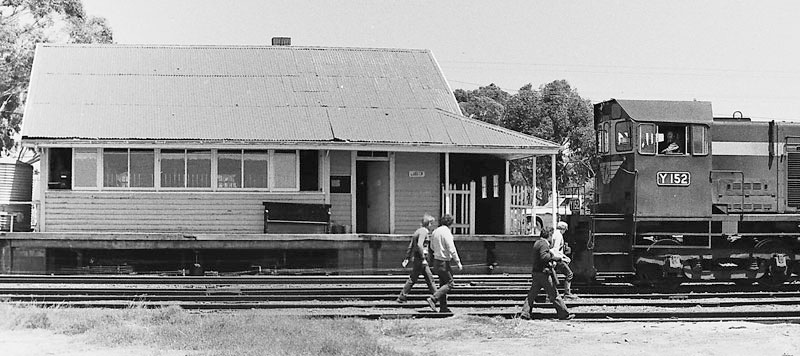
ABOVE: Y 157 attends to its yard pilot duties at Murtoa. The massive grain storage facilities of Marmalake can be seen in the distance. March 30 1970 Photo courtesy Tony Smith
ABOVE & BELOW: A down pass uses the back platform, the old loco shed and coal stage were still standing. March 30 1970. Photos courtesy Tony Smith
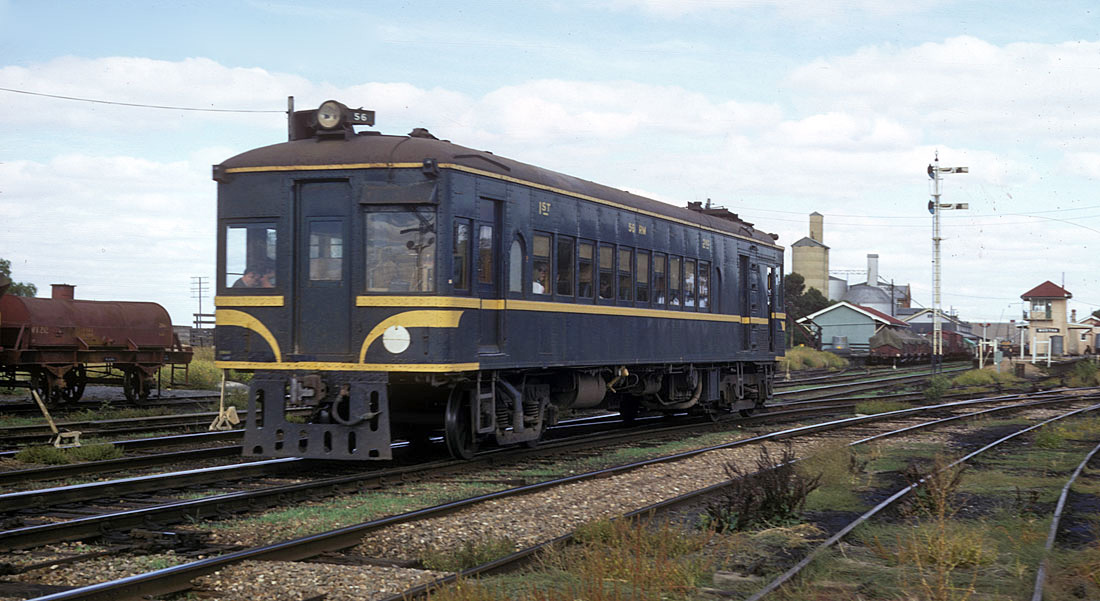
ABOVE: 56 RM arrives Murtoa after its run from Hopetoun, this service connected with both the down and up Dimboola passenger trains. March 30 1970. (photo courtesy Tony Smith)

ABOVE: 58 RM in the railmotor dock before departing for Warracknabeal, the connecting pass from Melbourne is seen on the right, Dec 1975. (photo courtesy Weston Langford)
ABOVE: The morning down Horsham pass sets out some cars for an enthusiast's special to Patchewollock. BELOW: After re-attaching to its train it continues its journey to Horsham. Nov 17 1979.
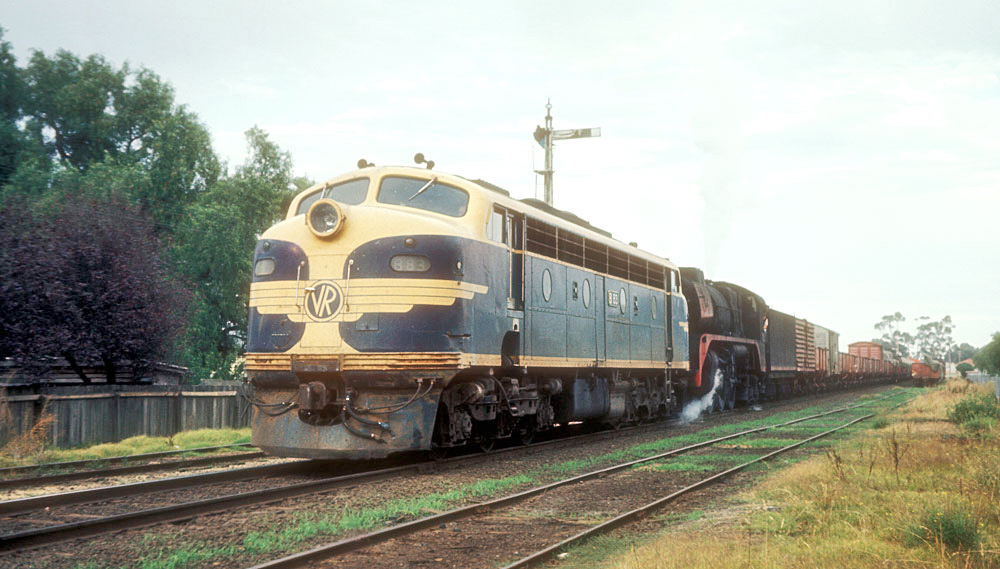
ABOVE: C 505 and an X class on a down goods cross B 61 on an up wheat train, as was common, B 61 has been backed out on the Warracknabeal branch for the cross. Jan. 31 1979. Photo courtesy Peter J. Vincent
ABOVE: 2 B's arrive Murtoa on an up goods. It was January 1979 and a friend and I were just commencing our annual 2 weeks "All Lines Ticket" sojourn around Victoria.
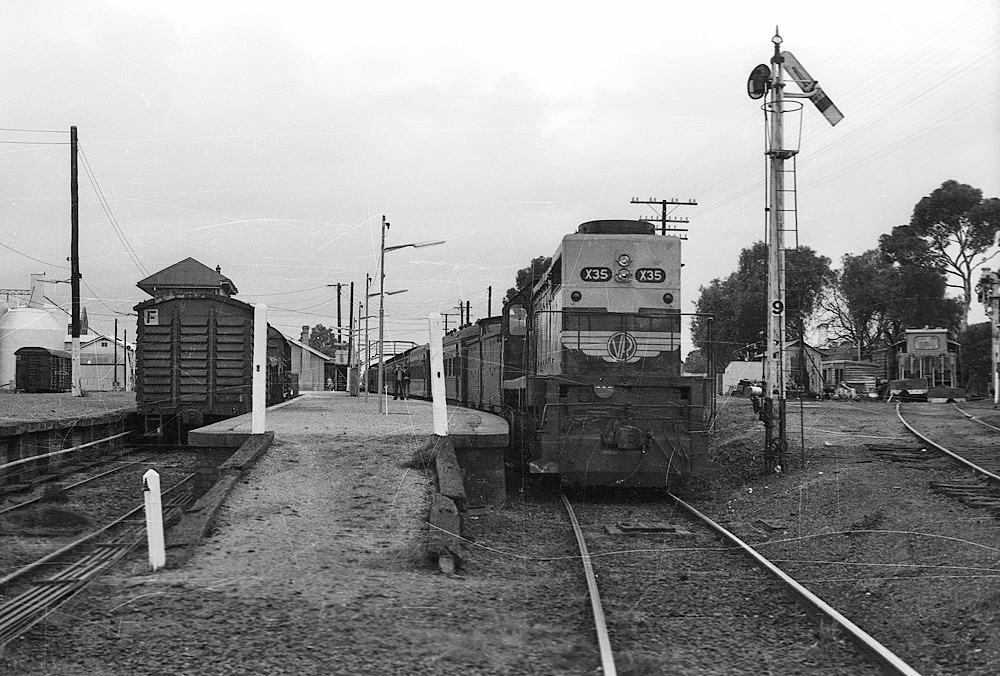
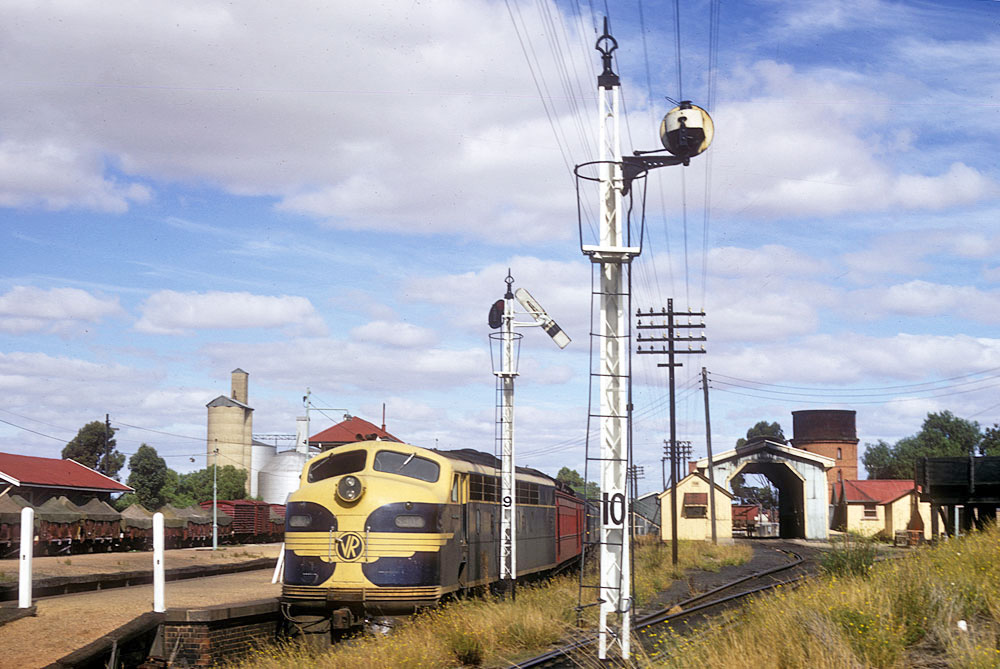
ABOVE: A badly scratched neg of X 35 running the down Horsham pass in the back platform, 1979
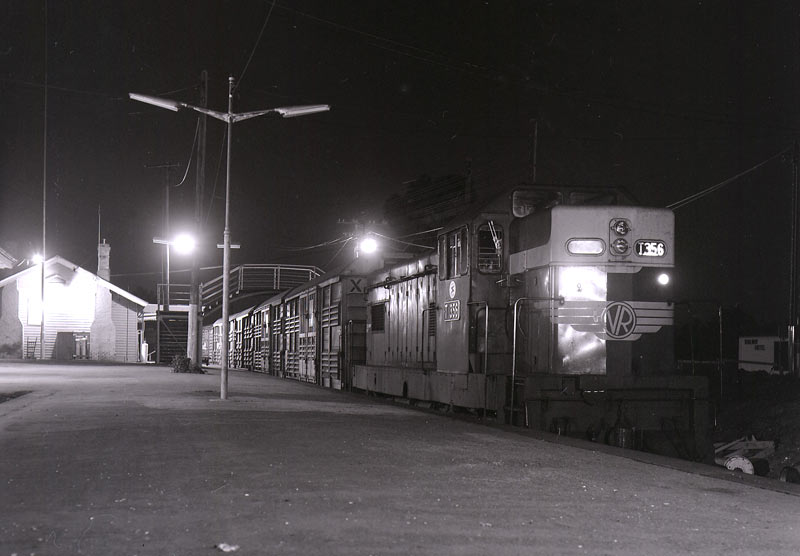
ABOVE: T 356 stands in the back platform track at Murtoa while running 9151 down goods to Dimboola, Sept 22 1983. Photo courtesy Chris Wurr
ABOVE: Technically not my greatest photo but included as a good view of the down end of Murtoa as seen from the cab of X 42 while running the down Horsham pass. Our train was sitting in the long gone, down platform. The track to the left was to the loco sidings.
Jung
ABOVE: A pre 1916 view of Jung looking west.

ABOVE: An up Horsham to Ararat goods at Jung, Dec 4 1957. photo courtesy Des Jowett
ABOVE; Jung, photographed from the north side looking towards Murtoa, 1982.

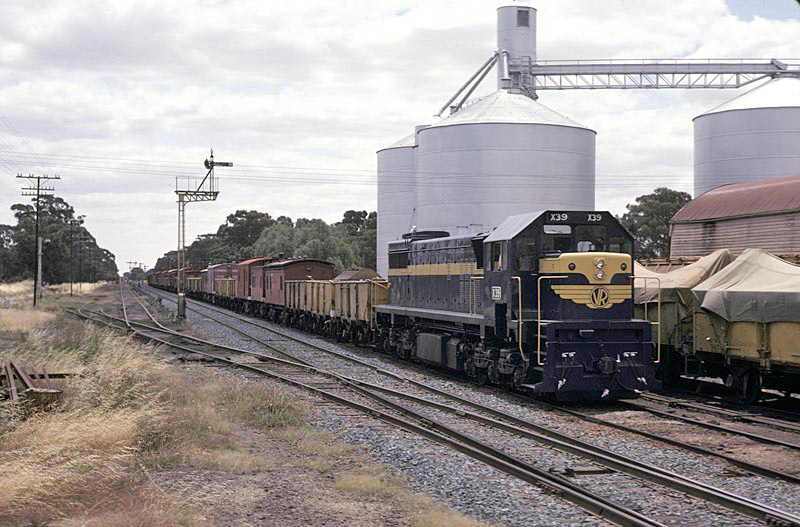
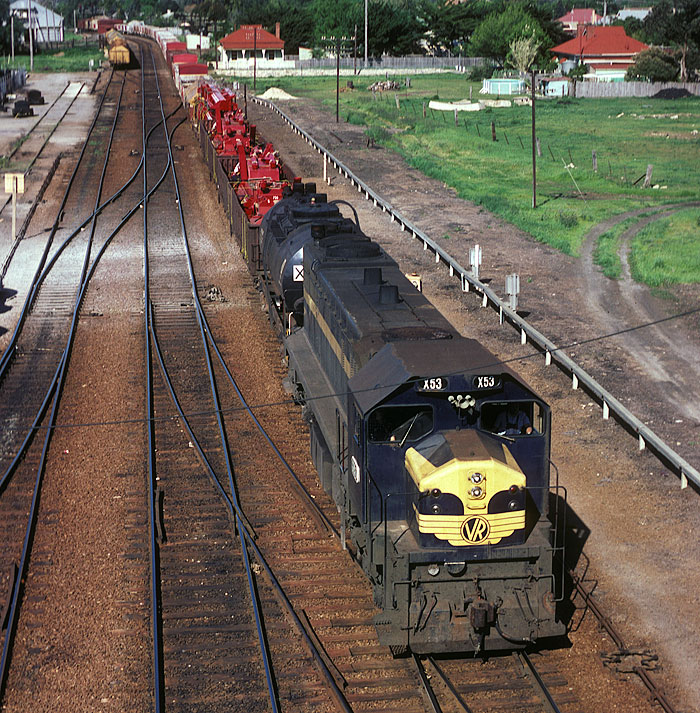
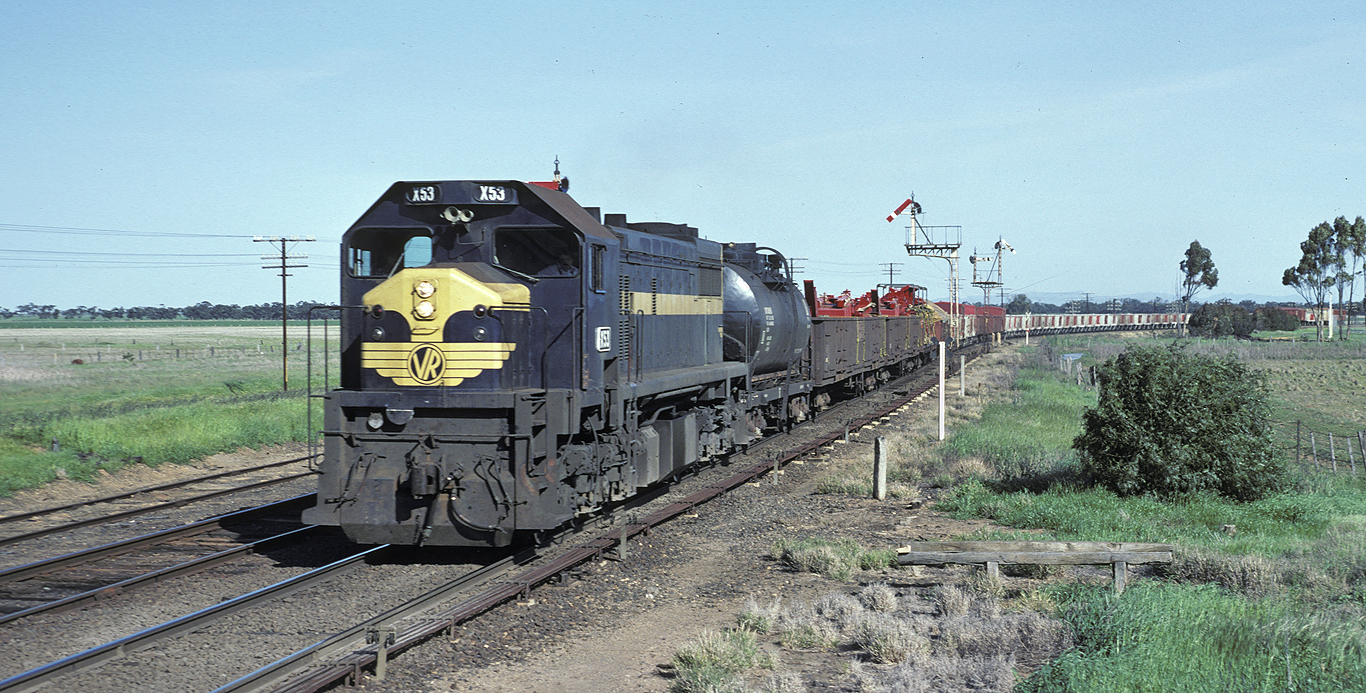
ABOVE: X 53 on a down goods, Oct 6 1981
ABOVE: Normally the afternoon Horsham to Spencer St. pass. would fly through Jung at 60 mph exchanging staffs using the auto exchanger but on this 1981 day the pass. is crossing a down wheat train so the staff is handed to the Signalman.
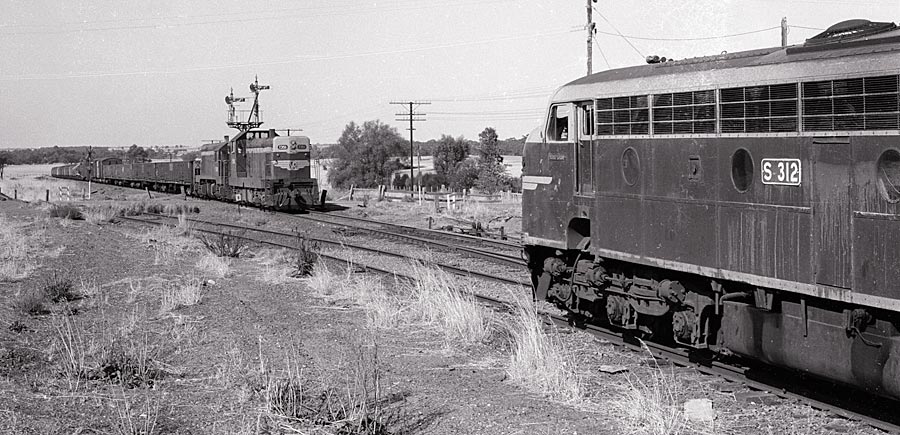
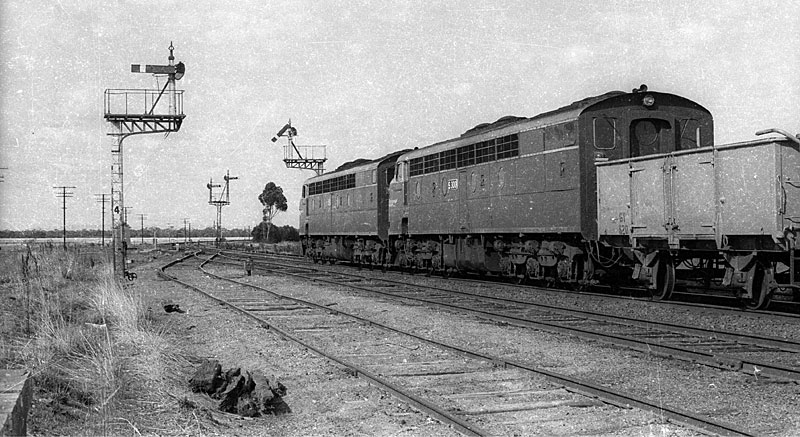
ABOVE: S 312 on an up goods crosses T 351 - T 413 on a down goods at Jung, 1981
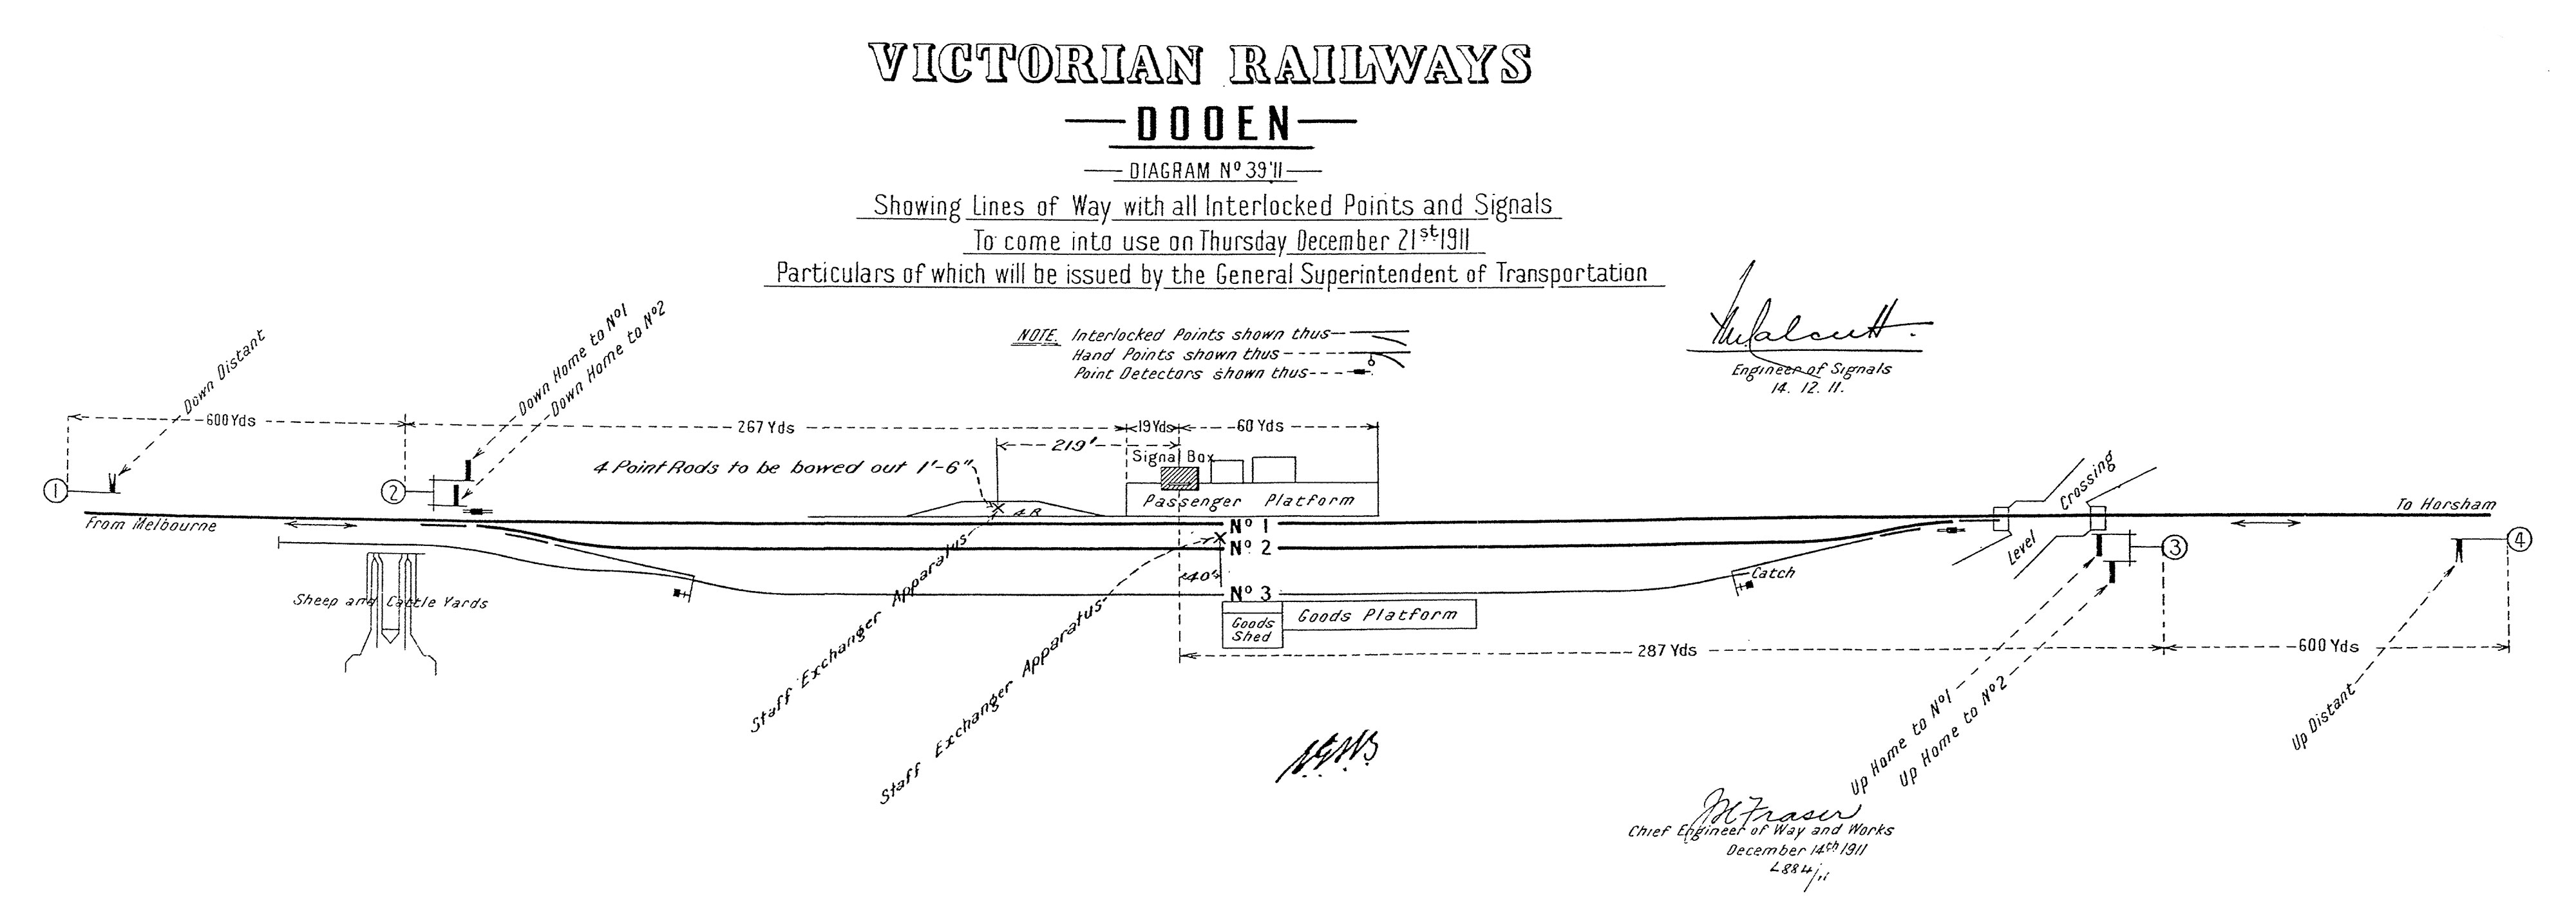
Dooen
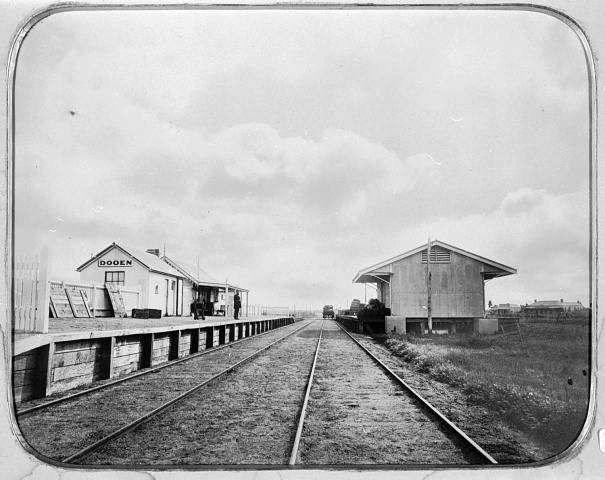
ABOVE: A very early view of Dooen, probably soon after opening and certainly before 1888 when it got its first interlocking frame.

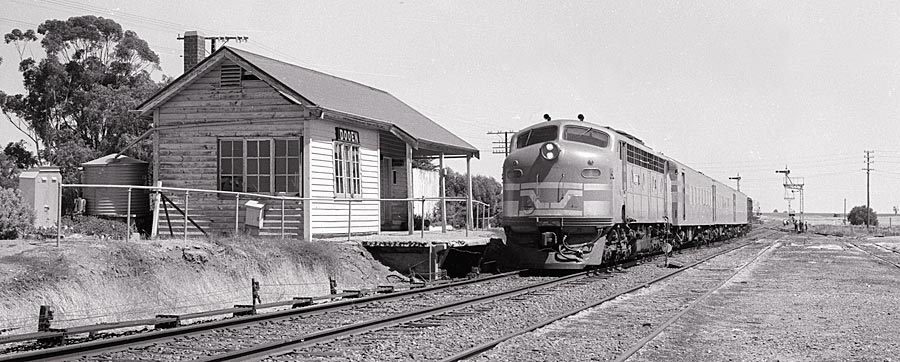
ABOVE: The 8.30am Spencer St. to Horsham pass nears the end of its journey as it passes through Dooen. Oct. 6 1981
ABOVE; The afternoon Horsham to Spencer St pass flies through Dooen as it exchanges the staff "on the auto" 1982. Dooen was almost demolished by a derailment in the late 70's requiring the front of the signalbox to be replaced, the platform was drastically cut back after the derailment. Dooen was closed to passengers in 1972. Dooen became a switch locked siding on Nov 11 1983 as a result of CTC between Murtoa loop and Horsham.


ABOVE: Taken from atop the wheat silo, an up goods arrives #2 road at Dooen, BELOW: The same train sitting waiting for a cross. May 1982.
ABOVE: When a loco fails and the cupboard is almost empty, anything goes. An up jet limped into Dimboola with a defective C class and all that Dimboola had on hand was a pair of T's, they made it to Ararat where more suitable power was attached for the journey to Melbourne. The cane staff carrier can be seen sticking out the window in preparation for the hand staff exchange. 1981
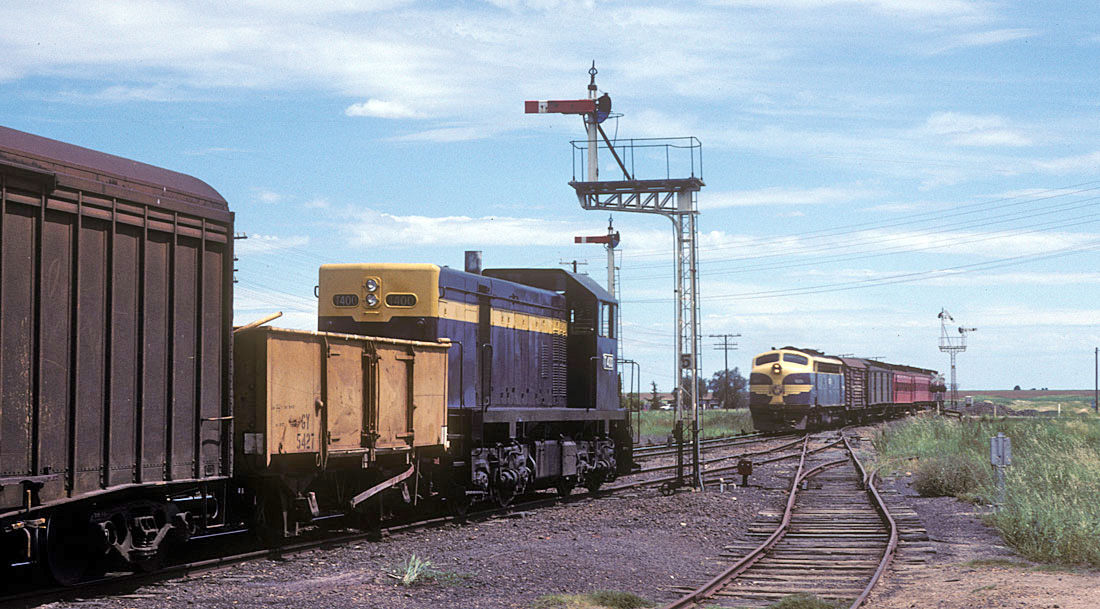
ABOVE: T 400 on a down goods crosses B 76 on the up afternoon Horsham to Melbourne pass. Nov. 3 1981
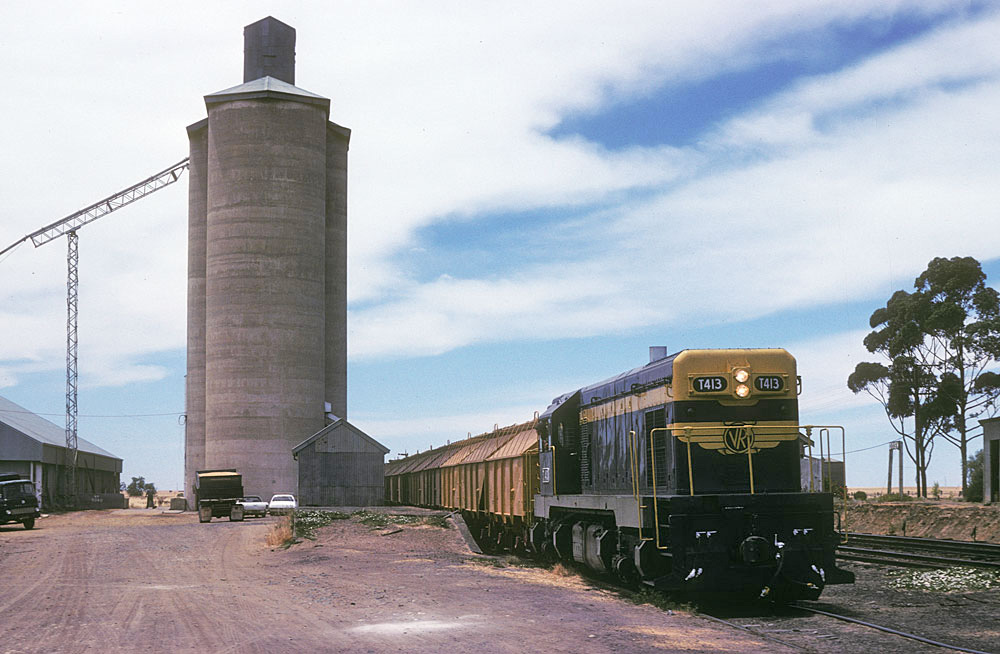
ABOVE: Freshly painted T 413 drops off some empty GH's at Dooen as a farmers wheat truck prepares to unload. Feb. 1982
Horsham
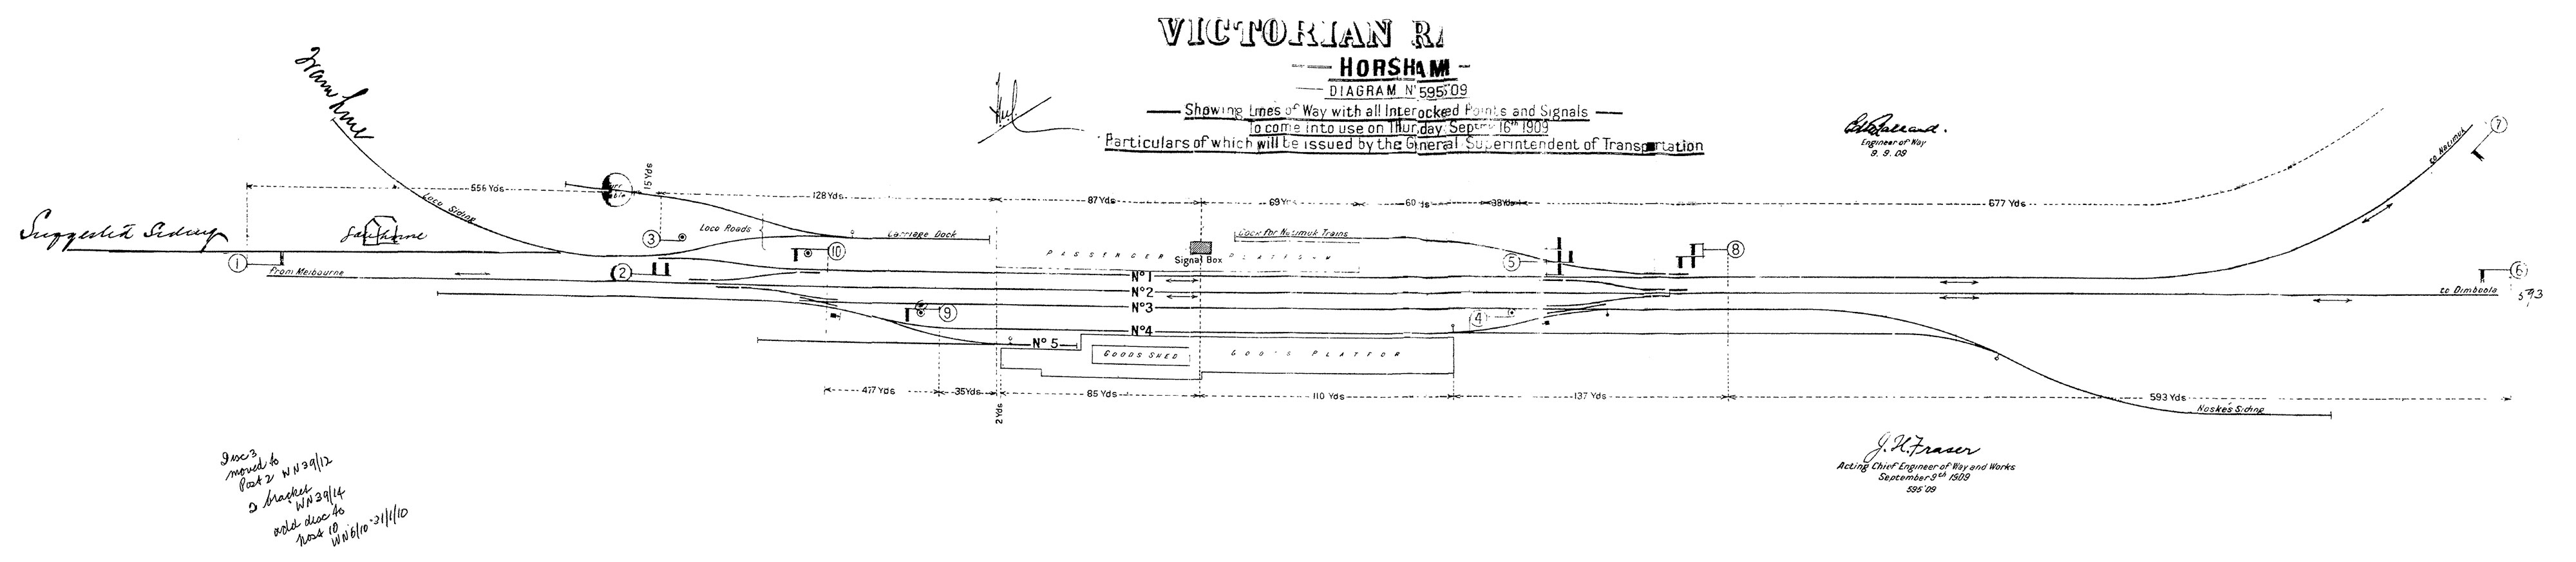
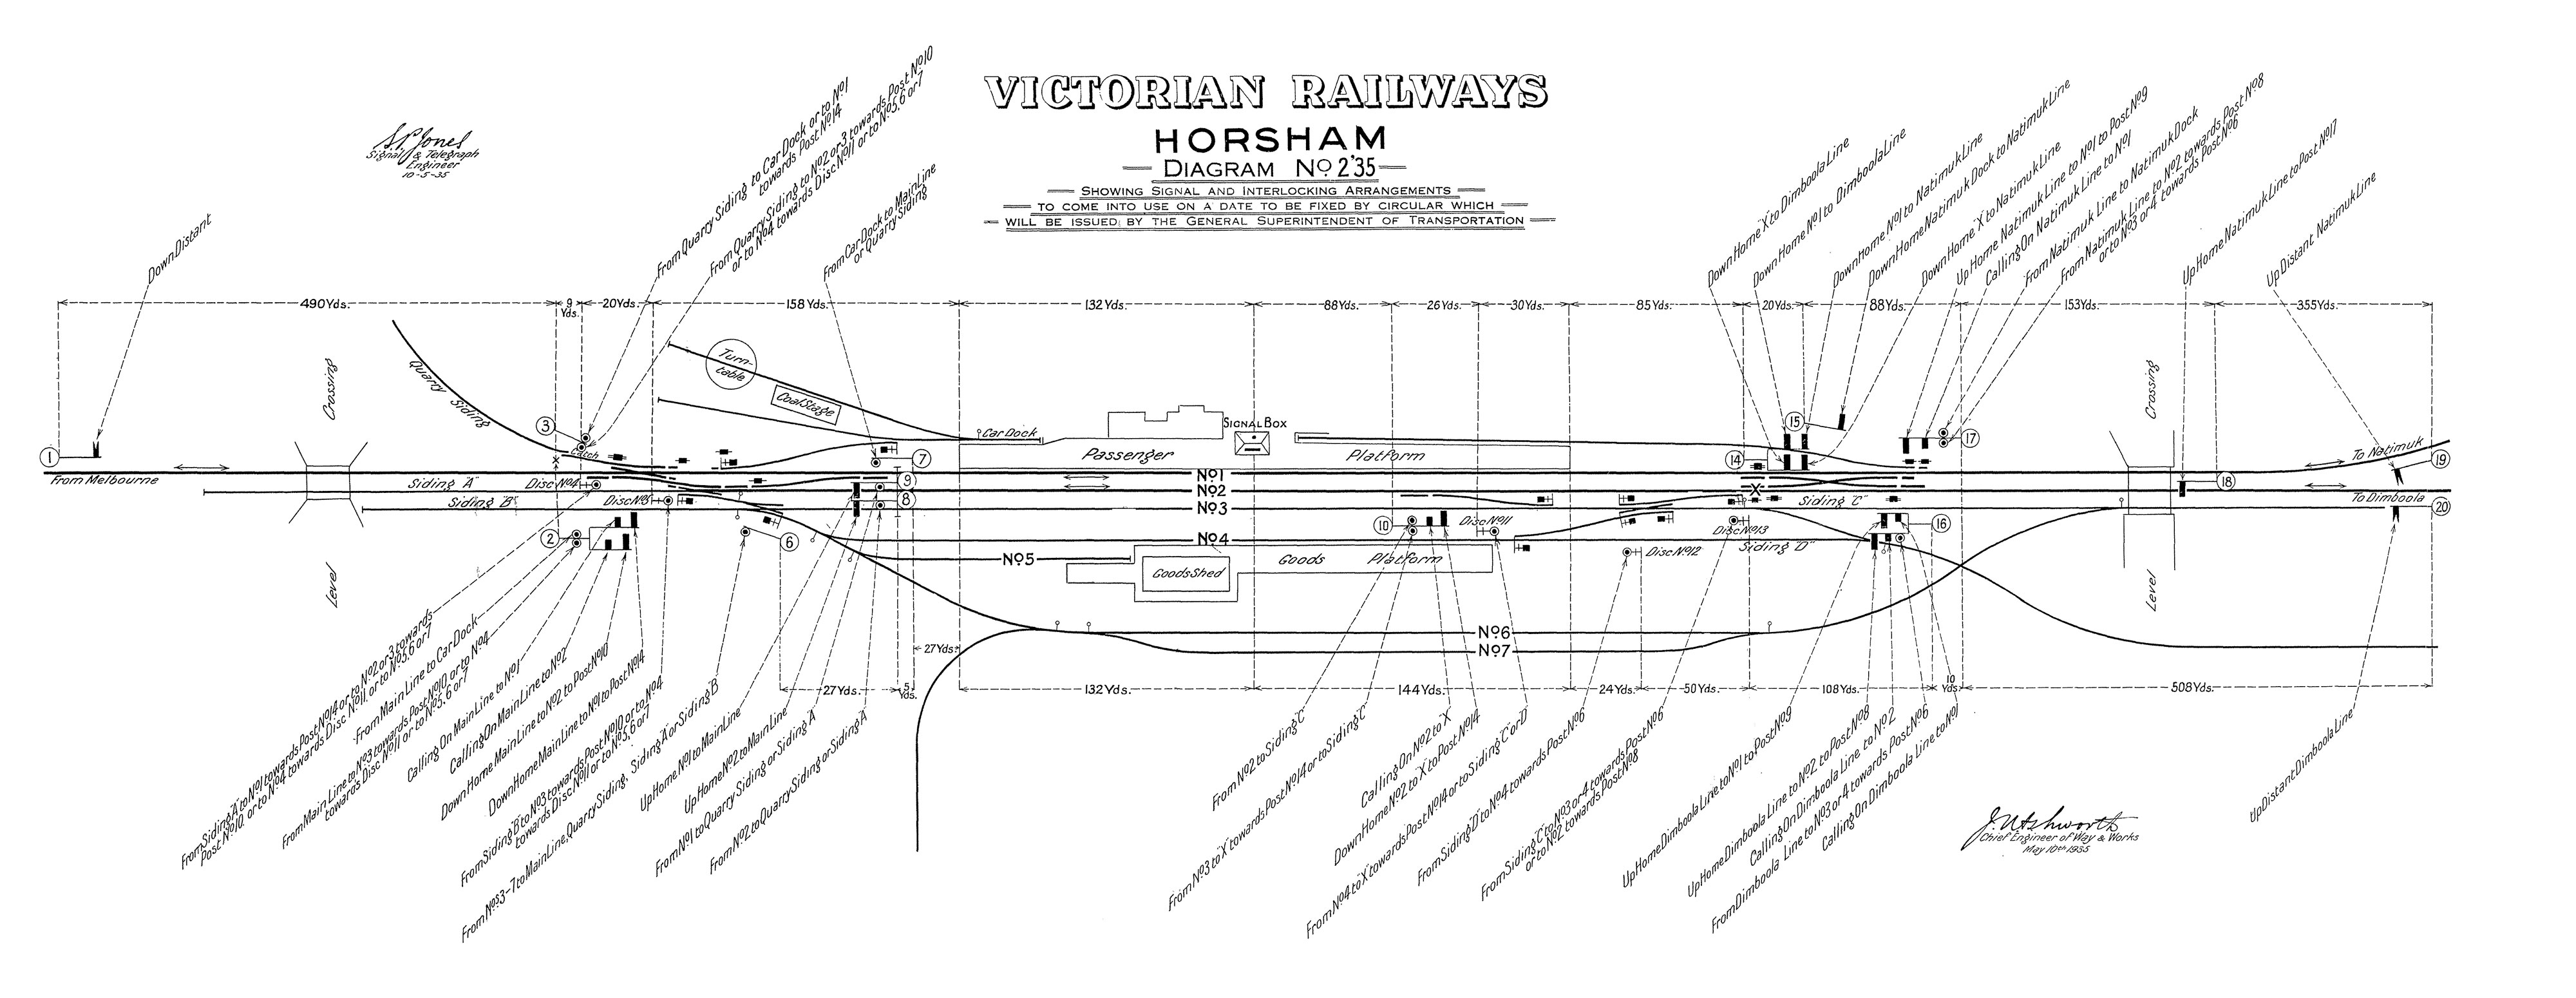
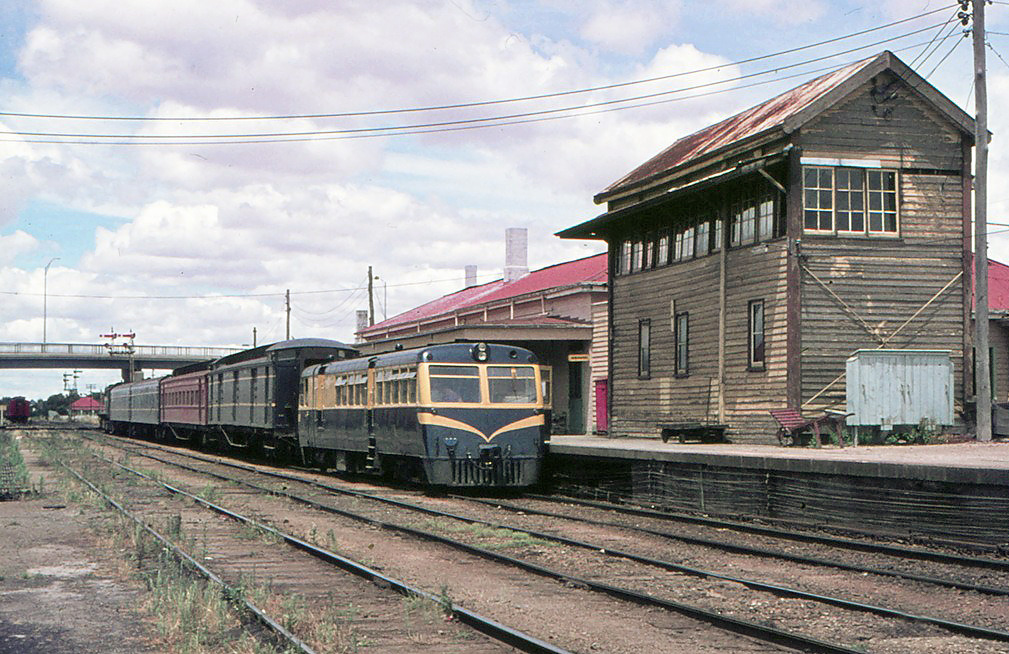
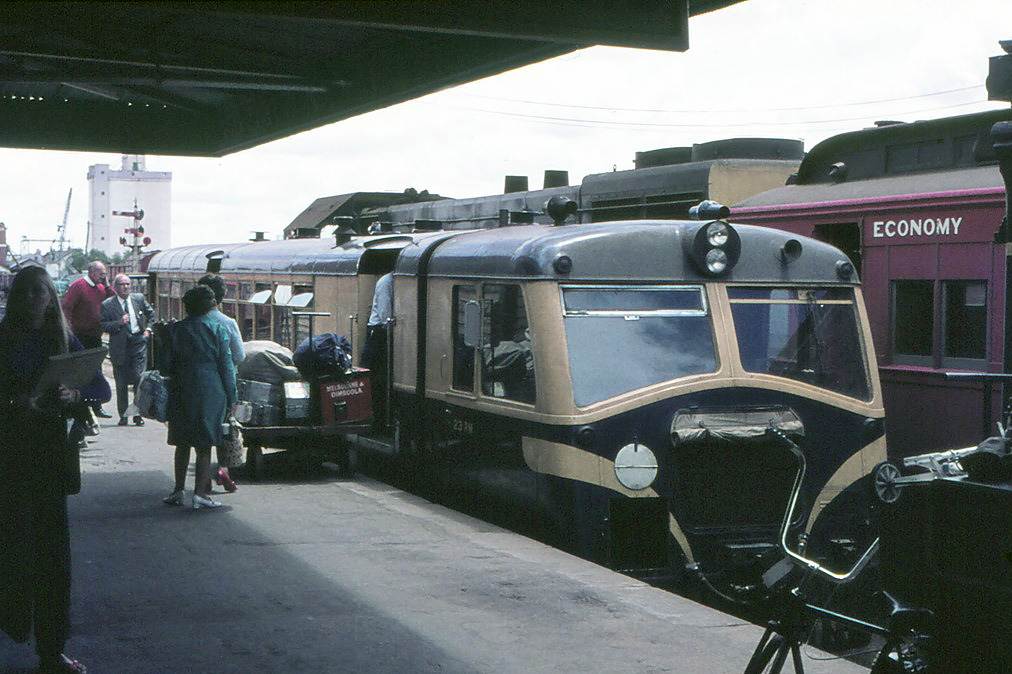
ABOVE: RM 23 prepares to depart Horsham on the 2.35pm Horsham to Serviceton service, behind it is the 2.45pm Horsham to Melbourne service. Dec 30 1974. The mechanical signalbox lasted until March 1976 when Horsham was provided with a signal panel. The track layout was drastically simplified as part of this project, Dec 30 1974. (photo courtesy Bob Wilson)
ABOVE: This photo was taken prior to the photo above. The pass from Melbourne would arrive at the platform, discahrge its passengers and then set back and run into No.2 road where it would reverse its guards van and then attch the loco to the Melbourne end after which it would pull out of No.2 road and set back behind the railmotor as shown in the photo above, Dec 30 1974. (photo courtesy Bob Wilson)
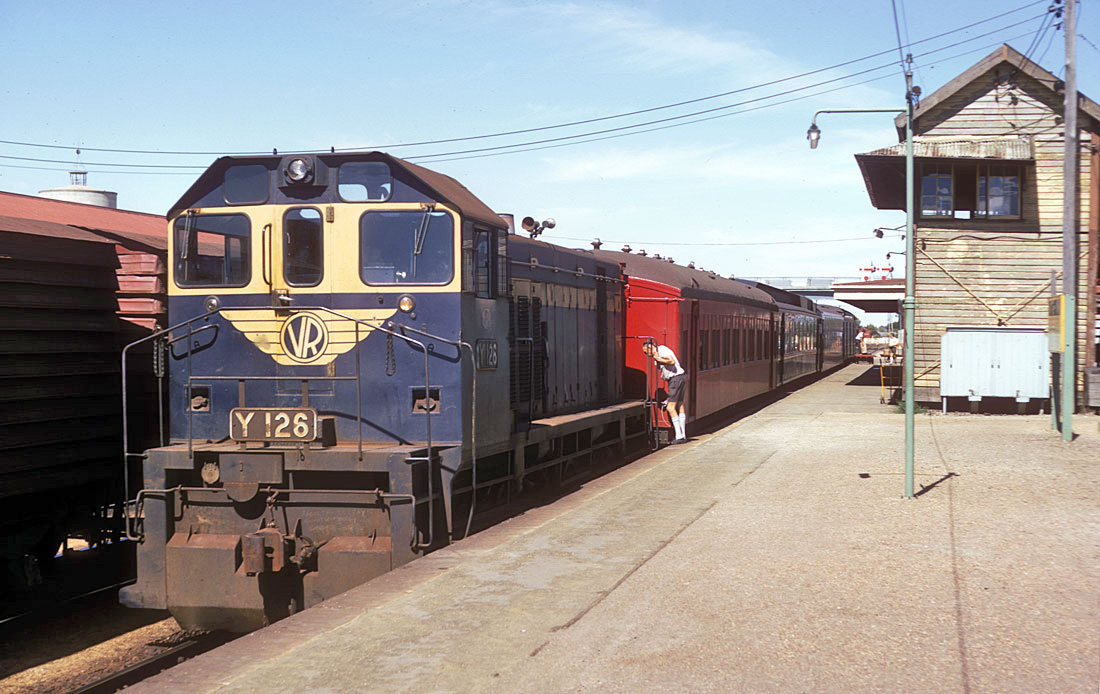
ABOVE: When locos were in really short supply VR had to try every trick in the book. A fairly common practice during grain harvests was for the Dimboola pass. to lose its big loco at Murtoa or Horsham from where the rest of the journey was done by the yard pilot. The big loco would be put to immediate good use by attaching to an up grain train. ABOVE: Y 126 attaches to the Dimboola pass. at Horsham (photo courtesy John Ward)
ABOVE: A view of Horsham looking towards Melbourne taken from the top of the Noske flour mill Up goods No. 36 is in No. 1 road and a Walker railcar is sitting in the Natimuk dock. Dec. 1961. (photo courtesy Des Jowett)
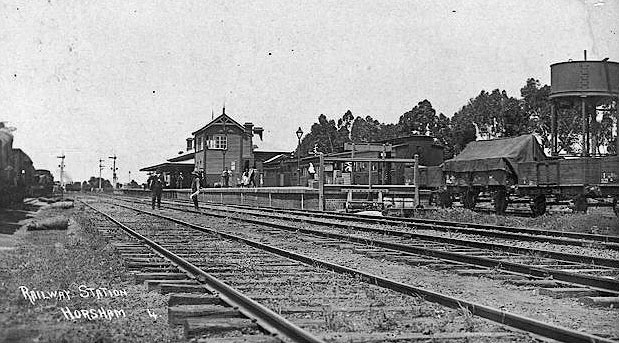
ABOVE: Horsham looking east, sometime between 1909 and 1919.
ABOVE: C 7 arrives Horsham on its last run, on a Dimboola to Ararat goods, March 12 1962 with Driver Herb Howland and Fireman Hill. The Carpolac line can be seen curving away to the left under the smoke deflector. (photo courtesy Des Jowett)
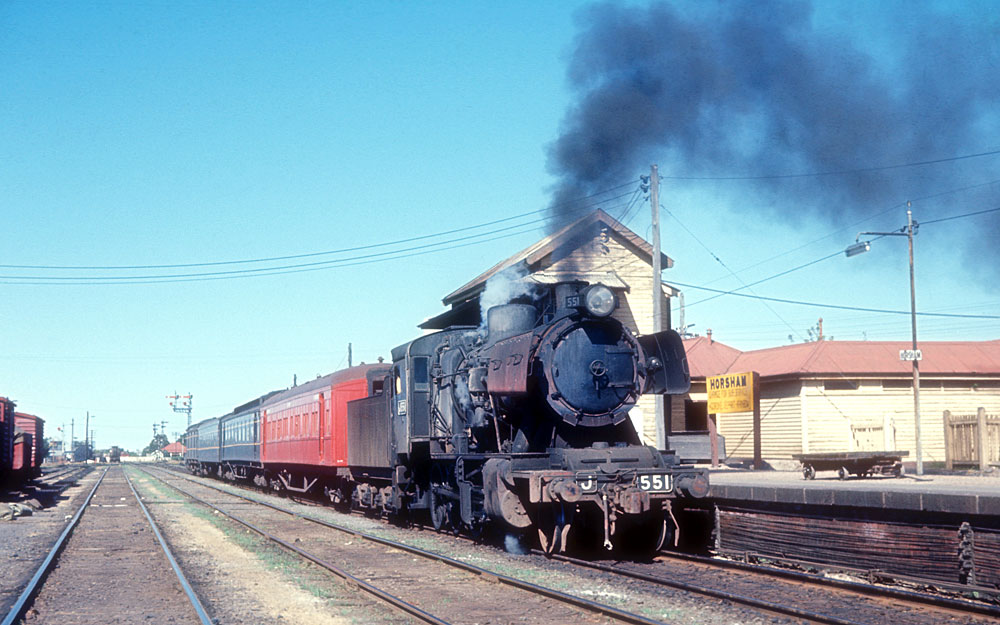
ABOVE: J 551 at Horsham on the Melbourne to Dimboola pass. This train would have been diesel hauled to either Murtoa or here at Horsham where the J would have been attached to release the diesel for goods working. March 6 1967. Photo courtesy John Ward
ABOVE: B 83 and R 735 arrive Horsham on No 86 through goods that ran from Dimboola to Ararat March 7 1967. The line to the left of the loco was the Goroke branchline. Photo courtesy John Ward
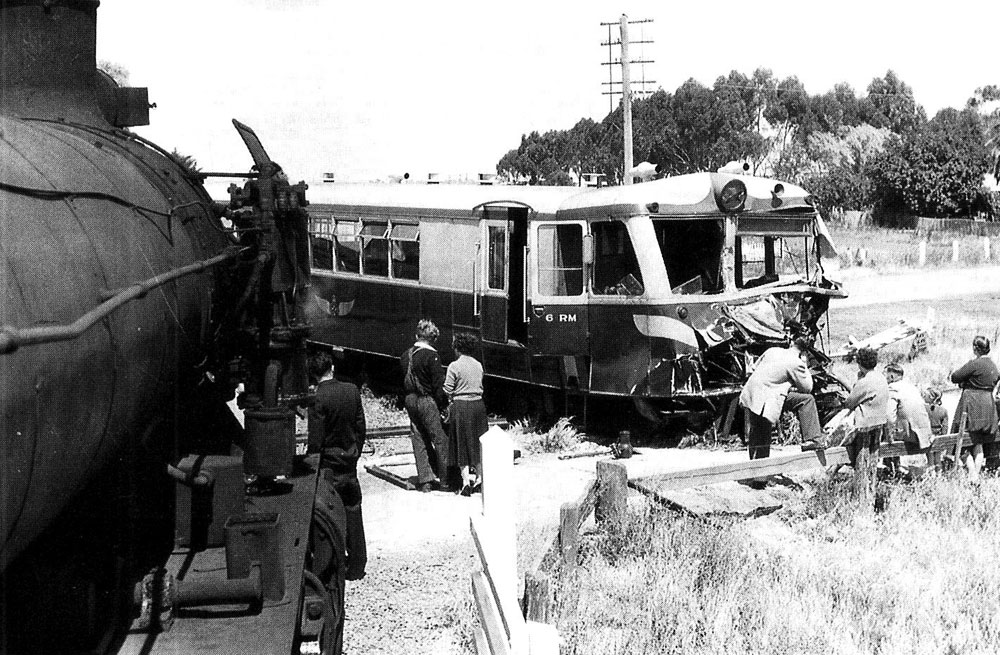
ABOVE: RM 6 collided with a truck on the Western Highway at Horsham whilst running the Horsham to Goroke service on Nov. 26 1957. The photo was taken from N 419 which assisted in re-railing. (photo courtesy Des Jowett)
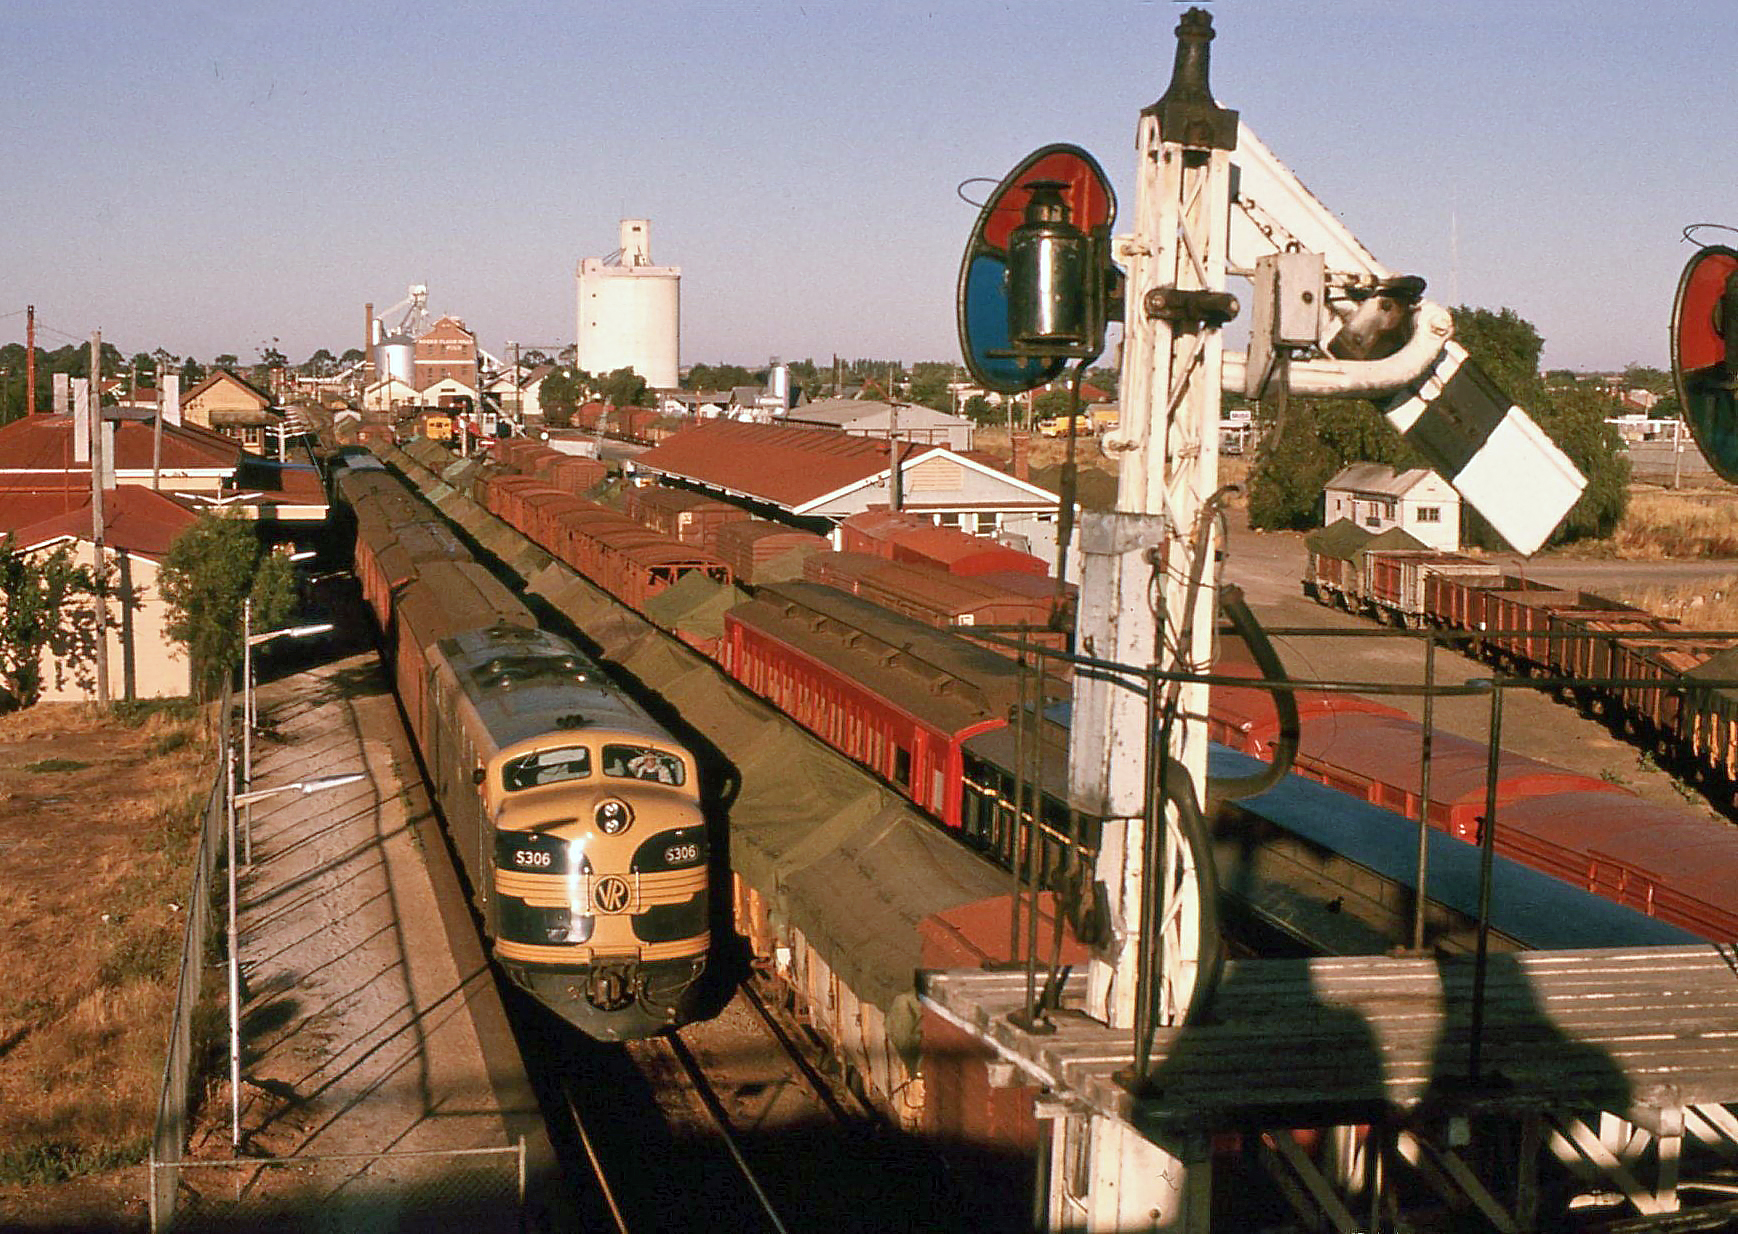
ABOVE & BELOW: A very busy scene at Horsham sees S 306 departing on the morning Dimboola to Melbourne pass. Sleepers 5 & 8 were on an AREA special. Dec 31 1975. (photos courtesy Doug Miles)
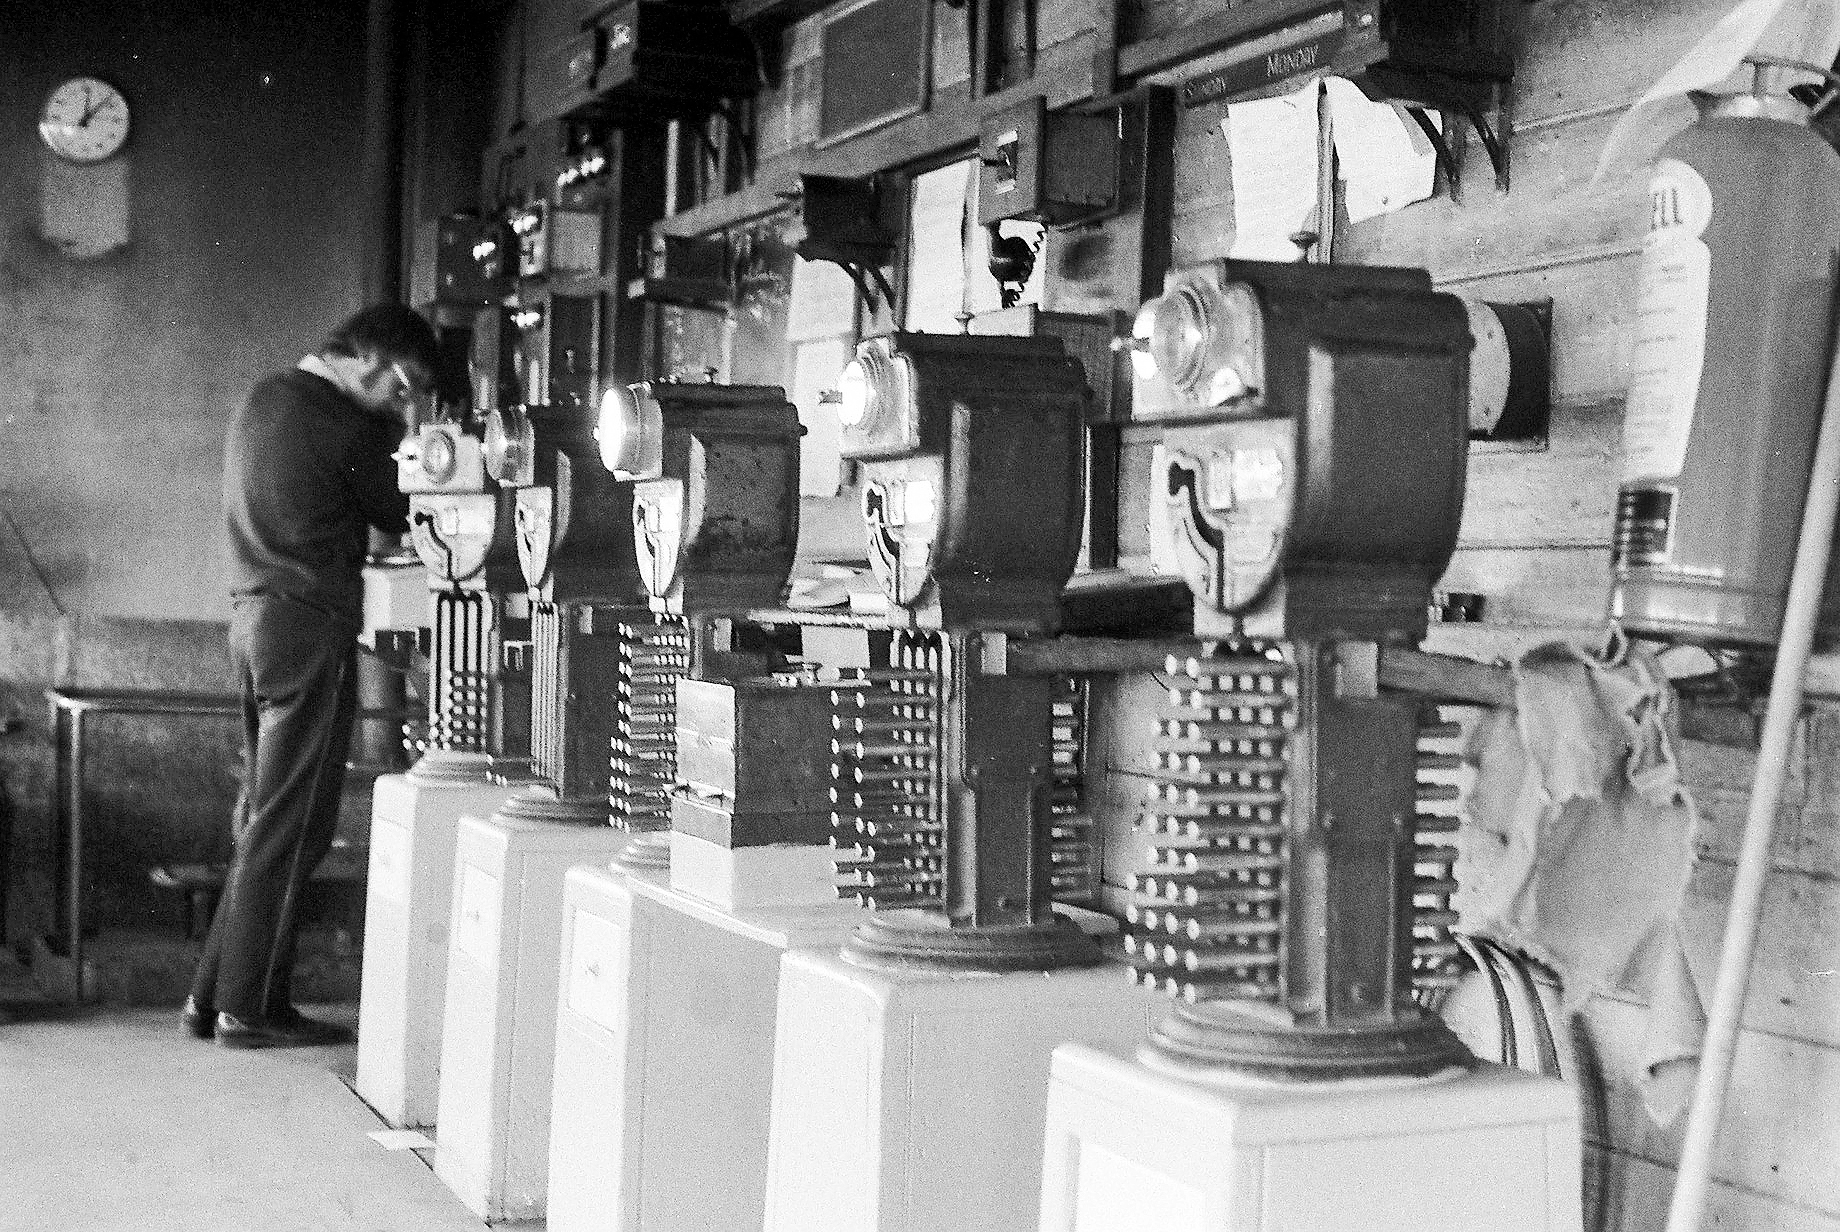
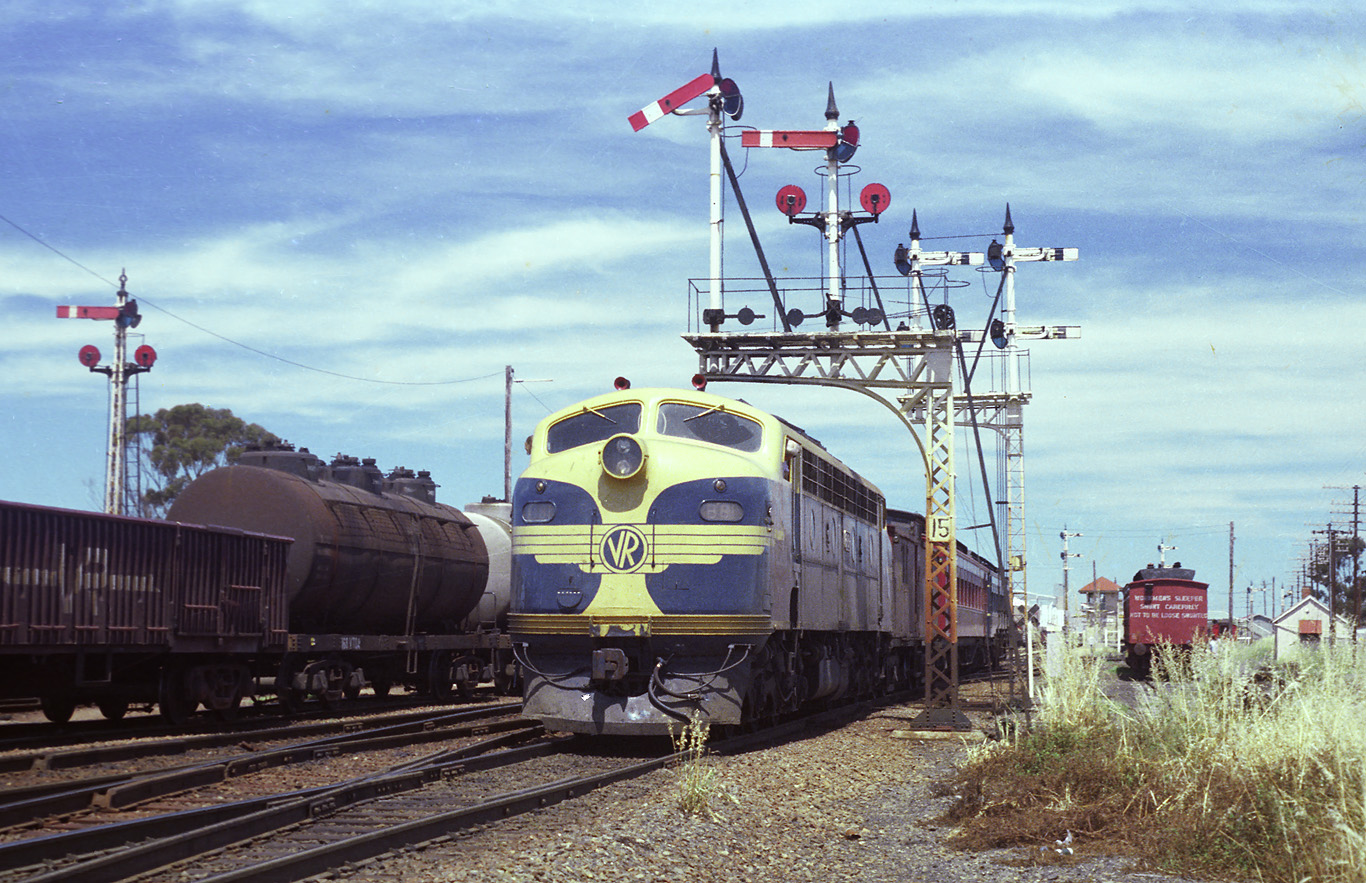
ABOVE: To my knowledge, Horsham was the only VR signal box that had 5 staff instruments. Left to right Horsham could work with Murtoa, Jung, Dooen, Pimpinio and Dimboola. (photo circa 1974 courtesy David Langley)
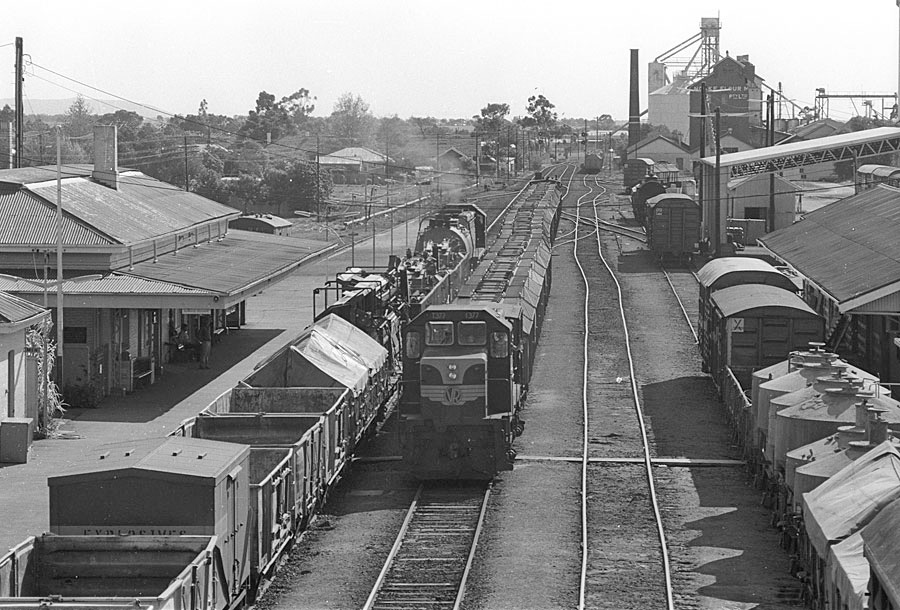
ABOVE: A down goods crosses T 377 on an up wheat train at Horsham, 1981.

ABOVE: The afternoon Horsham to Spencer St. pass. awaits its depature time from Horsham, Nov. 3 1981.

ABOVE: K 156 sits at Horsham loco, looking towards Melbourne, April 27 1969. (photo courtesy Doug Miles)
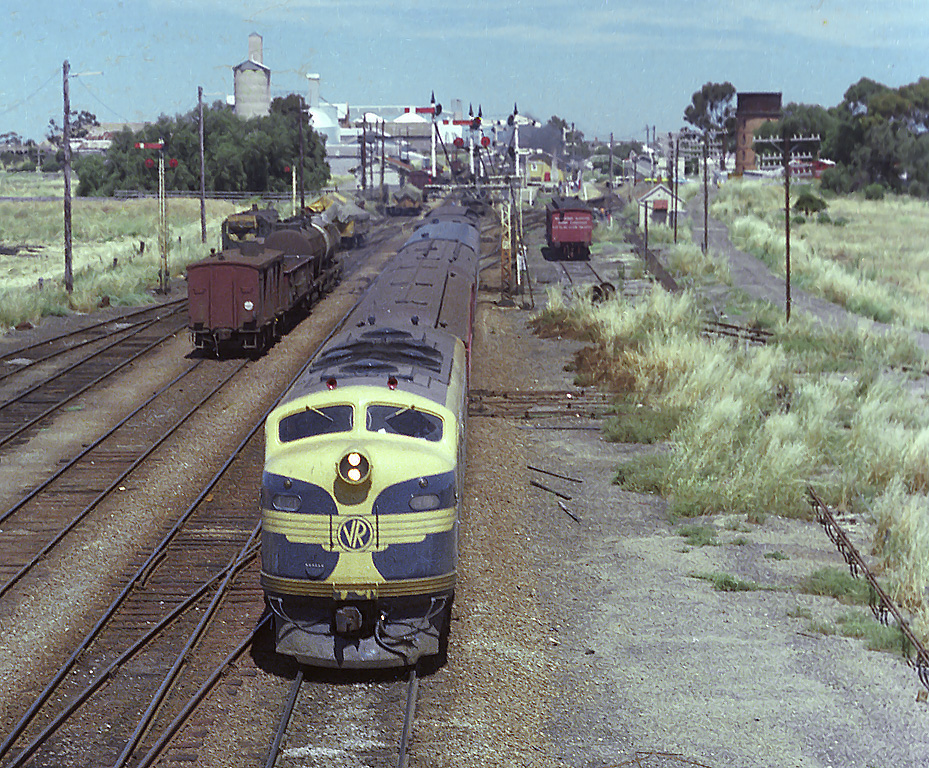
ABOVE: A down goods passes through Horsham. Oct 6 1981
ABOVE: Circus time at Horsham showing the up home departures, the portables are the loco office and rest hut where Ballarat crews used to rest. Feb. 1962 (photo courtesy Des Jowett)
ABOVE: An up loaded wheat train sits in the loop at Horsham, Jan 1979.
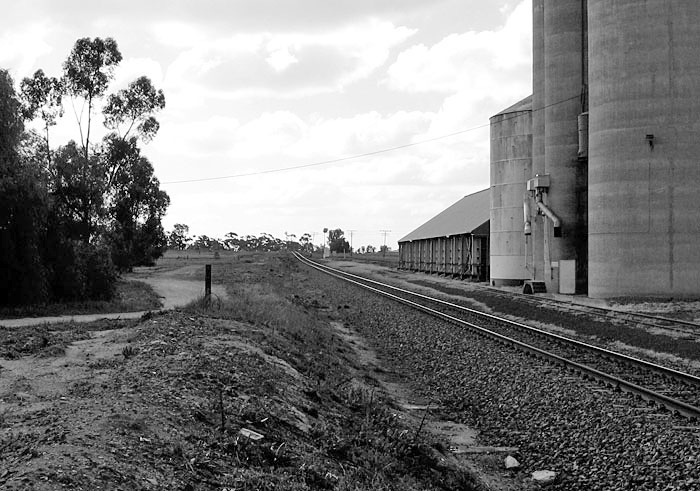
Pimpinio
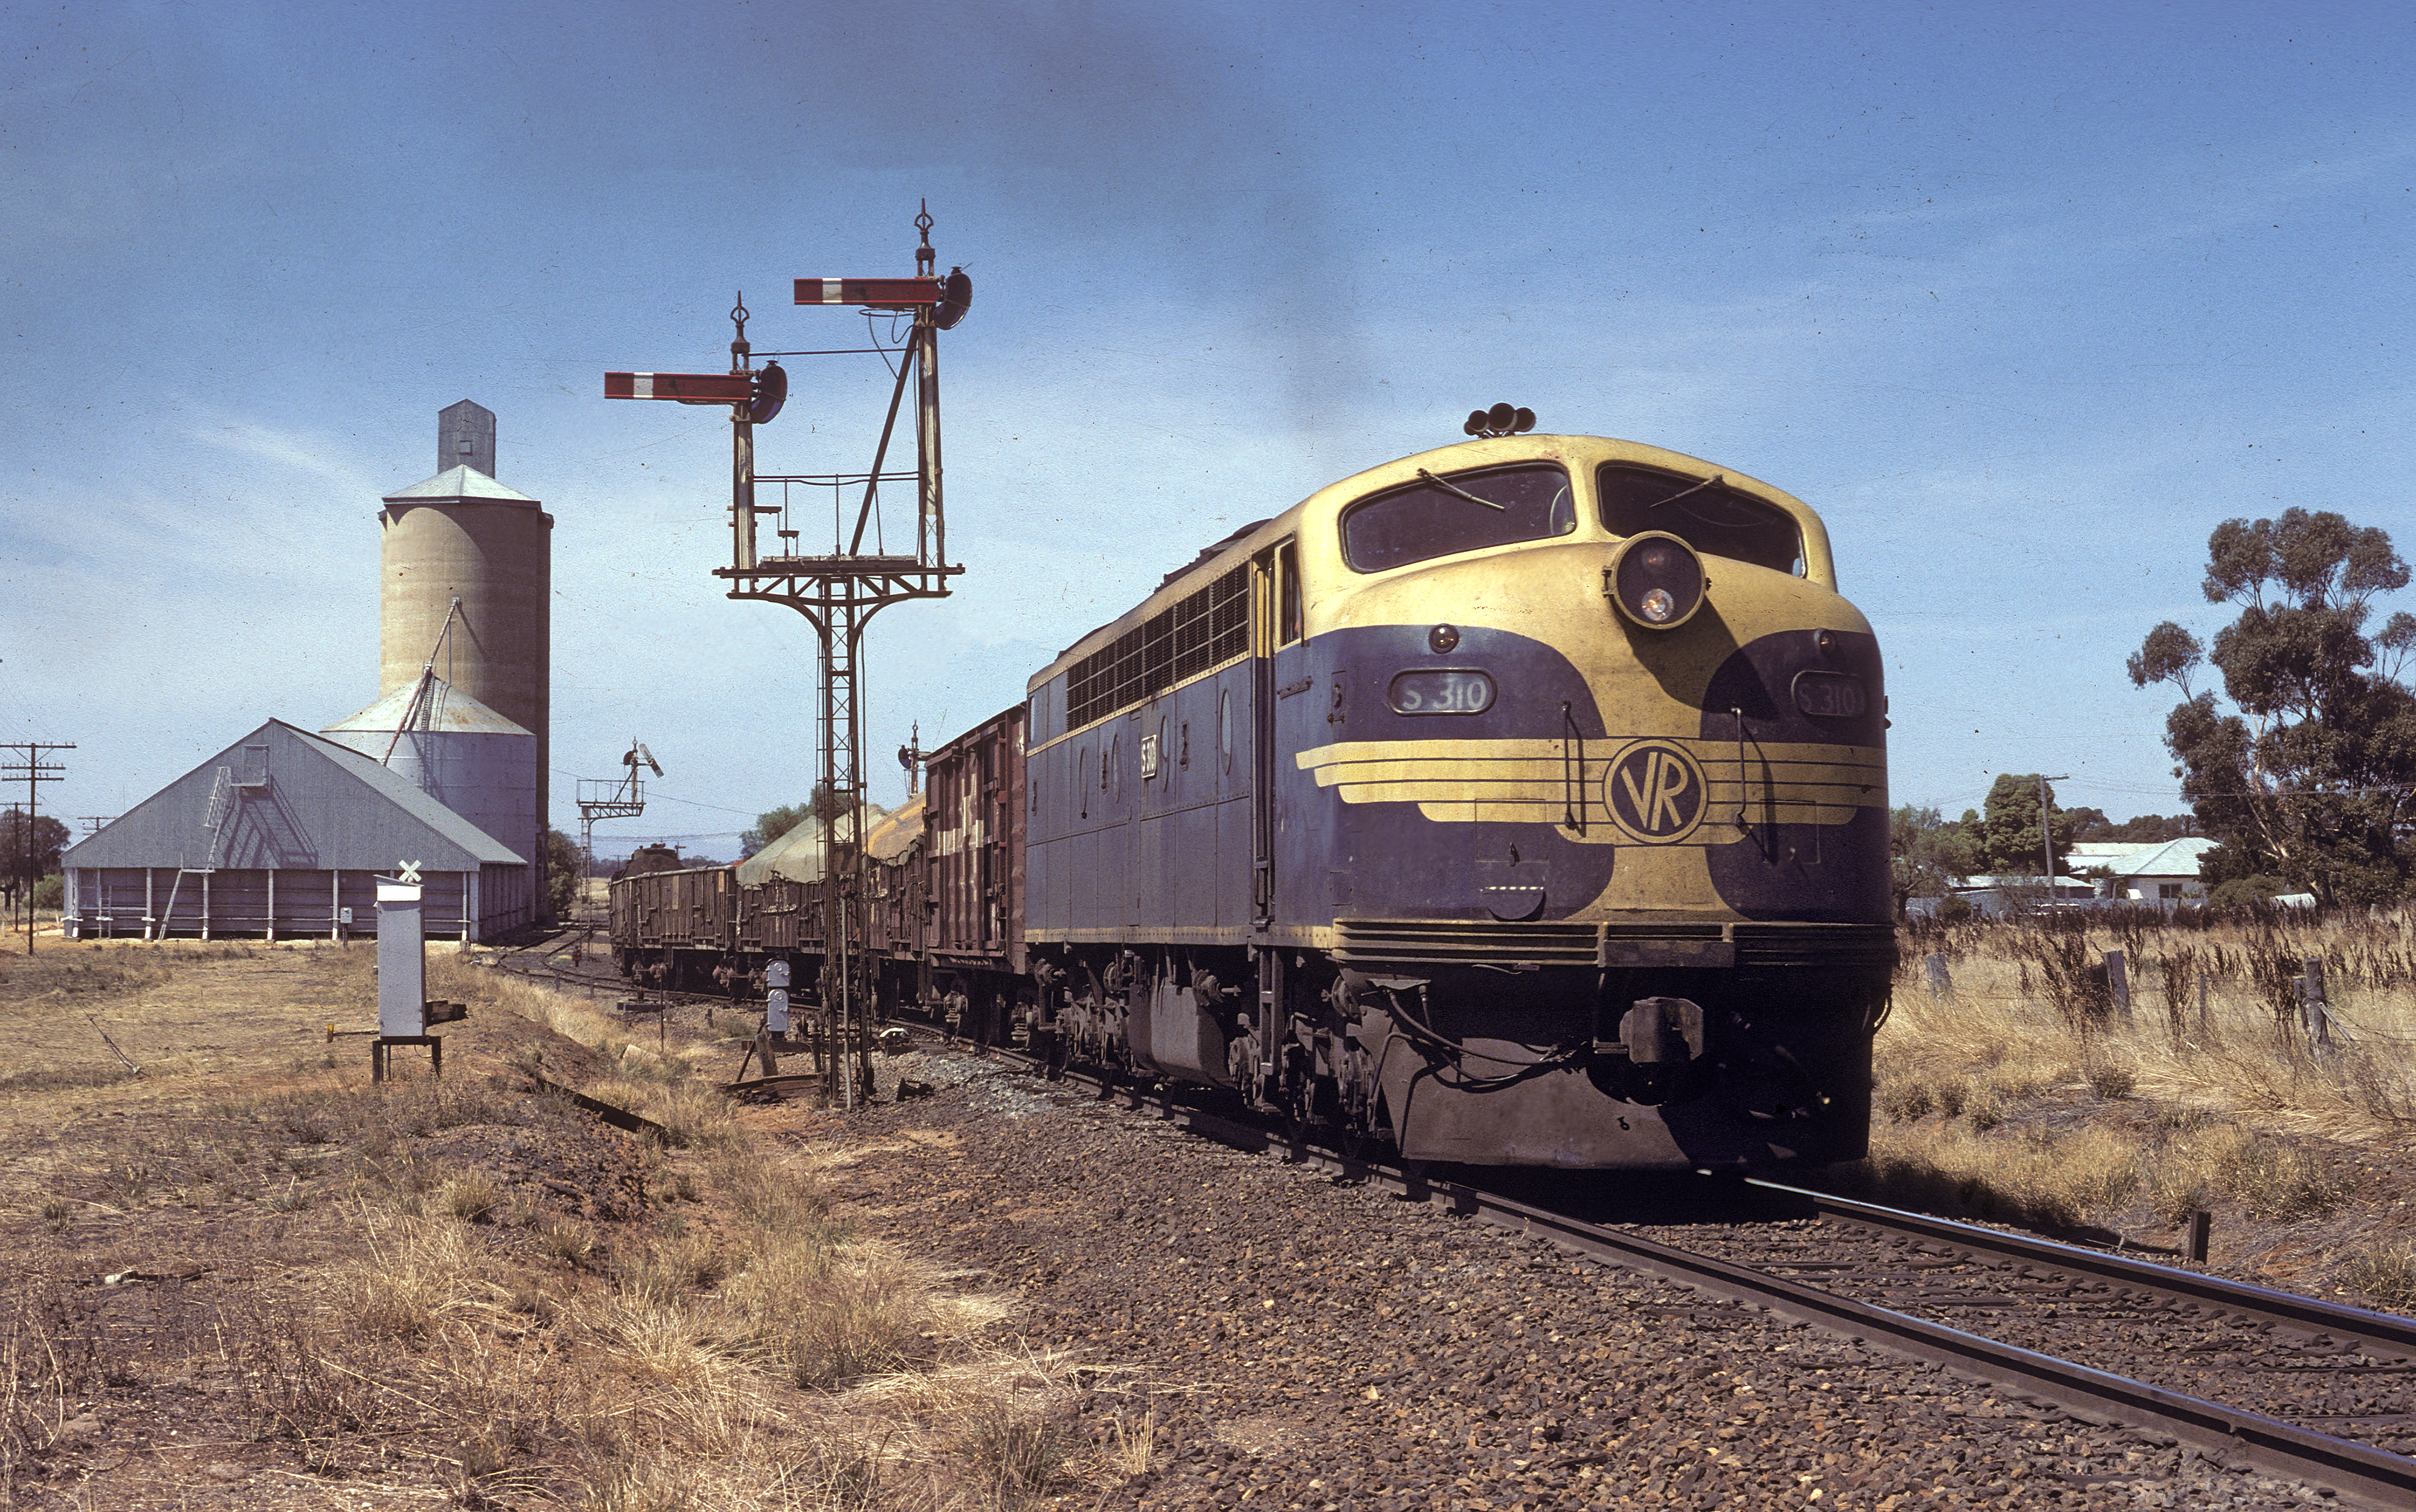
ABOVE: S 310 on a down Ararat to Dimboola goods departs No 2 road at Pimpinio, 1982.
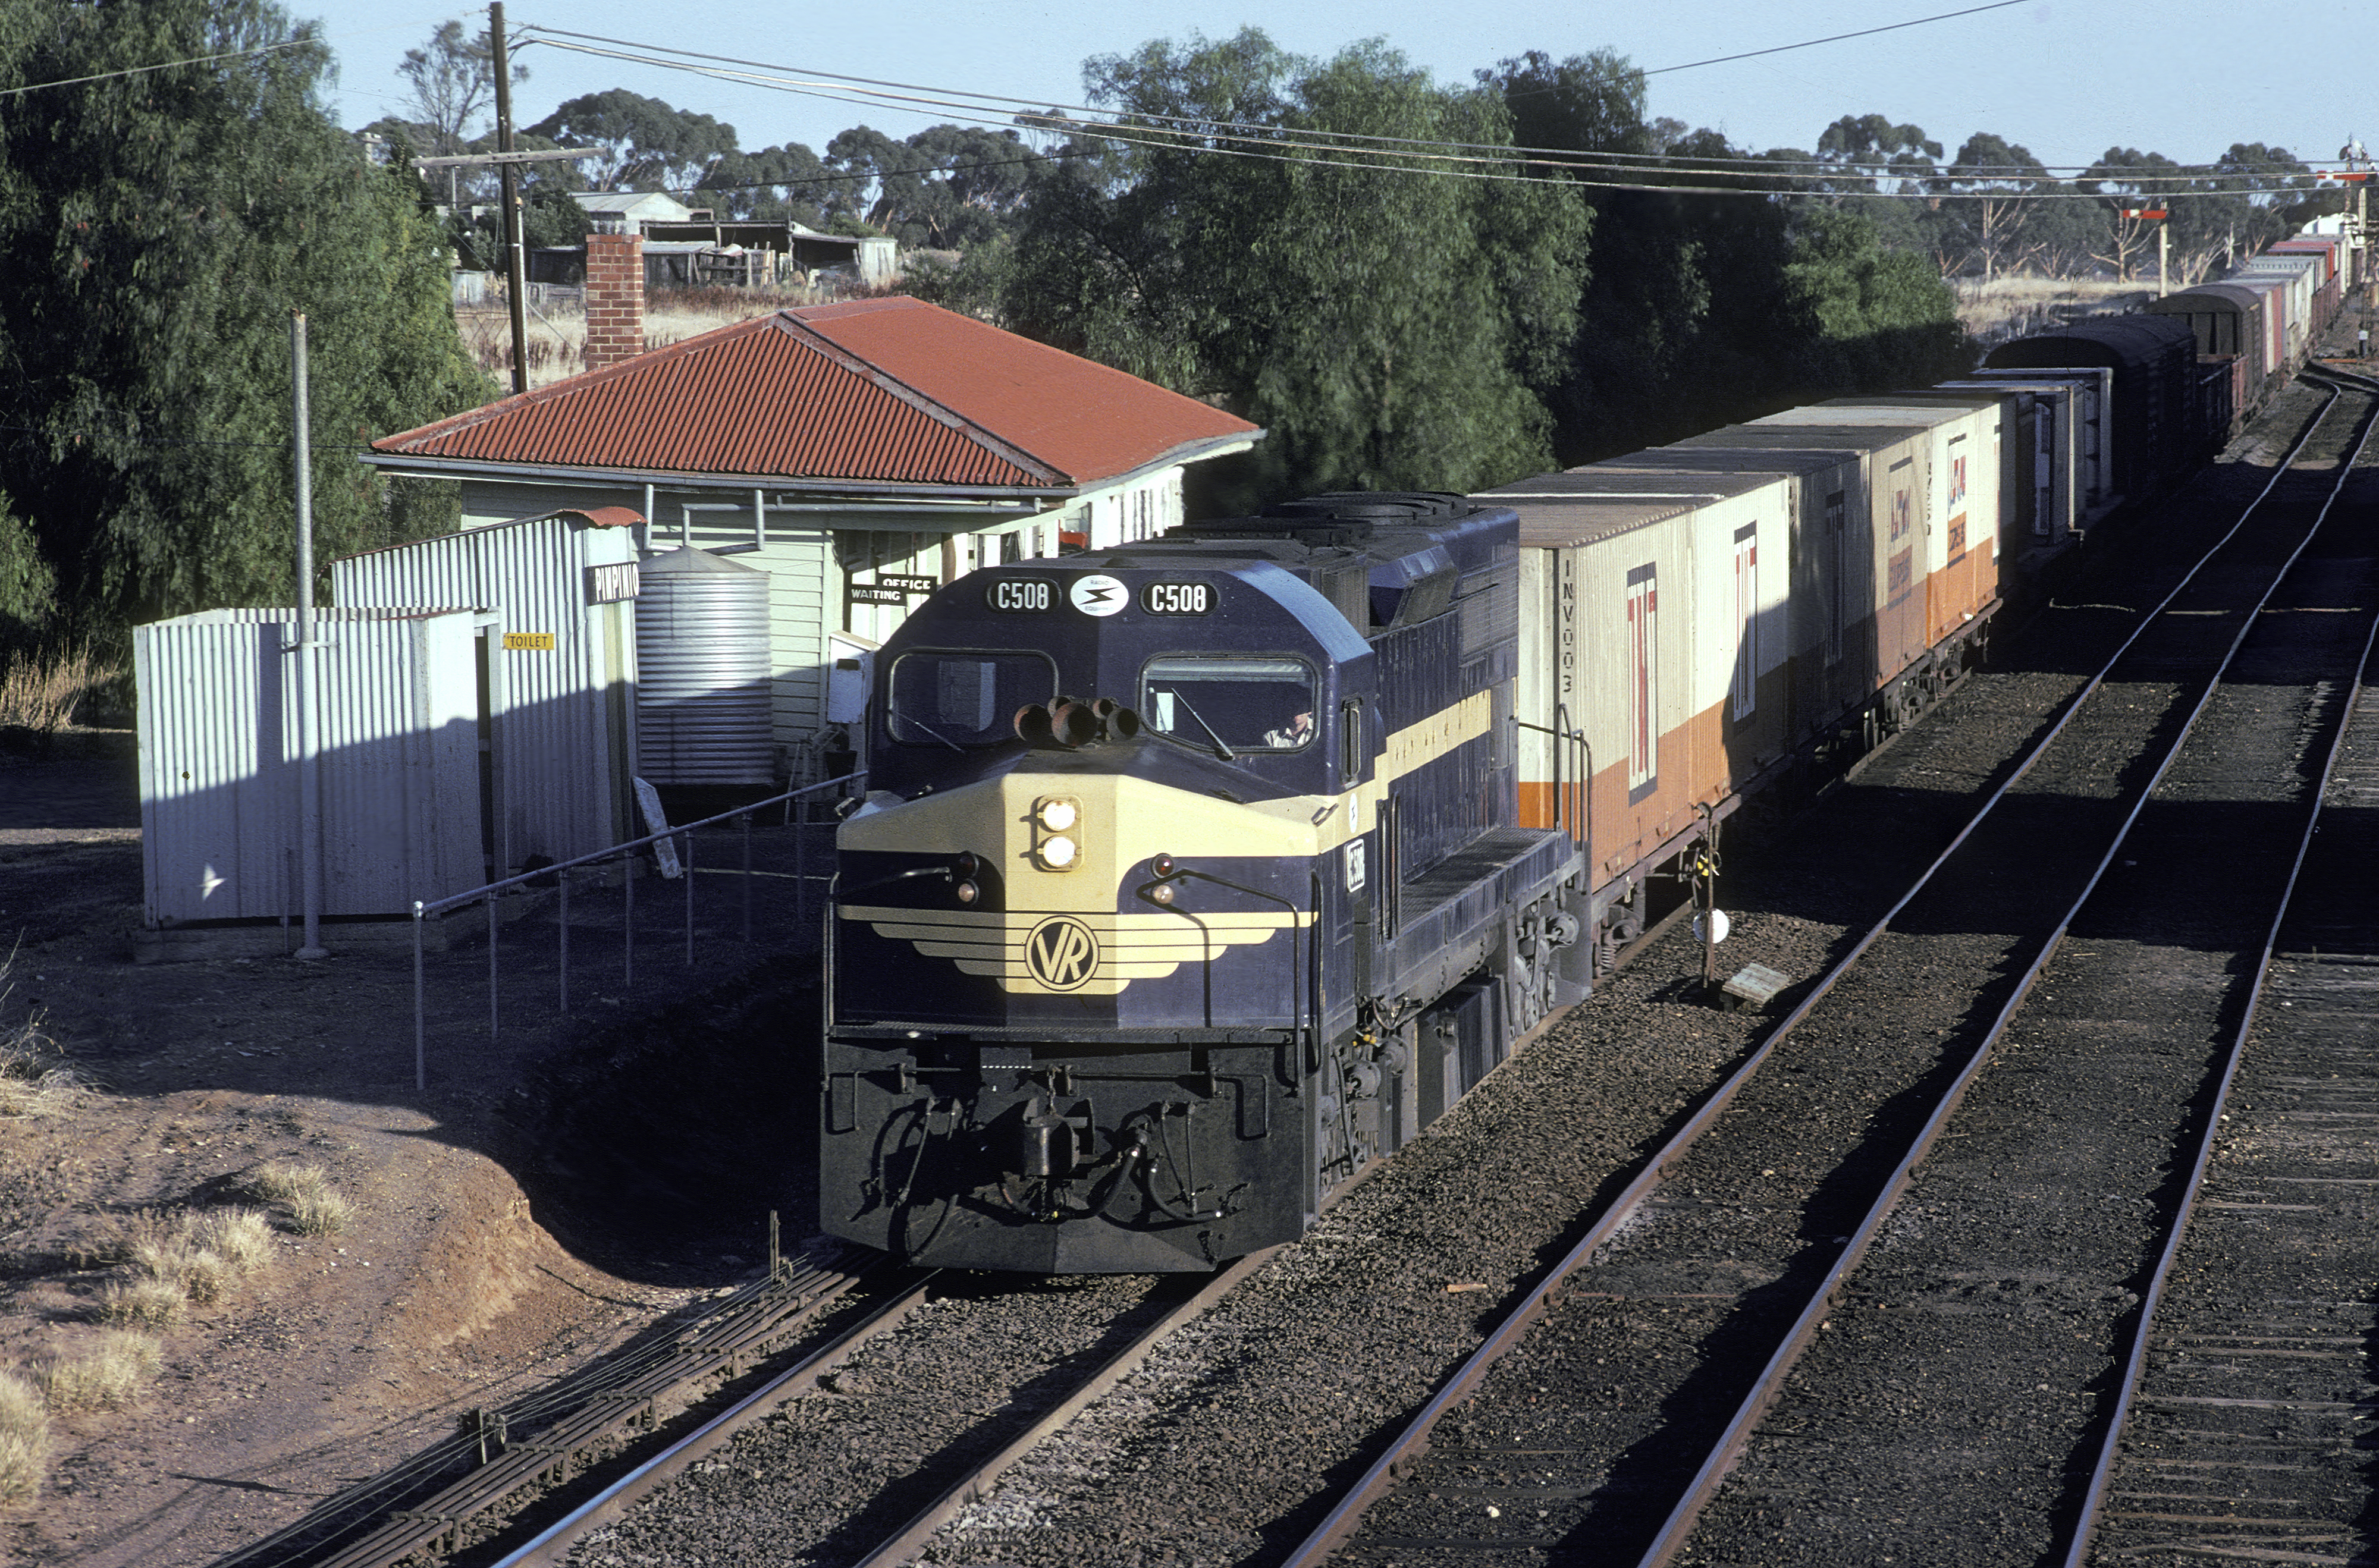
ABOVE: C 508 rushes through Pimpinio as it exchanges staffs "on the auto", the train was 9146 Adelaide to Melbourne express goods. March 1982.
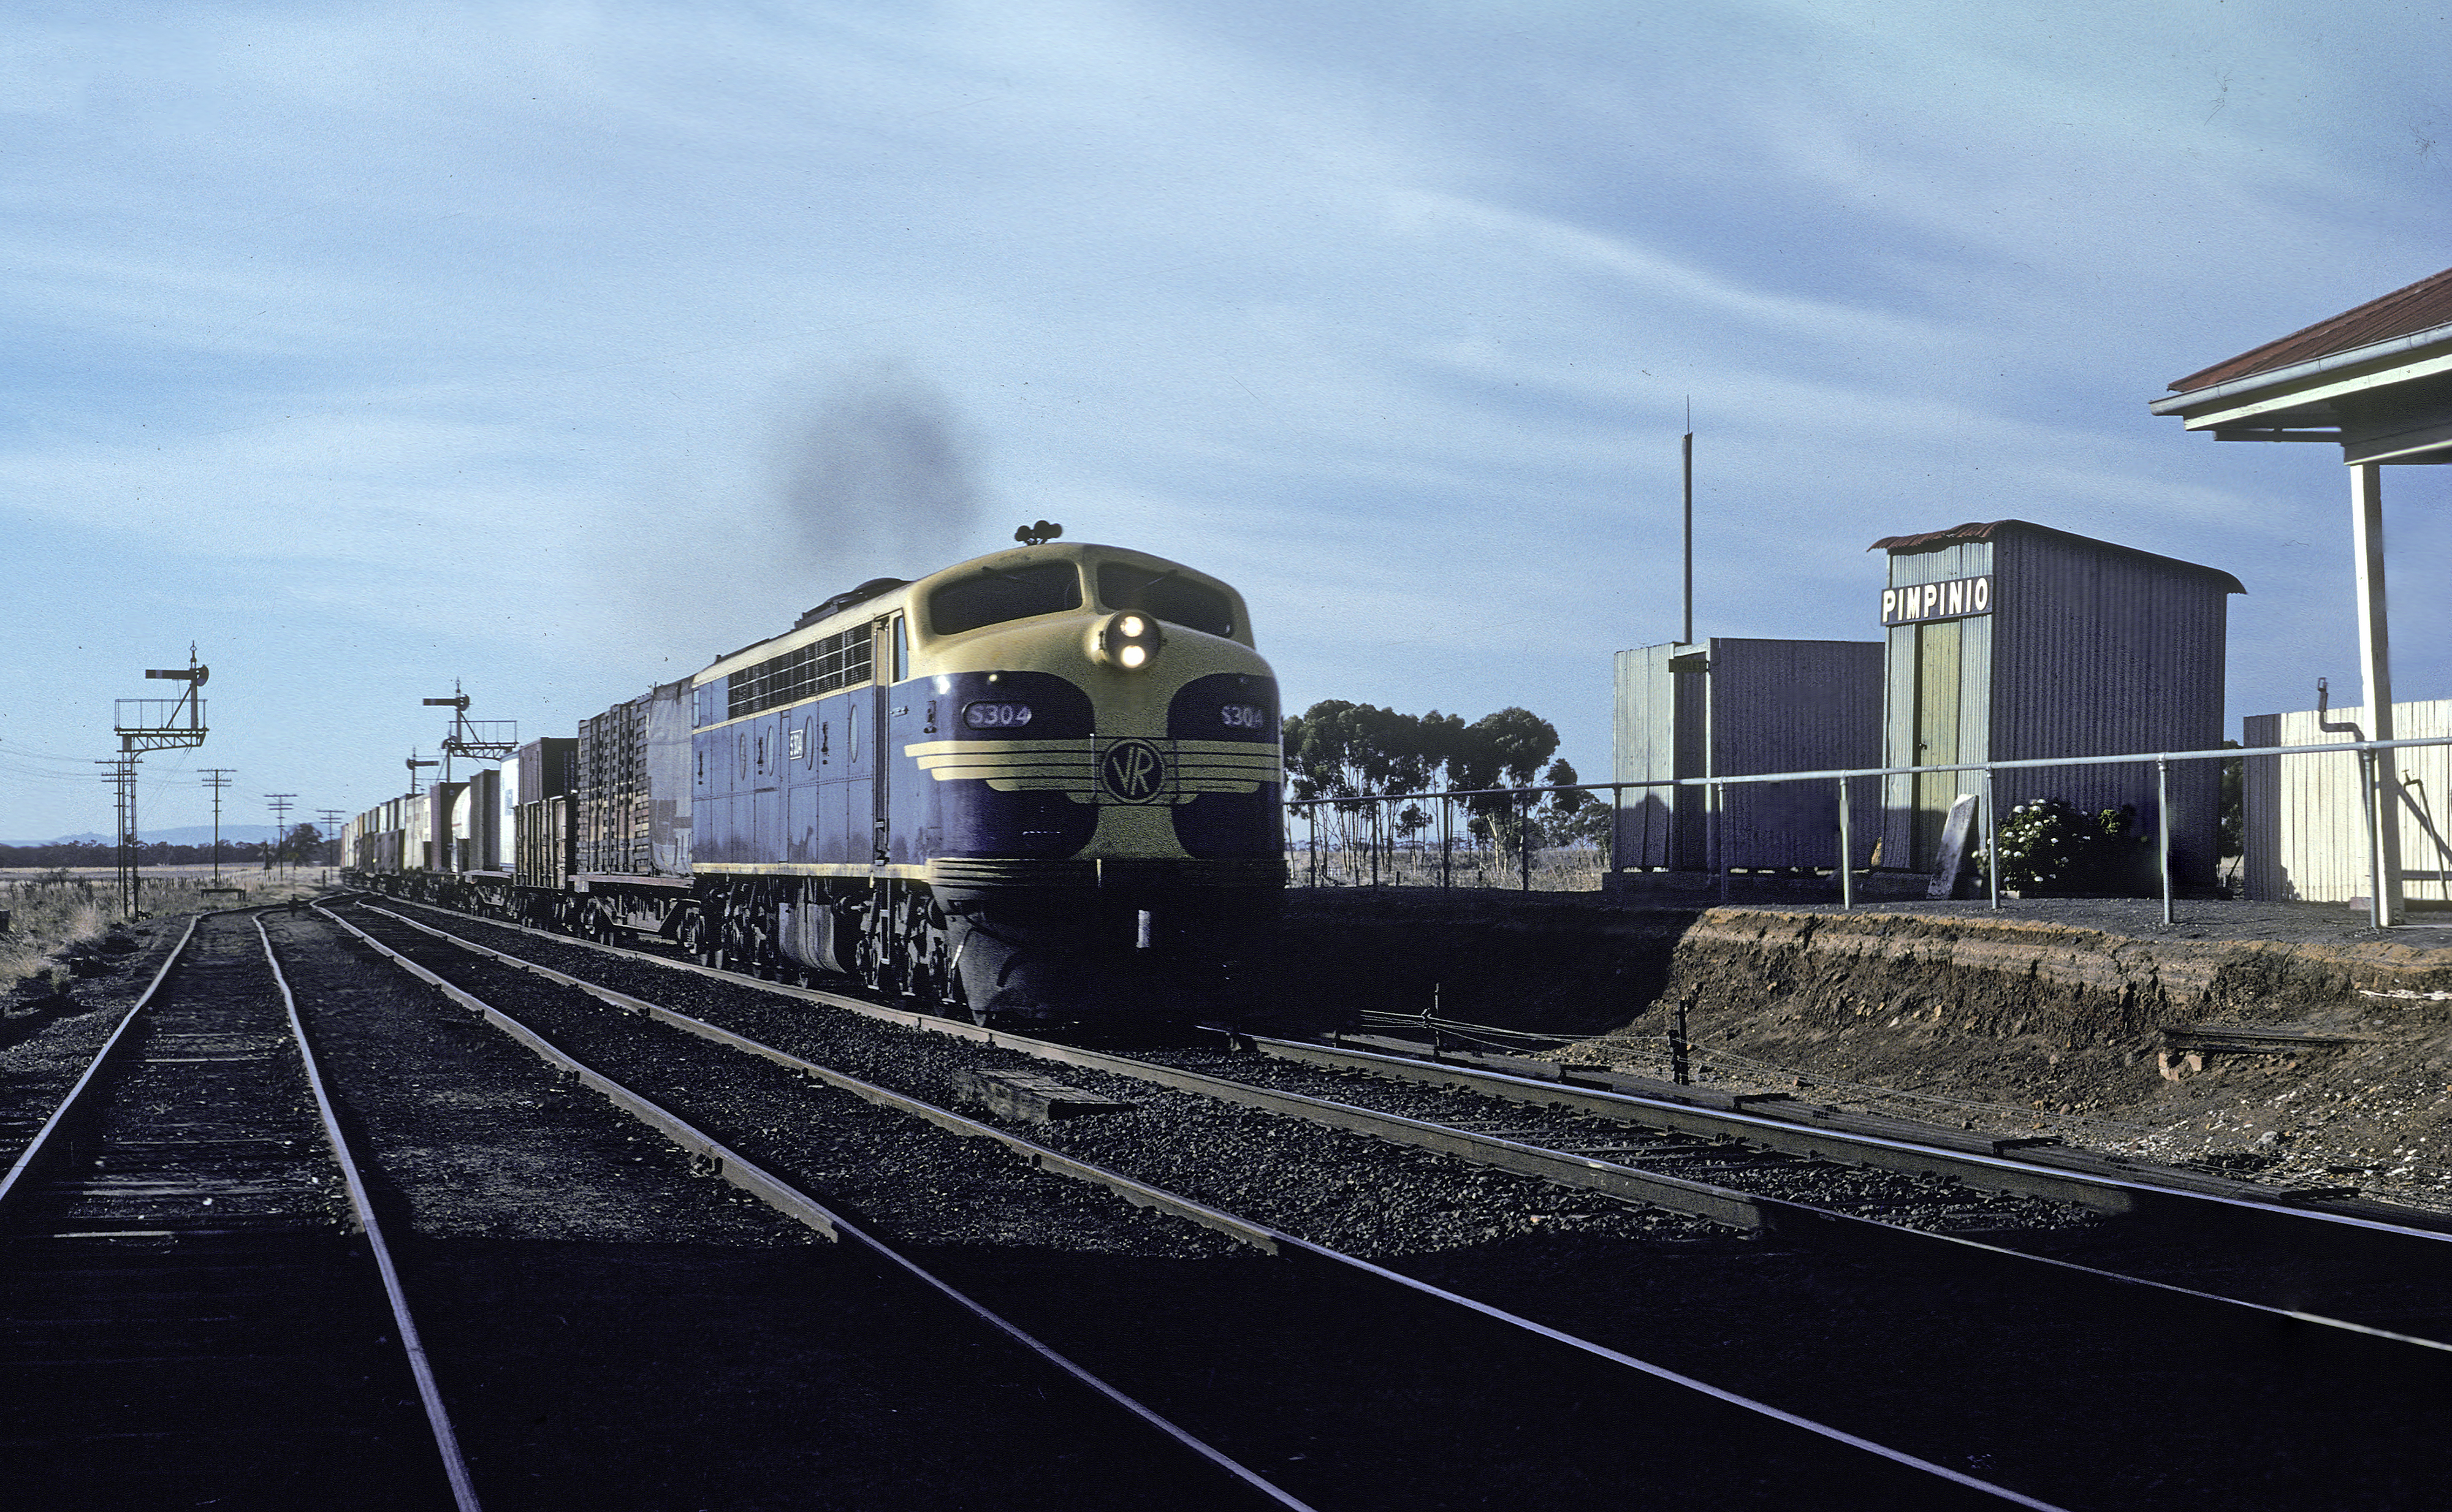
ABOVE: S 304 roars through Pimpinio on a Melbourne to Adelaide "jet" in March 1982. The use of just a single loco on a "jet" was quite rare. Exactly 10 years later S 304 was scrapped (March 1992)
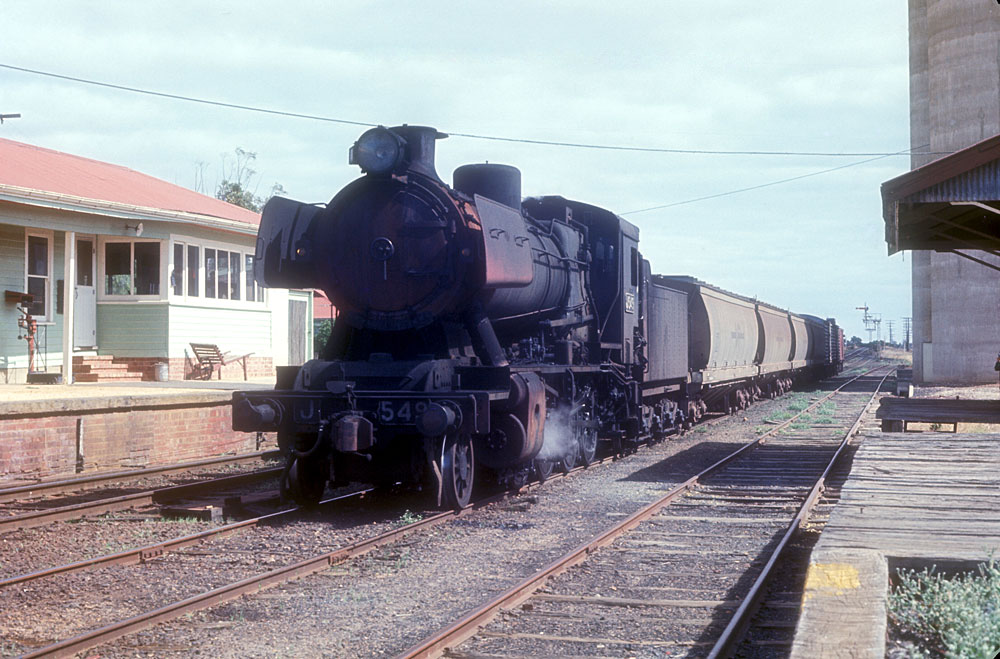
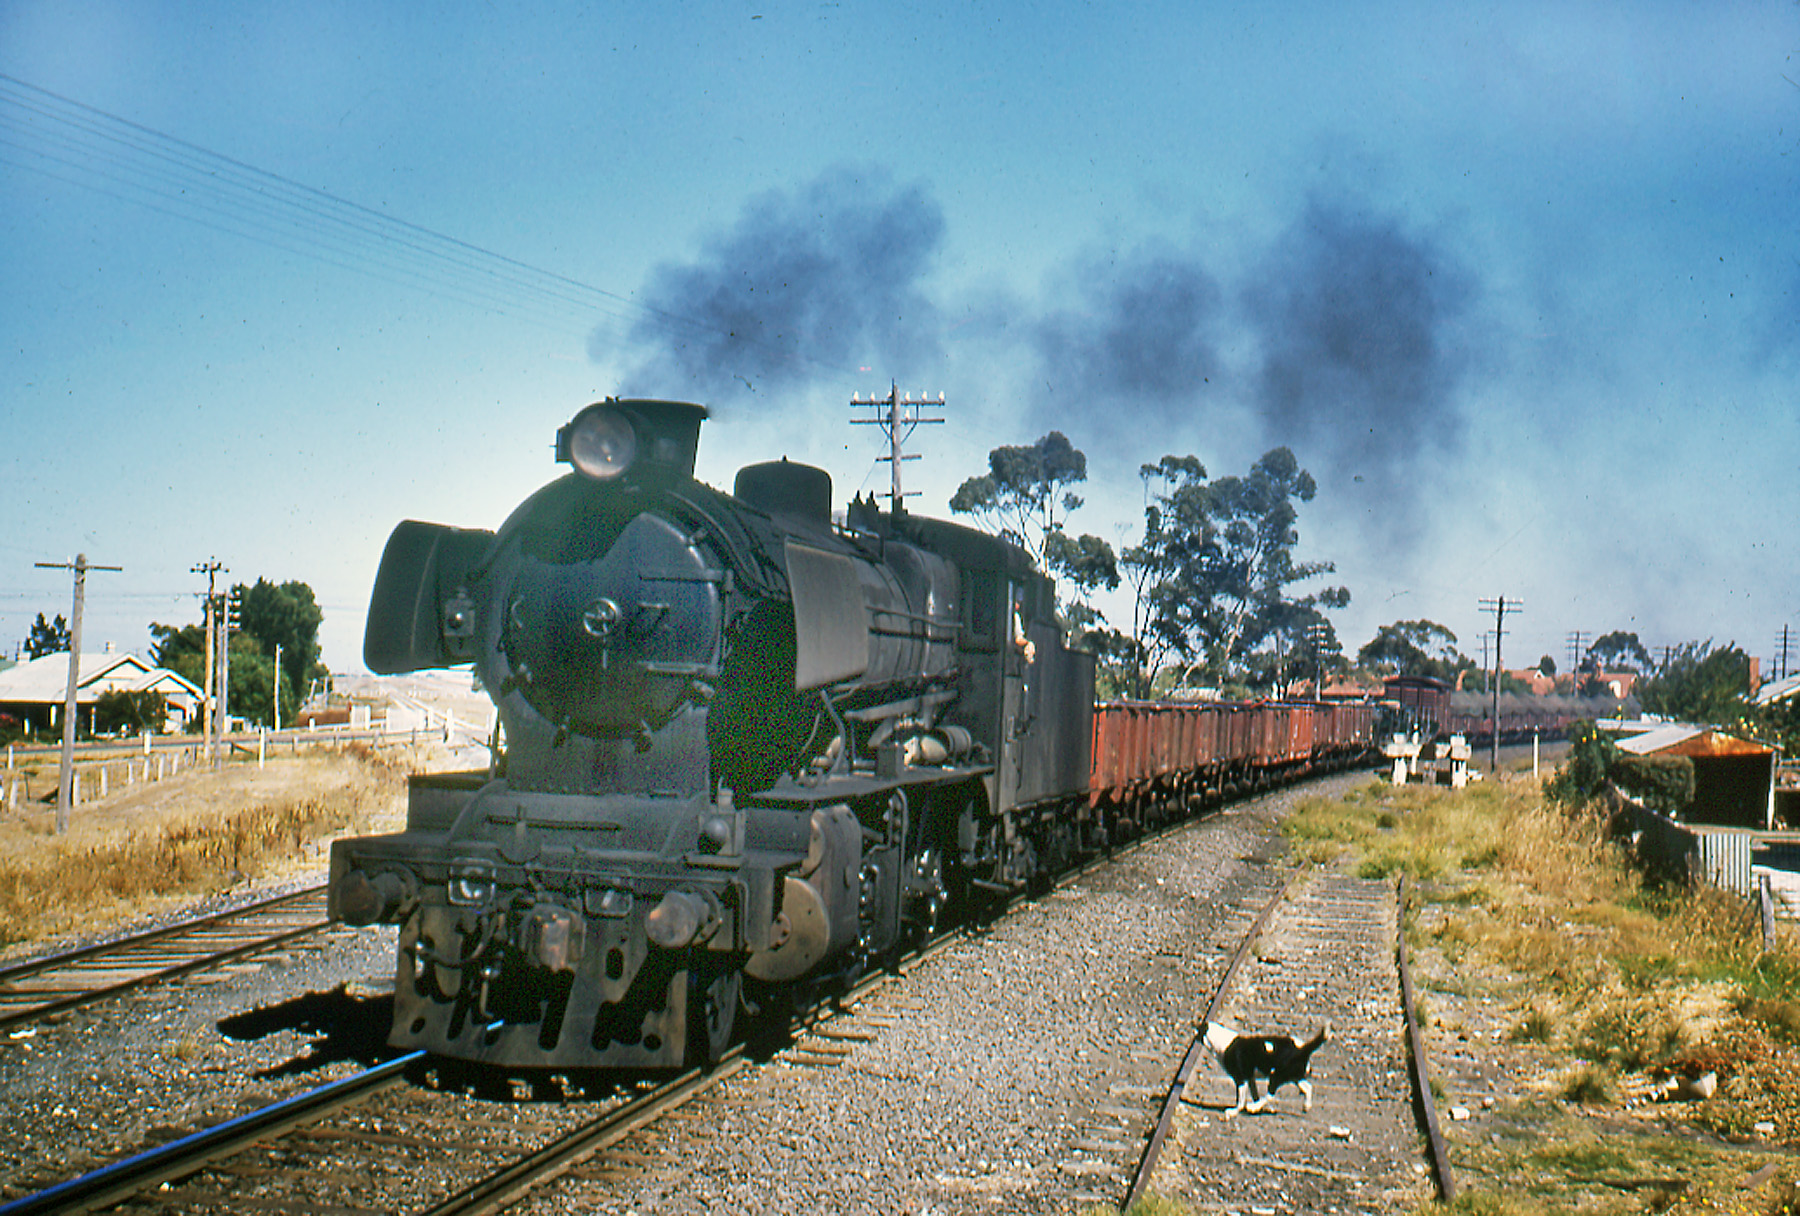
ABOVE: There can't be too many photos of steam locos hauling bogie wheat hoppers (GJX's) but here's proof that it happened. J 549 is sitting in No 2 road at Pimpinio whilst running No 142 Dimboola to Ararat roadside goods. Feb. 26 1969. Photo courtesy John Ward
ABOVE: B 82 on a short Dimboola to Ararat freight centre goods waits at Pimpinio for the train in front of it to arrive at Horsham 1979.
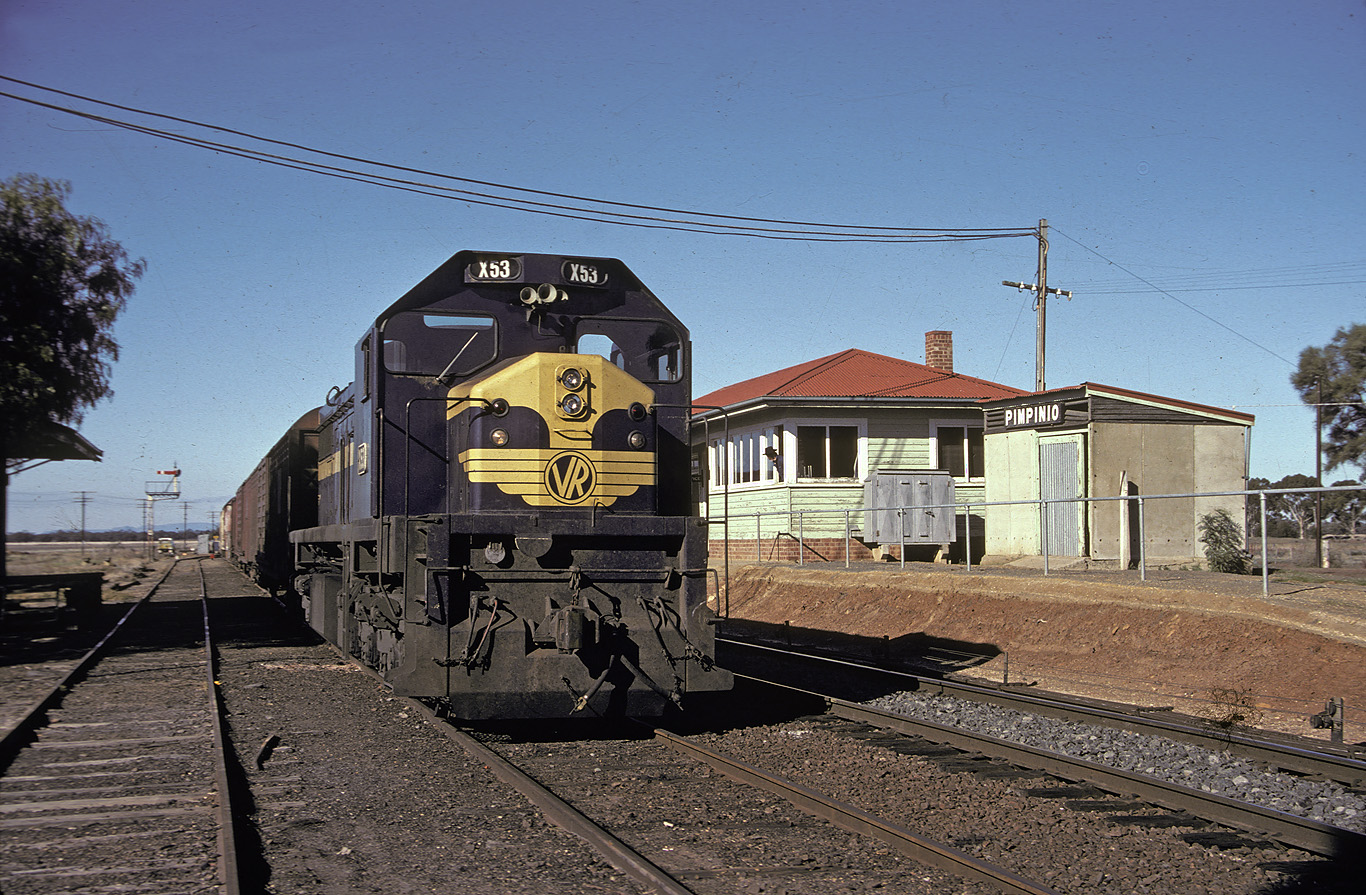
ABOVE: X 53 on a down Ararat to Serviceton goods, Oct 6 1981. The signals in both directions being at proceed was when the signalbox was "switched out"
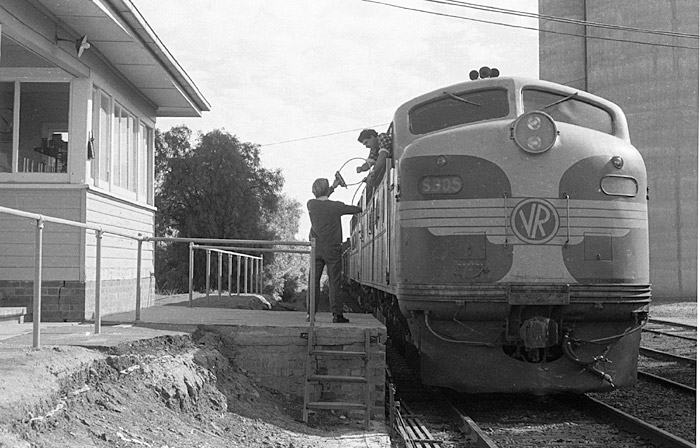
ABOVE: The fireman on S 305 exchanges staffs by hand with the signalman at Pimpinio while running a Dimboola to Ararat goods 1981. BELOW: This photo was taken from the same spot on Sept 20 2008, 27 years later.
ABOVE: An up goods in No. 1 road, this train had waited for the preceeding up train to clear Horsham and is about to depart. 1983.
