East Natimuk - Hamilton

Horsham to Noradjuha opened Aug 25 1887
Noradjuha to Toolondo opened Sep 24 1912
Toolondo to Kanagulk opened Dec 17 1917
Kanagulk to Balmoral opened Jun 16 1919
Cavendish to Balmoral opened Nov 19 1920
Hamilton to Cavendish opened Nov 1 1915
Hamilton to Balmoral passenger service withdrawn March 10 1955
Hamilton to East Natimuk Gradient Diagram
Hamilton to Cavendish Plan & Section
Cavendish to Toolondo Plan & Section
Noradjuhu to Toolondo Plan & Section
========
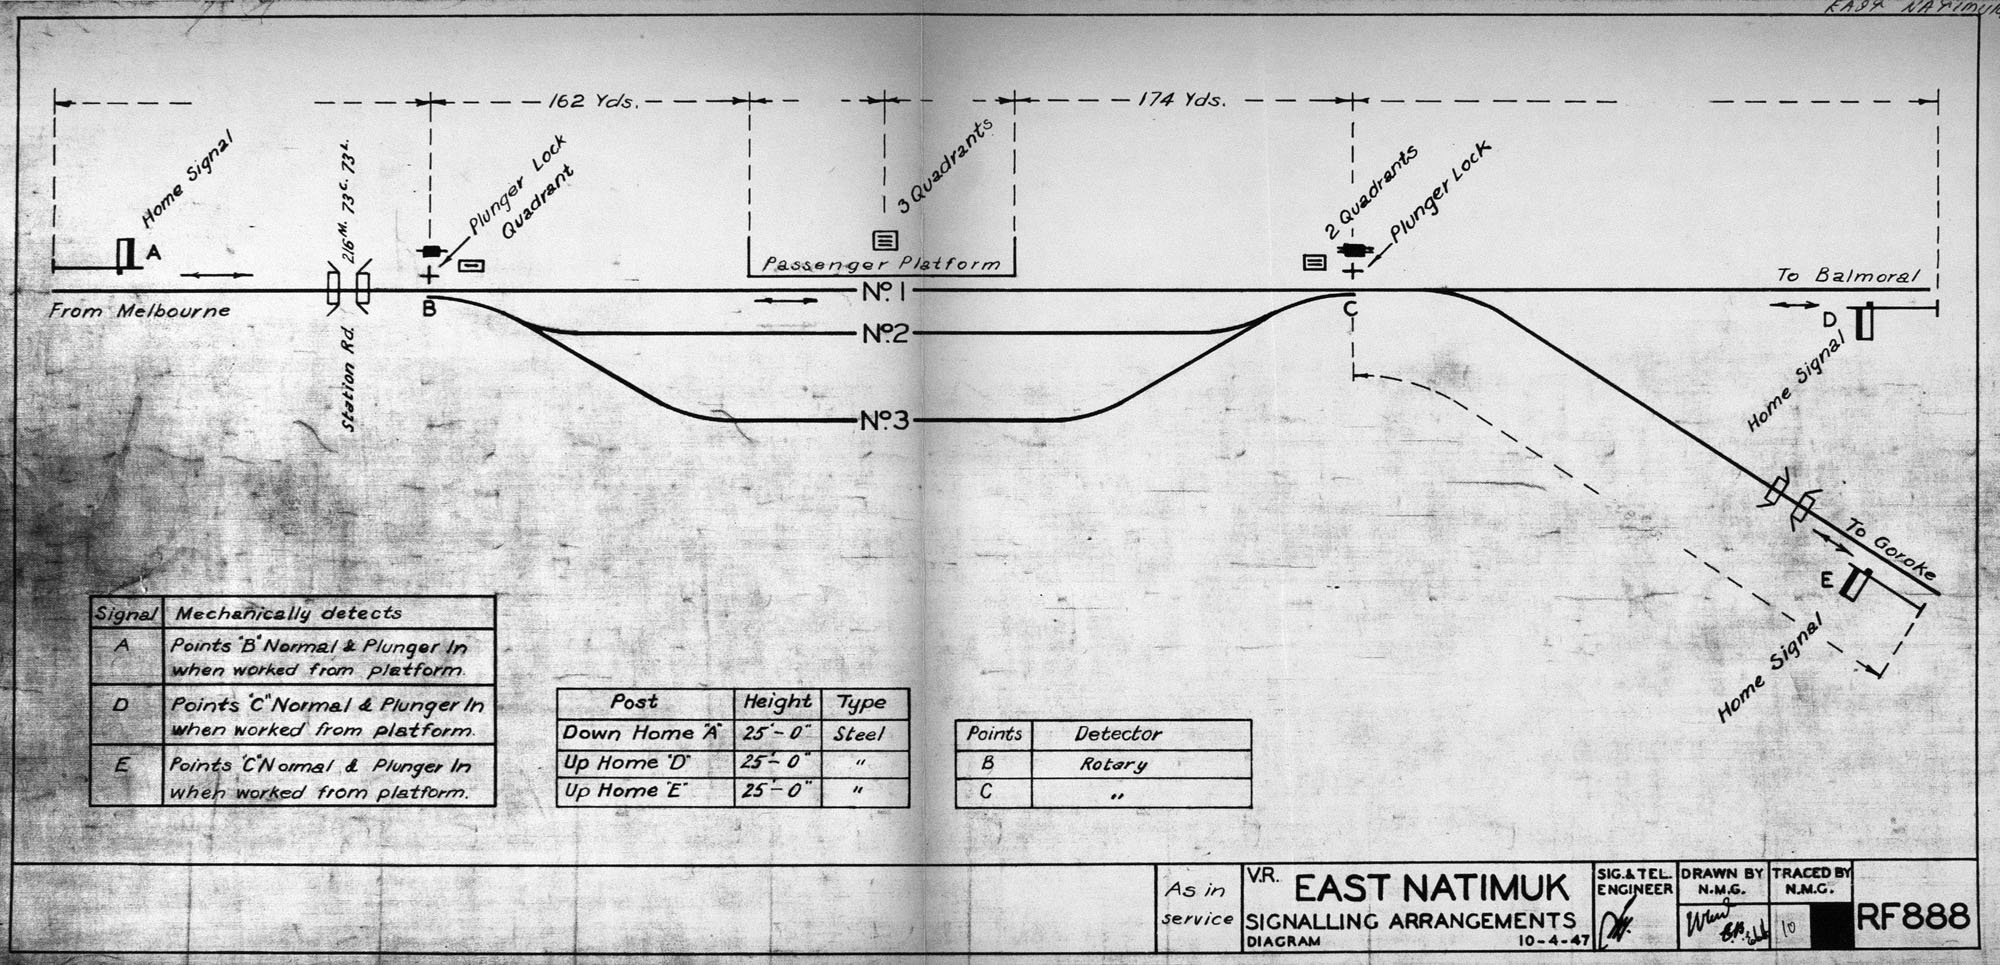
East Natimuk 1947 Signalling Arrangements

ABOVE: This photo shows a train from Balmoral at the junction with the Carpolac line which curves away to the right. 1958. Photo courtesy Des Jowett.
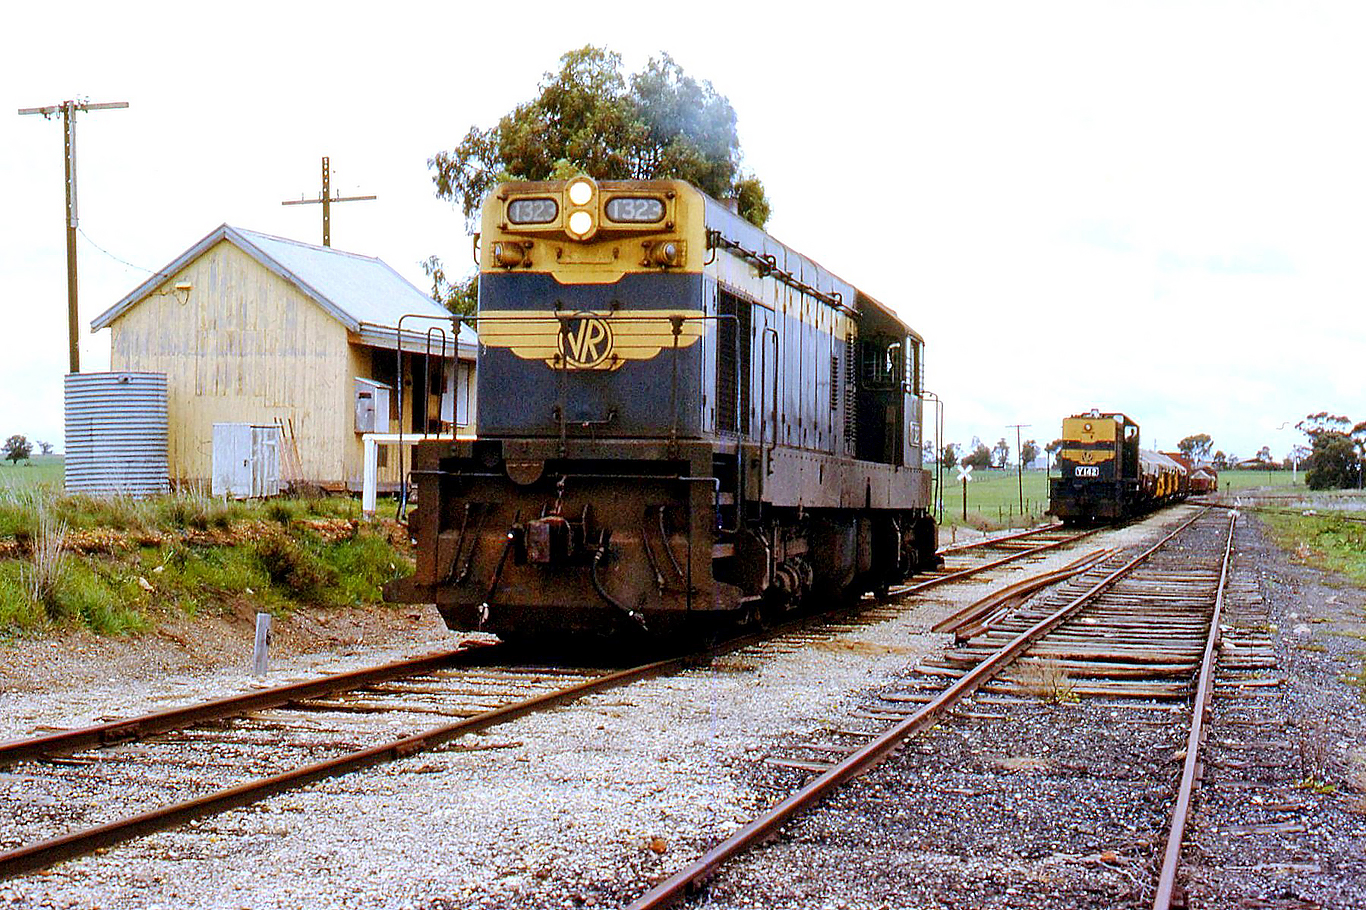
ABOVE: East Natimuk On days when the Hamilton to Horsham and Carpolac to Horsham goods trains both ran they would be combined at East Natimuk. Seen here T 323 from Hamilton and Y 142 from Carpolac are combining their trains on 29 July 1971. (photo courtesy Neville Gee)

ABOVE: East Natimuk 28 January 1971. (photo courtesy Neville Gee)
Noradjuha

ABOVE: Noradjuha was the terminus of the line from Horsham from 1887 until 1912 when it was extended to Toolondo. It was said to have had a brick station building similar in style to Rupanyup. 29 July 1971 (photo courtesy Neville Gee)
========
Jallumba
Jallumba 1912 Signalling Arrangements

ABOVE: T 323 heads north through Jallumba. 29 July 1971 (photo courtesy Neville Gee)
========
Toolondo
Toolondo 1934 Signalling Arrangements

ABOVE: Slowing to a stop at Toolondo, T 323 will pick up a QR loaded with railway sleepers. 29 July 1971 (photo courtesy Neville Gee)
========
Jeffries
Jeffries 1917 Proposed Signalling Arrangements

ABOVE: Fireman and guard are both involved in shunting movements at Jeffries. 29 July 1971 (photo courtesy Neville Gee)
========
Kanagulk 1934 Signalling Arrangements

ABOVE: Kanagulk was the terminus of the section from Toolondo from 1917 until 1919 when the section to Balmoral was opened. A turntable was located here. (photo courtesy Neville Gee)
========
Balmoral
Balmoral 1922 Signalling Arrangements

ABOVE: Balmoral looking south. (photo courtesy PROV)

ABOVE: A 280 Walker on ARHS Balmoral enthusiast special. Feb 24 1957. Photo courtesy Des Jowett.

ABOVE: Balmoral on Jan 11 1967 finds J 550 on a Hamilton bound goods crossing J 553 on a Horsham bound goods. (photo courtesy Doug Miles)

ABOVE: Balmoral station 29 July 1971. (photo courtesy Neville Gee)

ABOVE: After arriving from Horsham Y 111 has commenced shunting a congested Balmoral yard. 12 January 1977. (photo courtesy Neville Gee)

ABOVE: Y 111 has just arrived at Balmoral from Horsham on 12 January 1977. (photo courtesy Neville Gee)

ABOVE: An enthusiast special at Balmoral Dec 12 1976 (photo courtesy Stewart Lodington)
========
Englefield
Englefield 1921 Signalling Arrangements

ABOVE: T 323 runs non-stop through Englefield which appeared to be unused at this time. 29 July 1971. (photo courtesy Neville Gee)
========
Vasey
Vasey 1934 Signalling Arrangements

ABOVE: J 503 at Vasey on a Horsham to Hamilton goods, Aug 23 1962. Photo courtesy Des Jowett.

ABOVE: Heading north from Hamilton through Vasey the train consist has loaded farm machinery for Balmoral in an open wagon. 29 July 1971. (photo courtesy Neville Gee)

ABOVE: Y 111 is heading south through Vasey with the trackwork and yard overgrown in grass. 12 January 1977. (photo courtesy Neville Gee)
========
Cavendish
Cavendish 1934 Signalling Arrangements

ABOVE: J 503 on a Horsham to Hamilton goods pauses at Cavendish. Aug 24 1961. Photo courtesy Des Jowett.

ABOVE: Cavendish station and the DR’s have recently been repainted and were in good condition on 29 July 1971. (photo courtesy Neville Gee)

ABOVE: An enthusiast special at Cavendish Dec 12 1976. (photo courtesy Stewart Lodington)

ABOVE: The remains of the pile bridge over the Wannon River at Cavendish. Feb 2020.
========
Kyup 1969 Signalling Arrangements
========
Kanawalla 1915 Proposed Signalling Arrangements
Kanawalla 1969 Signalling Arrangements
========

ABOVE: (photo courtesy Geoff Winkler)


