Gheringhap - Maroona
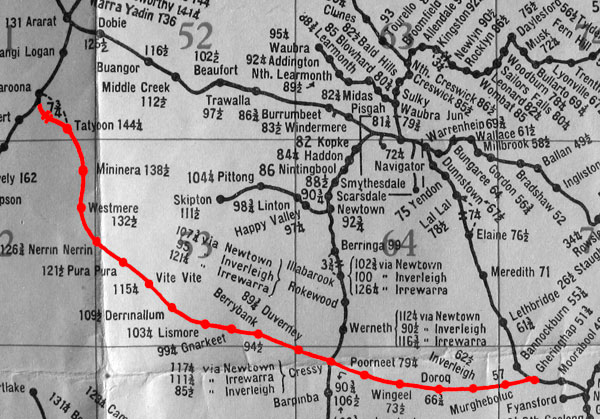
1969 Inverleigh to Maroona signal diagram
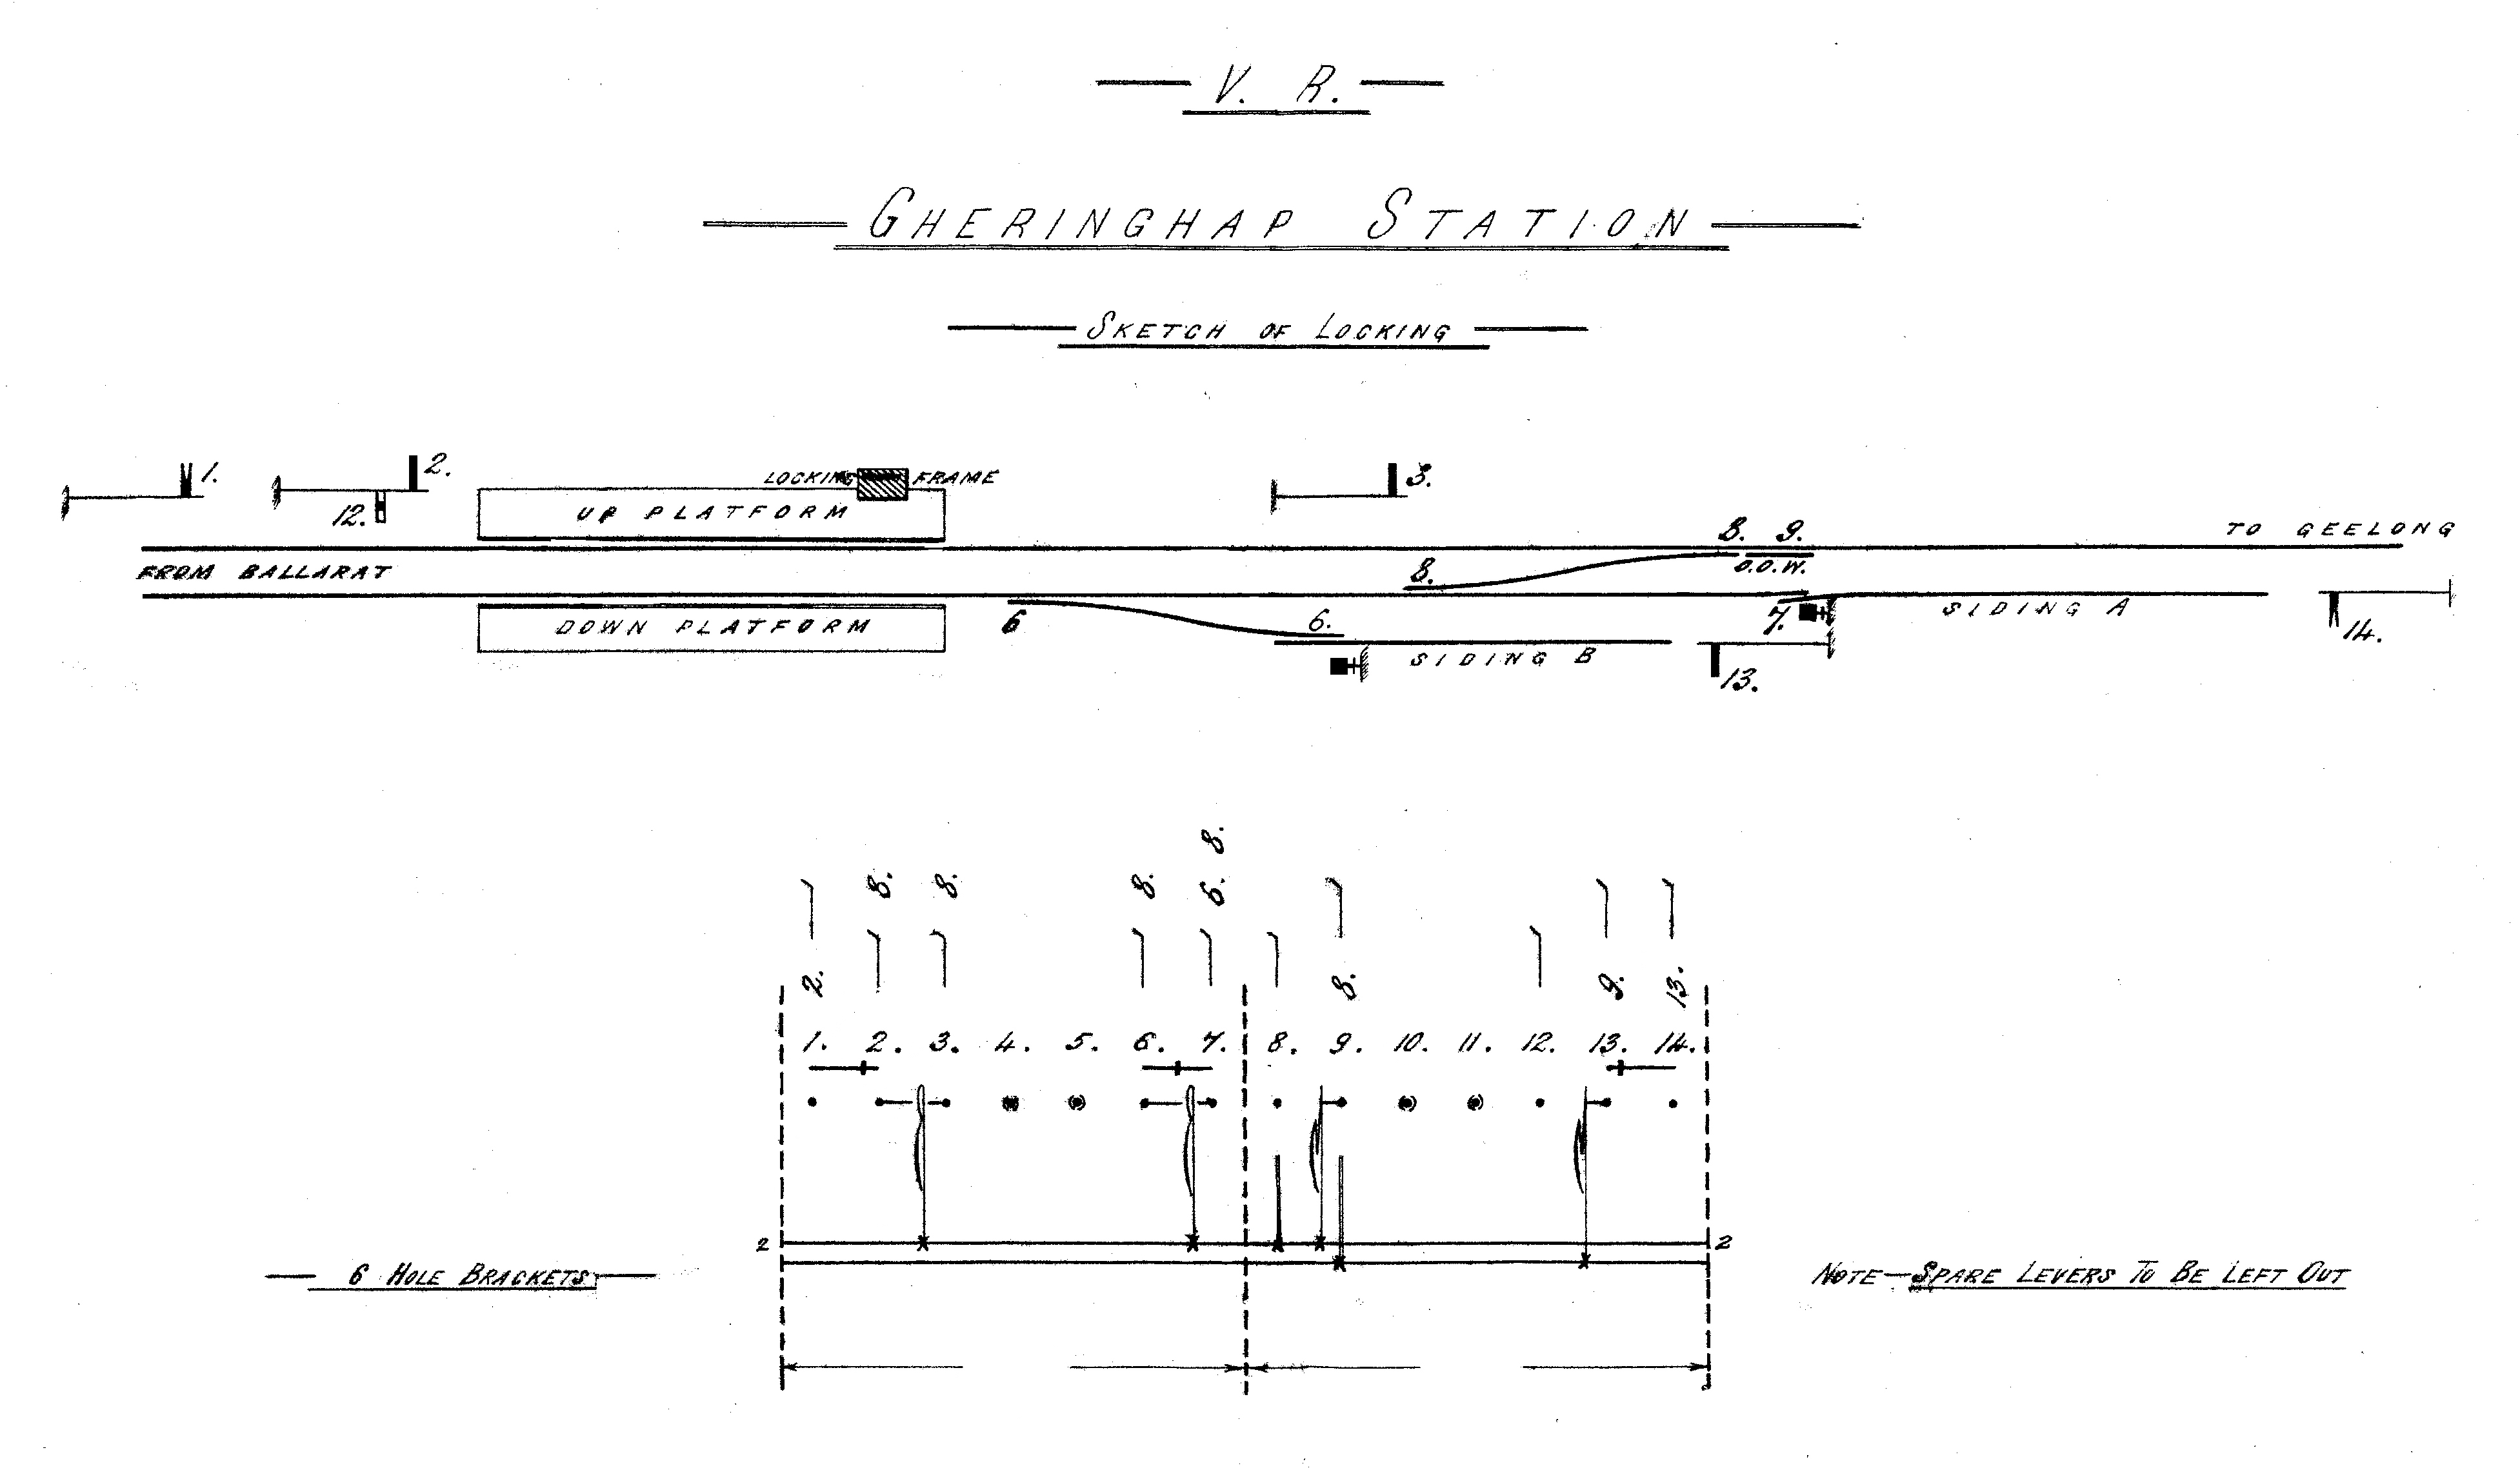
Gheringhap locking sketch. Nov 18 1894 when the section from Gheringhap to Moorabool was single tracked.
1967 Gheringhap signal diagram

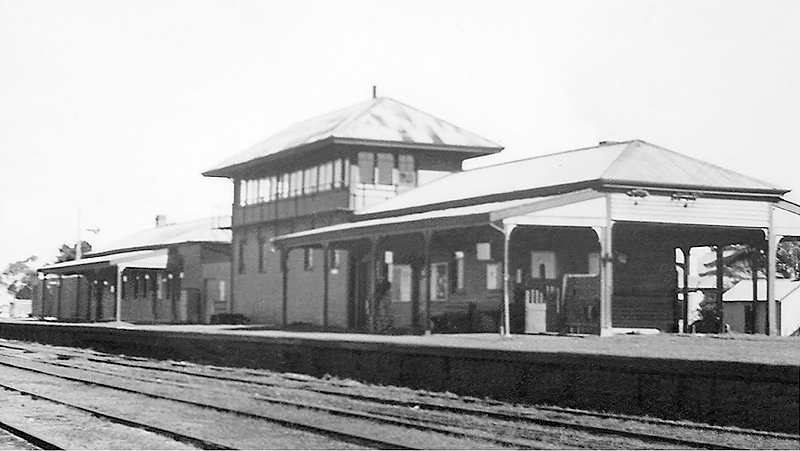
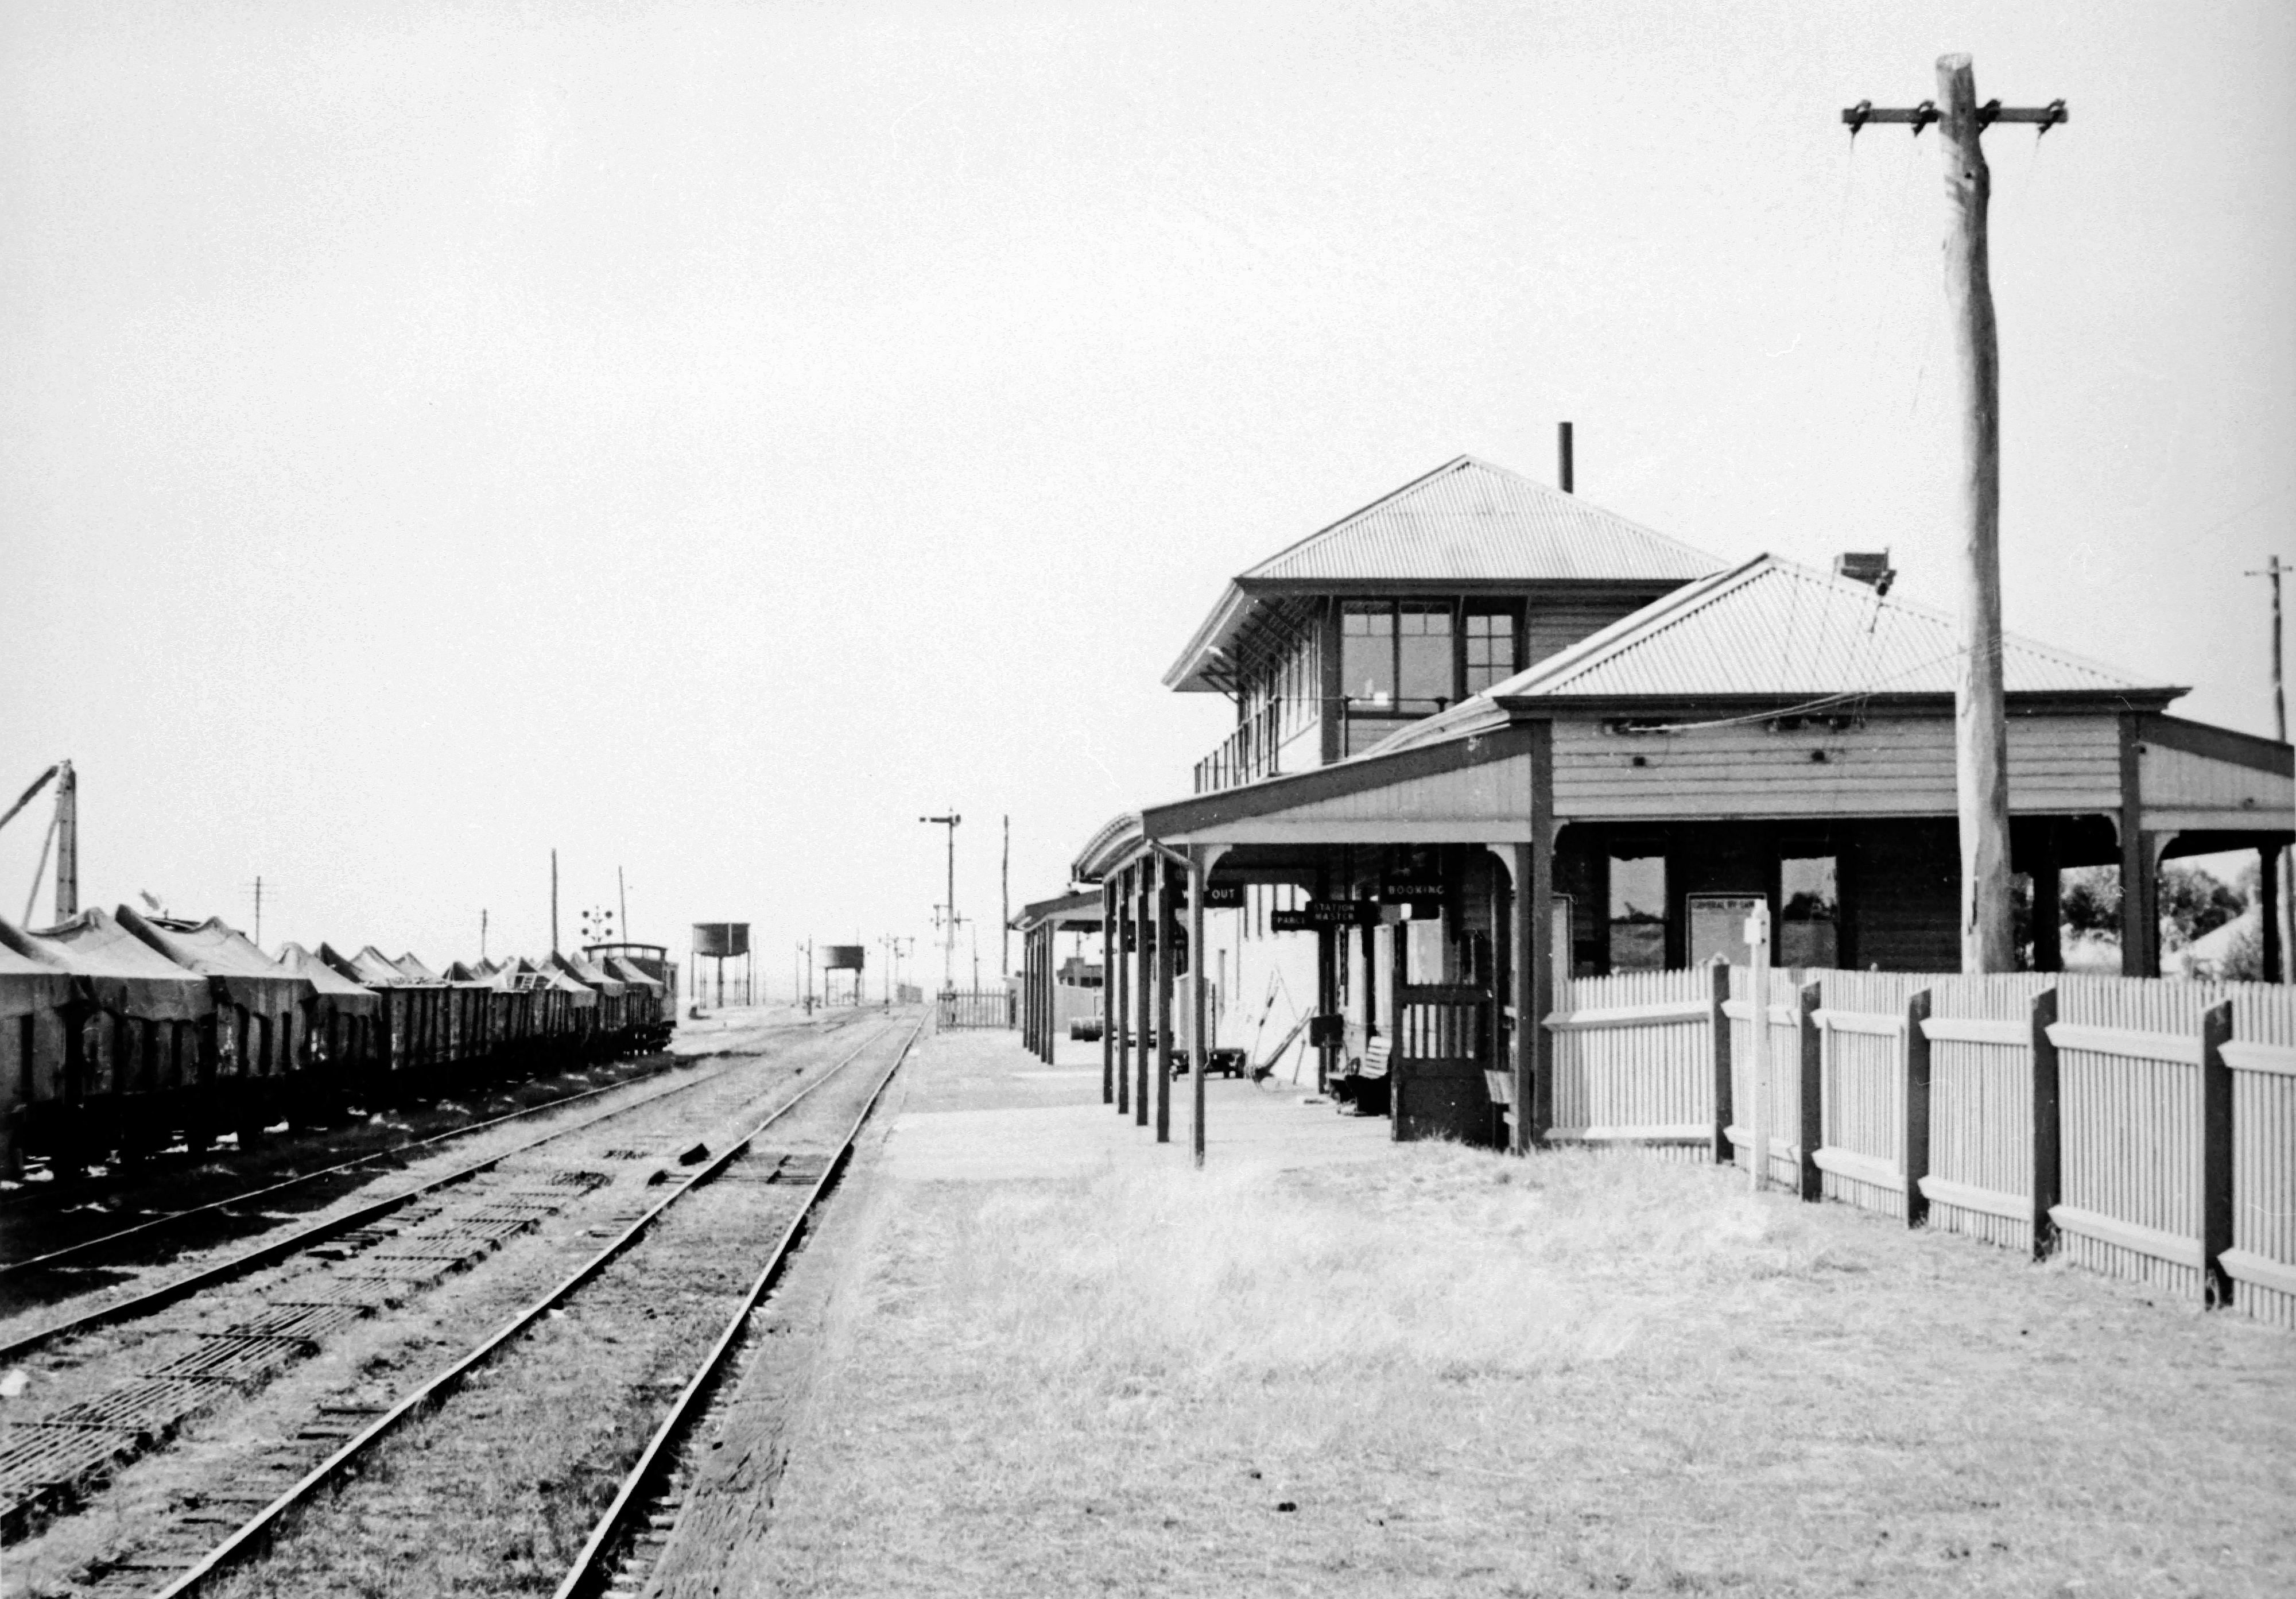
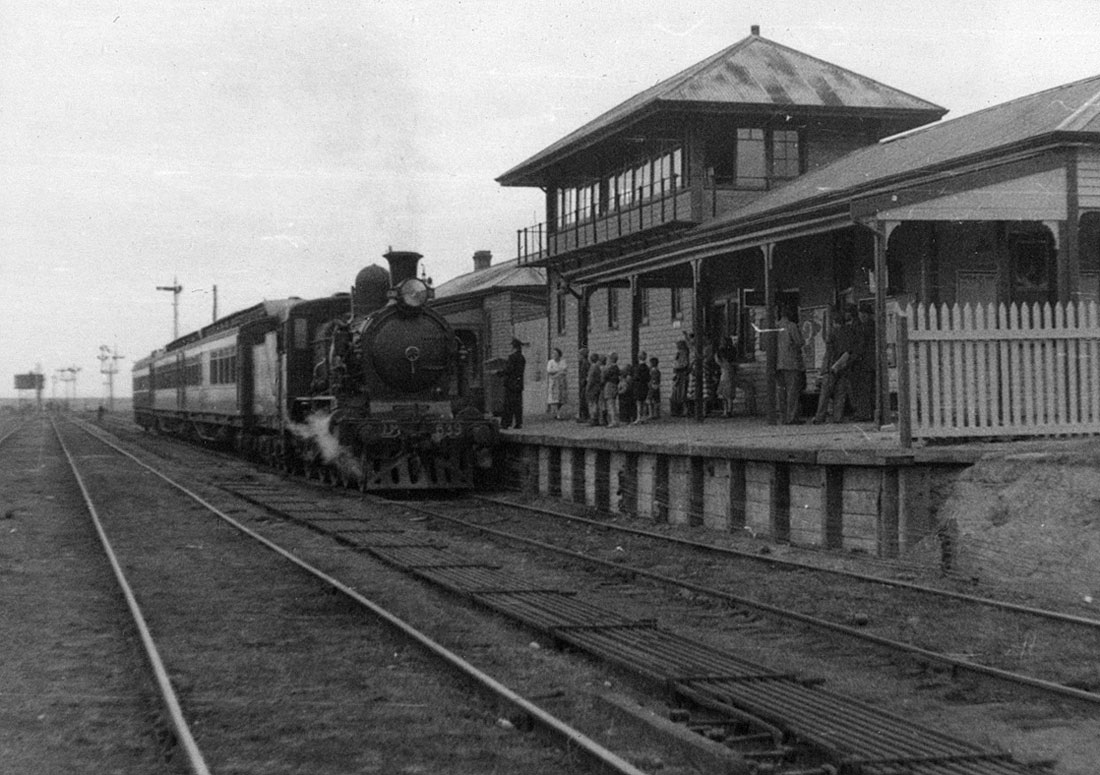
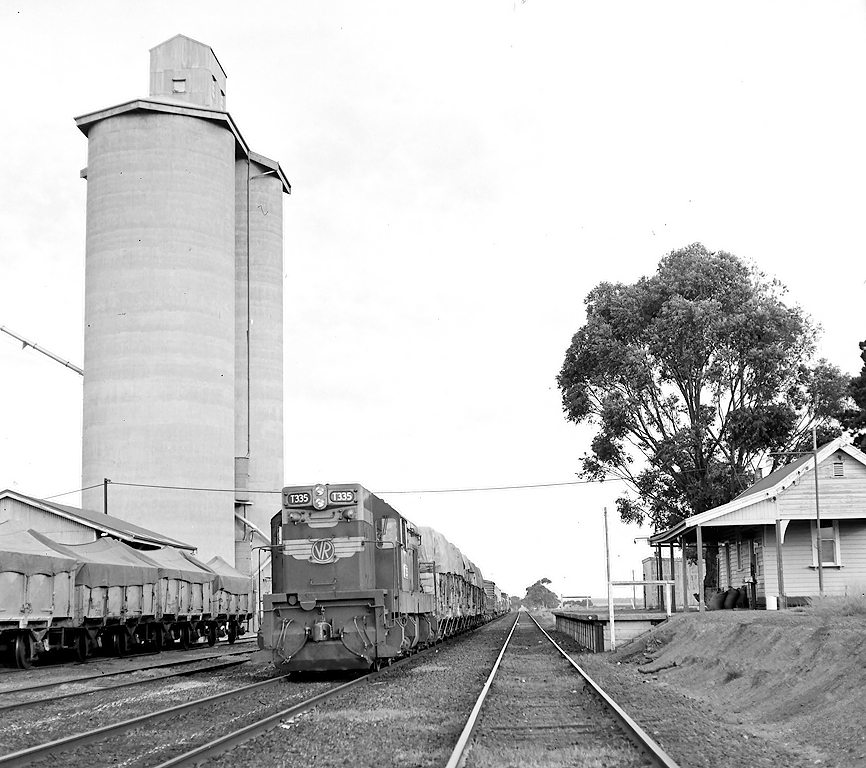
ABOVE: When Gheringhap station first opened on 13 December 1878, it consisted of 2 passenger platforms, but no amenities. In 1882, a shelter shed and a small office were erected on the Up platform. A goods siding was constructed on the Down (South) side in late 1889 and a shed placed there in 1890. When the double line was removed between here and Moorabool in 1894, a 14 lever signal frame was installed at the Geelong end of the Up platform to control trains to and from the single line. It is unclear if this was housed in a separate Signal Box or in the Station Office. Subsequently in 1907, it was replaced with an 18 lever frame, which was installed in the Station Office. Commencing in 1912, when Gheringhap was becoming the junction for the new line across the Western Plains to Maroona, a new island platform was constructed on the South side of the line. It was positioned slightly closer to Geelong, likely done to allow sufficient room for the junction pointwork to be clear of the level crossing. First World War difficulties delayed the project and it was not completed until April 8 1918. The former Up platform became redundant, the yard tracks were rearranged and expanded and a new timber station building was built containing the office and public waiting rooms, with an elevated Signal Box in the middle. The Signal Box housed an 18 lever interlocked frame and was sited directly opposite its predecessor. Suspected to be during the 1940's, the Station building and Signal Box were rationalised. The high level signal box was demolished and the signal lever frame was relocated directly below at ground level. This was housed in a newly built timber structure, which was attached to the Geelong end of the main station office. The former public areas of the station buildings were also demolished. This picture, courtesy of Museums Victoria, shows Gheringhap station in its prime, after 1918, and prior to the 1940's rationalization. (caption courtesy Geoff Winkler)
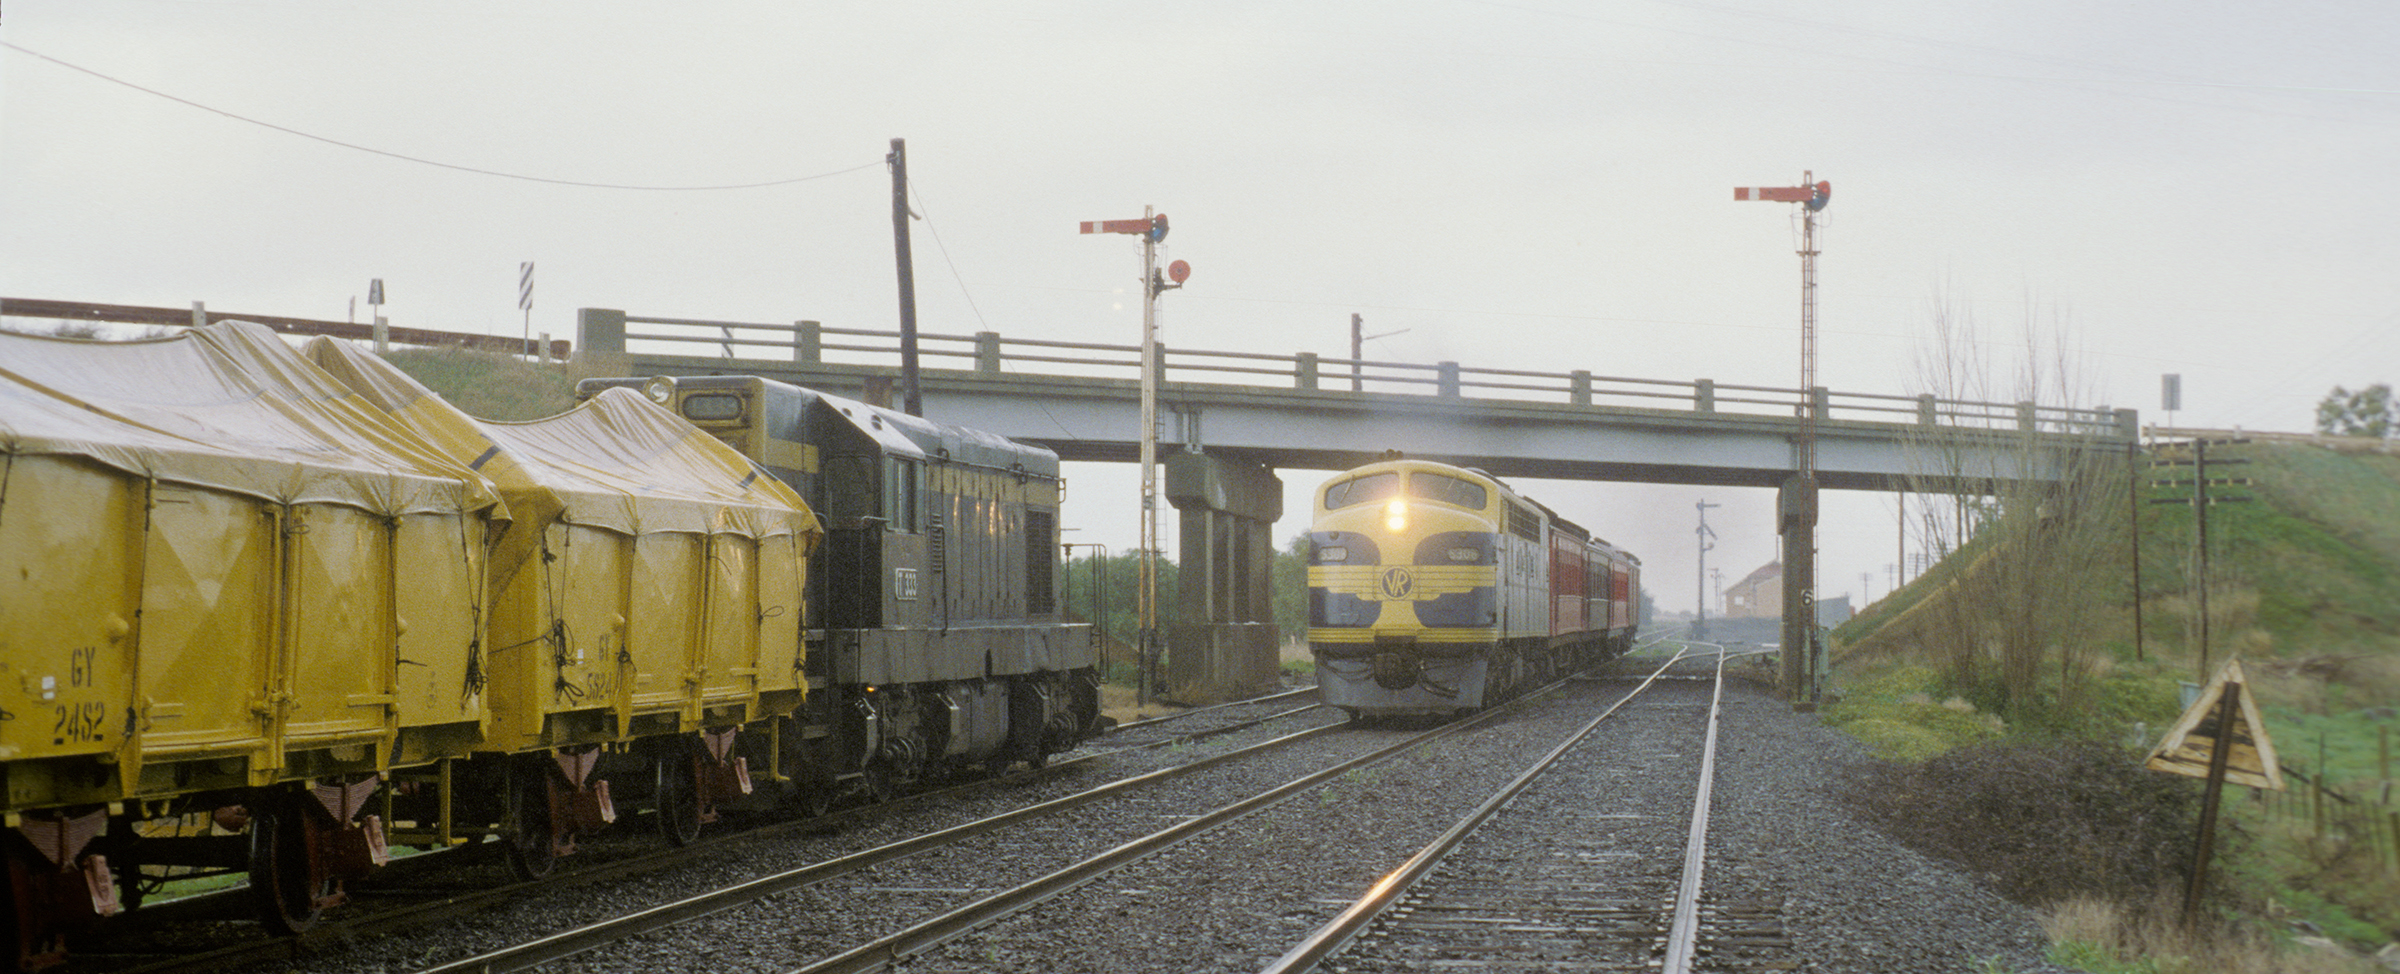
ABOVE: With a diverted Ballarat bound train, S308 accelerates toward Bannockburn after exchanging staffs. With no crossing loop provided, T333 has its grain train pushed back into 'C' siding to allow it to pass. 14:15, August 20, 1979. (photo courtesy Geoff Winkler)
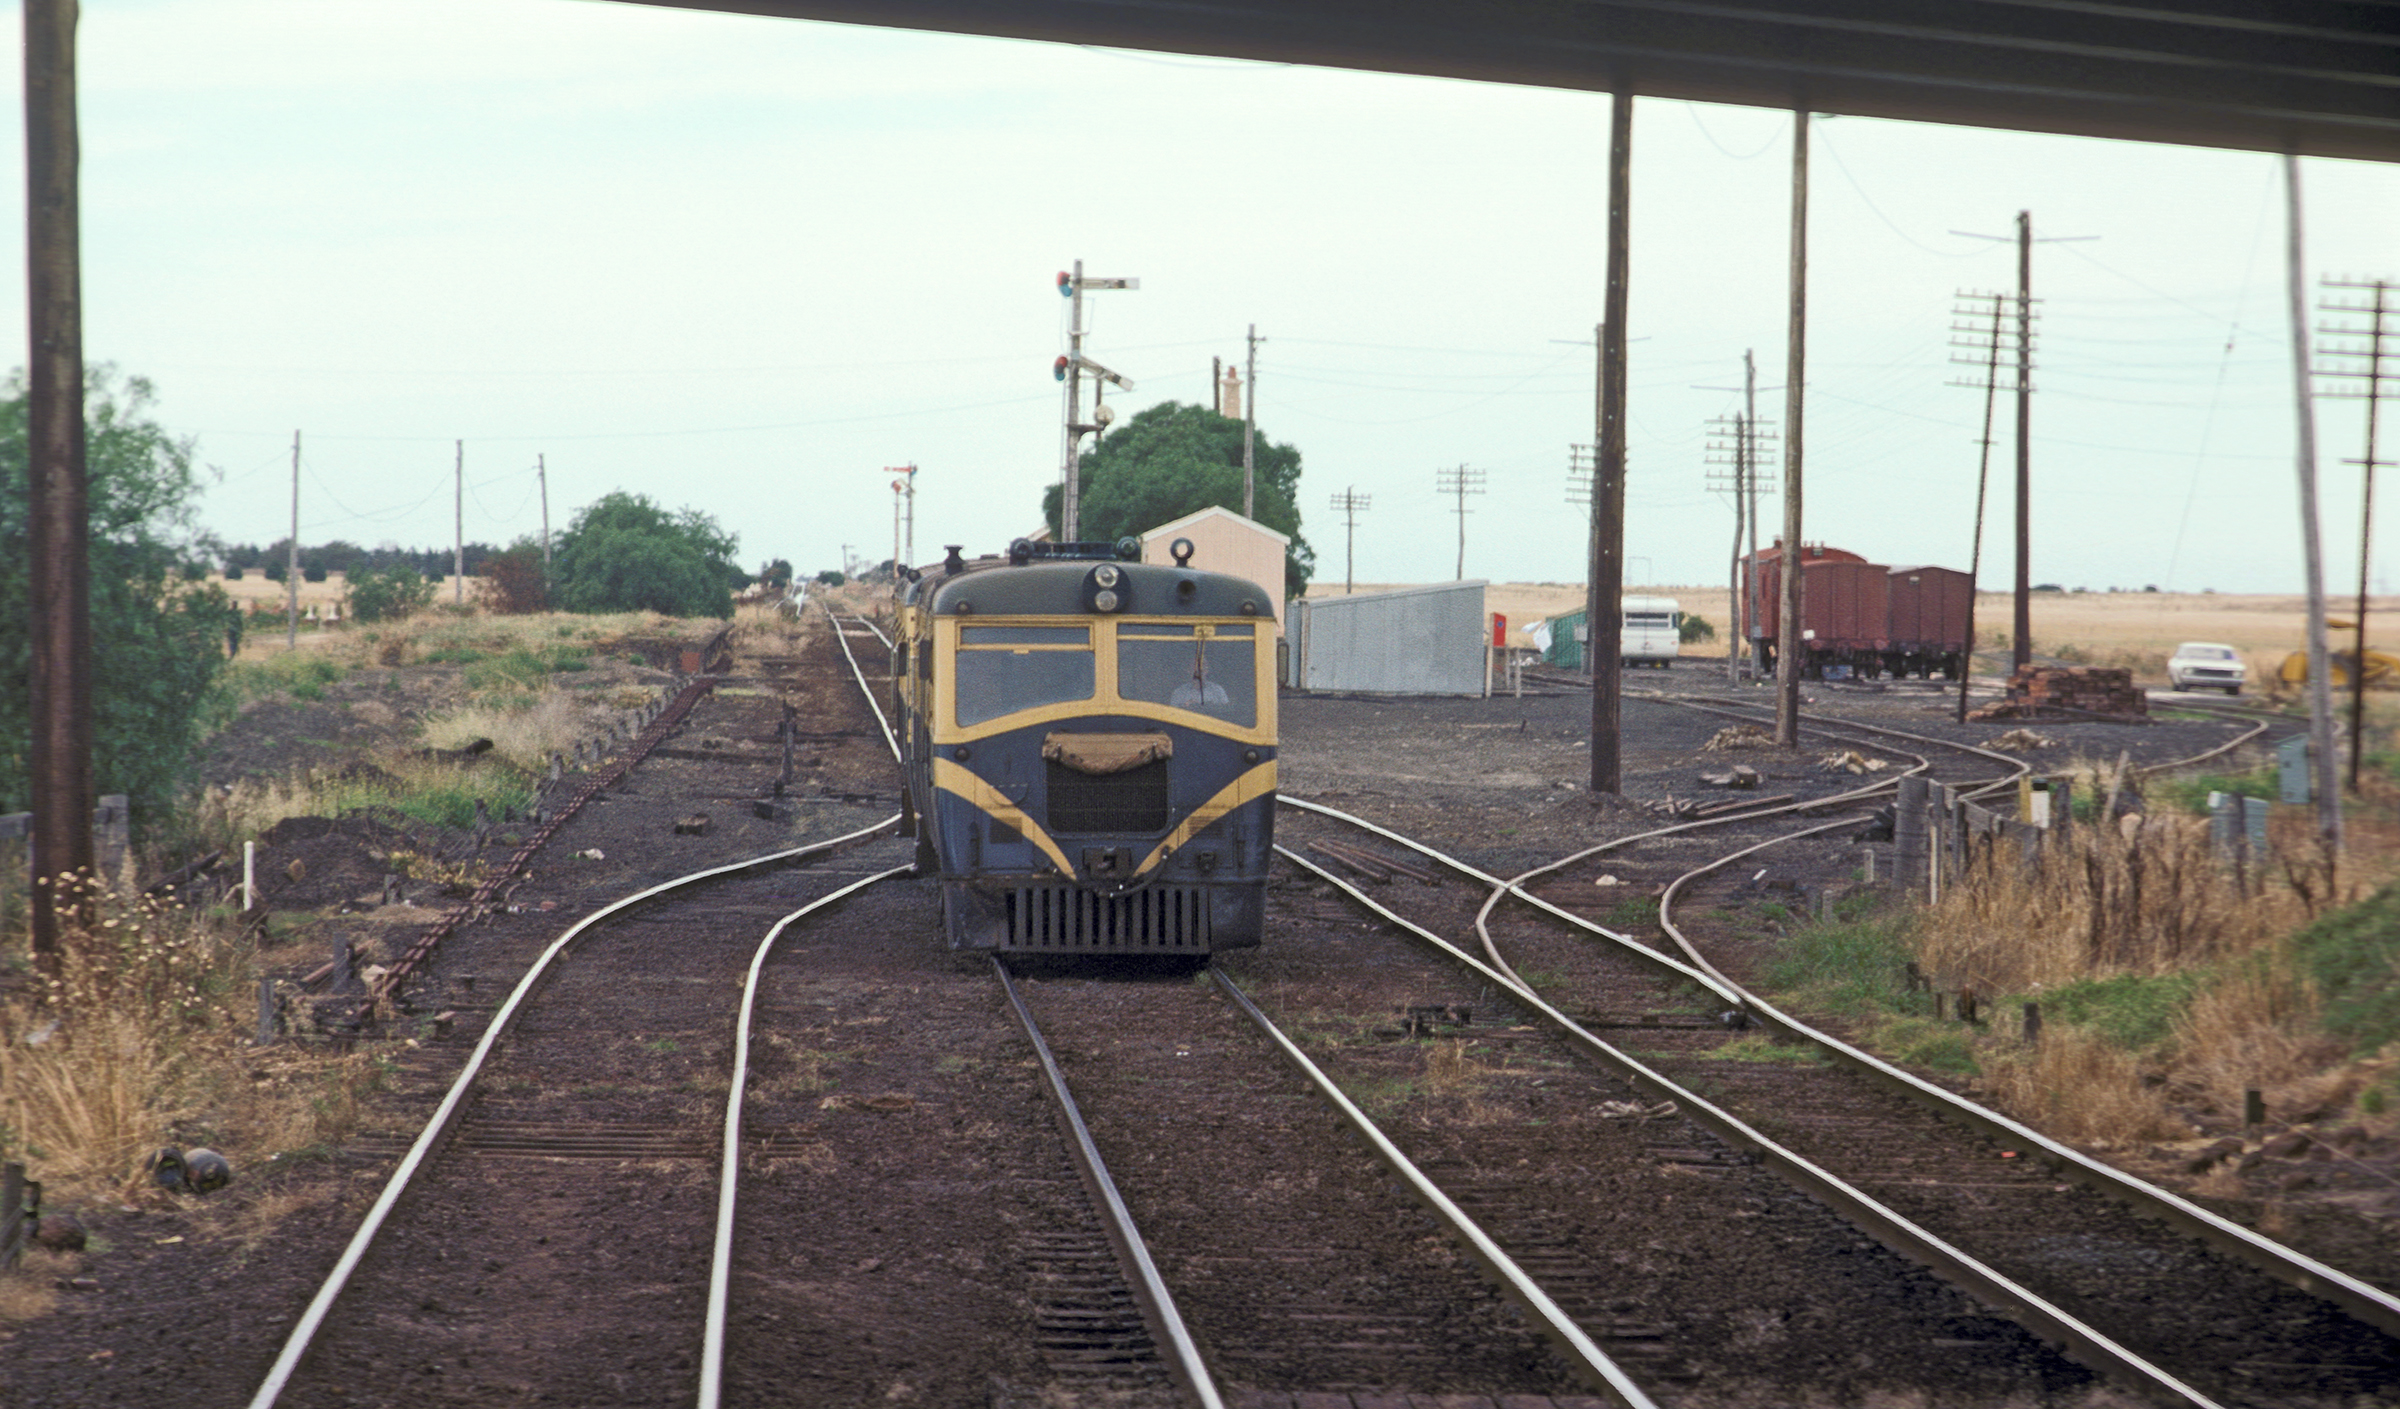
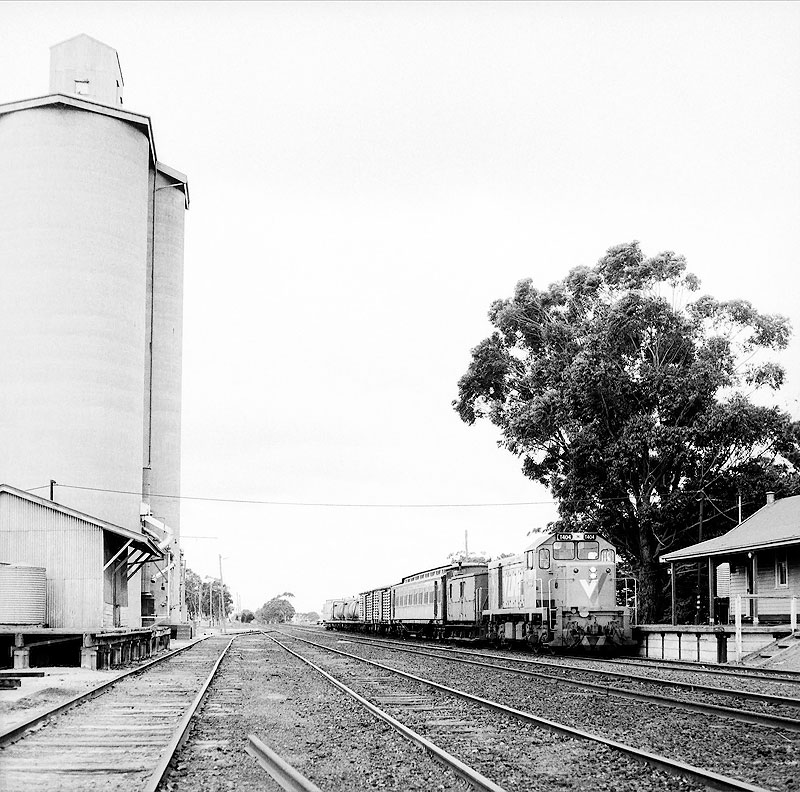
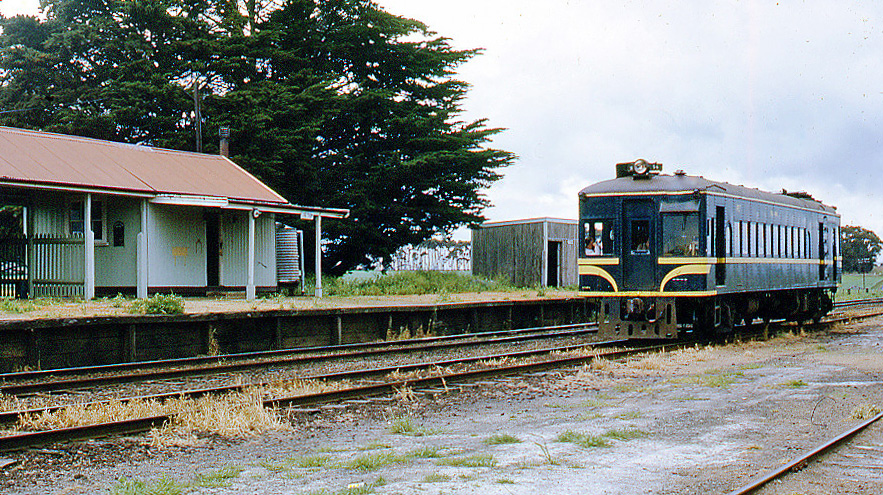
ABOVE: RM22 with MT54 in tow on the afternoon down service, 18:07, December 20, 1977. The track on the left, C siding, is all that remained of the original double track at Gheringhap and the platform on the left was the original up platform. (photo courtesy Geoff Winkler)

ABOVE: Gheringhap looking east towards Geelong. This image shows the old up platform from double line days. late 1970s, photo courtesy Peter J Vincent.
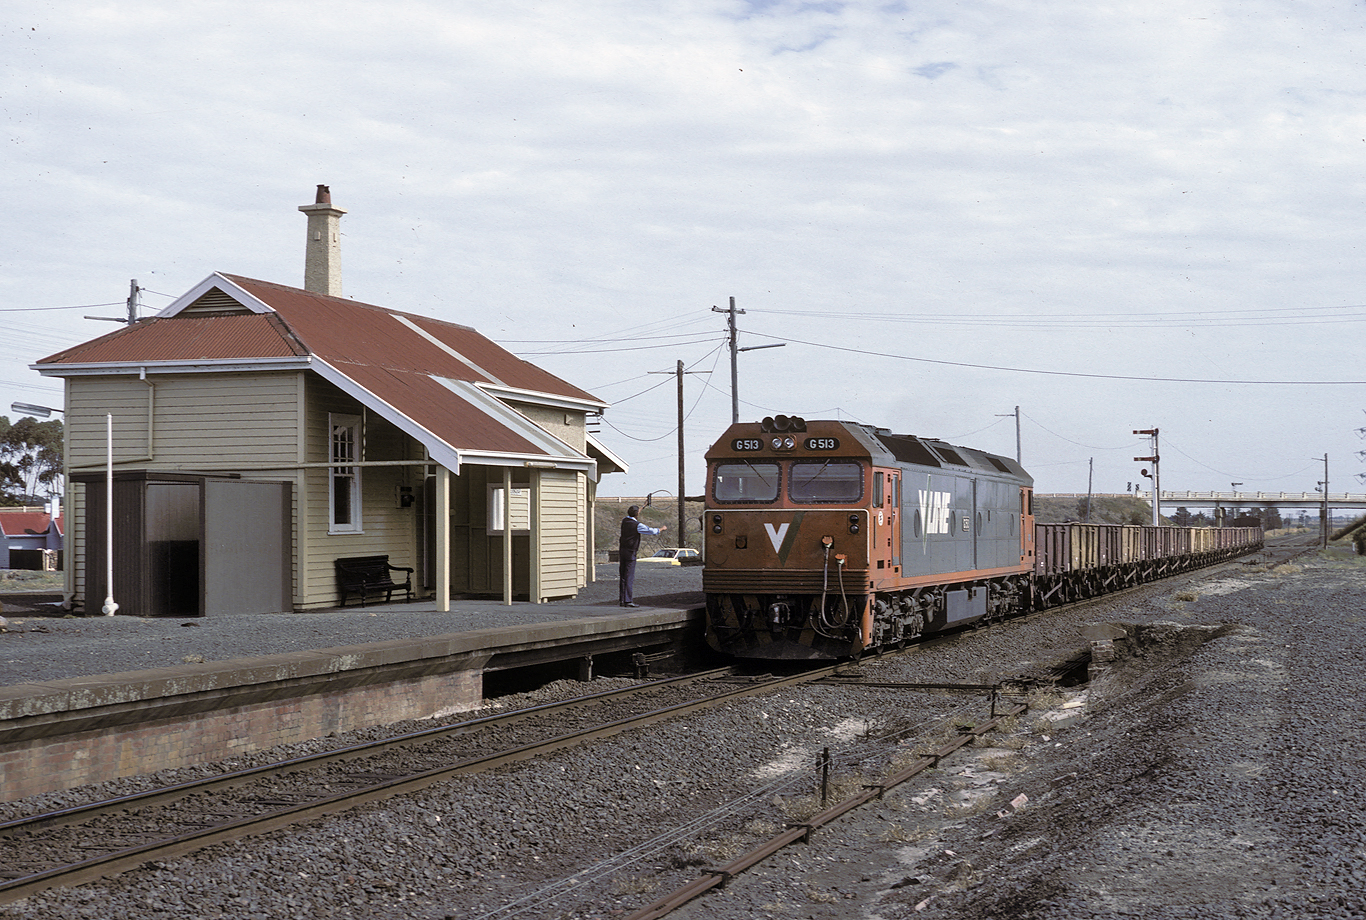
ABOVE: G 513 on a Ballarat to Geelong goods at Gheringhap. Apr 3 1986.
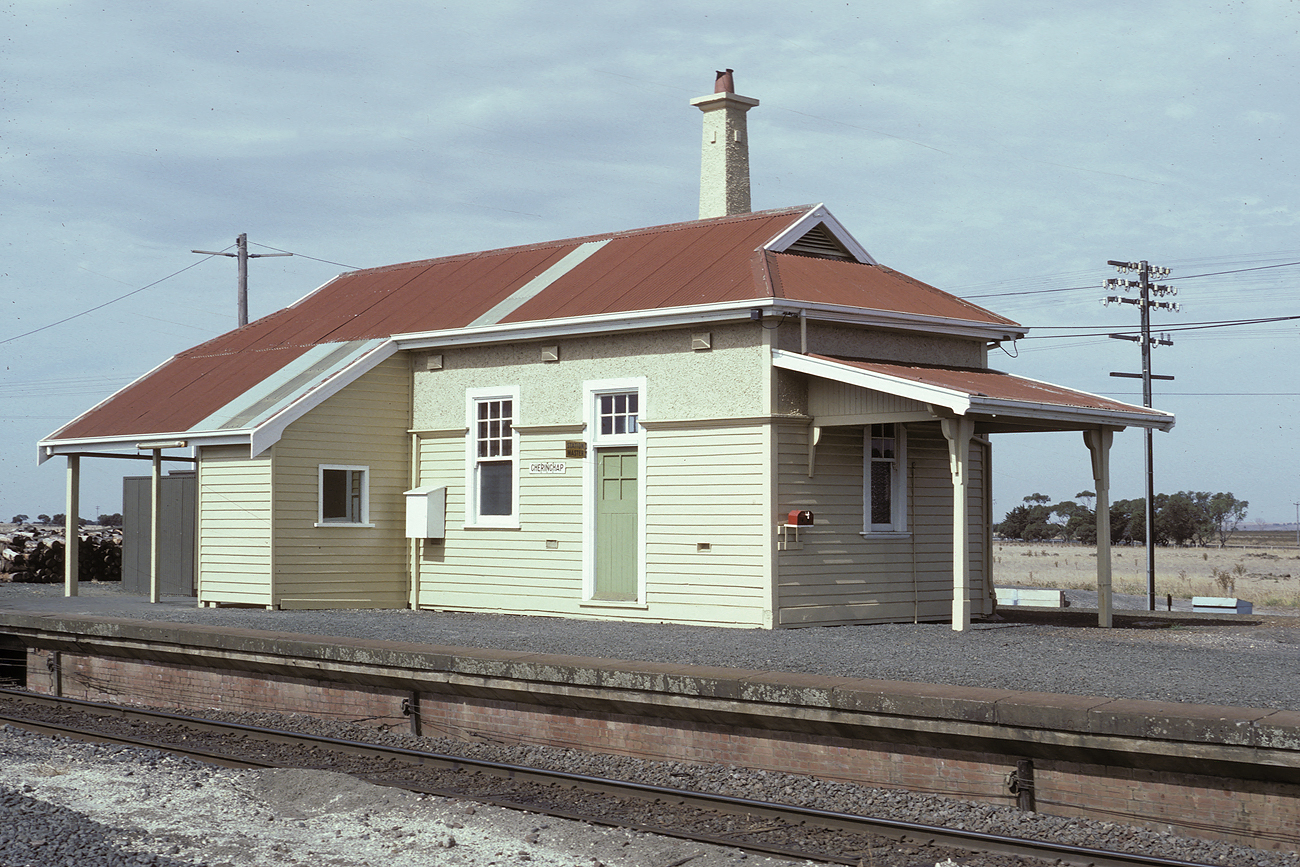
ABOVE: Station building at Gheringhap viewed from the north side. April 3 1986
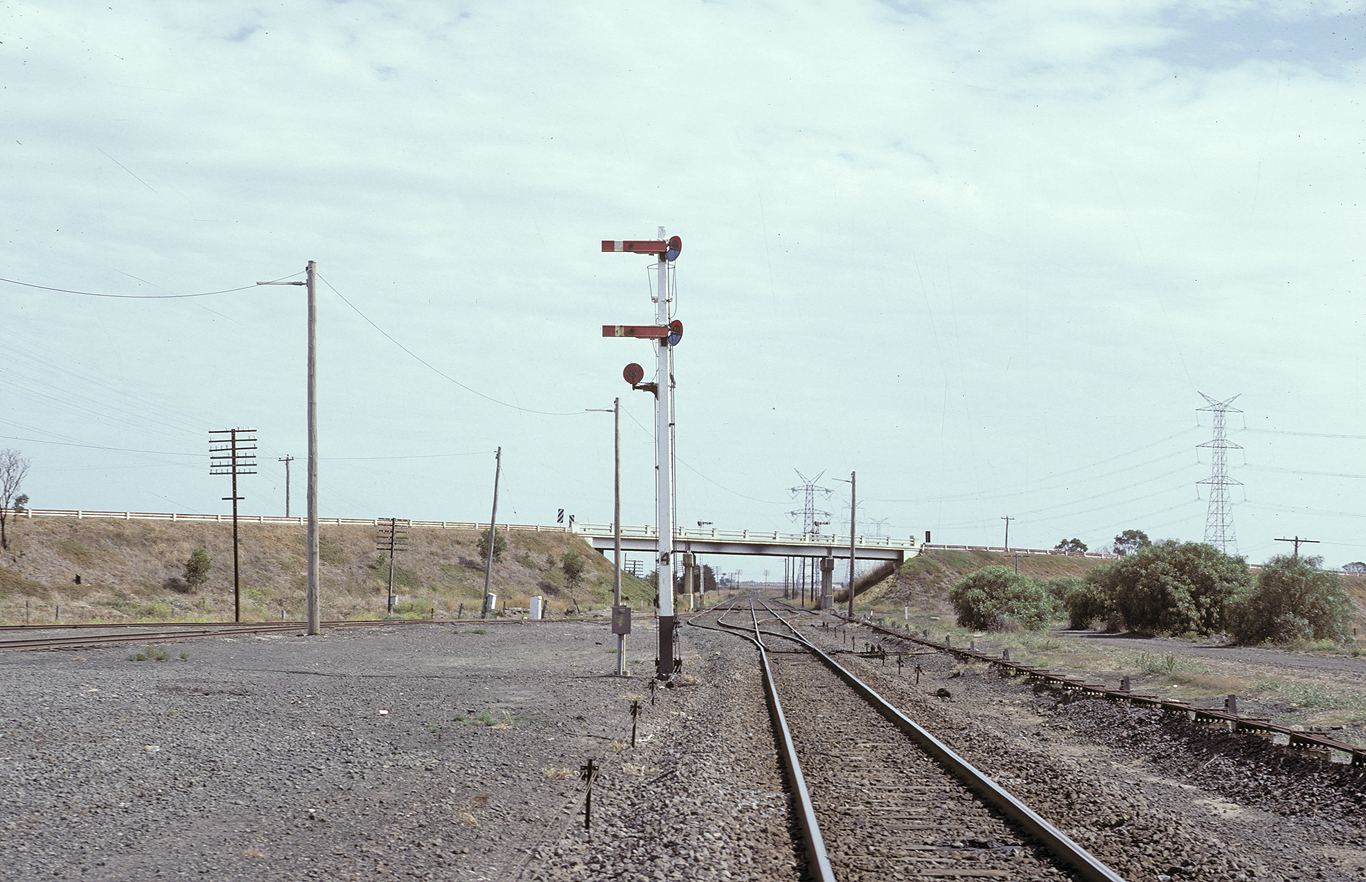
ABOVE: Looking west at the junction. Normally 2 position home signals were side by side when they applied to different routes but the old conventions were still being used at Gheringhap. The diverging track to the left was the line to Cressy but for this move you got the top arm, the straight track was to Ballarat for which you got the bottom arm! April 3 1986
ABOVE: Gheringhap Station 4 October 1970. (photo courtesy Neville Gee)
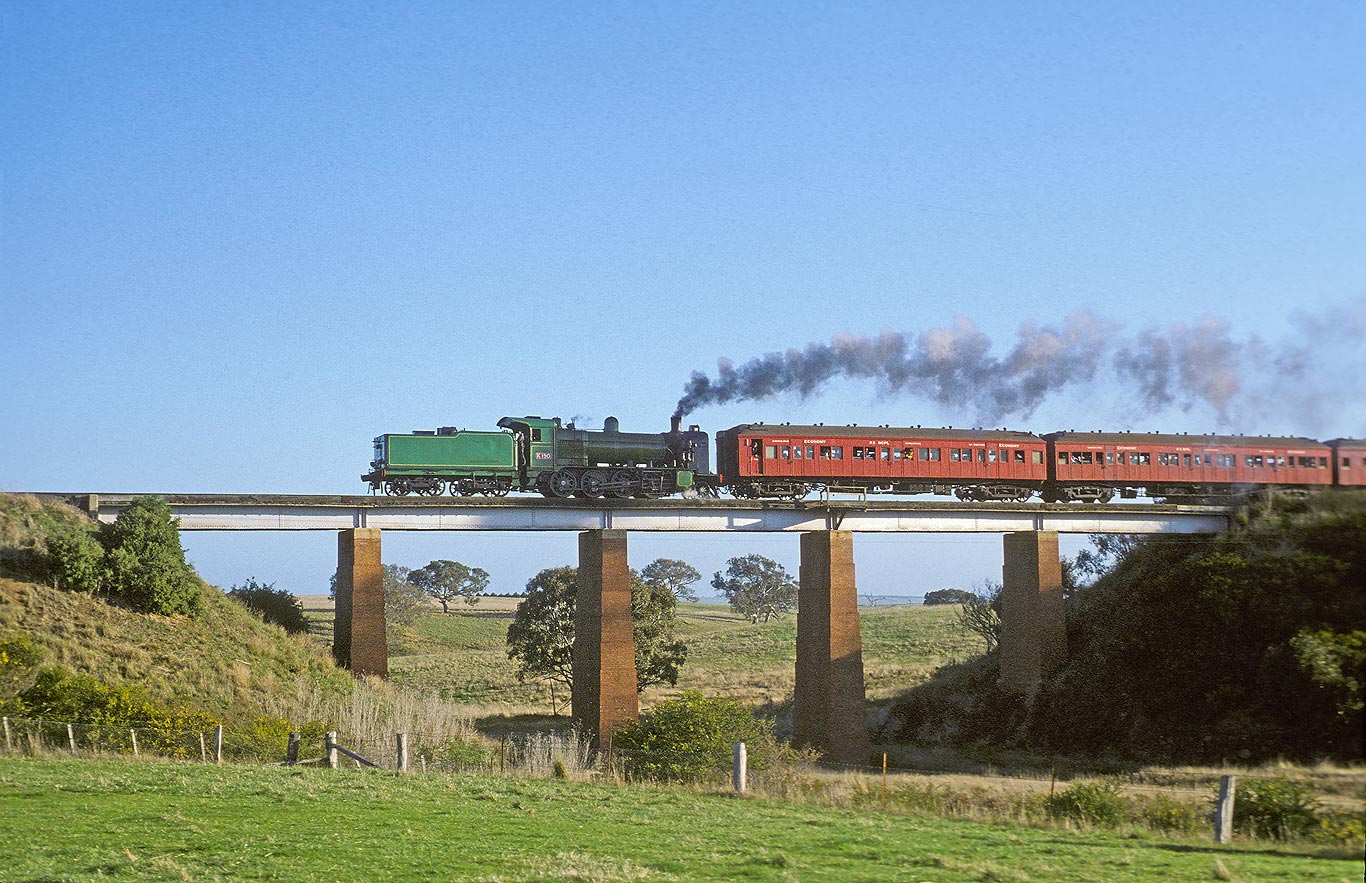
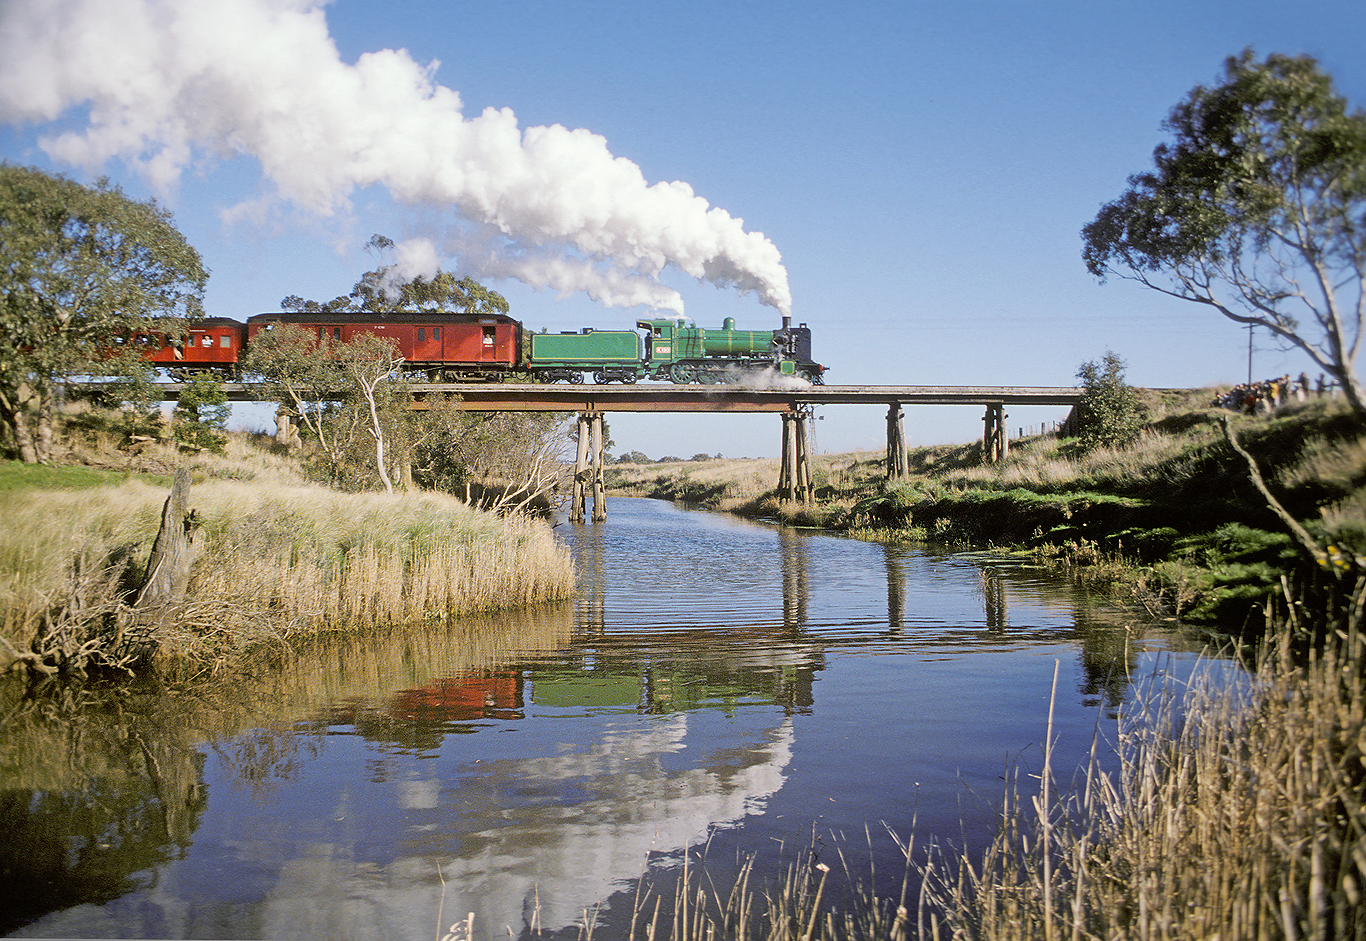
ABOVE: K 190 croses the rarely photographed bridge over Bruce's creek between Inverleigh and Gheringhap. This bridge later disappeared when Armco culverts were installed. Sep 23 1979. (photo courtesy Geoff Winkler)
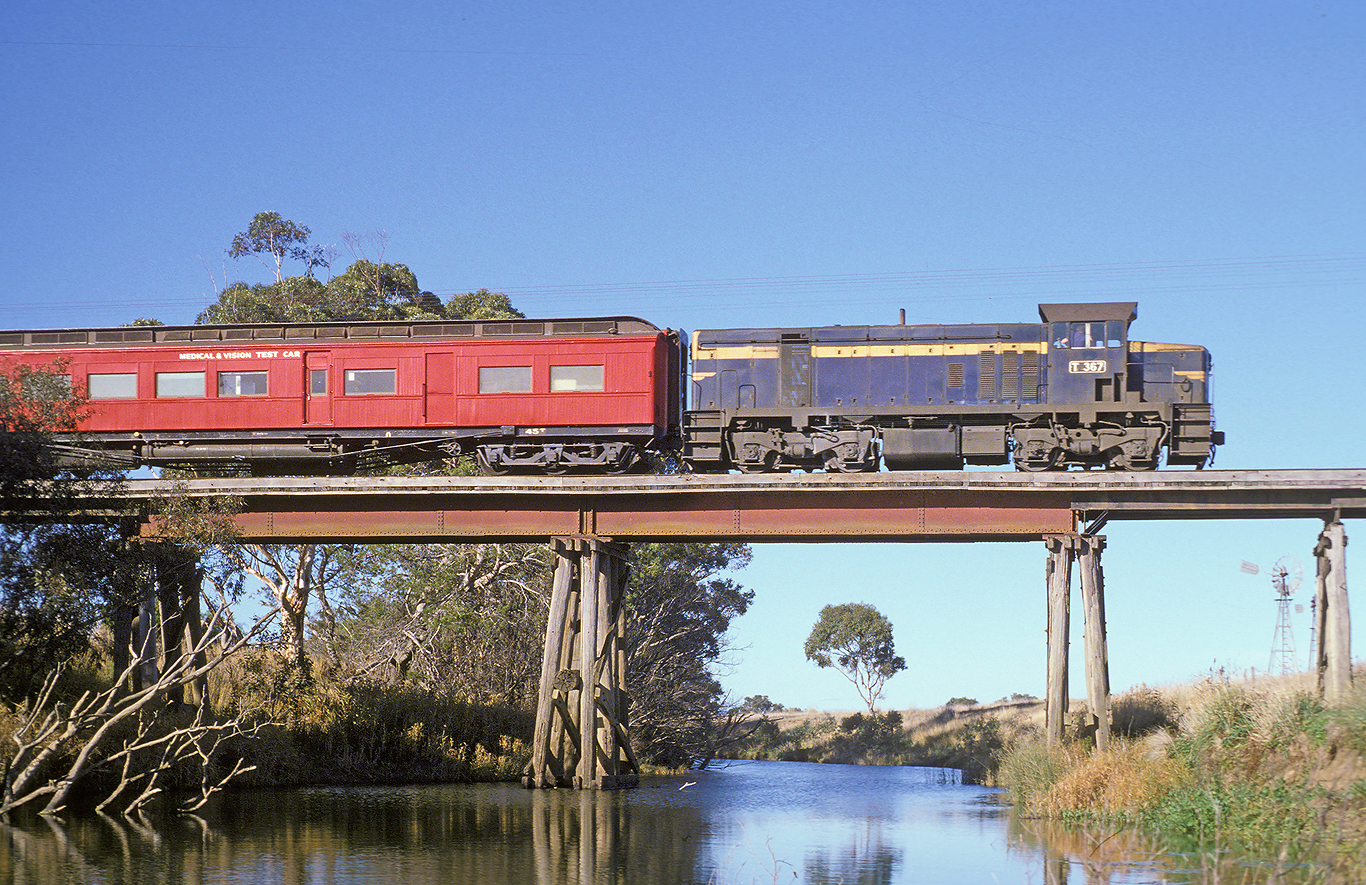
Just east of Inverleigh the line crosses Leigh River. ABOVE: T 367 with the Medical Vision & Test car on the down June 11 1979. BELOW: K 190 at the same spot, Sep 23 1979. (both photos courtesy Geoff Winkler)
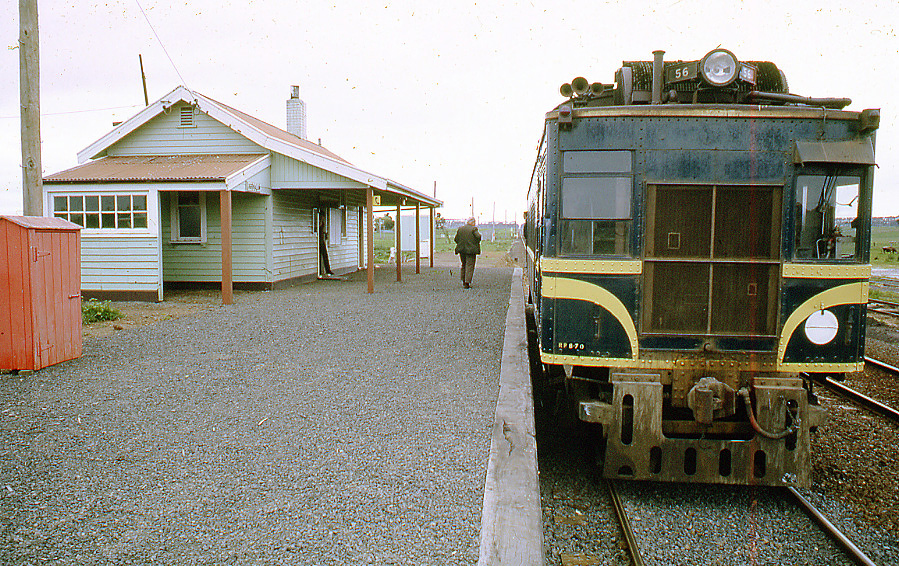
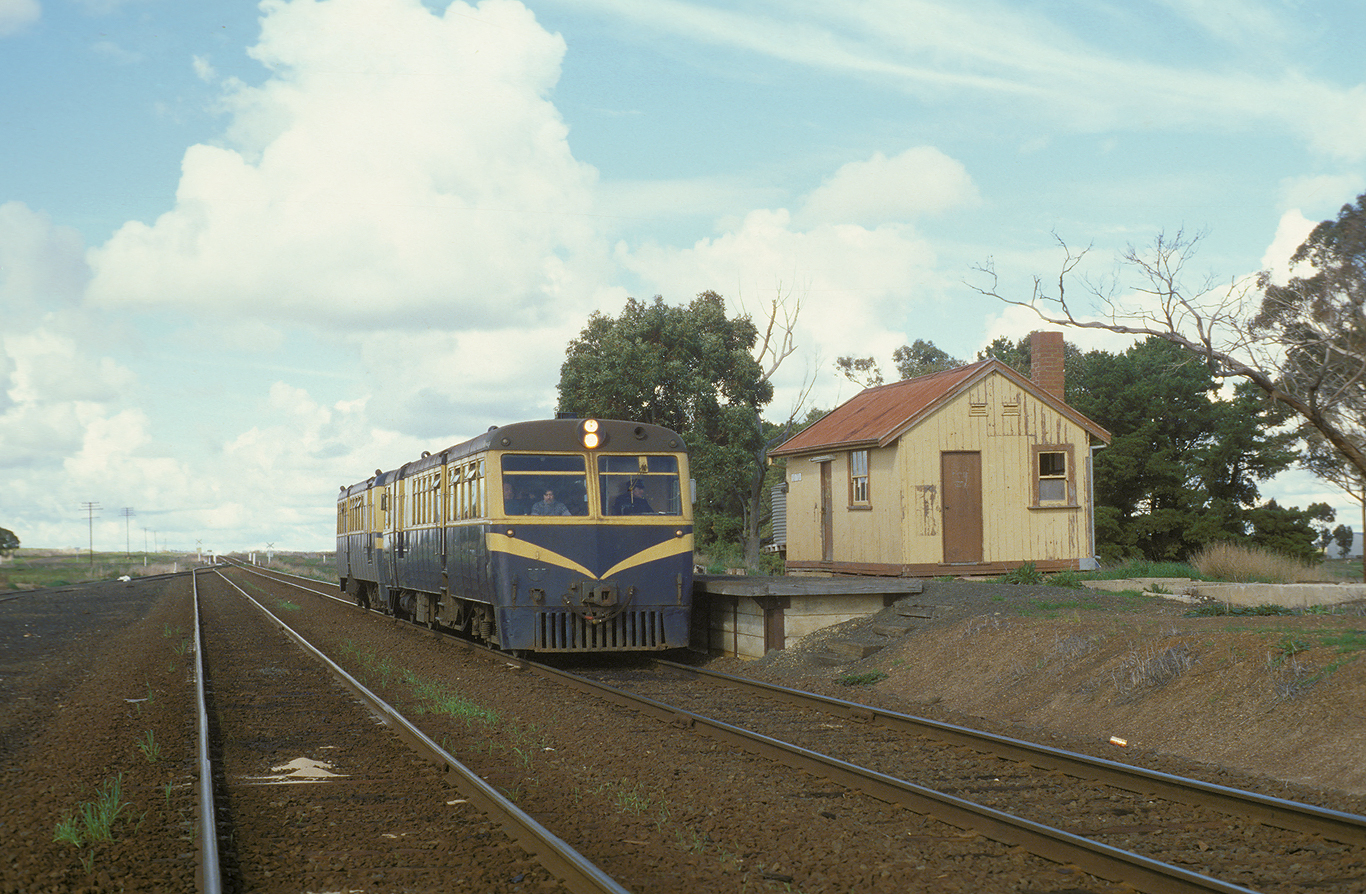
ABOVE: DERM 56 pauses briefly at Inverleigh for staff to attend to Safeworking procedures while en route to Coleraine. 17 October 1970. (photo courtesy Neville Gee)
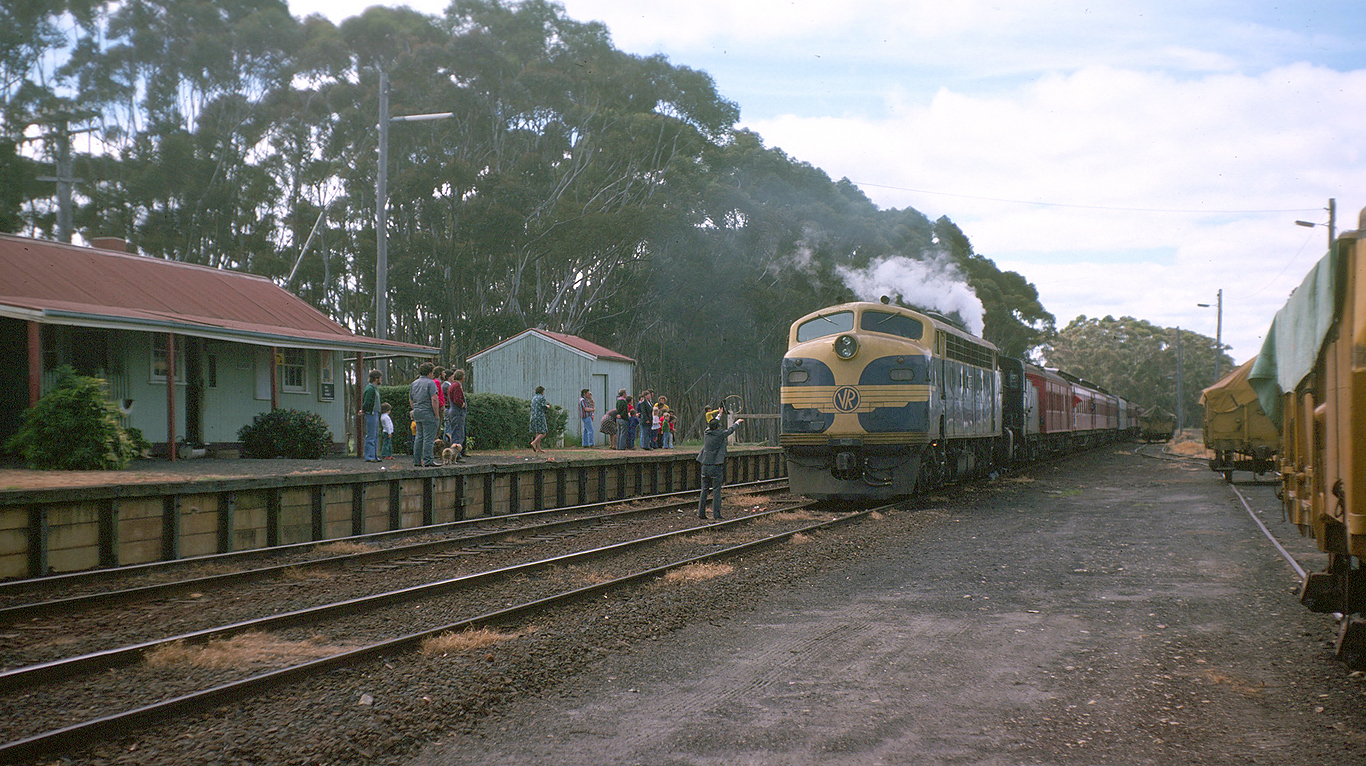
ABOVE: A down special hauling the Medical Vision & Test car at Inverleigh. June 11 1979. (photo courtesy Geoff Winkler)

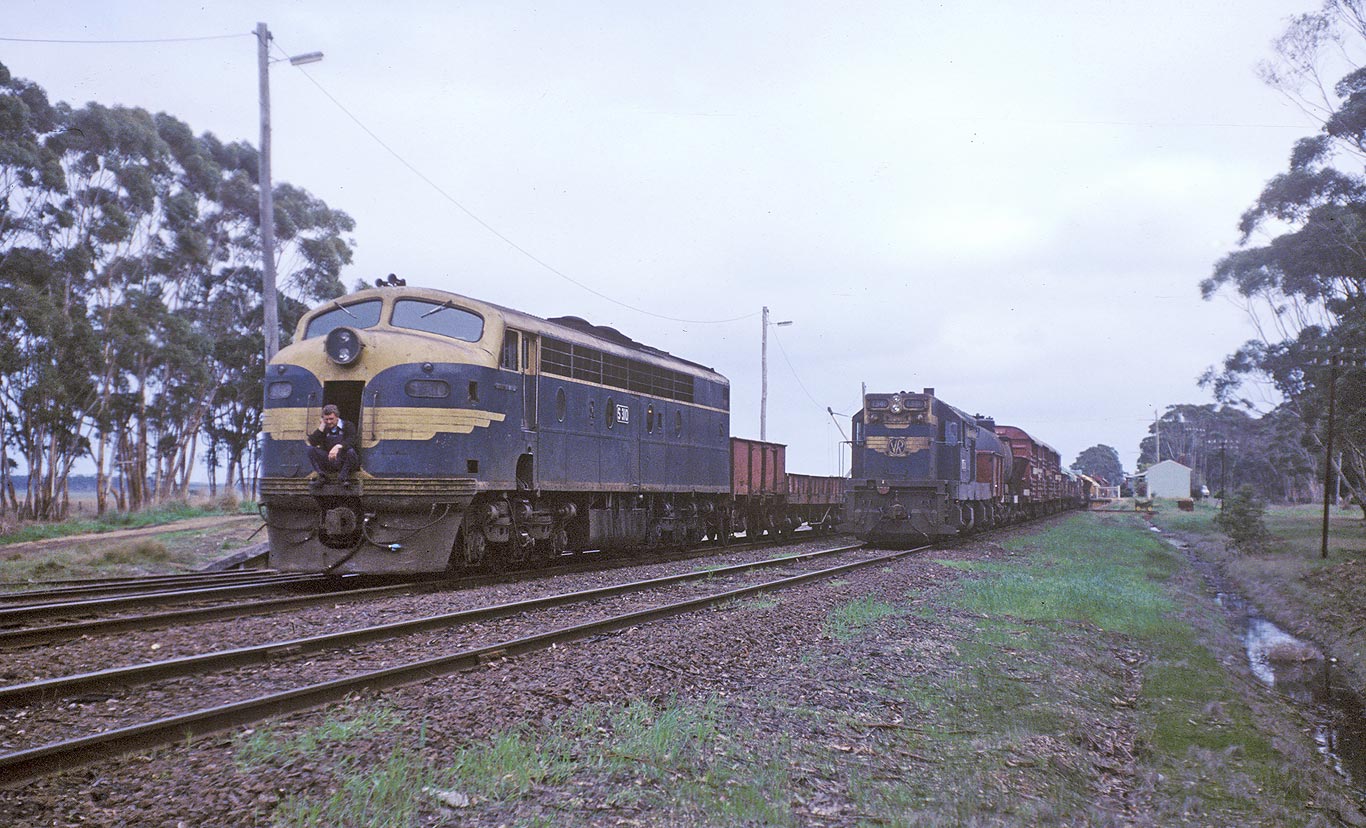
ABOVE: S 300 and B 62 on an up goods at Inverleigh, Jan 21 1978. (photo courtesy Geoff Winkler)
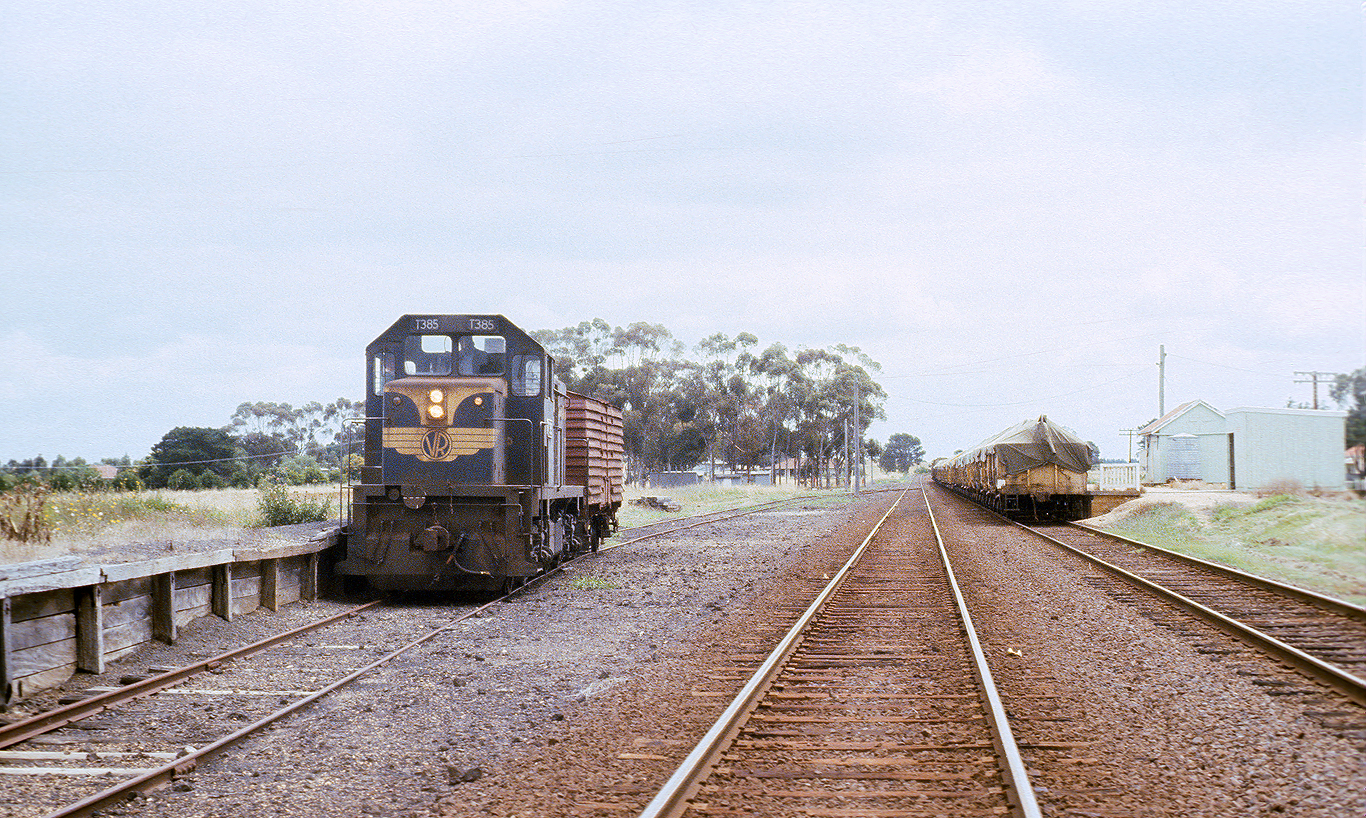
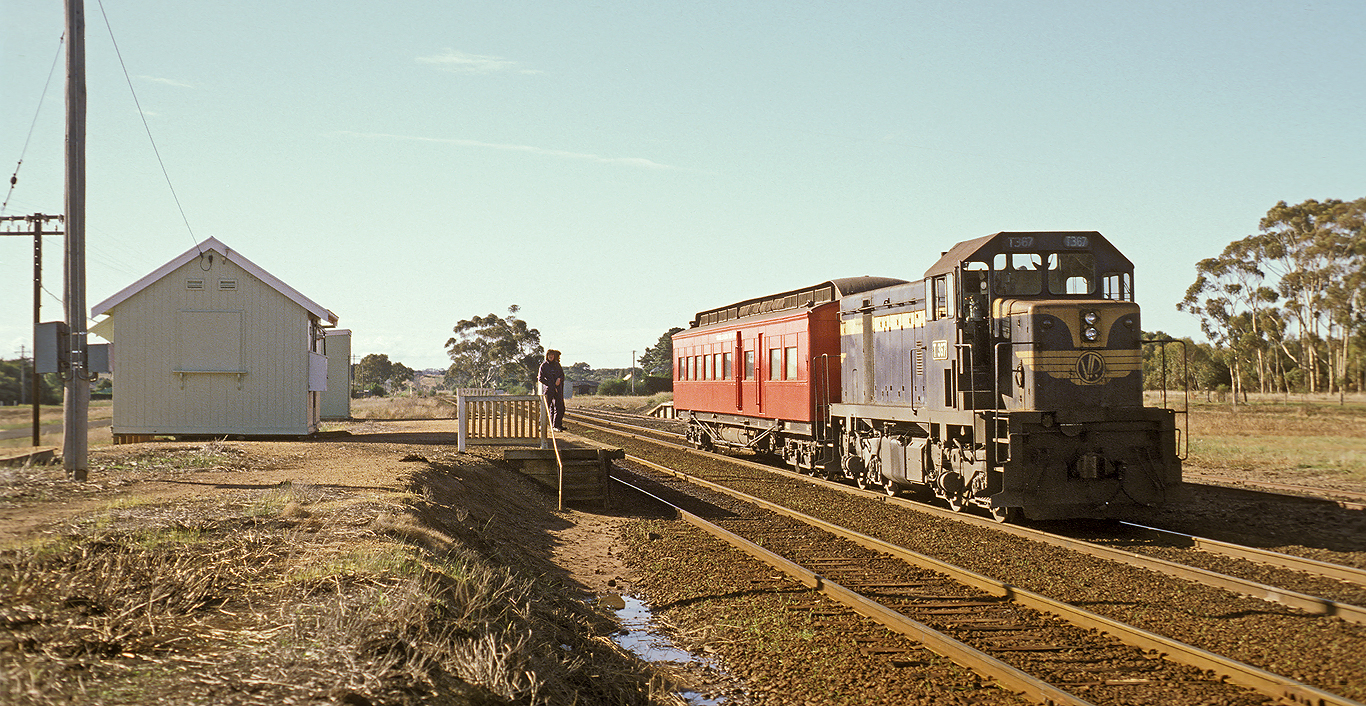
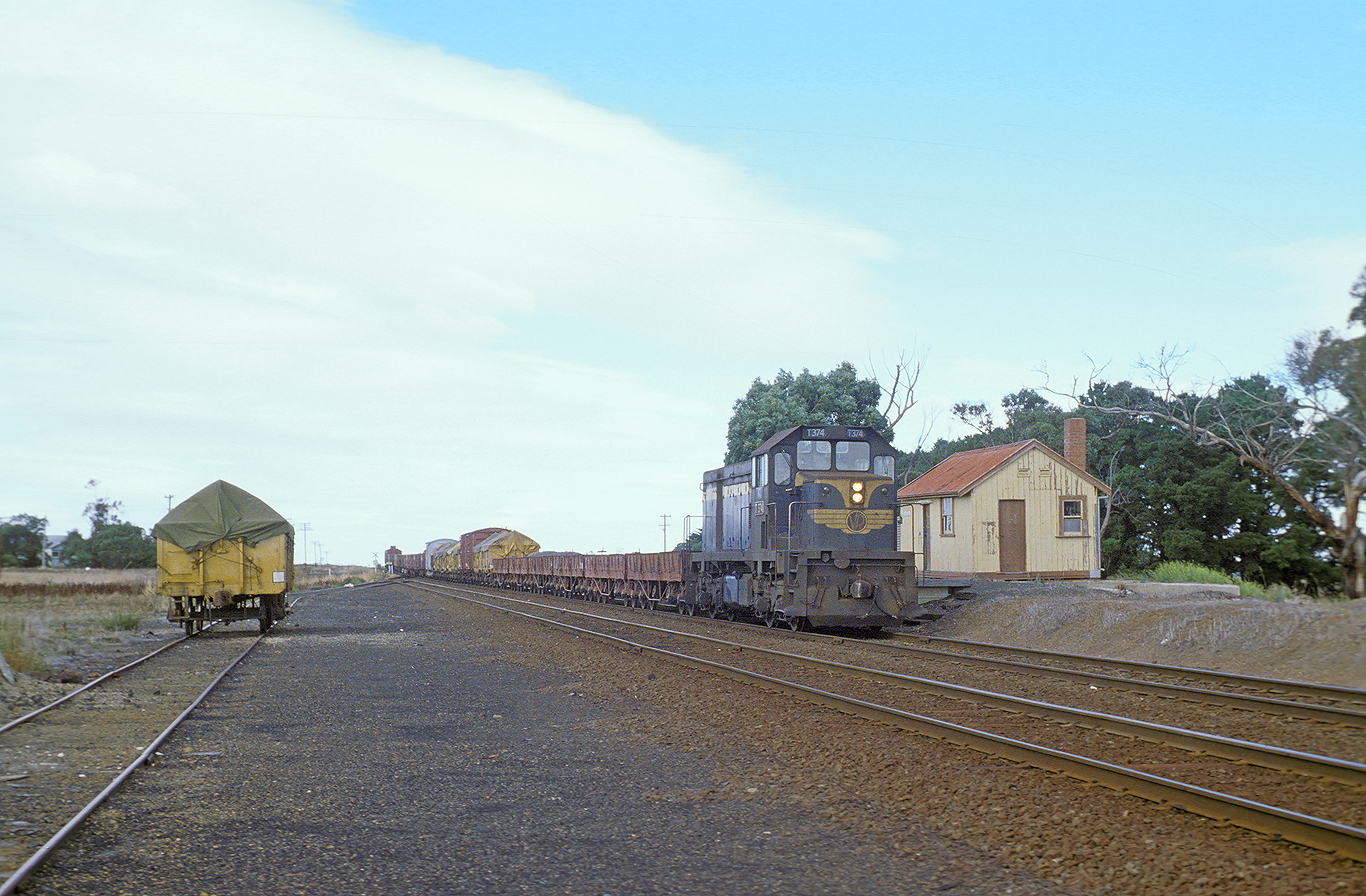
ABOVE: T 385 picks up a U van at Inverleigh whilst running an up goods, Dec 18 1978. (photo courtesy Geoff Winkler)
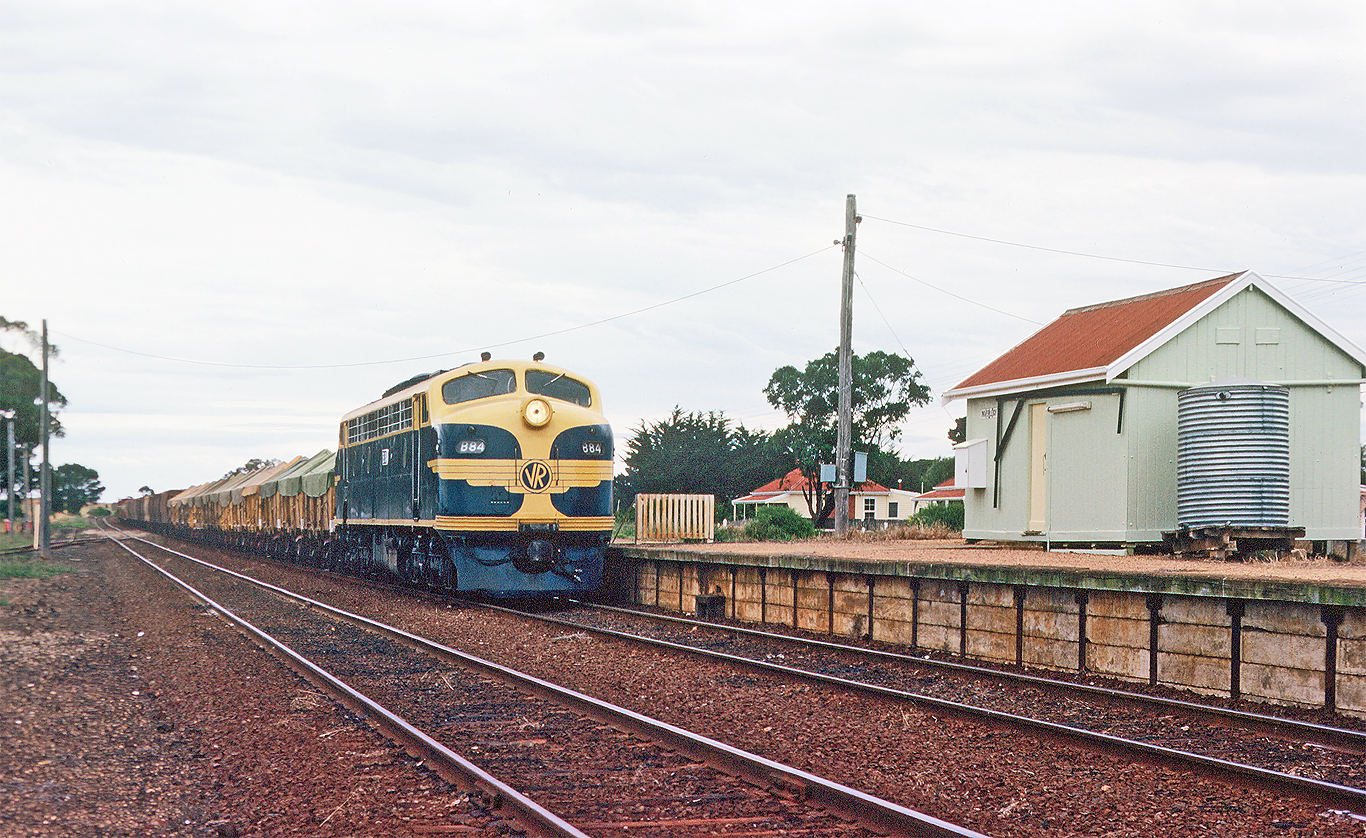
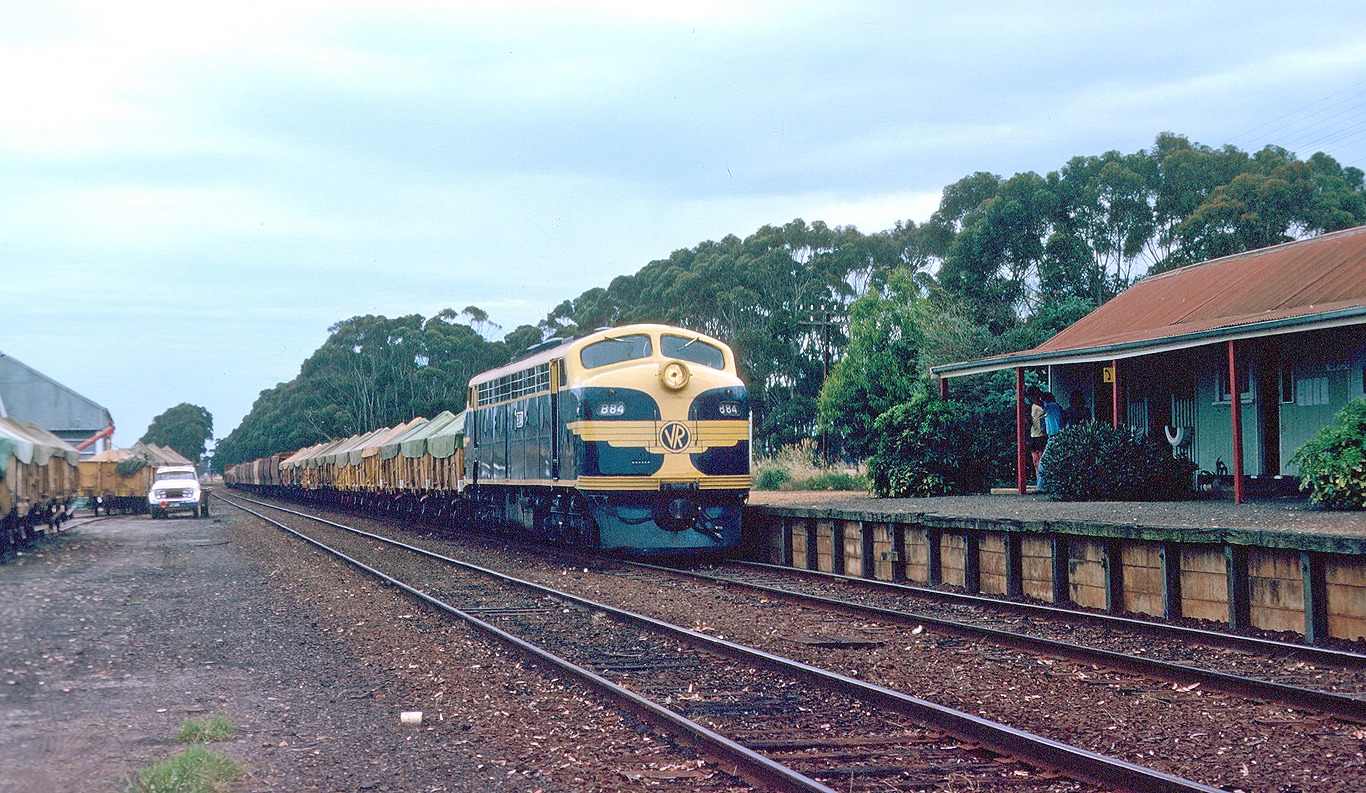
ABOVE: B 84 on an up goods at Inverleigh, Feb 1979. (photo courtesy David Hewitt)
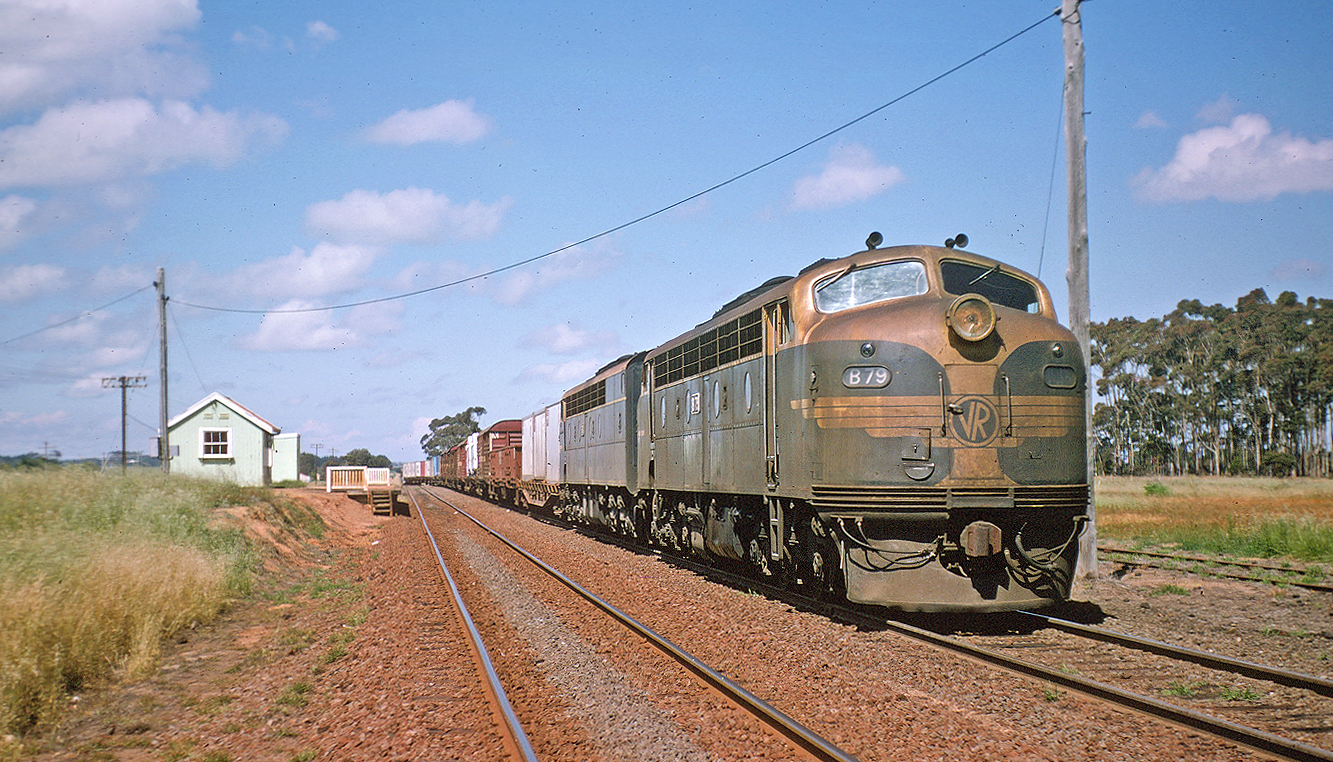
ABOVE: B 79 and an S on a down goods at Inverleigh, Nov 1976. (photo courtesy David Hewitt)
WINGEEL
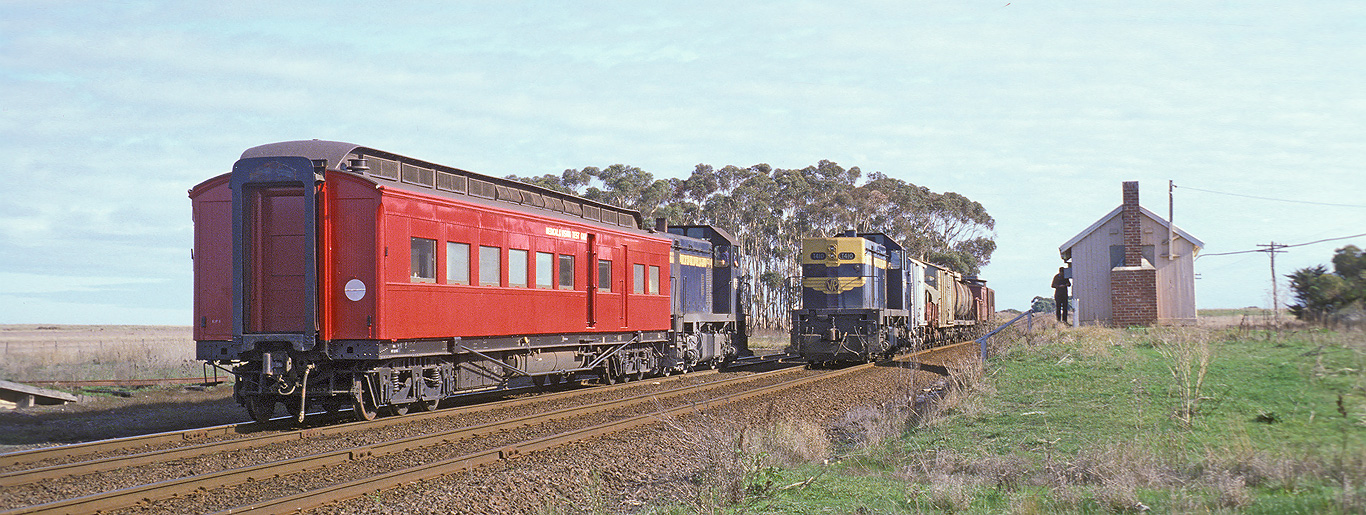
ABOVE: T 410 on an up goods crosses T 367 on a westbound move of the Medical Vision & Test car at Wingeel. Most platforms on the Cressy line in later days had their platforms drastically cut back but Wingeel lost its platform completely, hence the steps from the ballast up to the station building, June 11 1979, (photo courtesy Geoff Winkler)
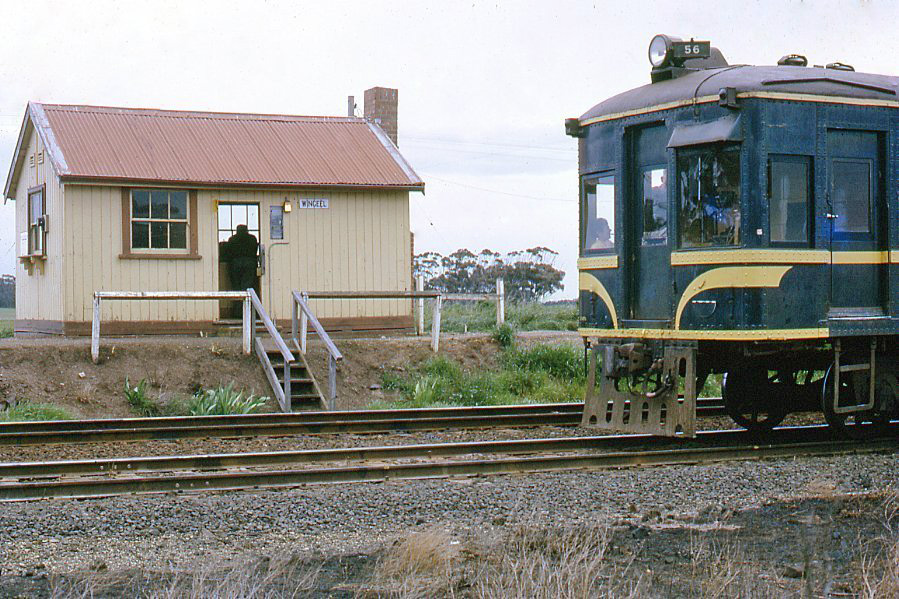
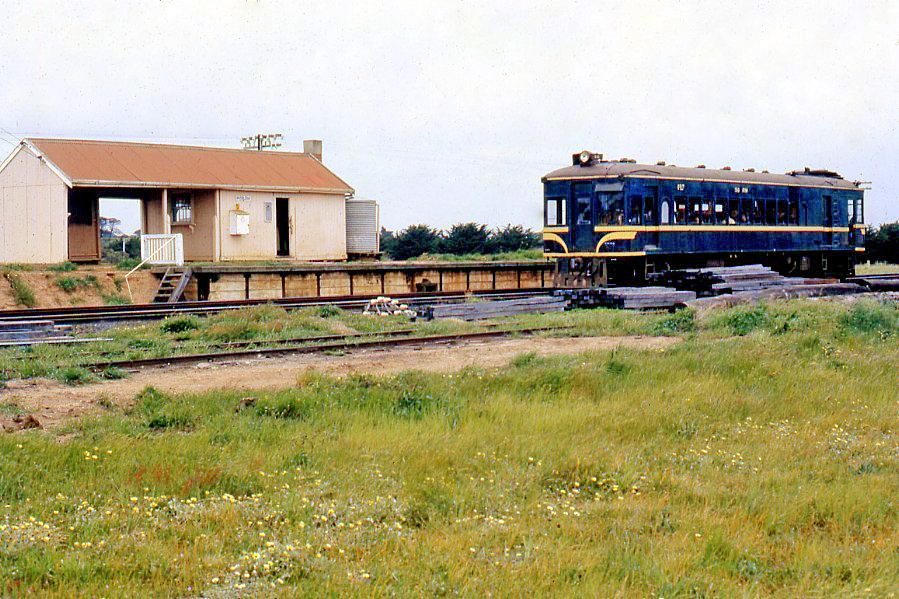
ABOVE: With the passenger platform at Wingeel long removed, a set of steps has been provided from rail level to access the station building. 17 October 1970. (photo courtesy Neville Gee)
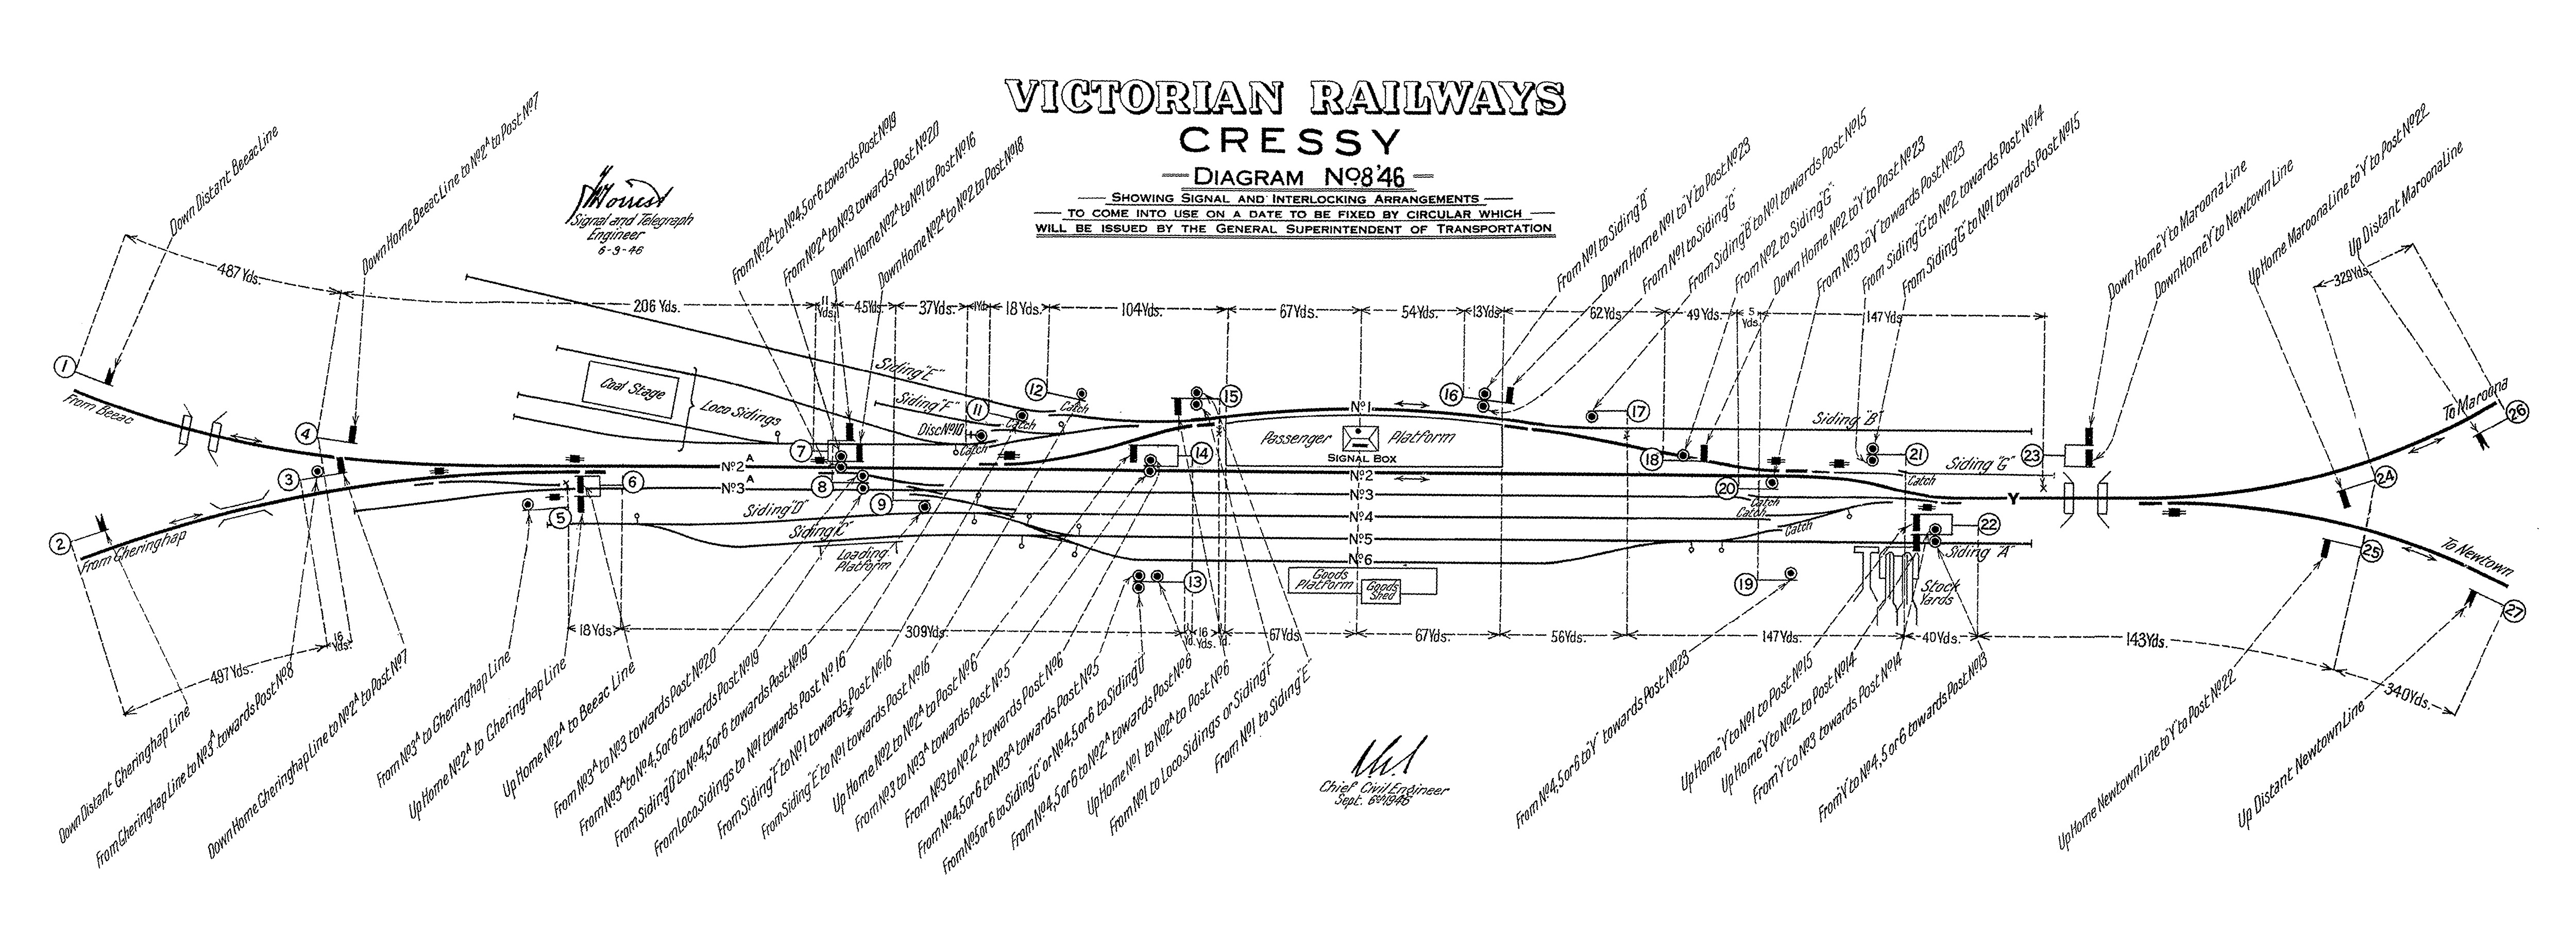
CRESSY
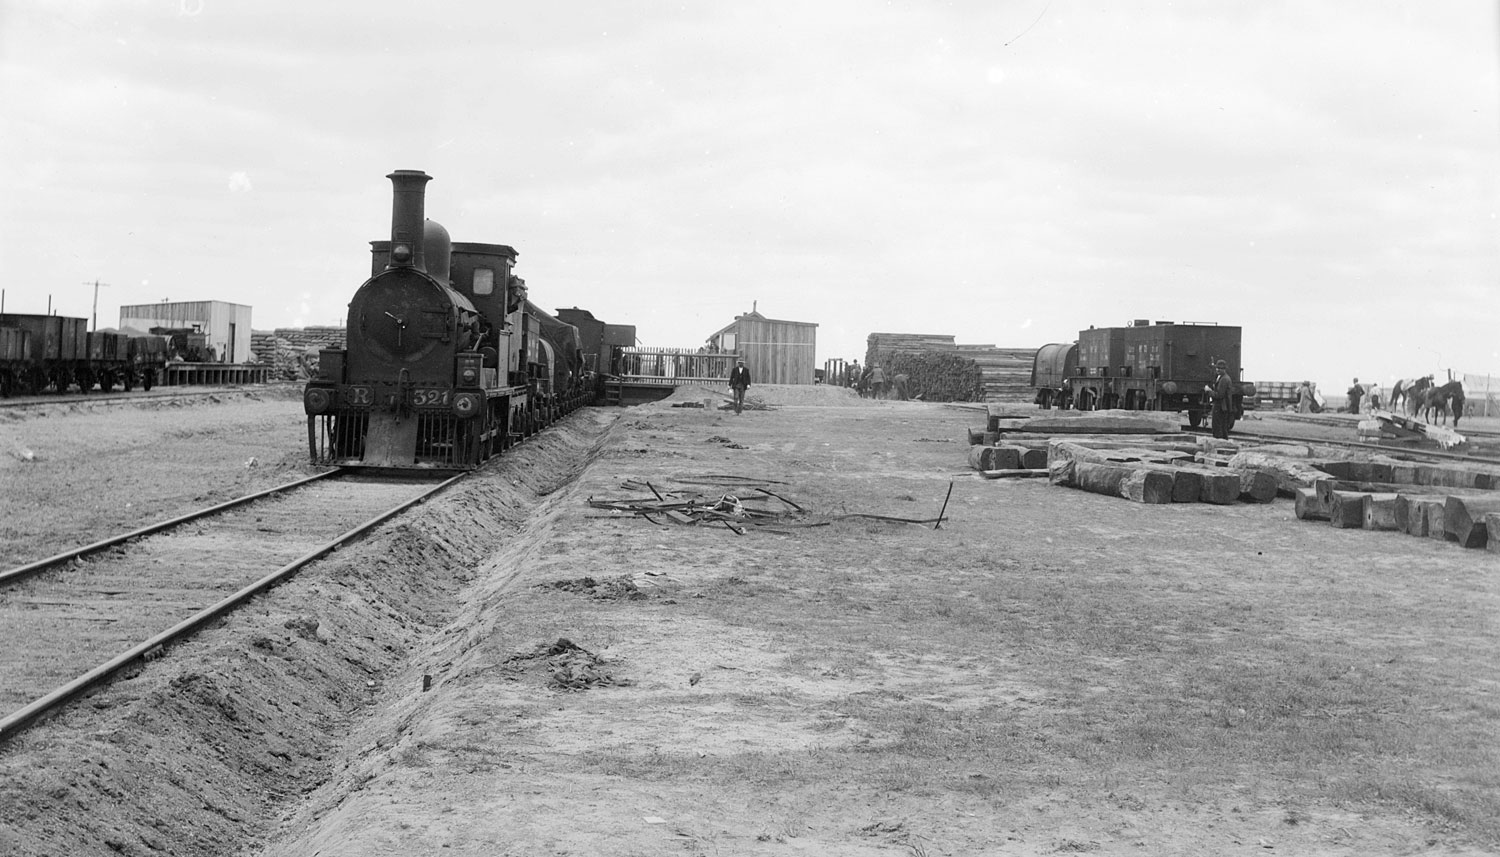
ABOVE & BELOW: A westbound train at Cressy, probably during construction.
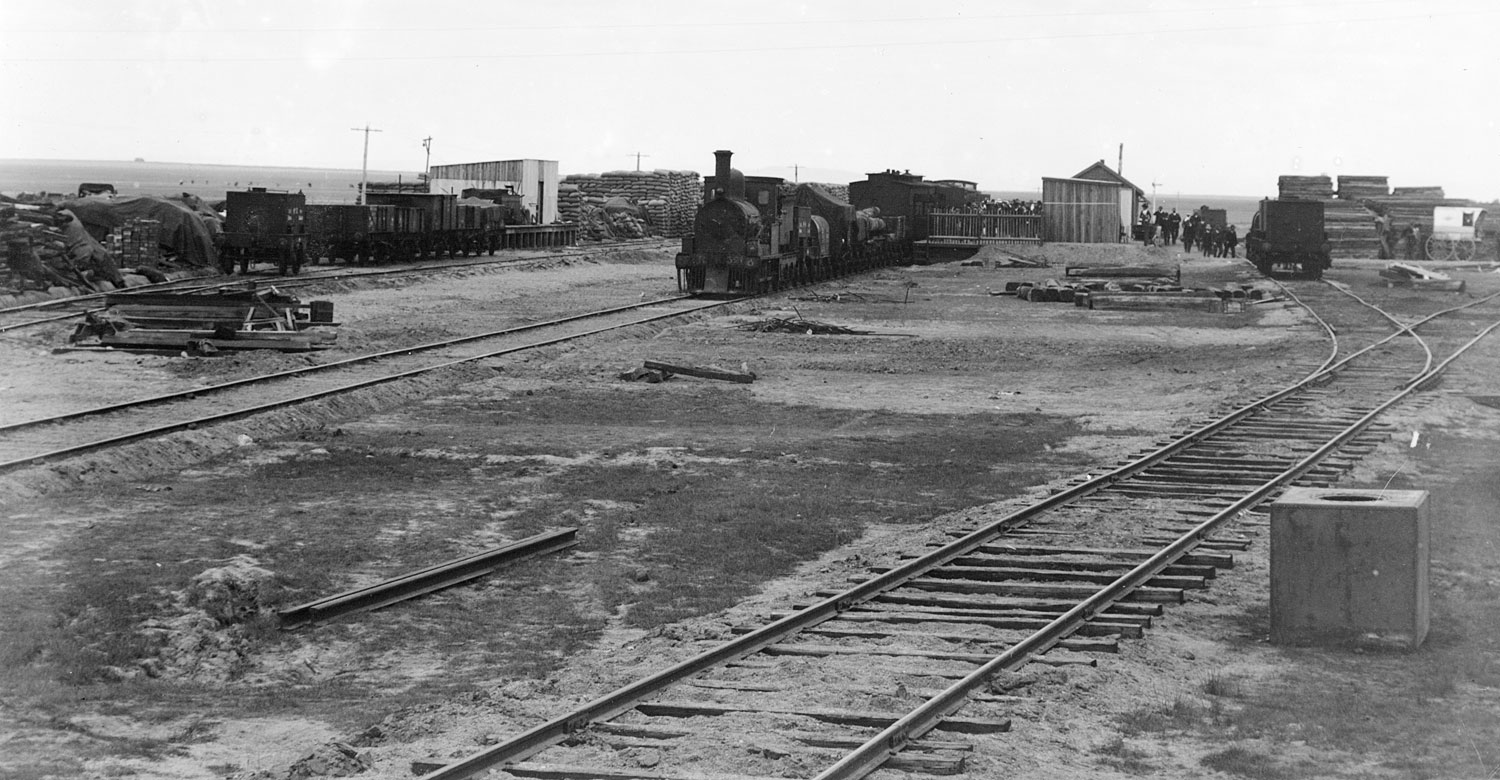
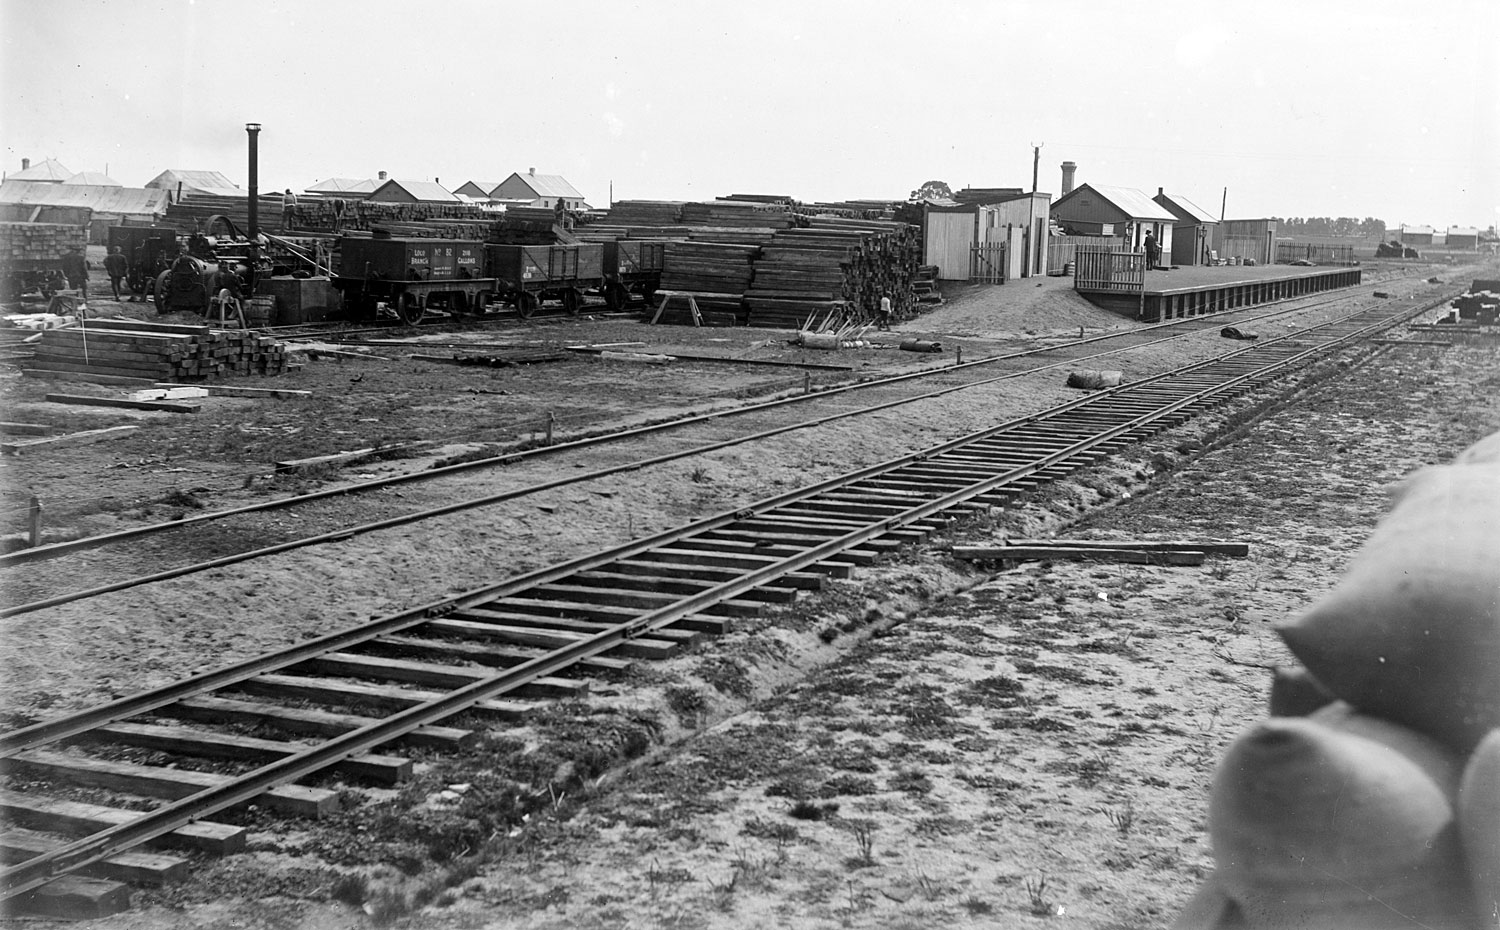
ABOVE: Looking West. 3 photos courtesy State Library of Victoria collection.
ABOVE: Looking towards Geelong from the north side of the track. date unknown (post 1916)
ABOVE: D3 639 arrives at Cressy on what appears to be a commisioners special, circa 1955

ABOVE: An undated photo of an up mixed train at Cressy, note the mountains of bagged wheat.
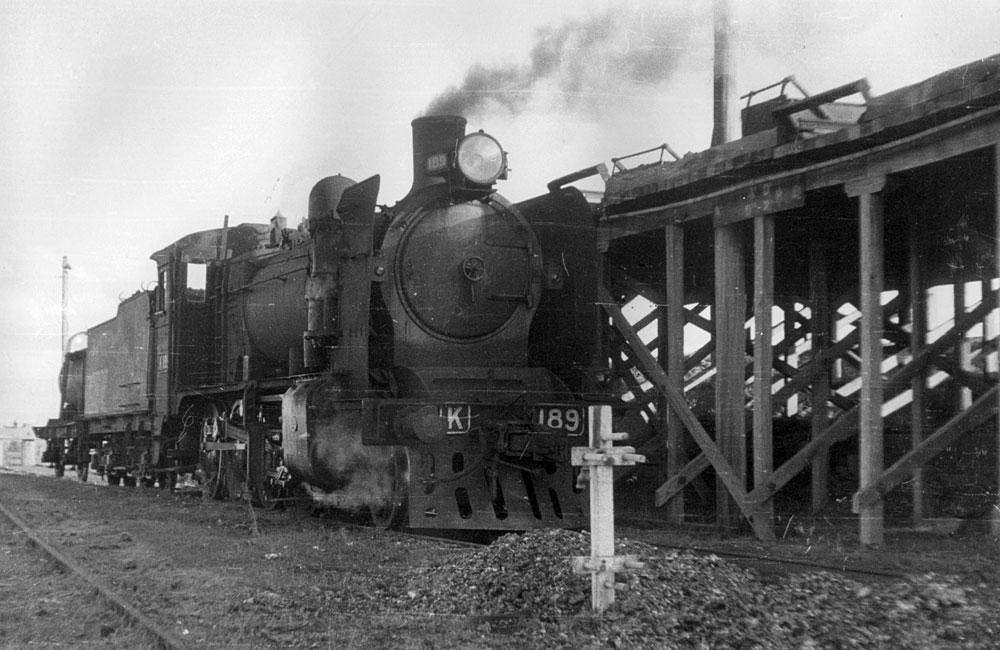
ABOVE: K 189 at the coal stage at Cressy circa 1960. Of interest on the coal stage is a board showing where to stop the cab of the loco to align with the coal skip.
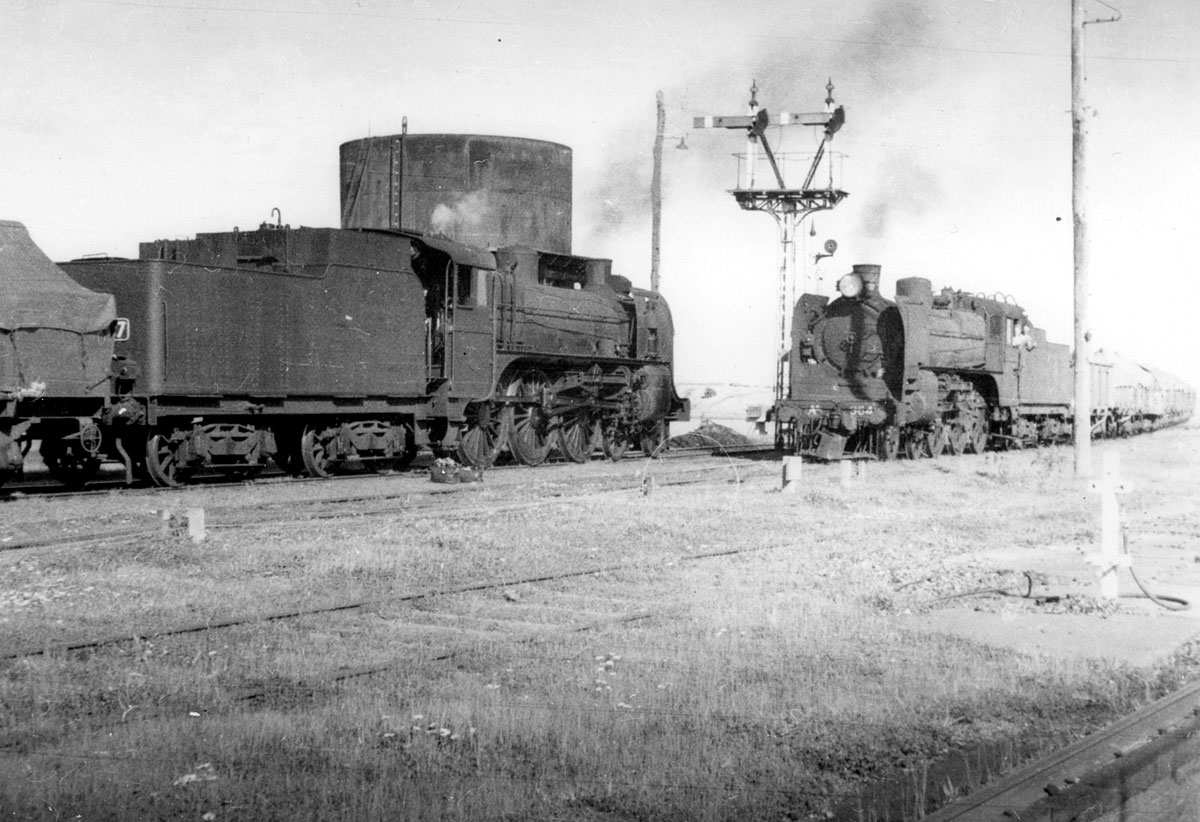
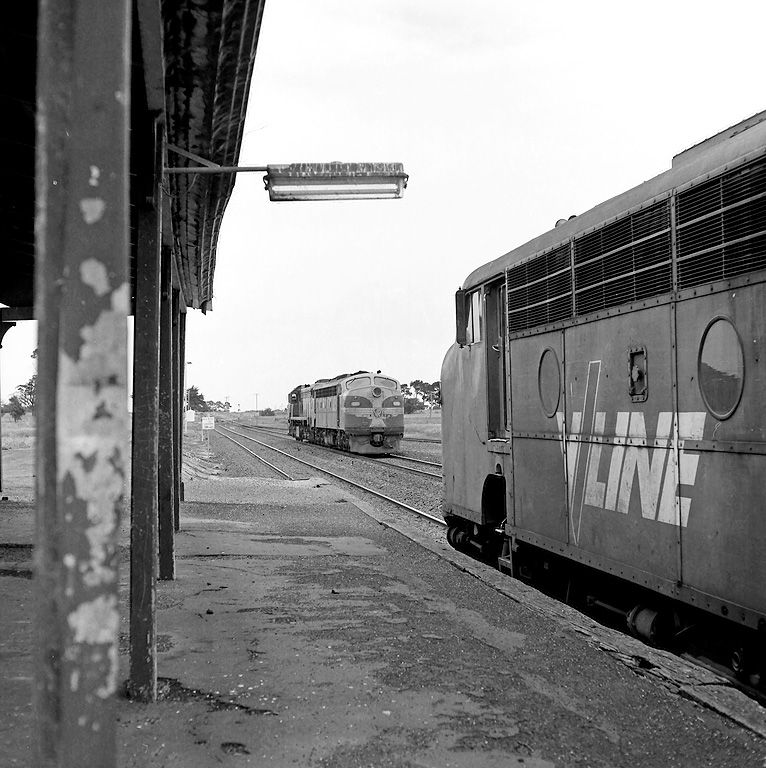
ABOVE: A2 947 stopped for Engine Requirements, A2 964 on 10.45 am Ararat. Cressy Oct. 14 1960
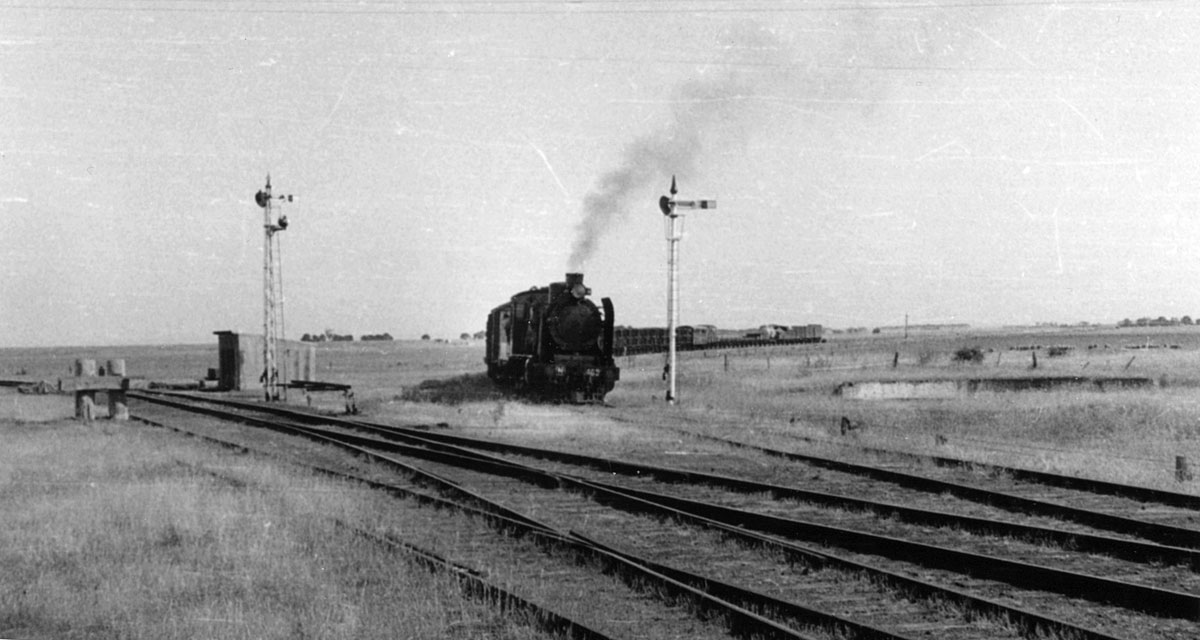
ABOVE: N 469 has backed its train onto the old Beeac line at Cressy, the turntable pit can be seen on the right. circa 1960.
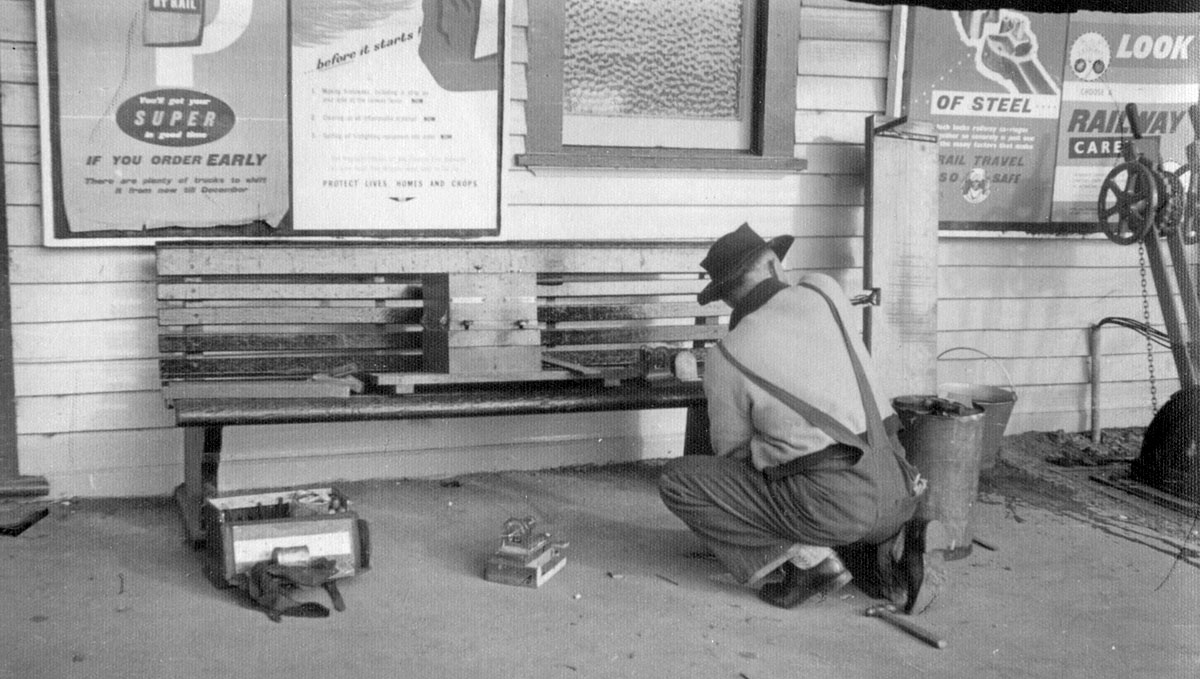
ABOVE: In July 1961 the signalbox at Cressy was abolished which necessitated the transfer of the staff instruments from the signalbox to the station office. Here we see a signal fitter transferring the equipment on the station platform
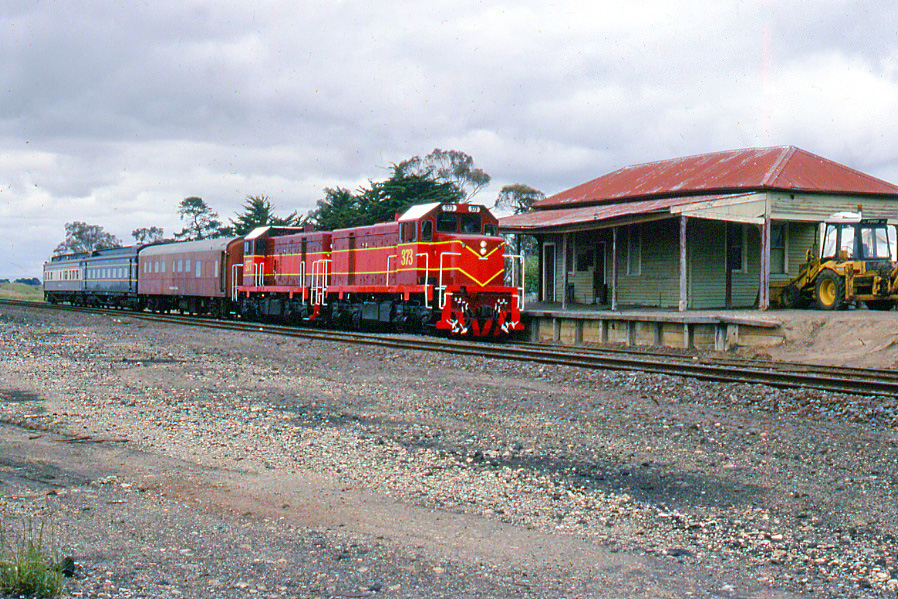
ABOVE: T 373 and T 377 on a tour special to Ararat are at the platform of a very forlorn looking Cressy station not long before it was demolished. 1990s. (photo courtesy Neville Gee)
ABOVE: B 64 on a down goods cross B 75 - X 35 at Cressy, Nov 15 1989. (photo courtesy Chris Wurr)
BERRYBANK
ABOVE: Both the station building and platform at Berrybank look to be in a reasonably good condition as seen on 17 October 1970.
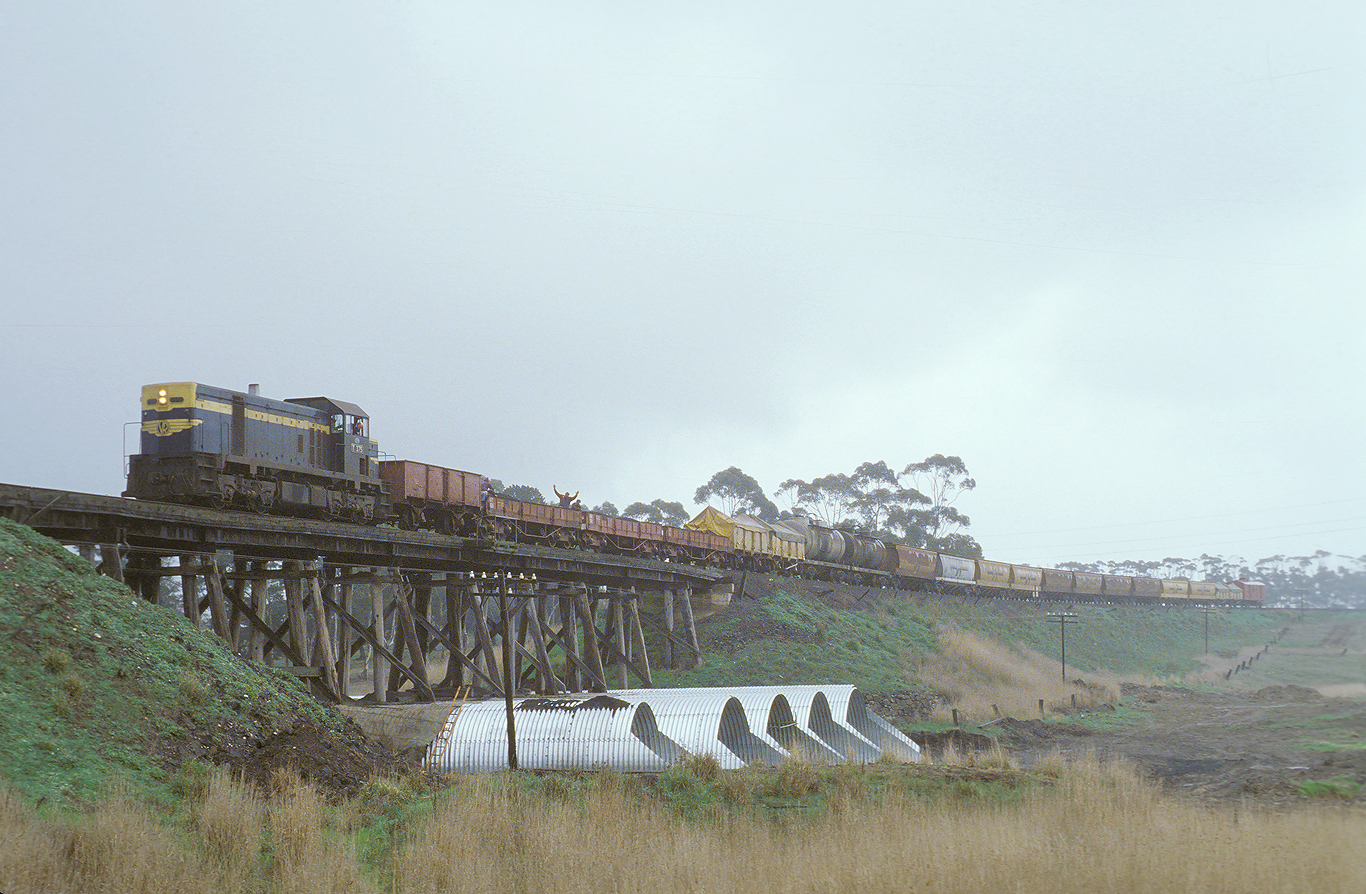
ABOVE: T 375 on an up goods on the soon to be gone Browns Waterholes trestle. May 19 1978. (photo courtesy Geoff Winkler)
Browns Waterholes crosses the Cressy line just east of Lismore. In the 1970s many trestles around the system were replaced by Armco culverts. This involved constructing the culvert in between the bridge piles and filling in with soil.
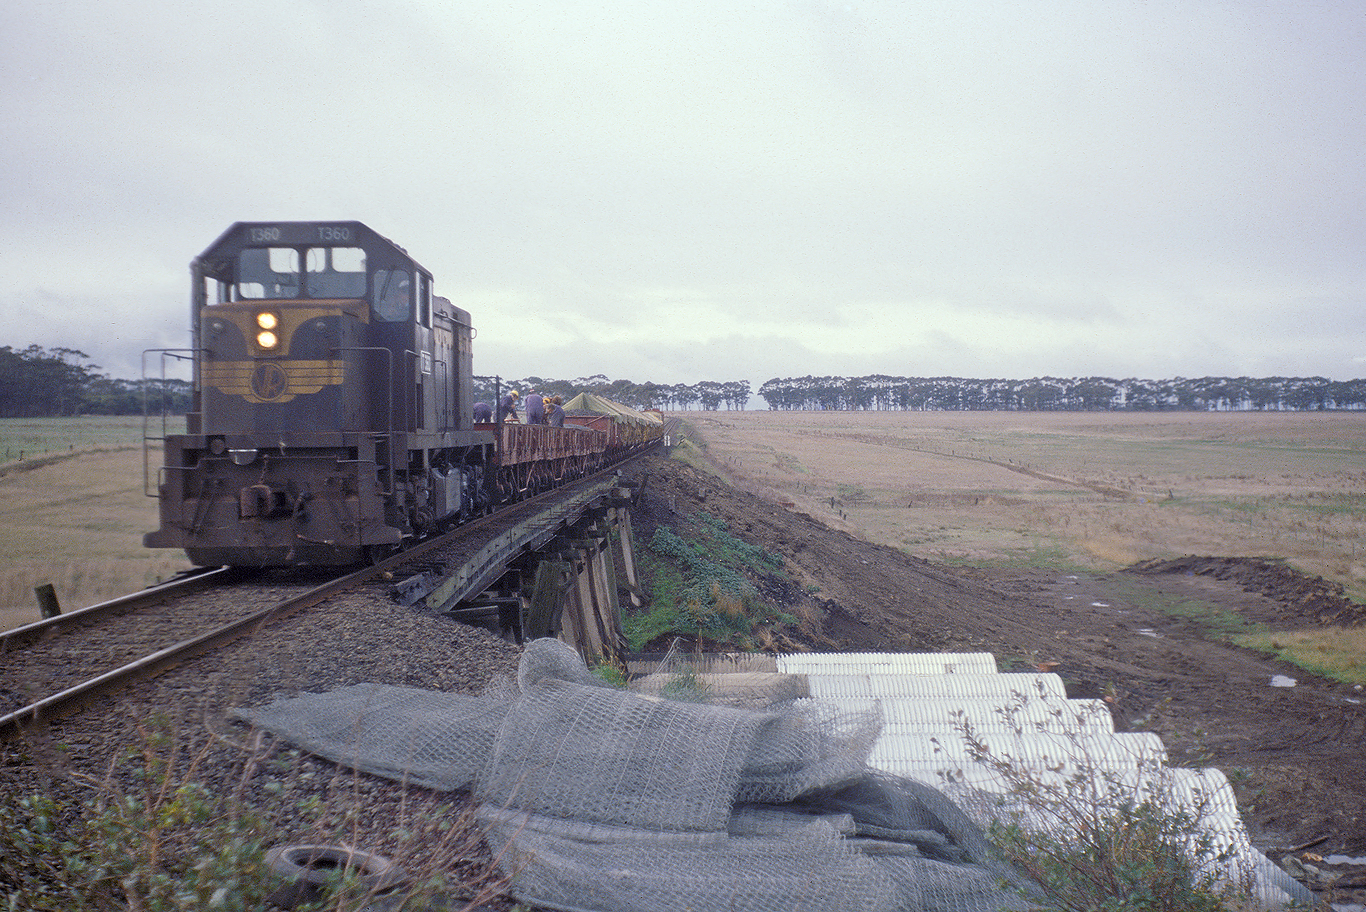
BELOW: T 360 on a down goods at Browns Waterhole, also in 1978. (photo courtesy David Hewitt)
LISMORE
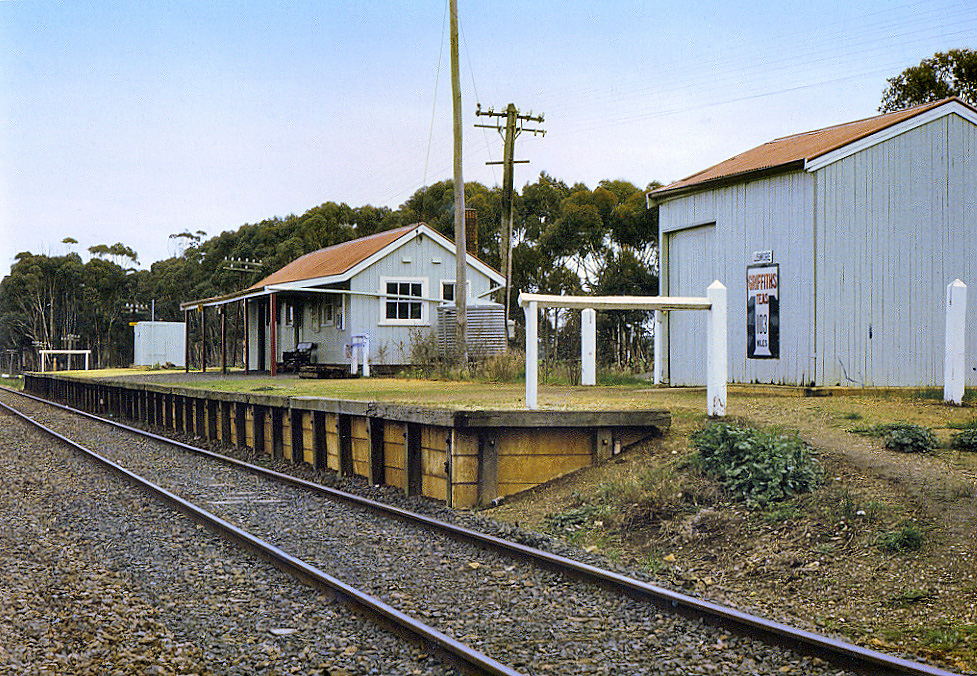
ABOVE: Most facilities remained in good condition at Lismore station on 28 July 1971, including the nice old Griffiths Tea sign listing it at 103 miles from Melbourne. BELOW By the 1990s there are clear signs that the end is near for Lismore station with most facilities and outbuildings removed with the platform having been cut back. (both photos courtesy Neville Gee)
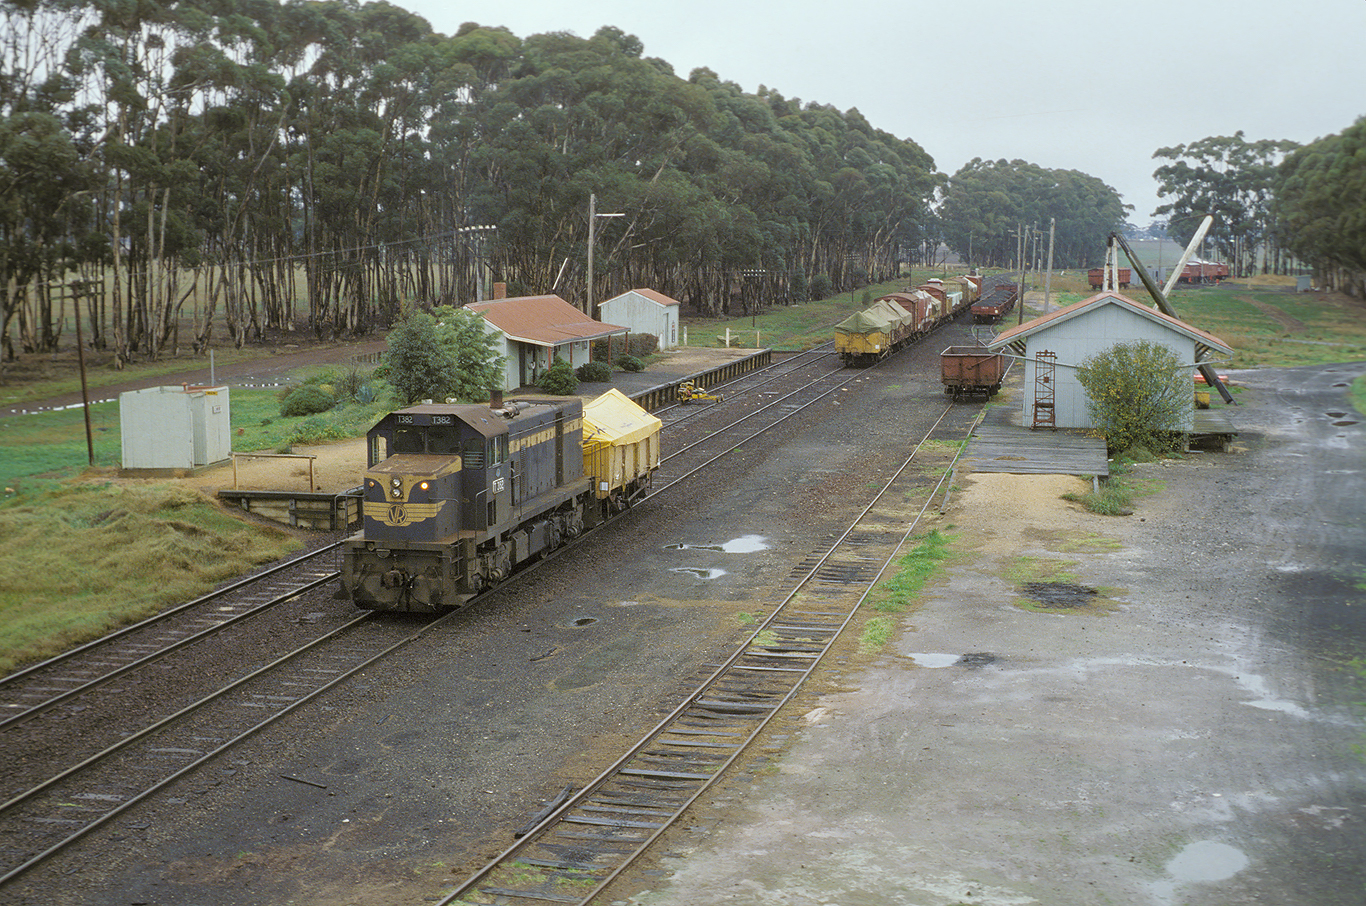
ABOVE: T 382 shunts at Lismore on a down goods. The rake of workmens sleepers and the ballast wagons were for the filling in of the Browns Waterhole trestle bridge. May 19 1978. (photo courtesy Geoff Winkler)
ABOVE: B 84 on an up goods at Lismore, circa Feb 1979. (photo courtesy David Hewitt)
ABOVE: The down Hamiliton Centenarian was important enough for a signalman to be in attendence at Lismore for its passage. Oct 29 1977. (photo courtesy David Hewitt)
ABOVE: T 340 is running through S 310 both on up goods trains at Lismore. S 310's driver looks like he needed a bit of fresh air, circa 1978. (photo courtesy David Hewitt)
BELOW: A down "Weedex" special is locked away in the rarely used No.3 road at Lismore, presumably, stabled for the night, May 7 1985. (photo courtesy Chris Wurr)
DERRINALLUM
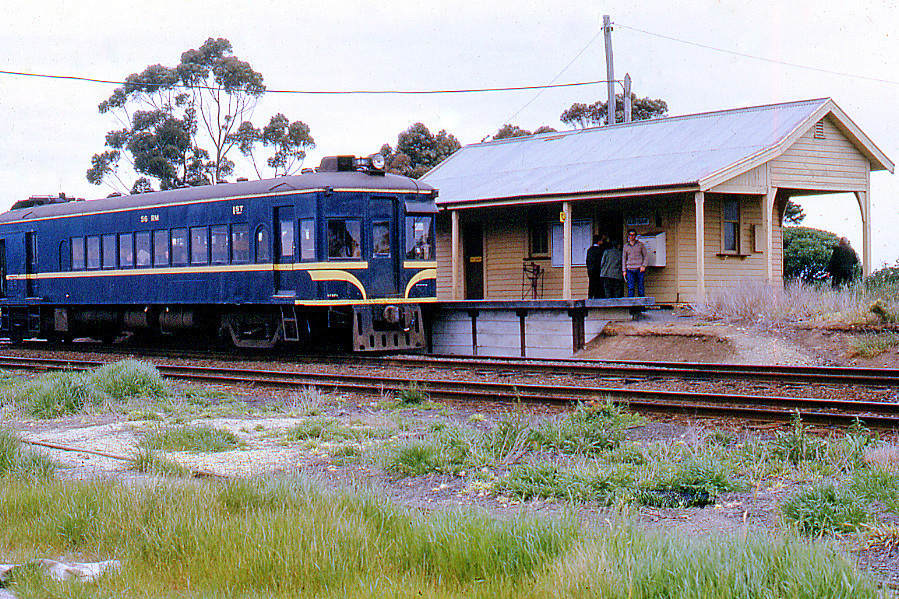
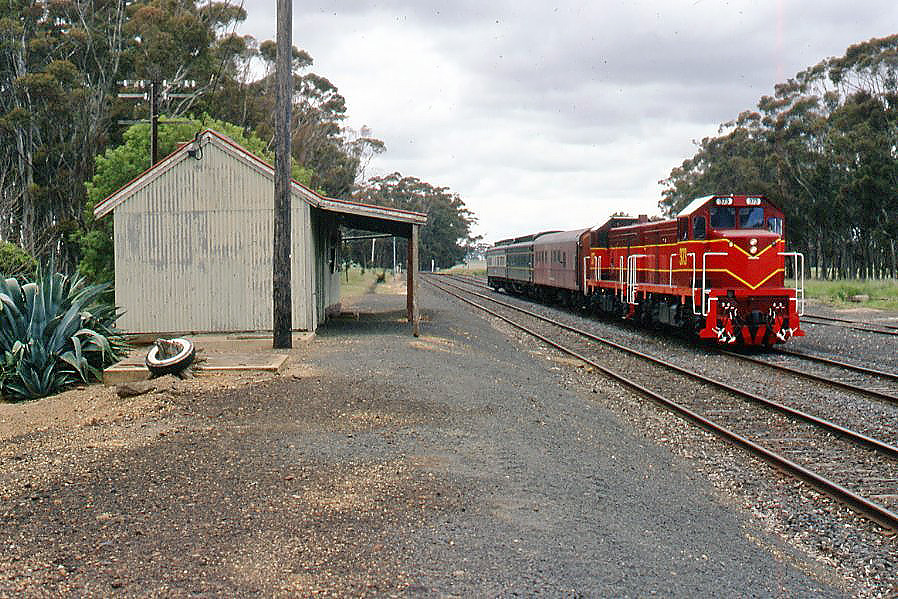
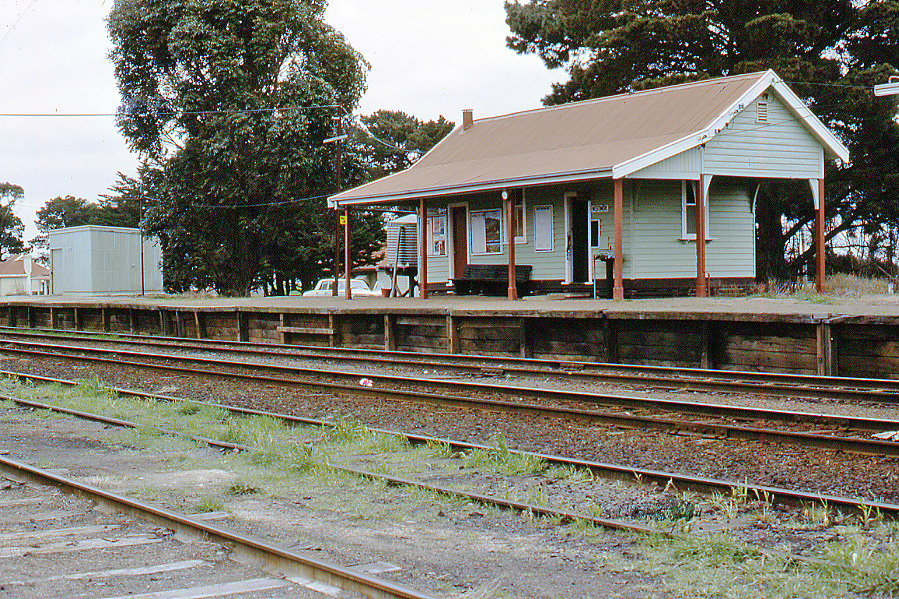
ABOVE: RM 56 stands at the recently refurbished platform at Derrinallum while heading towards Maroona on 17 October 1970. (photo courtesy Neville Gee)
ABOVE: Derrinallum looking towards Geelong. July 12 1980.
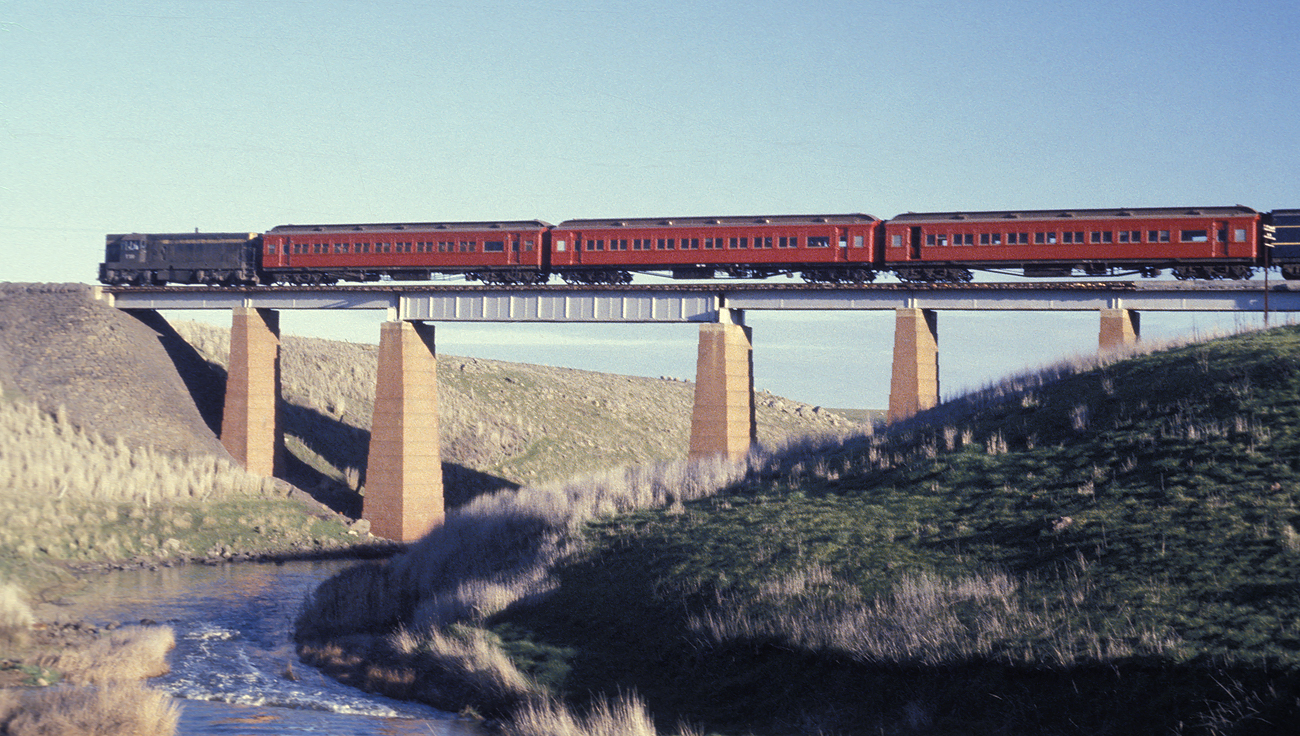
ABOVE: The Cressy line is largely devoid of anything that even approaches "scenic" but this bridge over the Mount Emu Creek, just east of Pura Pura, provides a scenic relief. The train is an up enthusiasts special. July 12 1980.
PURA PURA
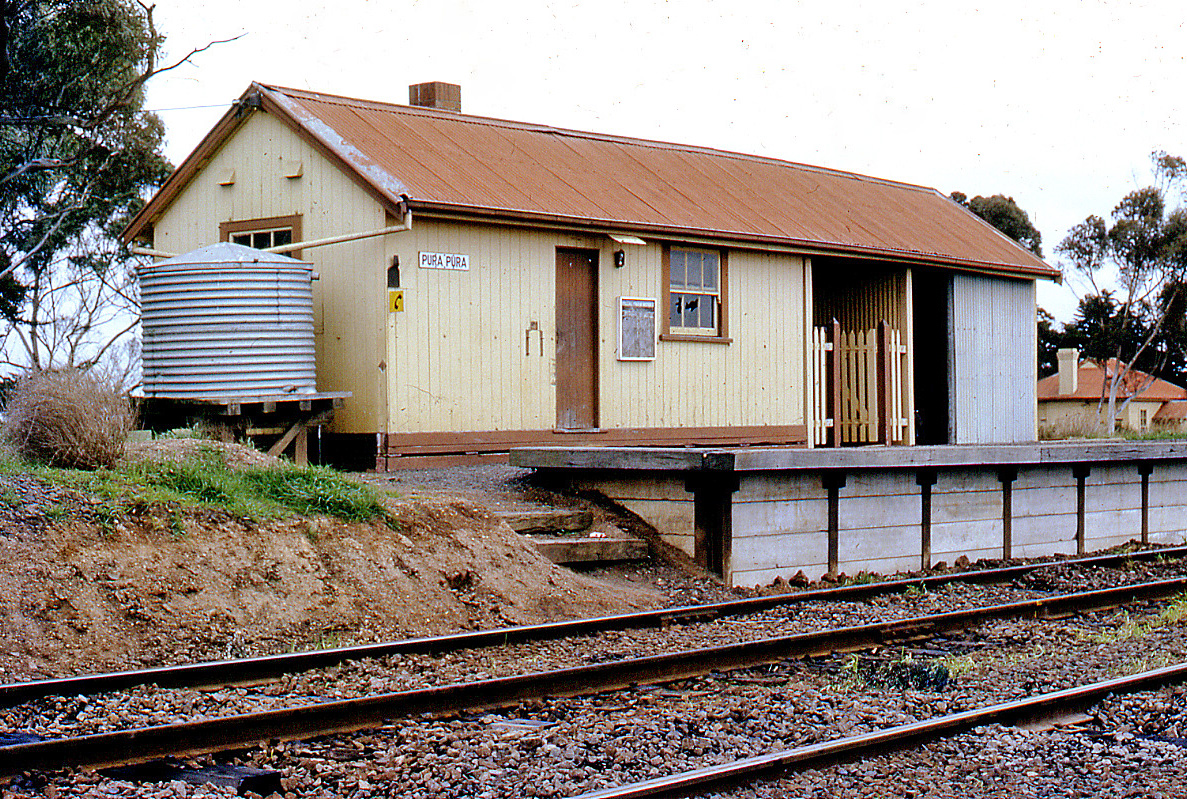
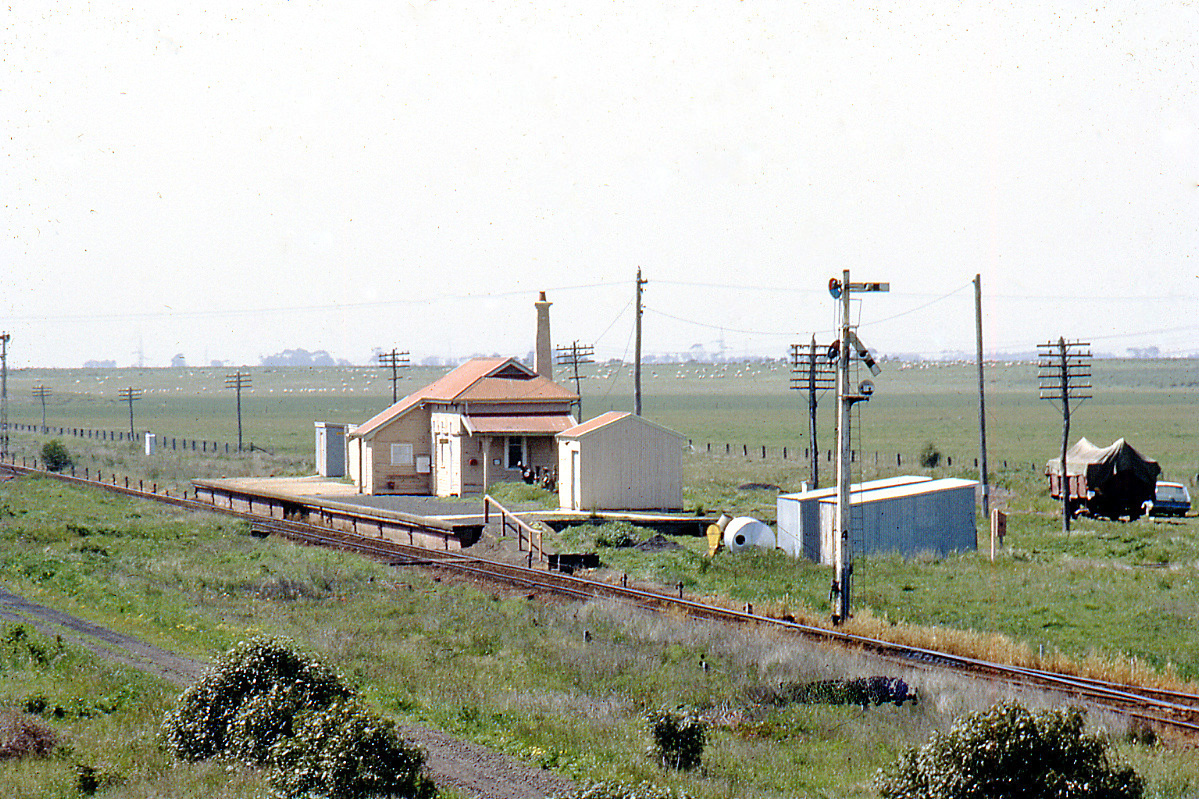
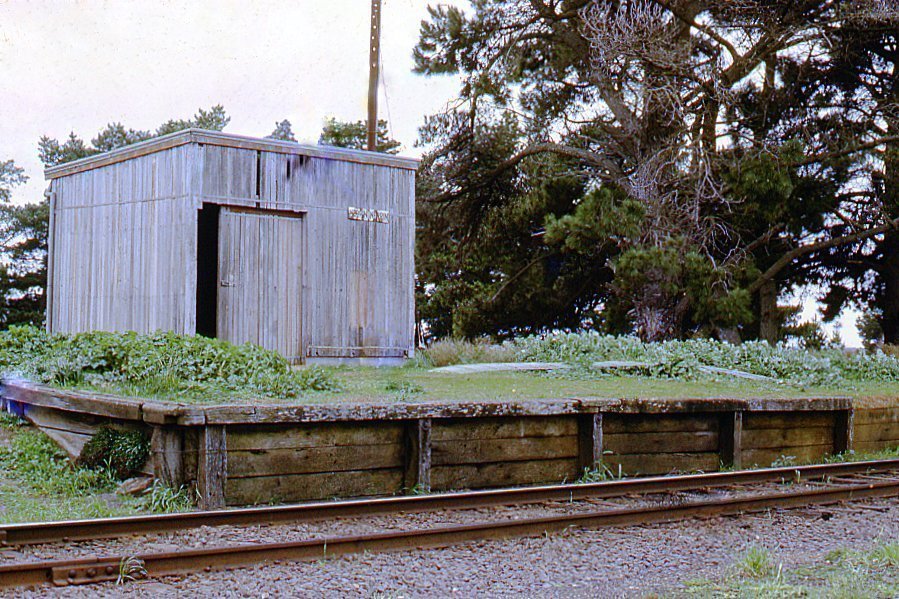
ABOVE: This photo at Pura Pura was taken shortly prior to the building being modified by removal of the waiting room and passenger barrier gate entrance. 28 July 1971. (photo courtesy Neville Gee)
ABOVE: A down goods pauses at Pura Pura, April 14 1979 (photo courtesy Geoff Winkler)

ABOVE: The Medical and Vision test car makes its way west at Pura Pura. This specially equipped carriage carried out medicals on railway employees around the system. June 11 1979 (photo courtesy Geoff Winkler)
ABOVE: An enthusiast special charter train consisting of RM 22 and MT 56 pauses at Pura Pura as it heads west. (photo courtesy Geoff Winkler)
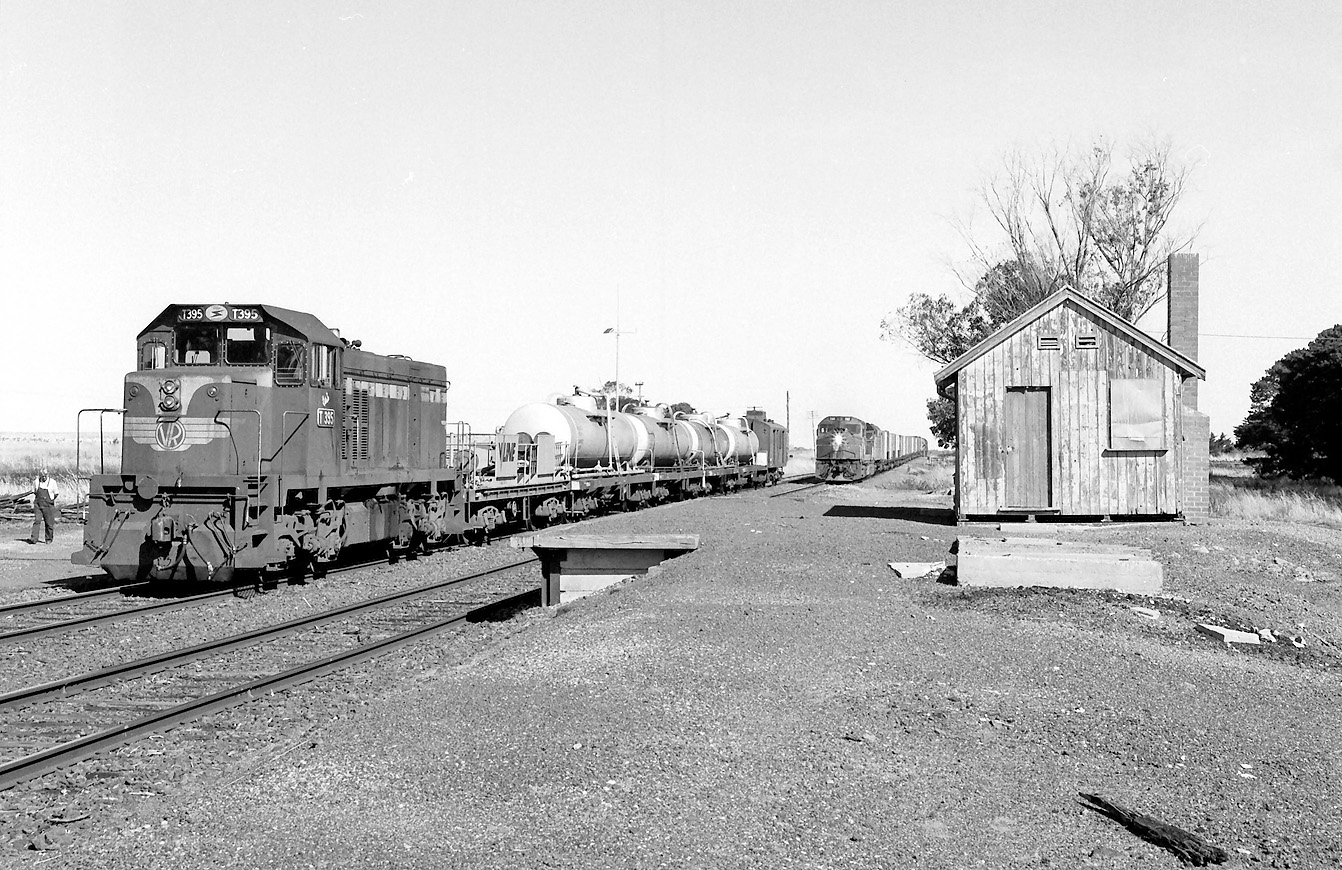
ABOVE: The summer of 1989/1990 saw many trackside fires being started by 9169 Melbourne -- Adelaide goods, as it crossed the Pleurisy Plains line, on an almost daily basis. Two factors brought this about. V/Line had decided as a cost-cutting measure, not to back-burn or plough the railway boundary firebreaks, as had been done for probably 100 years. The other problem was that 9169 was an extra length train which was rostered daily, to be worked by South Dynon train crews between Melbourne and Ararat. These crews were barely qualified in this line and certainly not familiar to any extent with the 112 miles of undulating track between Gheringhap and Ararat. Mis-handling of the brake was causing sticking brakes, which in turn were sparking fires in the grass beside the line. These fires were then getting away into adjoining paddocks. The situation became such a regular event that local CFA brigades along the line, would follow 9169 along the railway corridor in their tankers to extinguish spot fires. Eventually V/Line were forced to conduct burn-offs along the whole line, and to assist the local CFA brigades the Fire Attack train was pulled out of mothballs and put into service for days at a time, until the situation had been rectified. On this particular day, Friday 19th January 1990, T 395 was the loco operating the train, and is seen at Pura Pura waiting for C 503 and SAR 702 on 9169 to clear, before propelling the attack train into the Derrinallum section to resume controlled burning. (photo and caption, Chris Wurr)
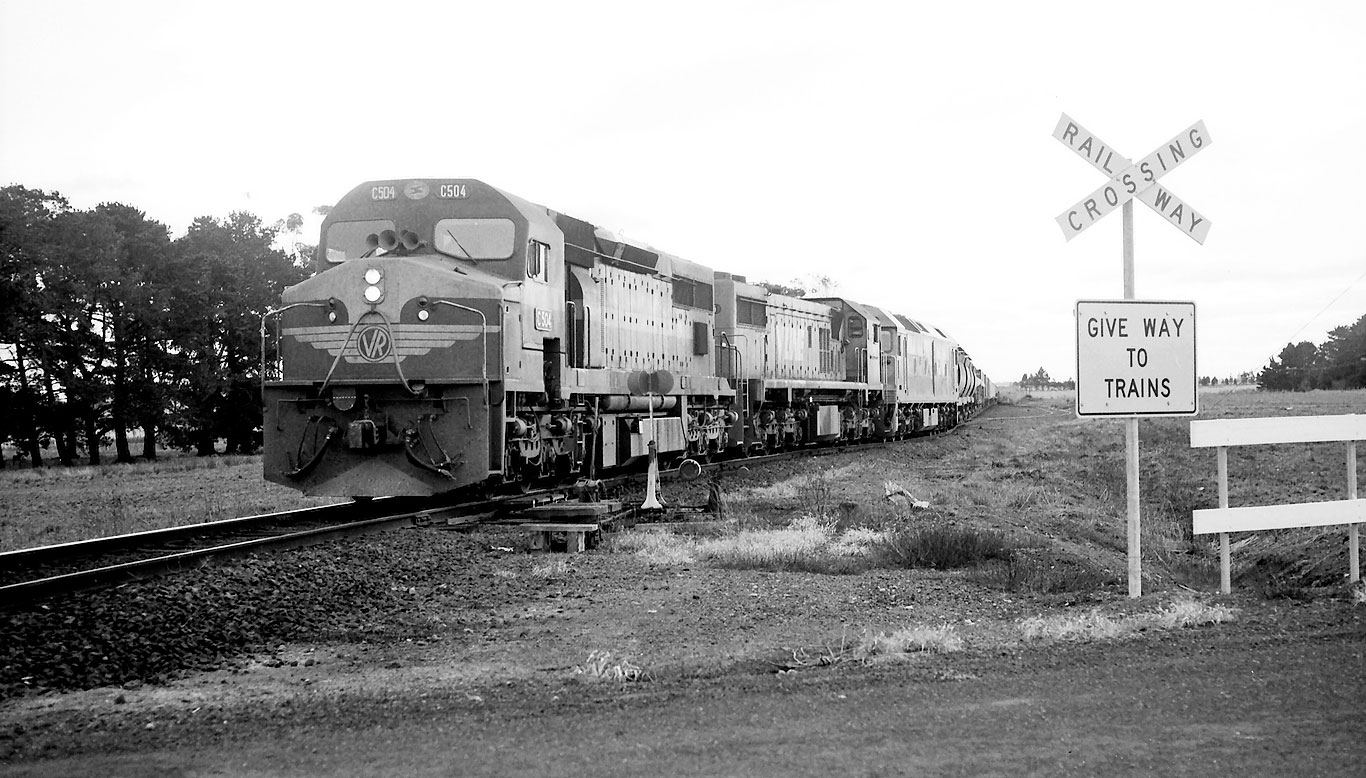
ABOVE: C 504 - X 45 - G 521 exit the loop and enter the mainline through the trailable points at Pura Pura on 9144 up jet, April 23 1986. (photo courtesy Chris Wurr)
NERRIN NERRIN
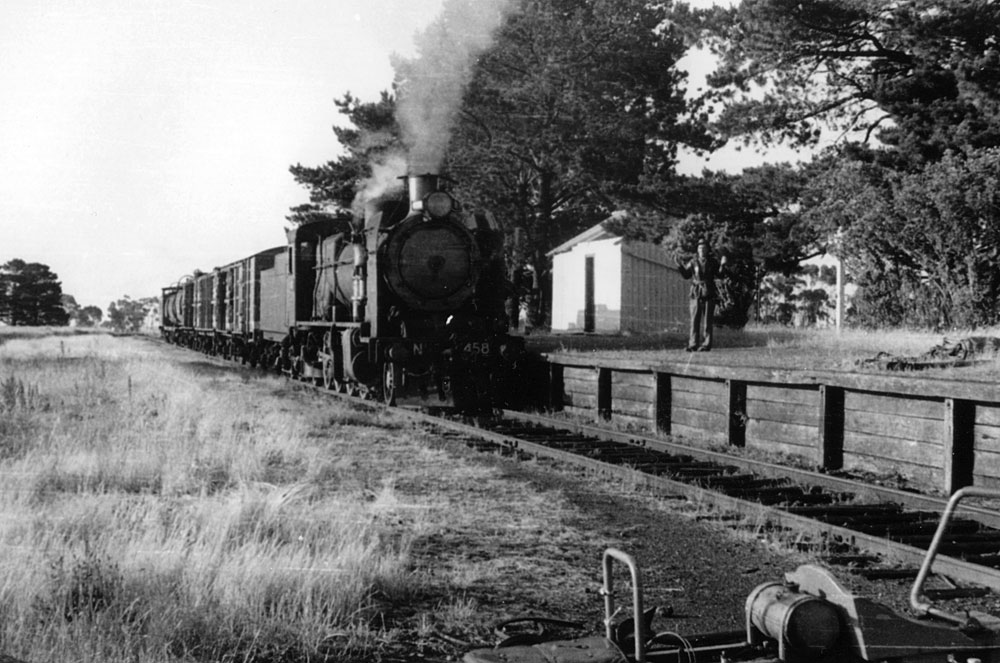
ABOVE: N 458 on the 1.30 pm up Ararat goods at Nerrin Nerrin, circa 1960. BELOW: By July 28 1971, Nerrin Nerrin's station buildings had been reduced to the absolute minimum. It had never been a staff station and was de-manned in 1963.
WESTMERE
ABOVE: Westmere, looking towards Geelong, July 28 1971. (photo courtesy Neville Gee)
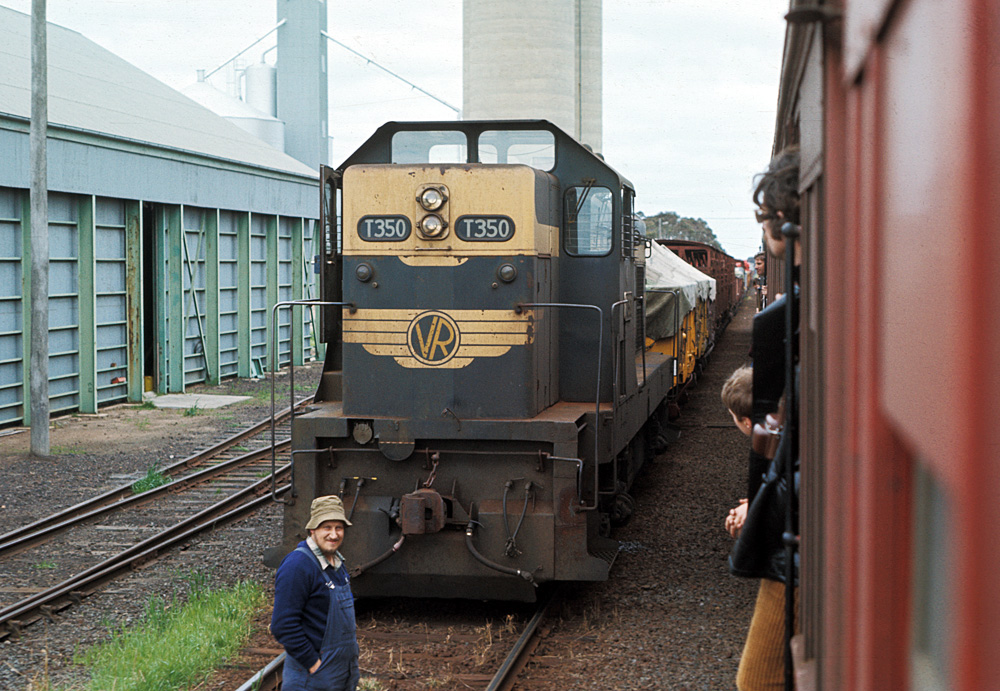
ABOVE: T 350 on a down Geelong to Ararat goods is overtaken by a steam special at Westmere. Oct. 1975
ABOVE: The Cressy line employed a unique system of safeworking and signalling. (Automatic Electric Staff and Trailable point) Normally trains arrived in the left hand track at crossing loops but this down train had to shunt at Westmere so it turned itself into the right hand track.Jan 6 1978. (photo courtesy Chris Wurr)
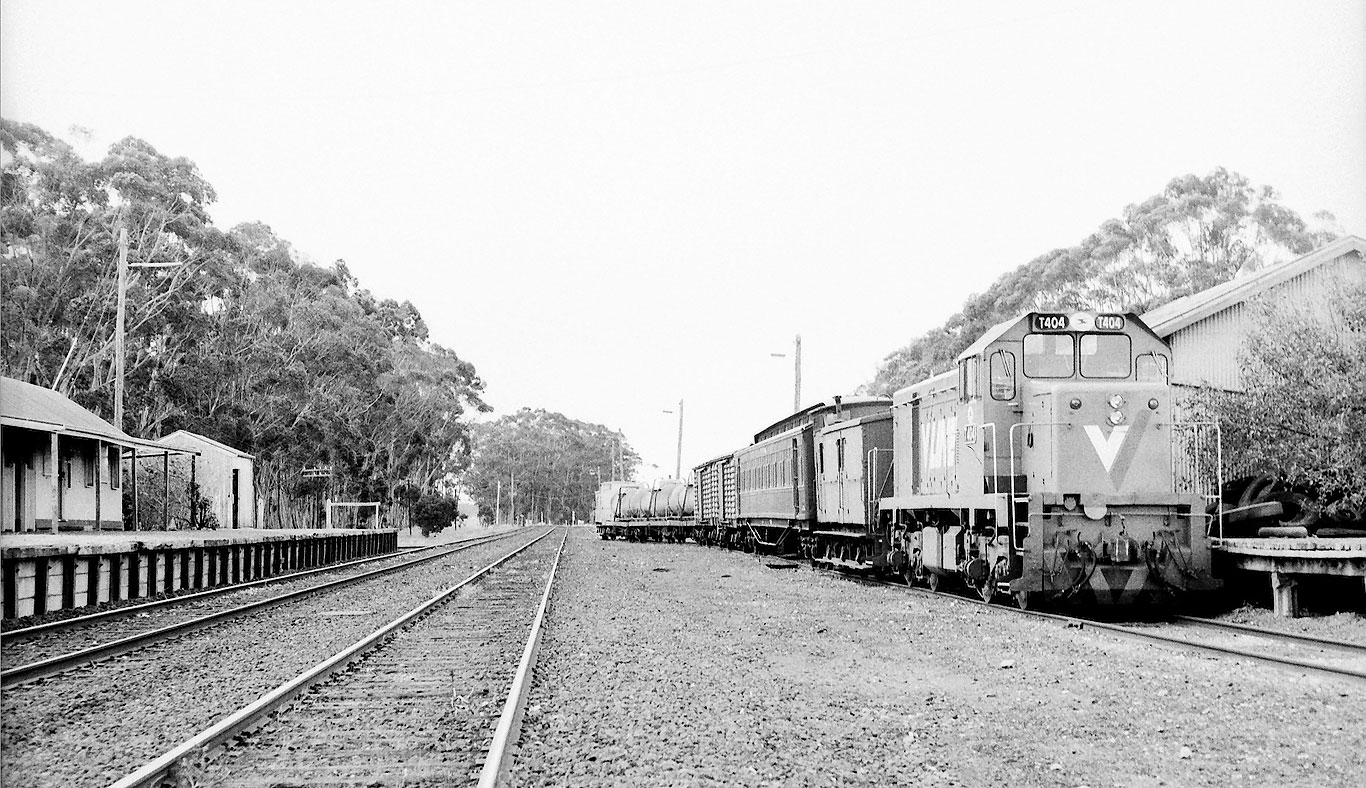
ABOVE: T 404 on a down "Weedex" special pauses at Westmere to exchange staffs, May 7 1985. The "Weedex" travelled around the entire VR system spraying poison to control weeds. (photo courtesy Chris Wurr)
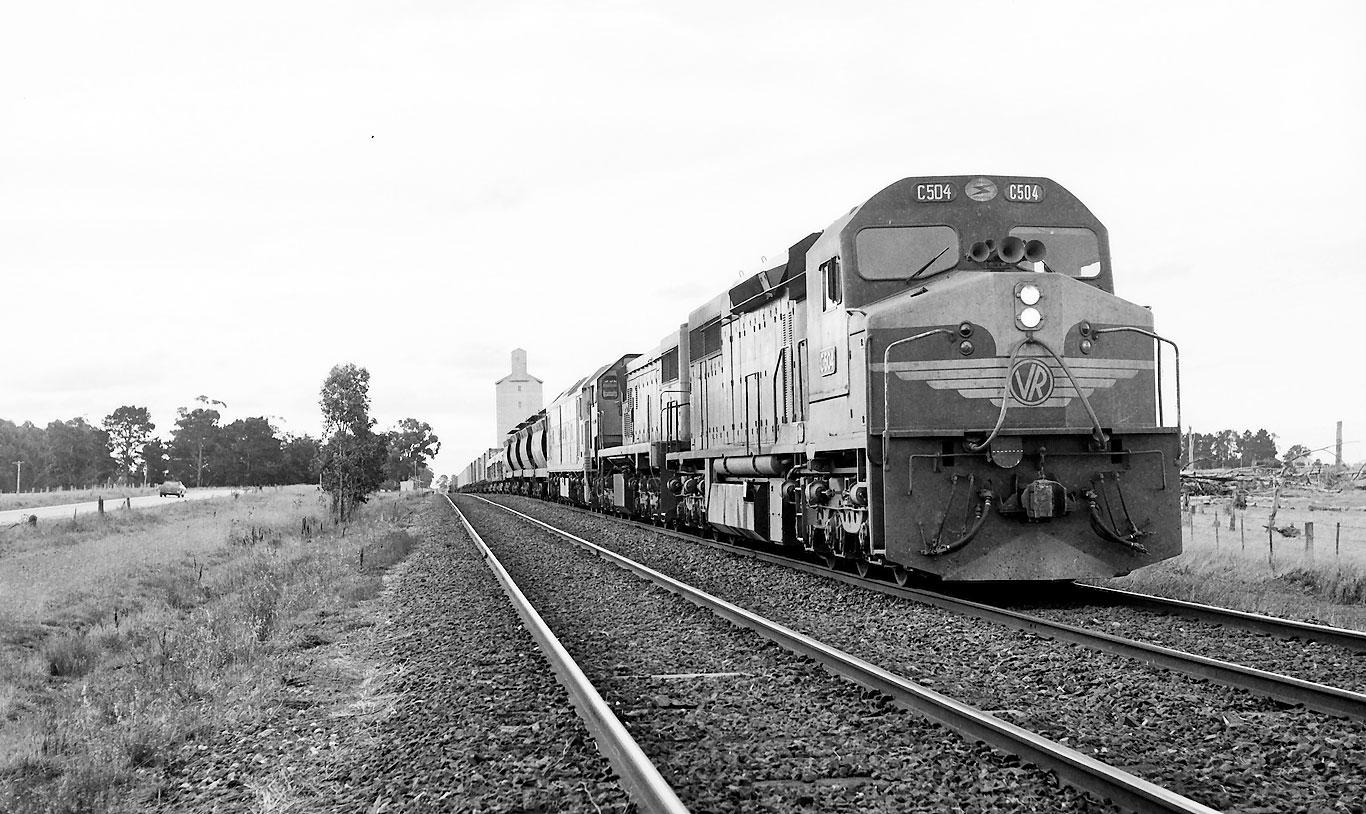
ABOVE: C 504 - X 45 - G 521 sit in the loop at Westmere on 9144 up jet, April 23 1986. (photo courtesy Chris Wurr)

ABOVE: RM 56 departing Westmere is about to "break the points". This photo shows the normal swictch-stand indication for an approaching train when the left hand track was the non-diverging track. (photo courtesey Neville Gee)
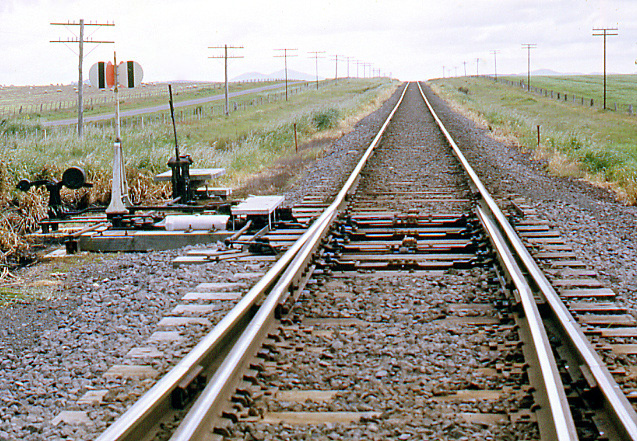
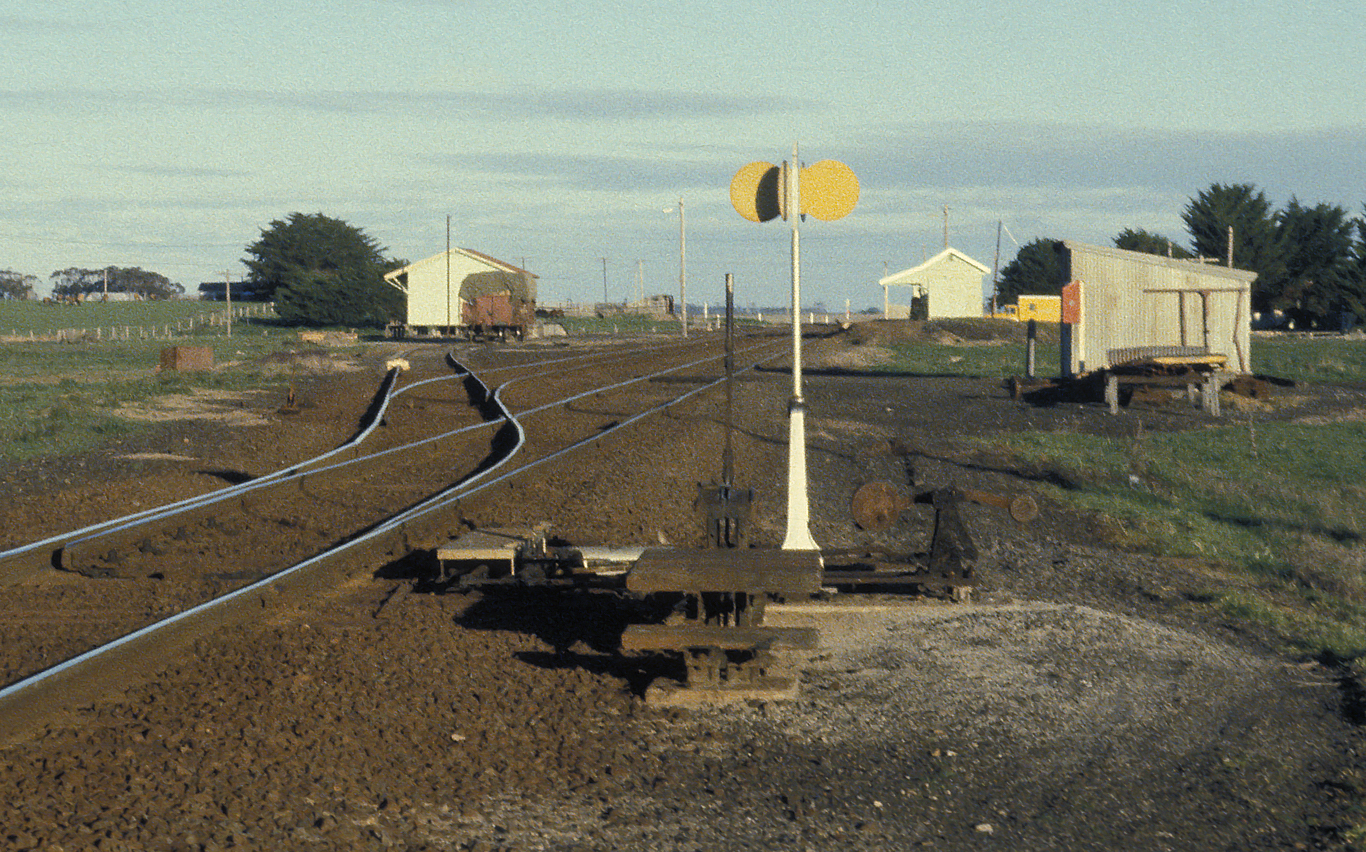
ABOVE: Westmere, looking in the down direction, in normal operation all departing trains pushed the points over themselves, the 2 white discs with vertical black bars informed the crew that it was ok to trail through the points even though the points were laying against the move. BELOW: The DERM has now pushed through the point blades and the switch-stand now displays two red discs, this was normal for trailing moves but if an approaching train came across two red discs it was required to stop and inspect the points, July 28 1971. (photos courtesy Neville Gee)
MININERA
ABOVE: Mininera, circa 1920's more research required. (PROV collection)
ABOVE: An up mixed departs Mininera in 1946. The mixed train service finished in 1952. (Lance Cross collection)
ABOVE: Mininera looking towards Geelong, a down goods has paused here for van goods. July 28 1971. (photo courtesy Neville Gee)
TATYOON
1962 Tatyoon signal arrangements (pre trailable points)
1988 Tatyoon signal arrangements
ABOVE: pauses at Tatyoon on a down enthusiasts special, Oct 17 1971. In later years the covered entrance and verandah were removed and all that remained was the basic portable. (photo courtesy Neville Gee)
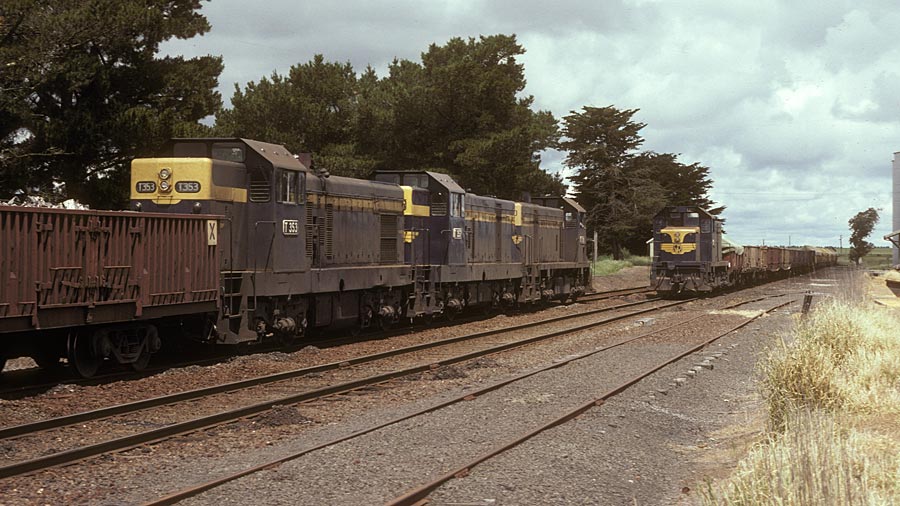
ABOVE: Tatyoon is the last station on the windswept Gheringhap to Maroona line. T 389 on down goods sits in #2 road to cross T 378 - T 357 - T 353 on 9144, a "jet" that usually ran via Ballarat. There was no station staff on this line so every train had to stop at every station to exchange electric staffs. Nov 13 1981.
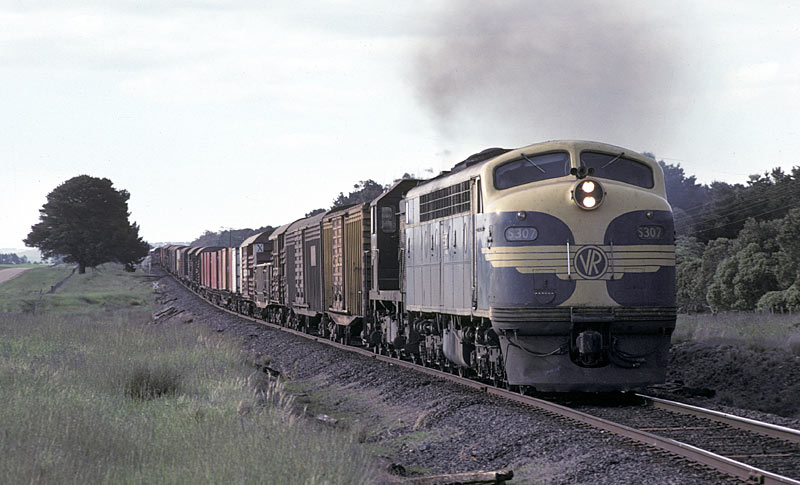
ABOVE: Long before the Cressy line was converted to standard gauge the track did see occasional interstate freights. S 307 leads a T on #9144 Adelaide to Melbourne express goods near Tatyoon. The embankment curving away from the track is what's left of the Tatyoon ballast pits, used in construction of the line. Oct. 23 1981