(Beechworth Junction)
| Wangaratta | 149 Miles 02 Chains 77 Links / 243.358 km | Boorhaman |
| Boralma |
| Springhurst |
| Londrigan |
In the year after the opening of the main North-East line, the contract for the construction of a branch line to Everton was let. This was signed on November 6, 1874, and, presumably early in the following year, 'North Wangaratta' came into being. A little over 3 and a half miles beyond the Wangaratta station, at a location previously known as 'Burkes Waterholes', (there was a natural spring located on the up side of the Main line, at the down end of the 80 chain curve), a junction was provided. This was to facilitate the operation of contractors trains, during the construction of the new branch line.
The location was named 'Beechworth Junction' when the line was officially opened on July 7, 1875. It seems however, that no facilities were provided there at this early stage. The North Ovens Shire had asked for a siding to be provided at No 84 Gate, about a mile south of this new junction, however the VR never replied to this request. On December 24, 1884, however, instructions were issued to erect a platform and siding at Beechworth Junction, where a 9 lever Ground Frame had been installed on August 1, 1883.
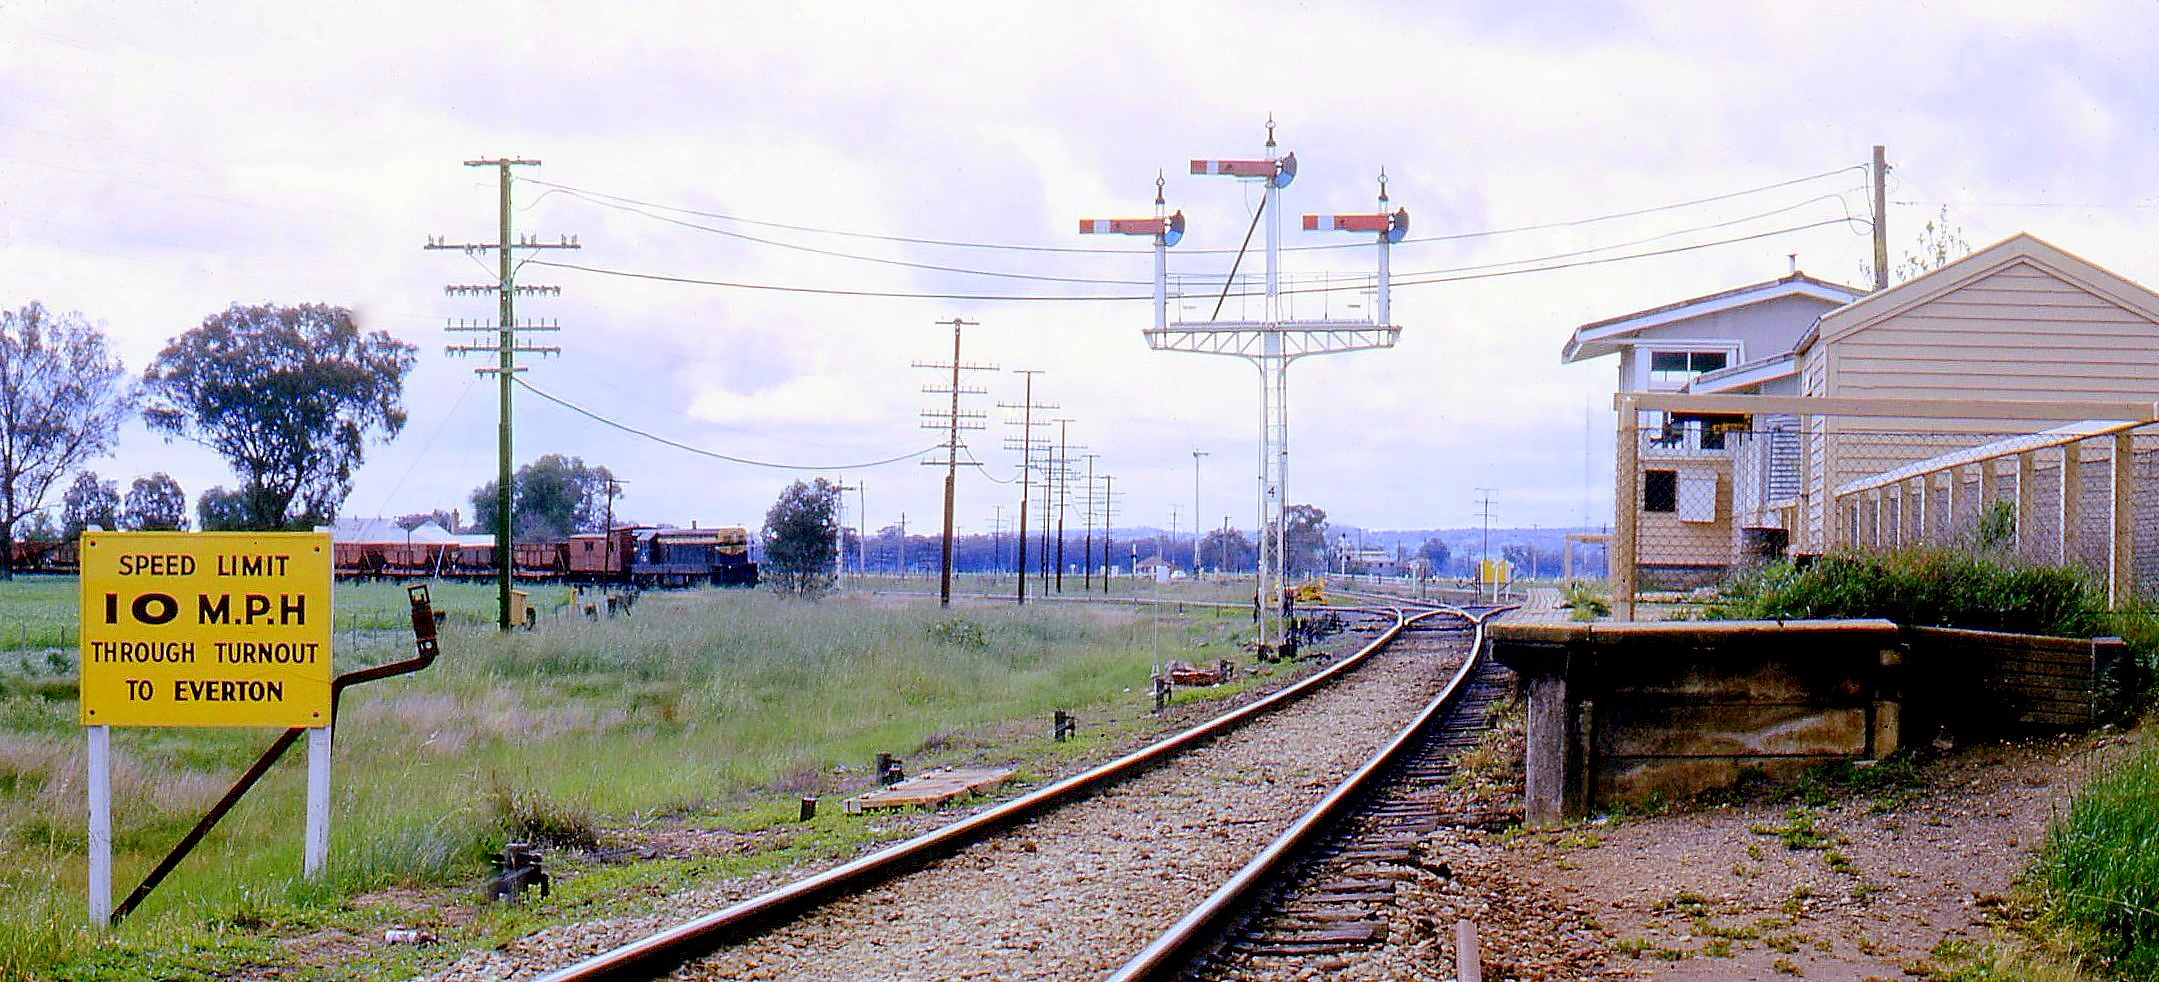
On January 21, 1885, instructions were issued to complete the siding and on February 13, 1885 a low grain platform was completed and ready for use. Over the years, Freight facilities expanded to include a bulk grain storage, livestock loading ramps, and a fertiliser store. The interchange of all goods to and from the branch lines however, was carried out at Wangaratta.
On February 13, 1888, the 9 lever Ground Frame was abolished, then on December 17, 1890, further interlocking alterations were made. A new signal box, utilising a 15 lever frame and new signals were installed, being ready for use 6 days later.
On April 24, 1890, instructions were issued to erect a passenger platform. This work was completed on August 14, 1890. A request was made by the Traffic branch on June 24, 1890, for an Up Starting Signal to be provided for when the platform was opened for traffic. Correspondence of December 12, 1890, stated that Interlocking alterations were to be done on December 17, and that the new signals would be ready for use on the 23rd.
On July 3, 1890, the contractor for the erection of the station buildings, F.Wrigley, said that he was unable to proceed with his contract and fresh tenders were then called. The Booking Office was eventually completed on November 6, that same year. Correspondence of November 24, however, reveals that Signals, Platform lamps and a Shelter shed, as well as a fireplace in the Signal Box, were required before the new station at Beechworth Junction could be opened for business. This residual work was completed by December 30, 1890, and the Station opened for passenger traffic on January 2, 1891.
On July 28, 1898, correspondence from the Traffic branch stated that the Up Starting signal at Beechworth Junction was now not required. Subsequently, instructions were issued on August 2, for the signal to be removed.
Two separate Instructions were issued during 1899, for the relocation of four former gatehouses to Beechworth Junction, to be re-used as DR's. The first was dated May 5, and referred to two gatehouses at the up end of Chiltern. One being from Racecourse Road, for number 92 gates, which had been removed on June 25, 1896, and one from Main Road, for number 93 gates, which had been removed on October 19, 1896. The second instruction was issued on August 7, 1899, It was for the removal of Gatehouse 17 near Murchison East, and that from Three Chain Road, just to the north of Beechworth Junction. The latter was for gates number 85, which had been removed earlier, on September 9, 1895.
Instructions were issued on May 5, 1899, for the removal of the Gatehouses at 92 and 93 Gates, situated further along the North-East Main line, and on August 7, 1899, for the removal of Gatehouse 17 near Murchison East, and Number 85 at Three Chain Road, just to the north of Beechworth Junction. All four of these were to be re-erected as DR's at Beechworth Junction.
A re-arrangement of the interlocking was undertaken during 1899, with a Mr. Ballard recommending on September 18, for the this work to be completed, and for its submission to the Commissioners for 'Authority'. Specific details of this are currently unavailable. Further alterations were made two years later, when the connections to the siding points were incorporated into the interlocking. This was brought into use on May 22, 1901.
On March 2, 1911, an additional up home signal was provided off the Everton line. This utilised the last remaining spare lever in the 15 lever signal box frame. The siding was extended an extra 100 yards towards Everton and, for the operation of the down end points, from July 11, 1912, an Auxiliary ground frame was provided. This was crosslocked from the Signal Box.
The Signal Box was abolished and a new signal bay was provided in the booking office on September 29, 1914. This was fitted with a new 20 lever frame. It appears however, that no alterations to the interlocking arrangements were made at this time.
An up starting signal was again provided on January 31, 1919.
In response to request from the Wangaratta Shire Council in 1921, the station was renamed on March 1 of the following year as 'Bowser' after a local politician and Premier of Victoria, John Bowser. A Station Master was appointed on March 20, 1923, with the position being withdrawn on January 13, 1933.
On July 5, 1927, an Annett Lock was provided to allow access for construction trains to and from the Peechelba East branch. Then, as of October 26 that same year, this new line was opened for traffic and control of the points and signals had been fully incorporated into the interlocking. The existing 2 doll bracket post was then replaced with a 3 doll, providing a separate down home signal for each of the three lines.
A drainage plan of 1931 shows the existance of a 'Floating Road', branching off the Main Line at the down end and curving to the West adjacent to the Peechelba Line. It is likely that this had been provided for use by the Construction Branch, associated with the building of the Peechelba line.
In preparation for the construction of the Standard gauge line, a new Signal Box was provided on December 12, 1959. This included a larger 25 lever frame to cater for the extra crossover required. Around that same time, the Everton line was slewed and the siding arrangement was altered to remove the up end connection to the running line. A new run-around loop siding was added, which connected via a dead end spur at the up end.
On August 23, 1961, two temporary Home Signals (light), post 20 on the down & post U20 on the up, were provided on the new standard gauge line, either side of Bowser. These were to protect the crossing of the line to Everton and were controlled from the Bowser Signal Box. Lever 20 in the signal frame was worked in conjunction with these light signals, to provide interlocking with the rest of the junctions points and signals. On January 21, 1963, the C.T.C. system was fully comissioned on the standard gauge line. With this, local control of the signals for that line was removed.
As of February 23, 1965, the Distant signals on both posts 9 & 11, being those off the Peechelba East and Everton lines, were permanently secured at the caution position. On October 1, 1968, flashing lights were provided to the Hume Highway level crossing. Along with this, the auxiliary ground frame was also abolished.
The station was closed to passenger traffic on October 1, 1972, however, the platform was not removed until July 6, 1976.
On January 13, 1987, the line to Peechelba East was closed, and in February, the standard gauge crossing was dismantled. This was three months before the line to Myrtleford, the last remnant of the Beechworth and Bright lines, was officially closed on April 21. Also on that same date, Bowser station was closed to all traffic. Five months later, on September 10, it was disestablished as a staff station, with the Signal Box, Points and Signals all being abolished, along with the former grain storage facility.
(Includes references from the Weekly Notice, the Interlocking Register and Signalling diagrams, as well as the books; 'The Mayday Hills Railway' and 'Six and a half Inches from Destiny').
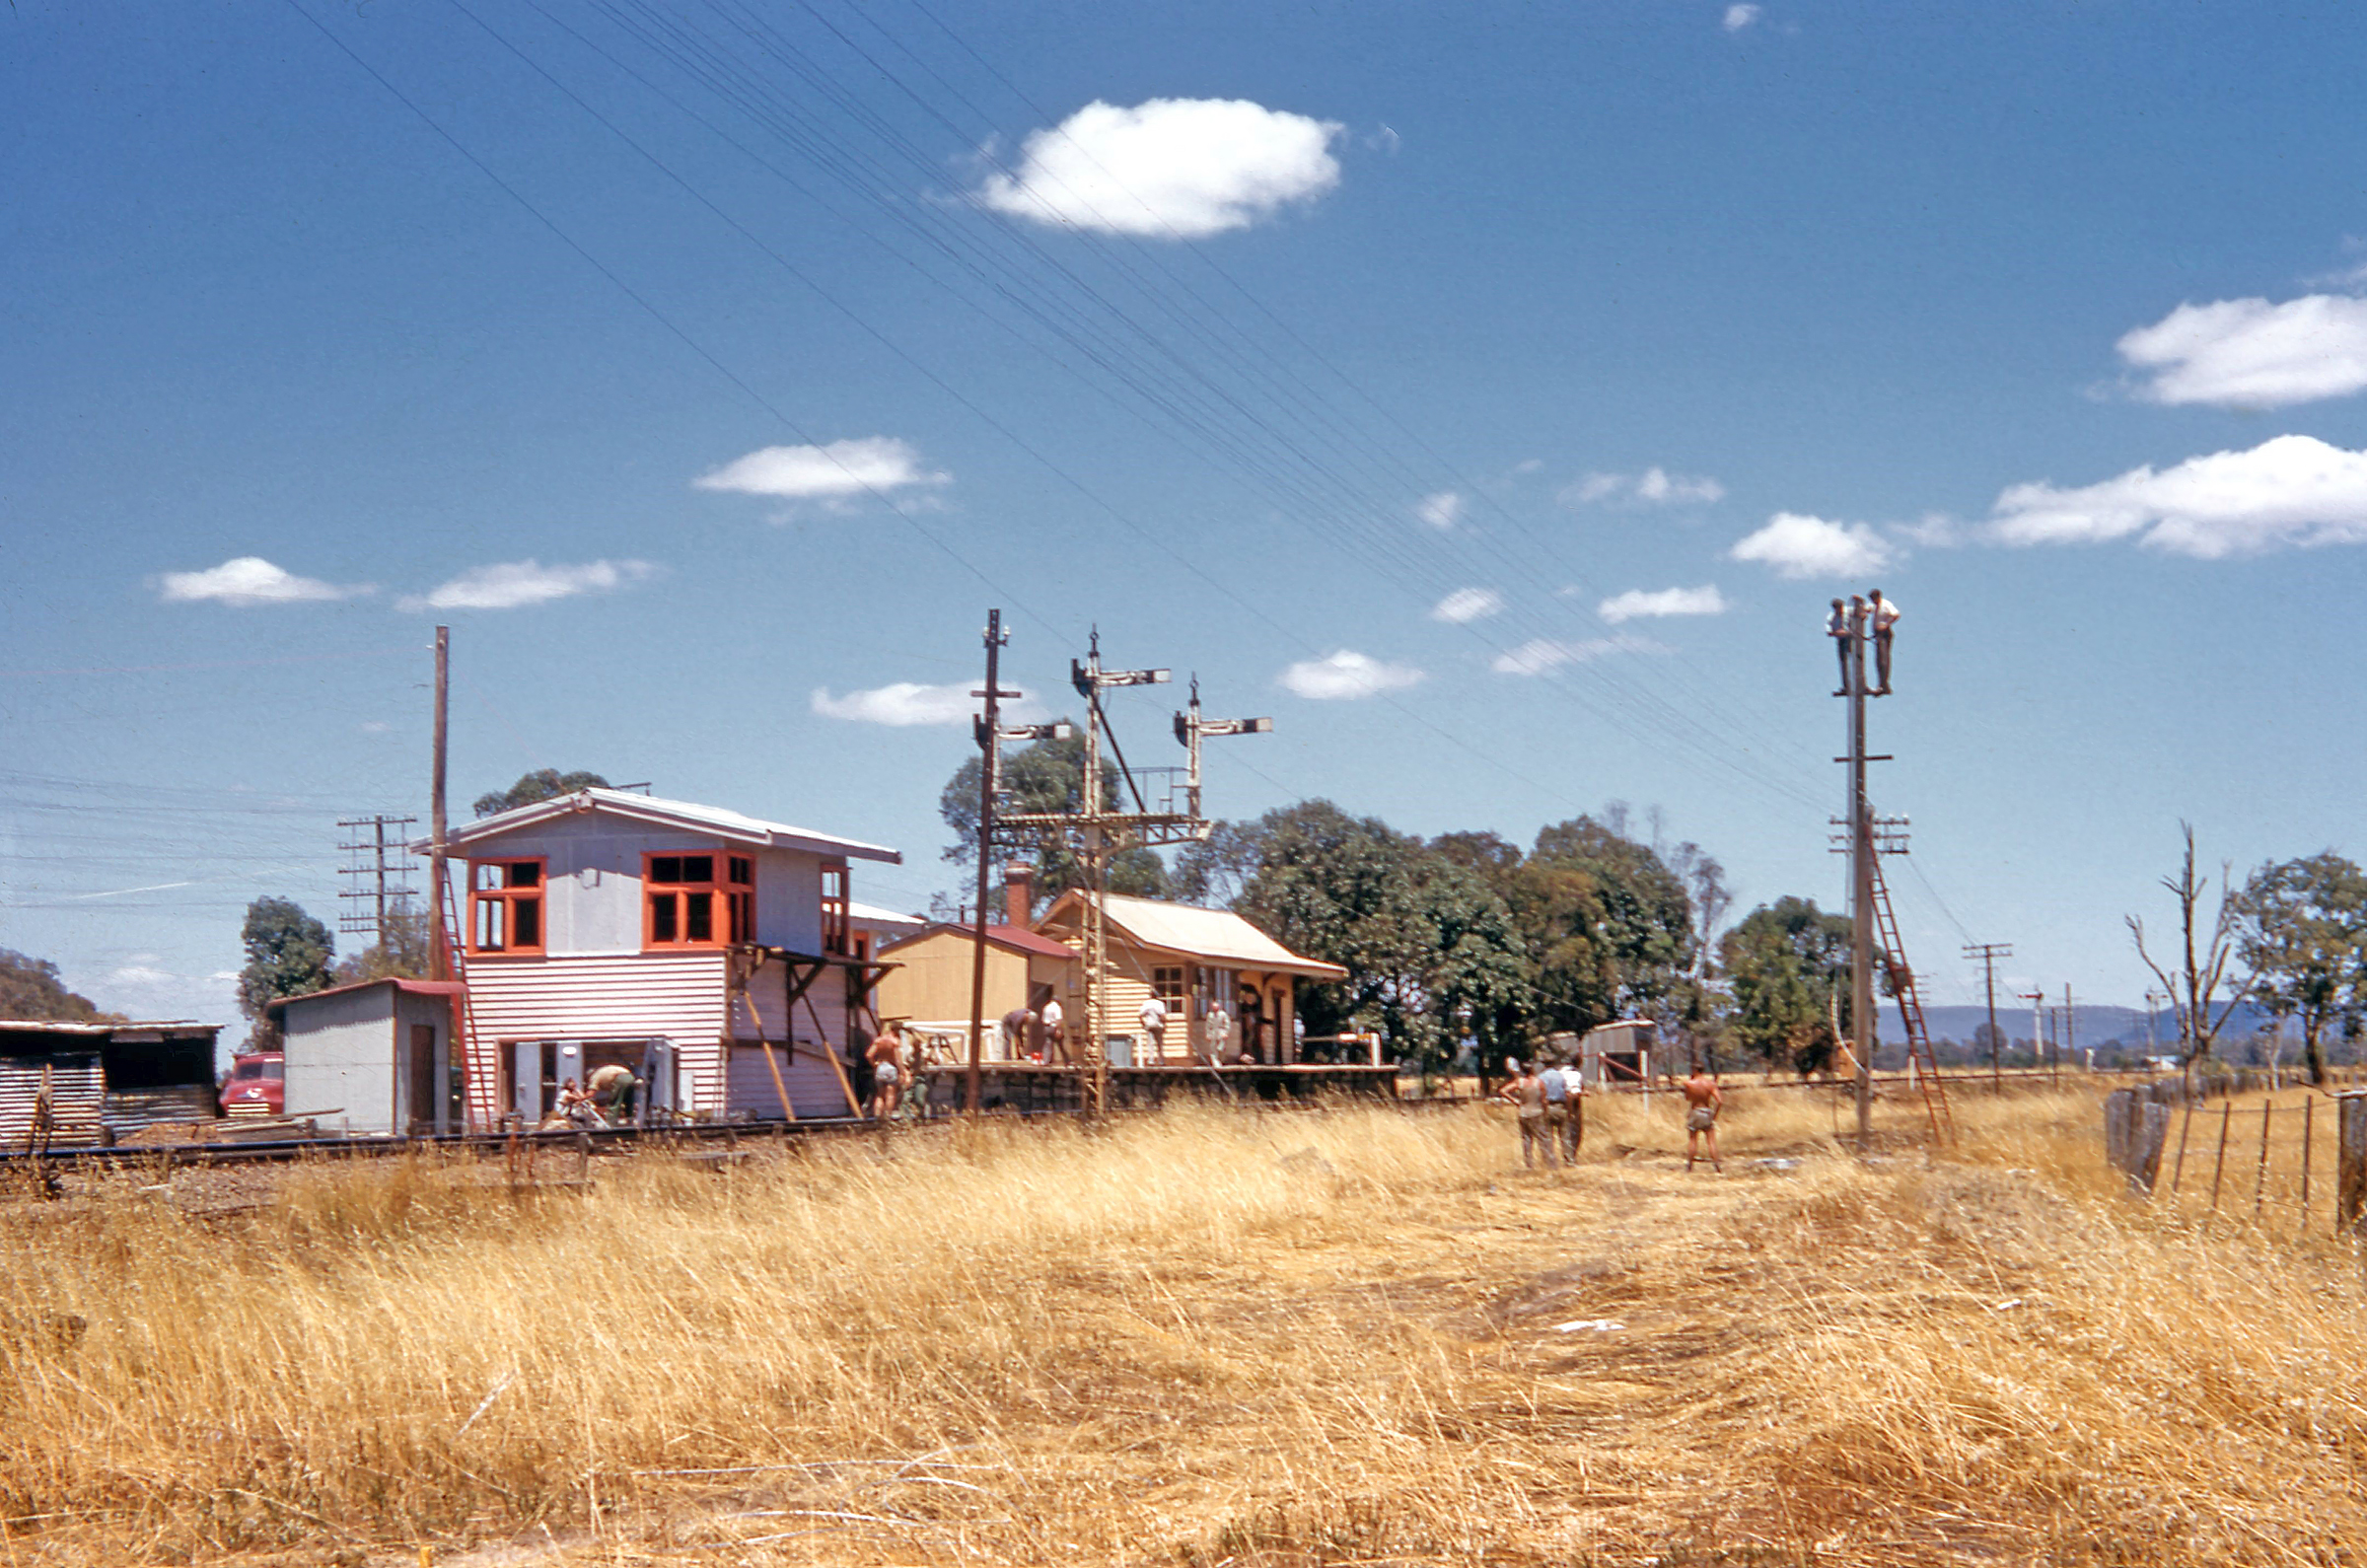
ABOVE: It's the late 1950's, and work is well underway on Bowser's transformation in preparation for the Standard gauge line. A new signal box is almost completed and the electrical fitters are fitting out the signalling relay boxes and installing new telegraph posts for extra wiring. Very soon the station building will be gone, but the platform survived for another 16 or so years.
(Jan Steczynski photo, courtesy of Anna Cox).
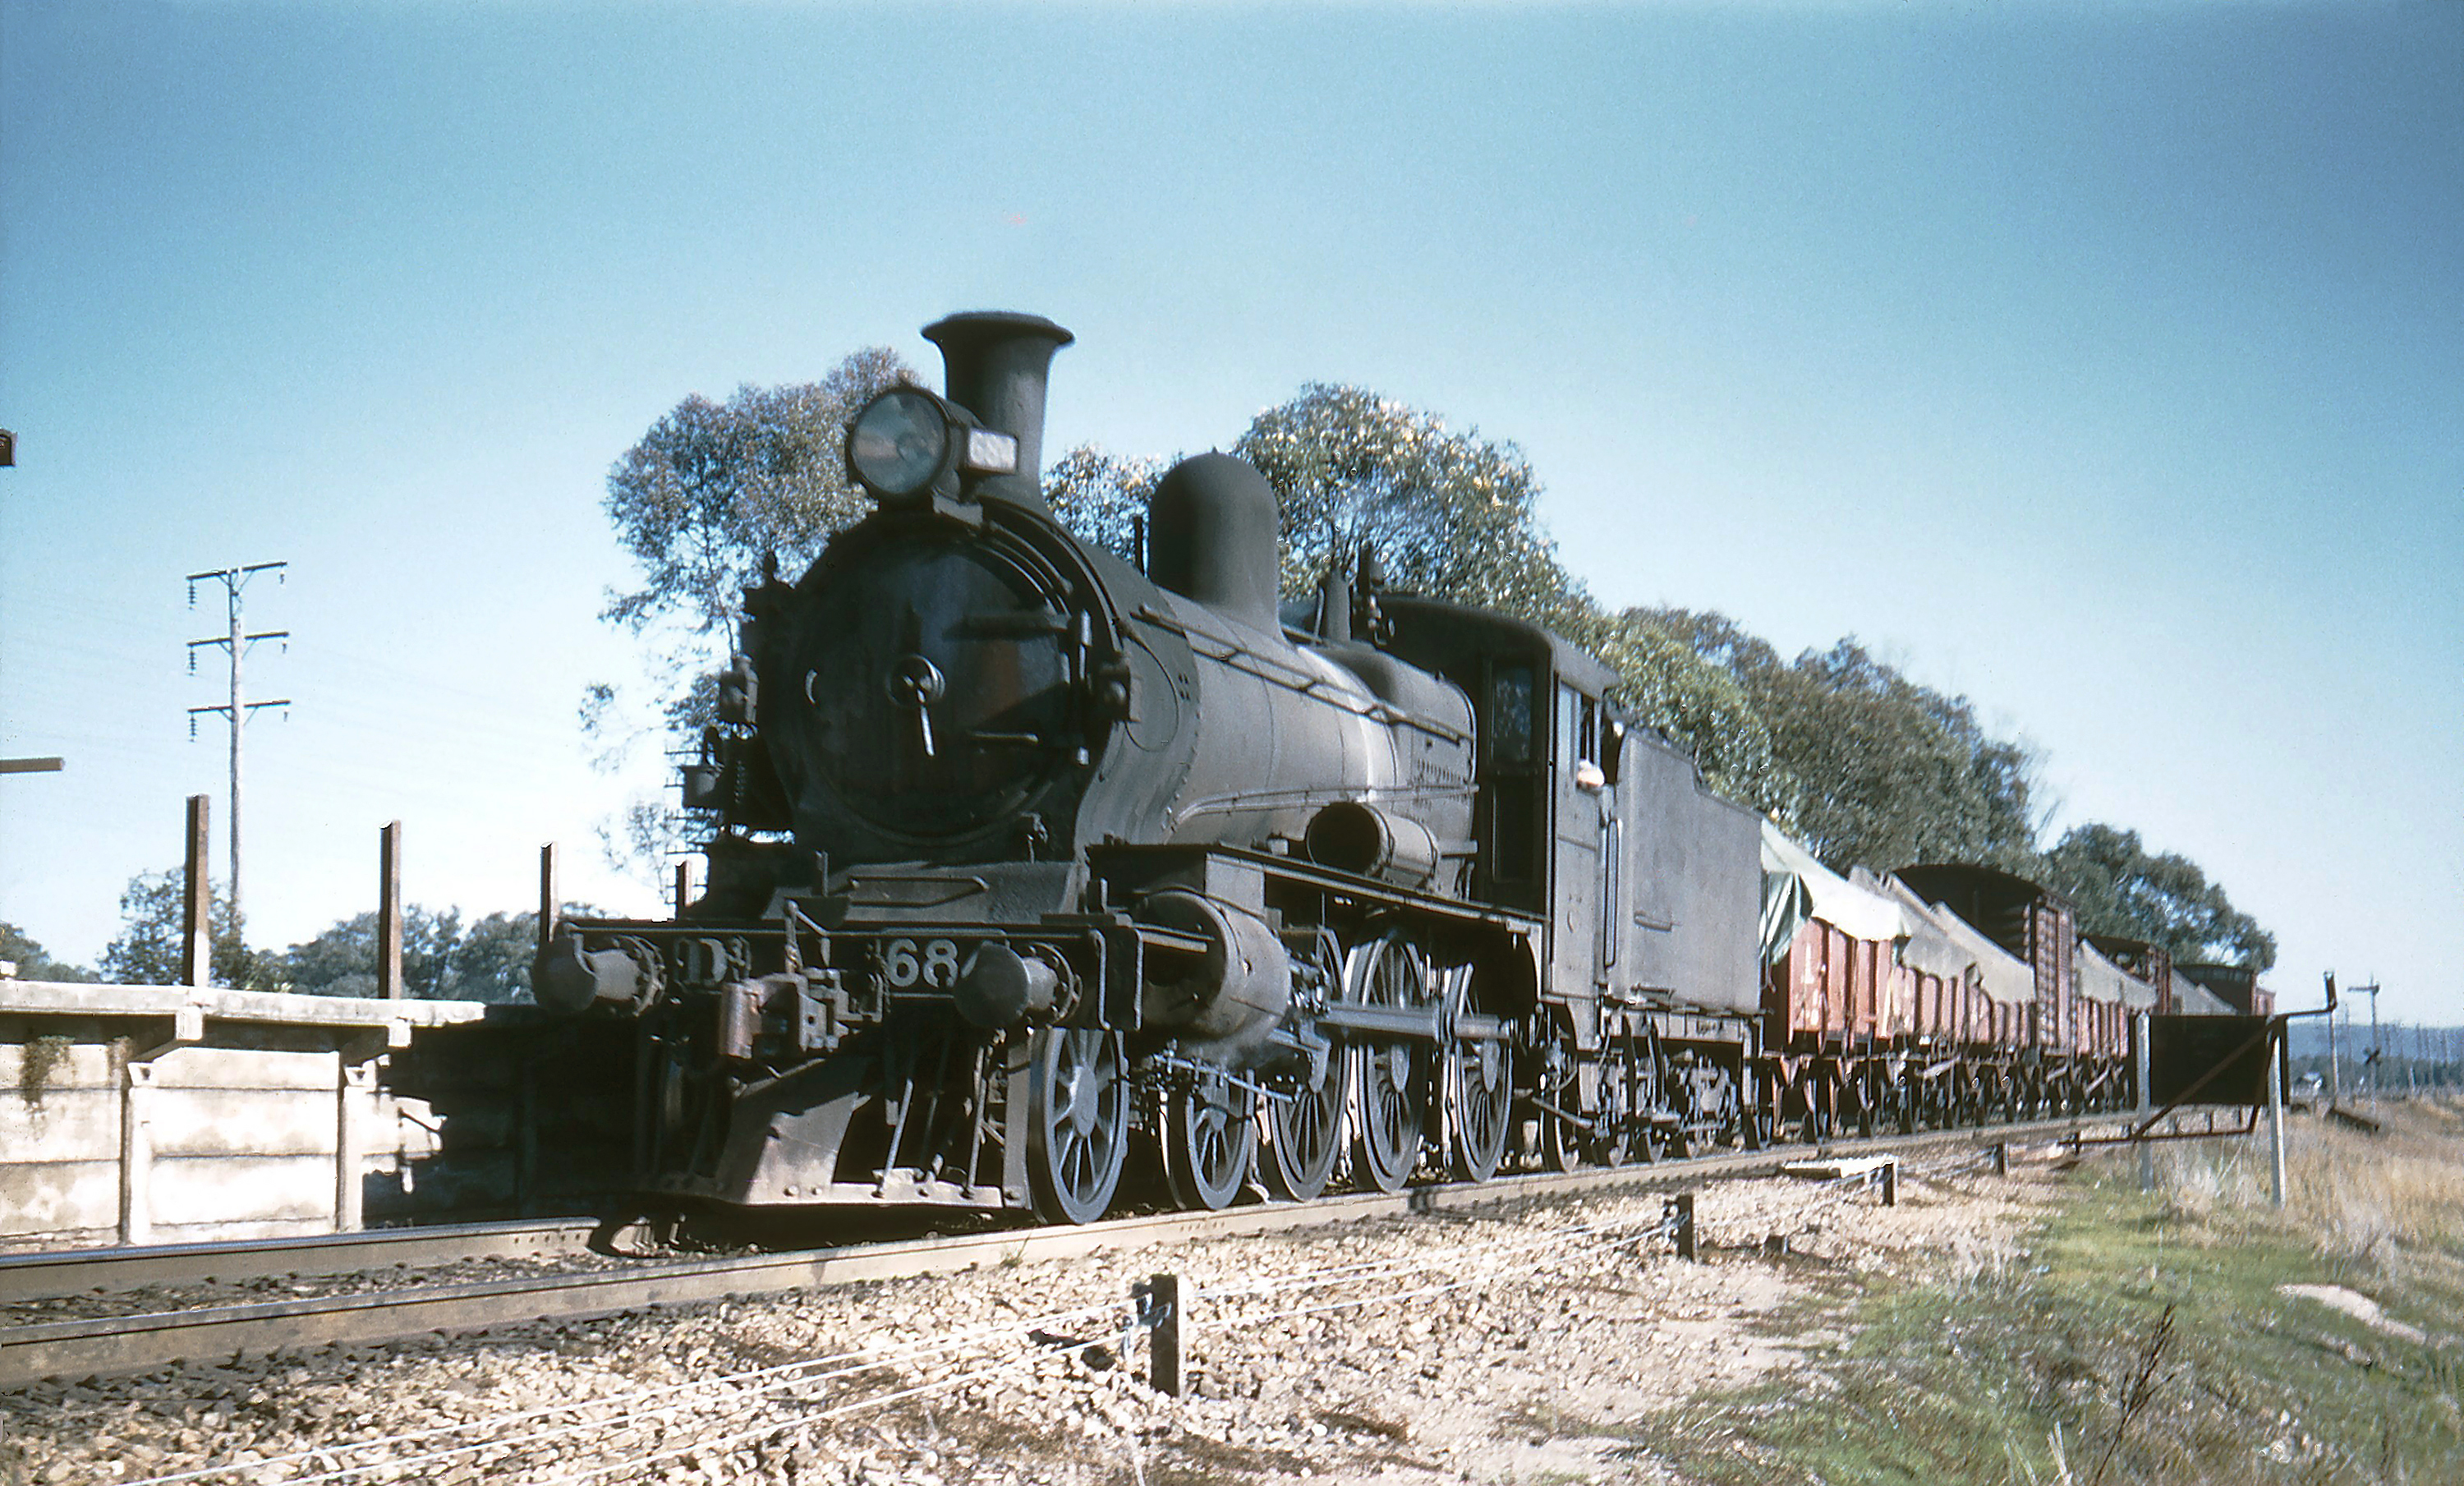
ABOVE: D3 684 draws into Bowser with a Beechworth bound goods. May 25, 1960.
(Photo courtesy of Weston Langford).
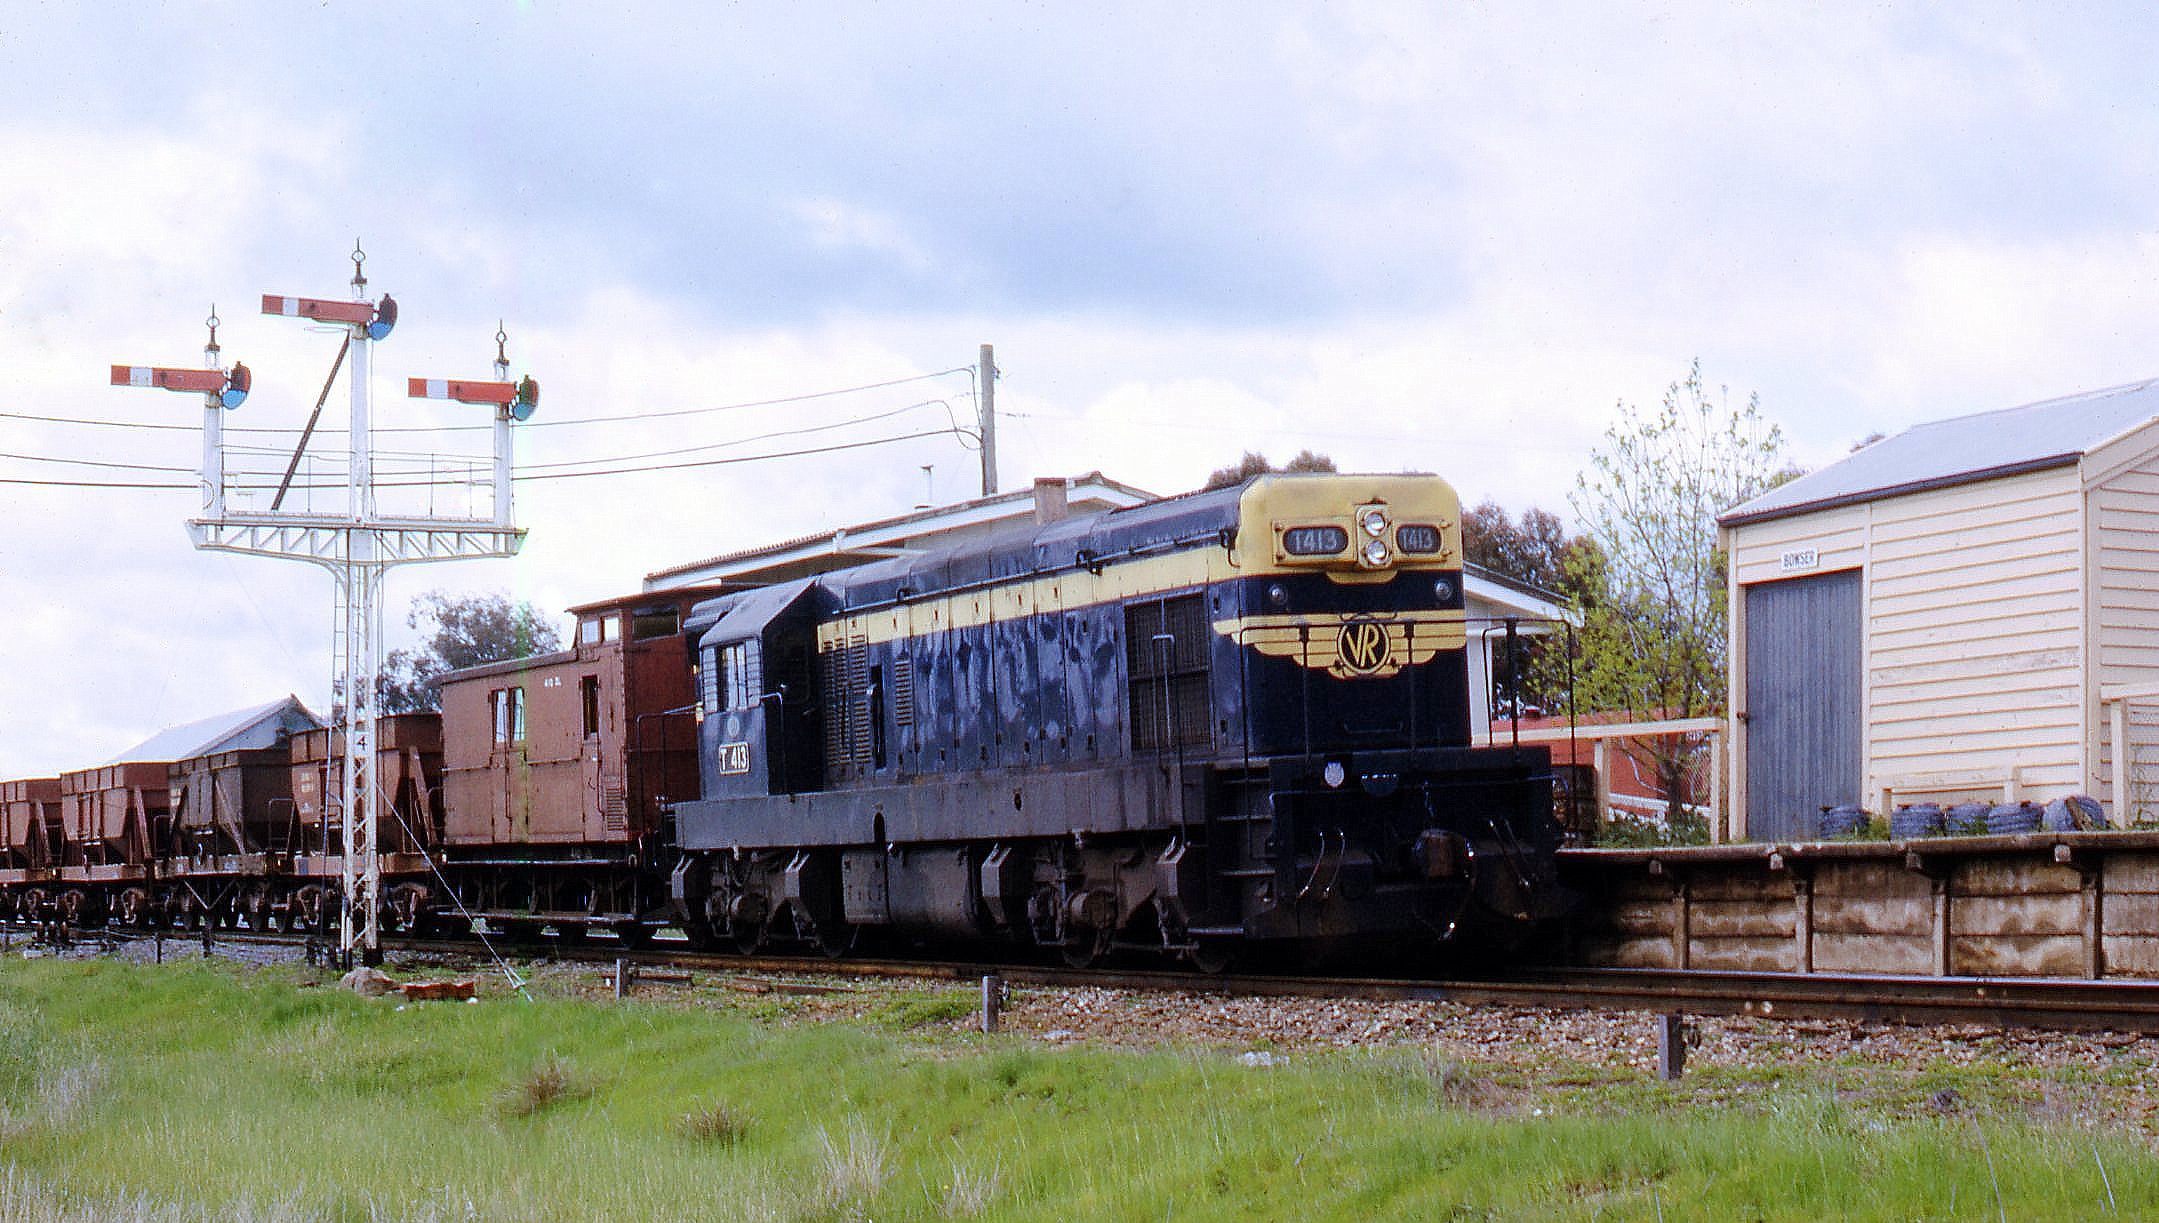
ABOVE: T 413 shunts a ballast train out on to the Peechelba East Branch, in order to temporarily clear the main line for other traffic. September 15, 1969.
(Photograph courtesy of Neville Gee).
ABOVE: T 413 patiently awaiting the signal off the Peechelba East line, before it can move back onto the main line and continue about it's business. September 15, 1969.
(Photograph courtesy of Neville Gee).

ABOVE: Having left Albury at 7:00am and with it's next stop being at Wangaratta, X 40 races through Bowser at the head of the Up 'Albury Express'. May 2, 1971. Although Bowser was still open for passenger traffic at this time, it was only an 'if required' stop, which was provided by only one train in each direction on six days of the week.
(Photograph courtesy of Neville Gee).

ABOVE: Returning from Peechelba East, Y 128 arrives into Bowser with a modest Goods train. April 5, 1971.
(Photograph courtesy of Doug Miles).
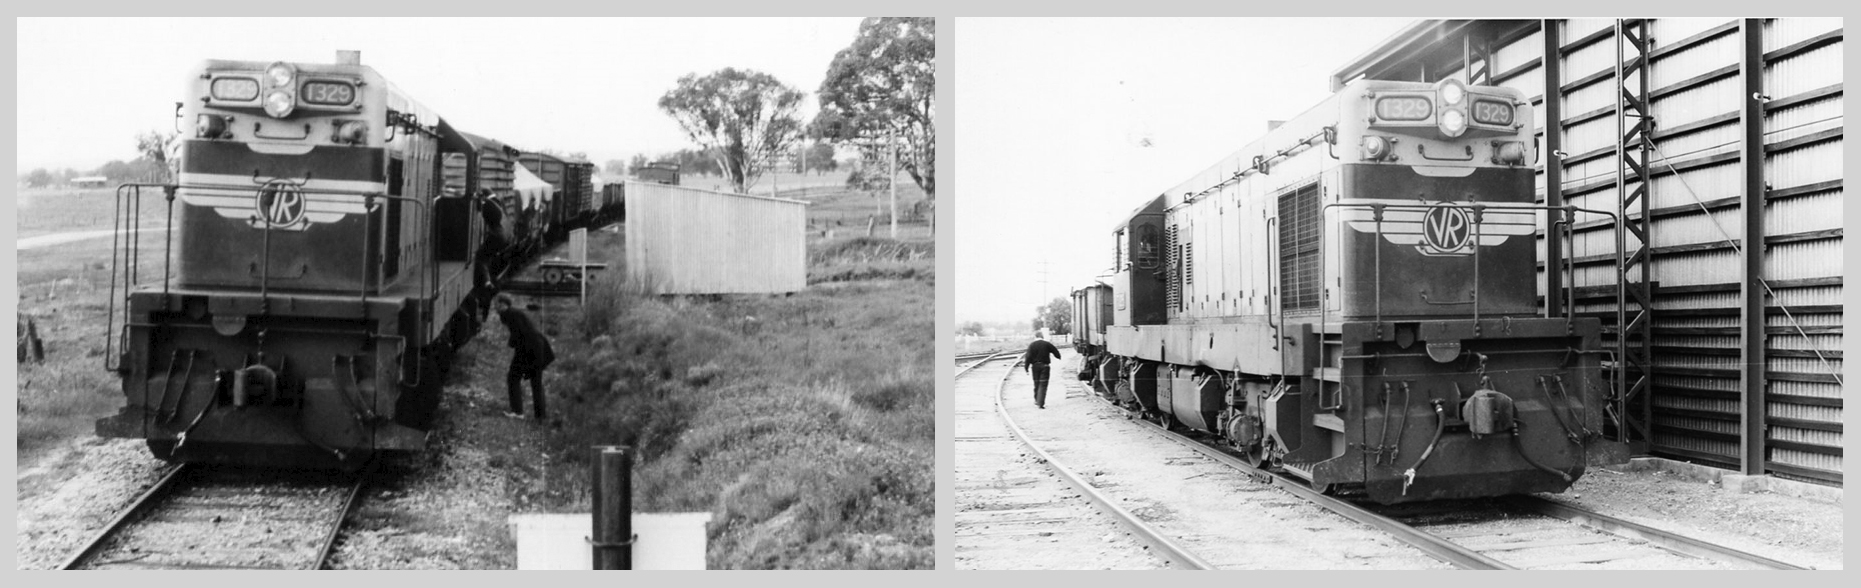
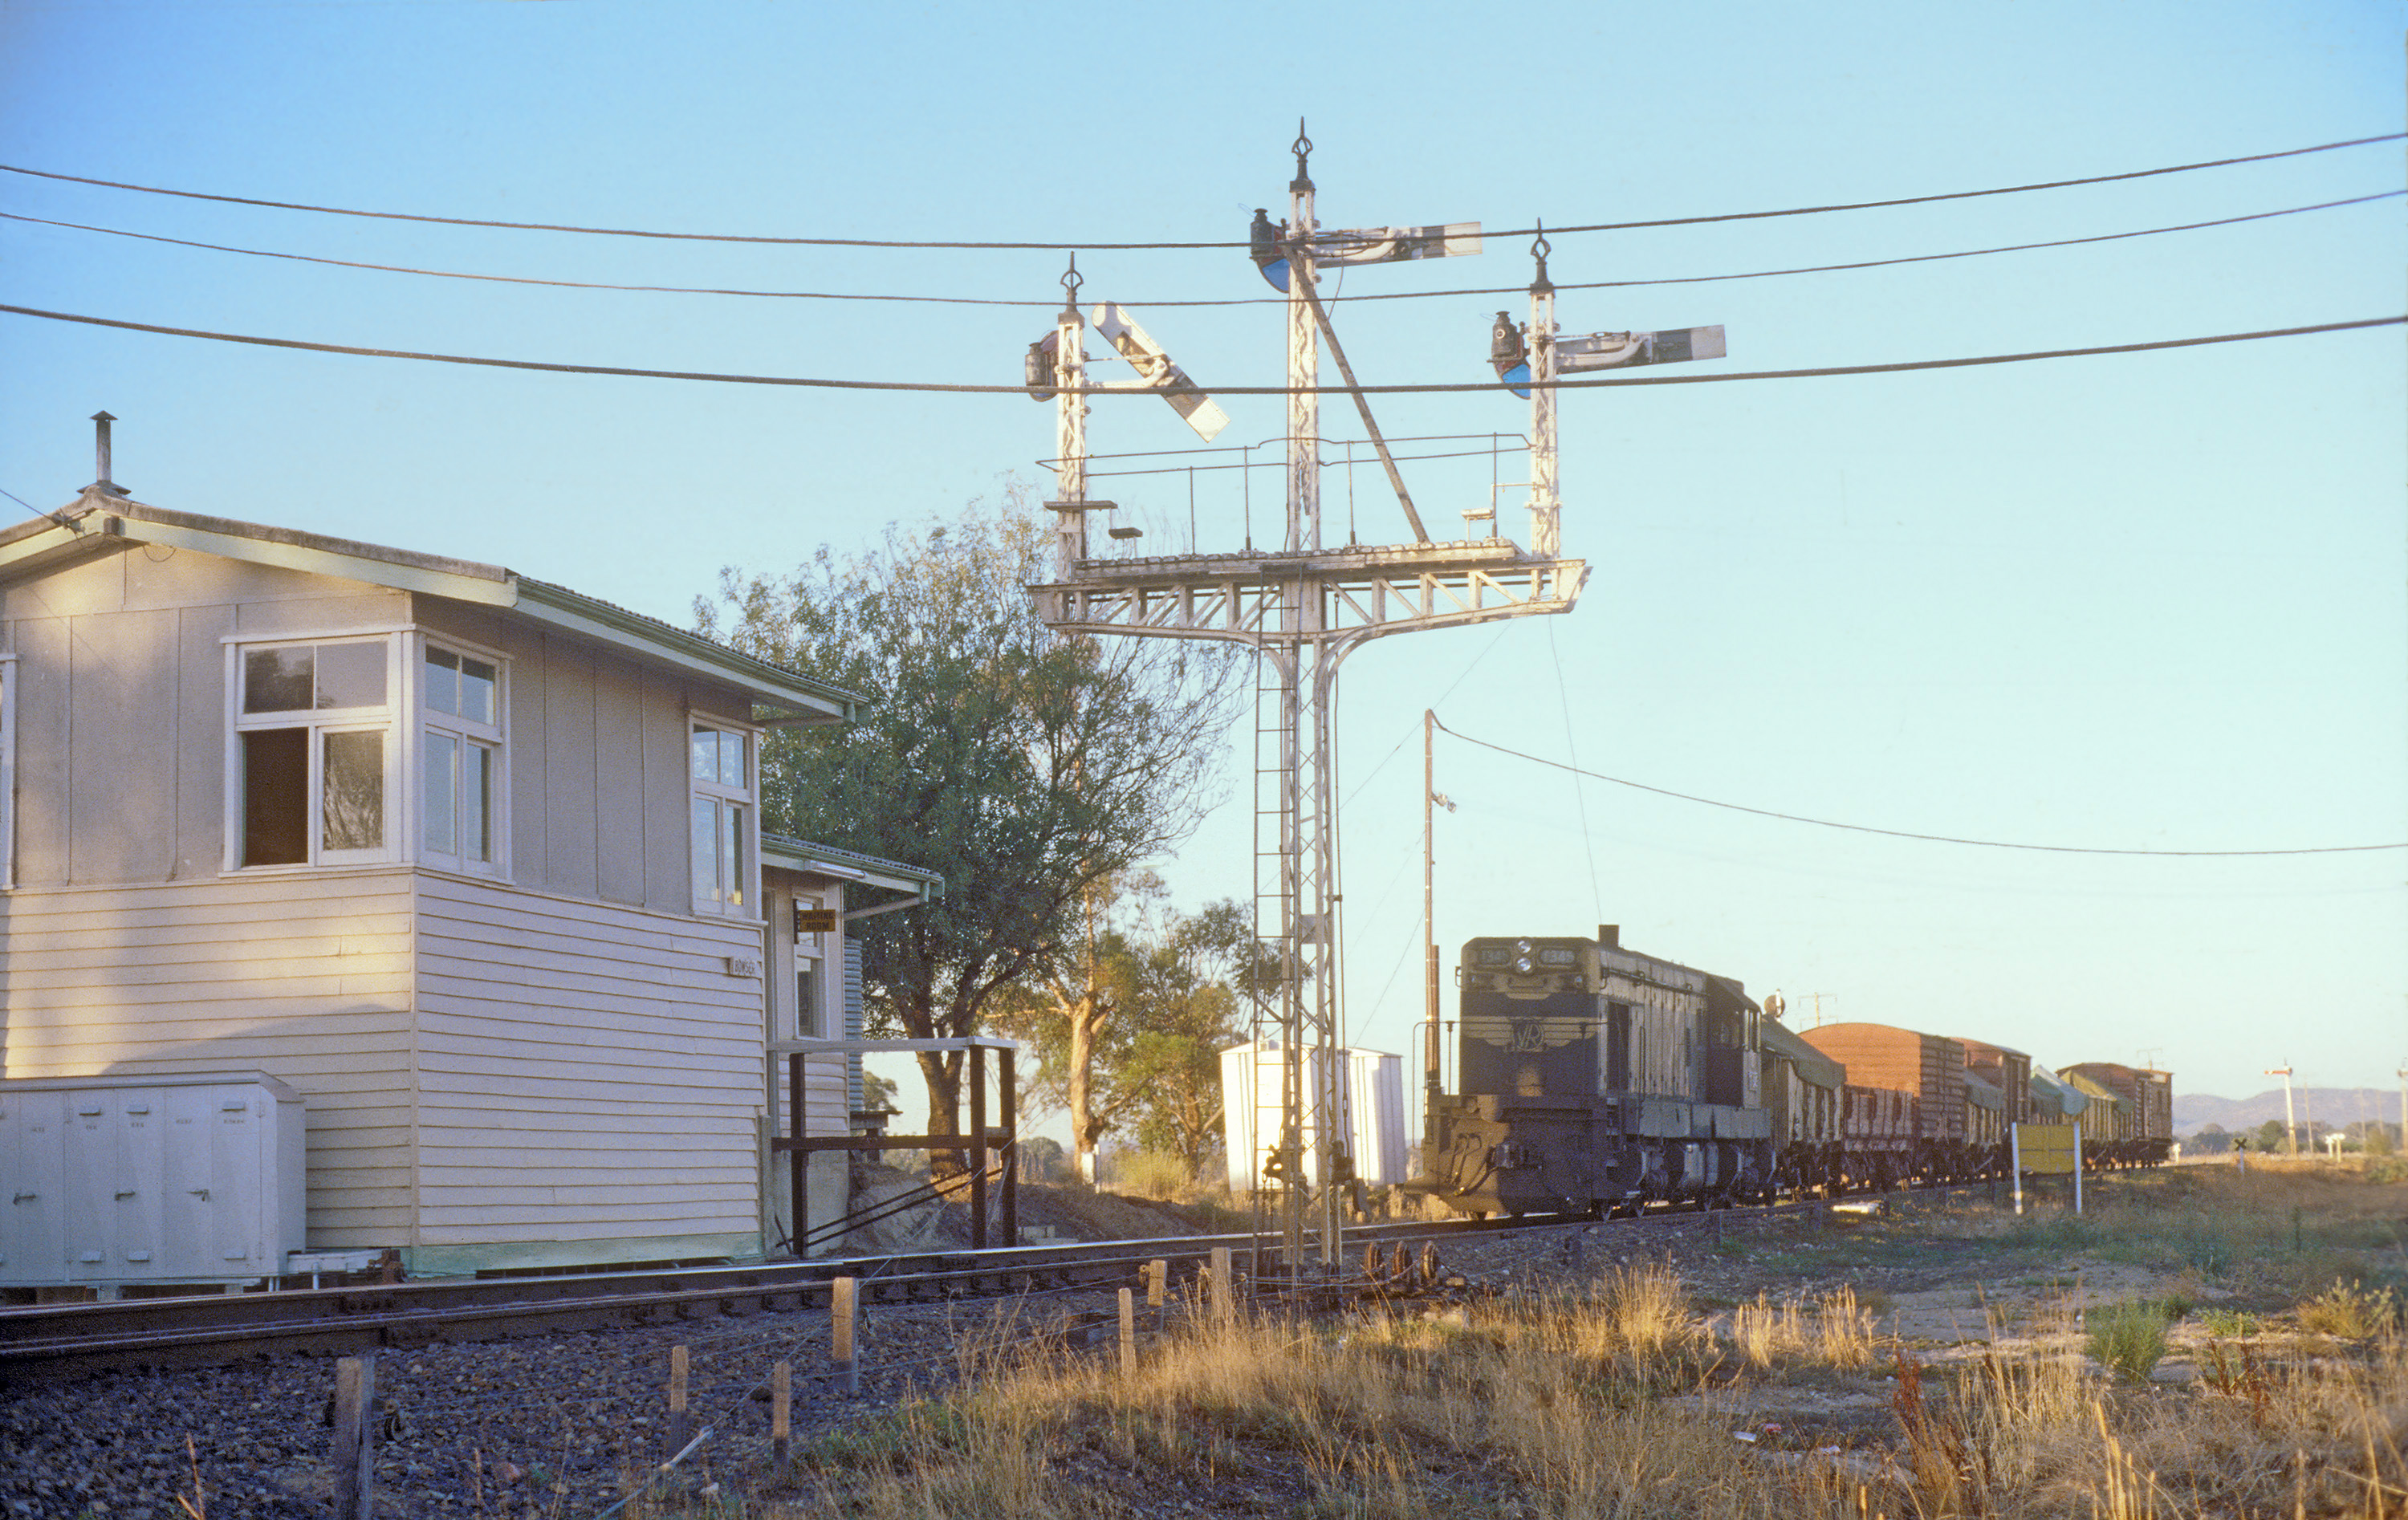
ABOVE: Left; On arrival back from Beechworth with an Up goods, the crew prepares to detach T 329 out on the branch. Right; Collecting an I truck out of the siding, to add to the consist. September 23, 1971.
(Both photographs courtesy of Doug Miles).
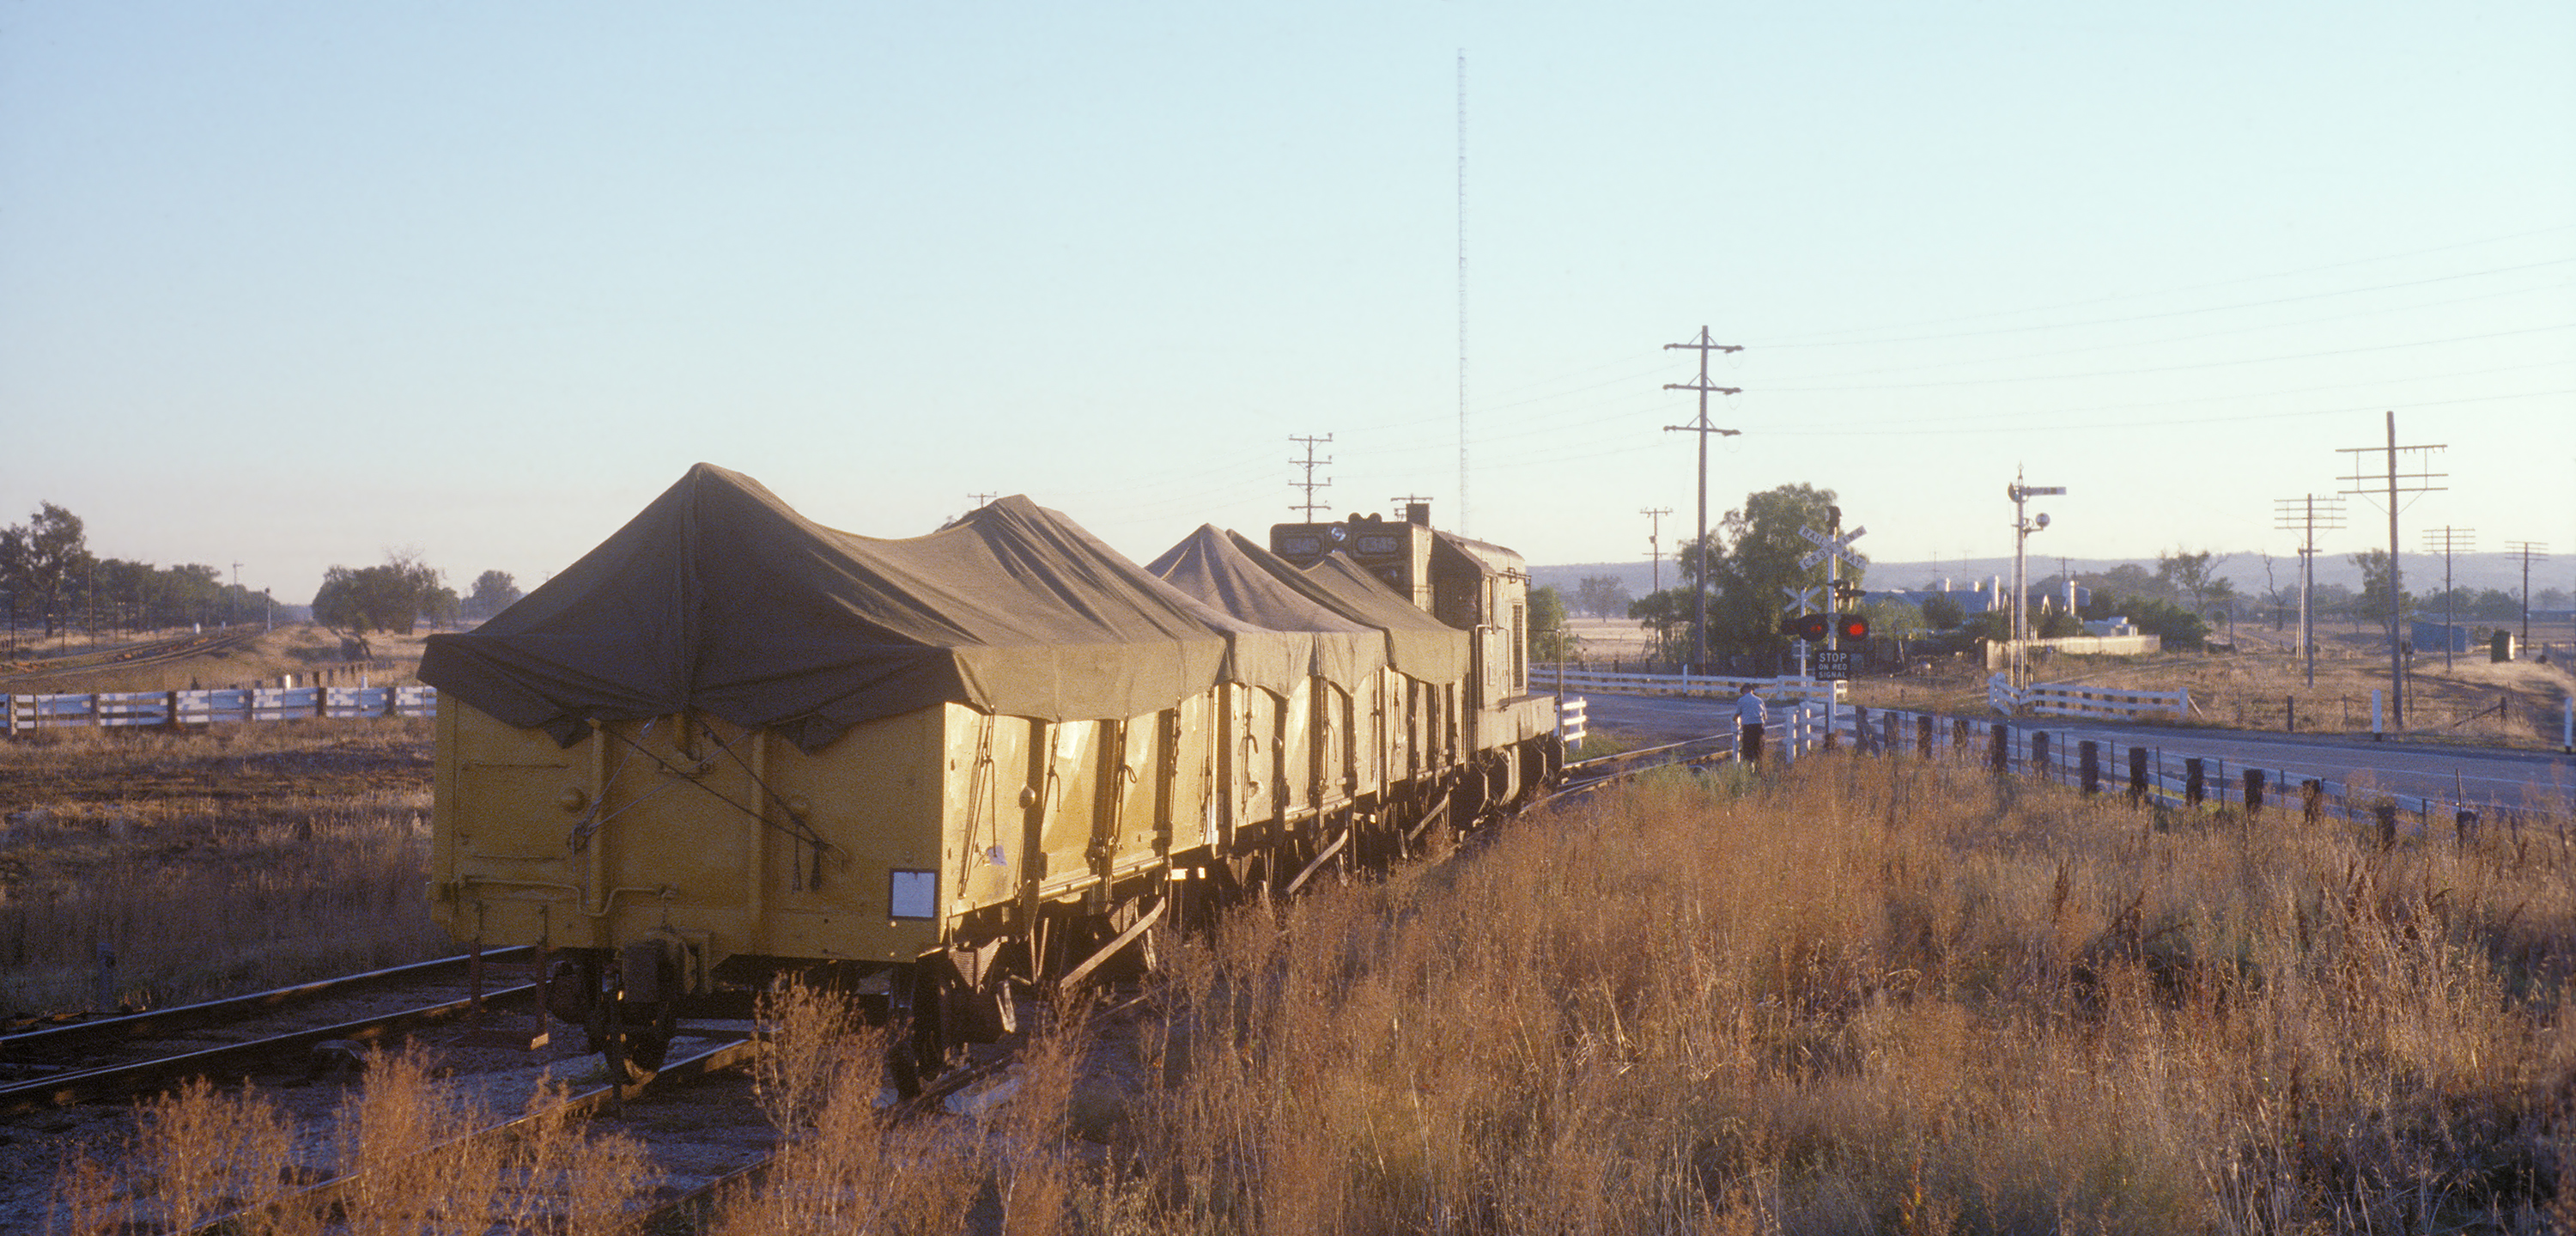
ABOVE: The Guard activates the level crossing switch, to enable T 345 to shunt across the Hume Highway, as it repositions some GYs in the goods siding at Bowser. 6:30am on March 14, 1978.
(Photograph courtesy of Geoff Winkler).
ABOVE: Two of the GYs are ready to be detached in the dead-end spur of the sidings at Bowser. 06:32 am on March 14, 1978.
(Photograph courtesy of Geoff Winkler).
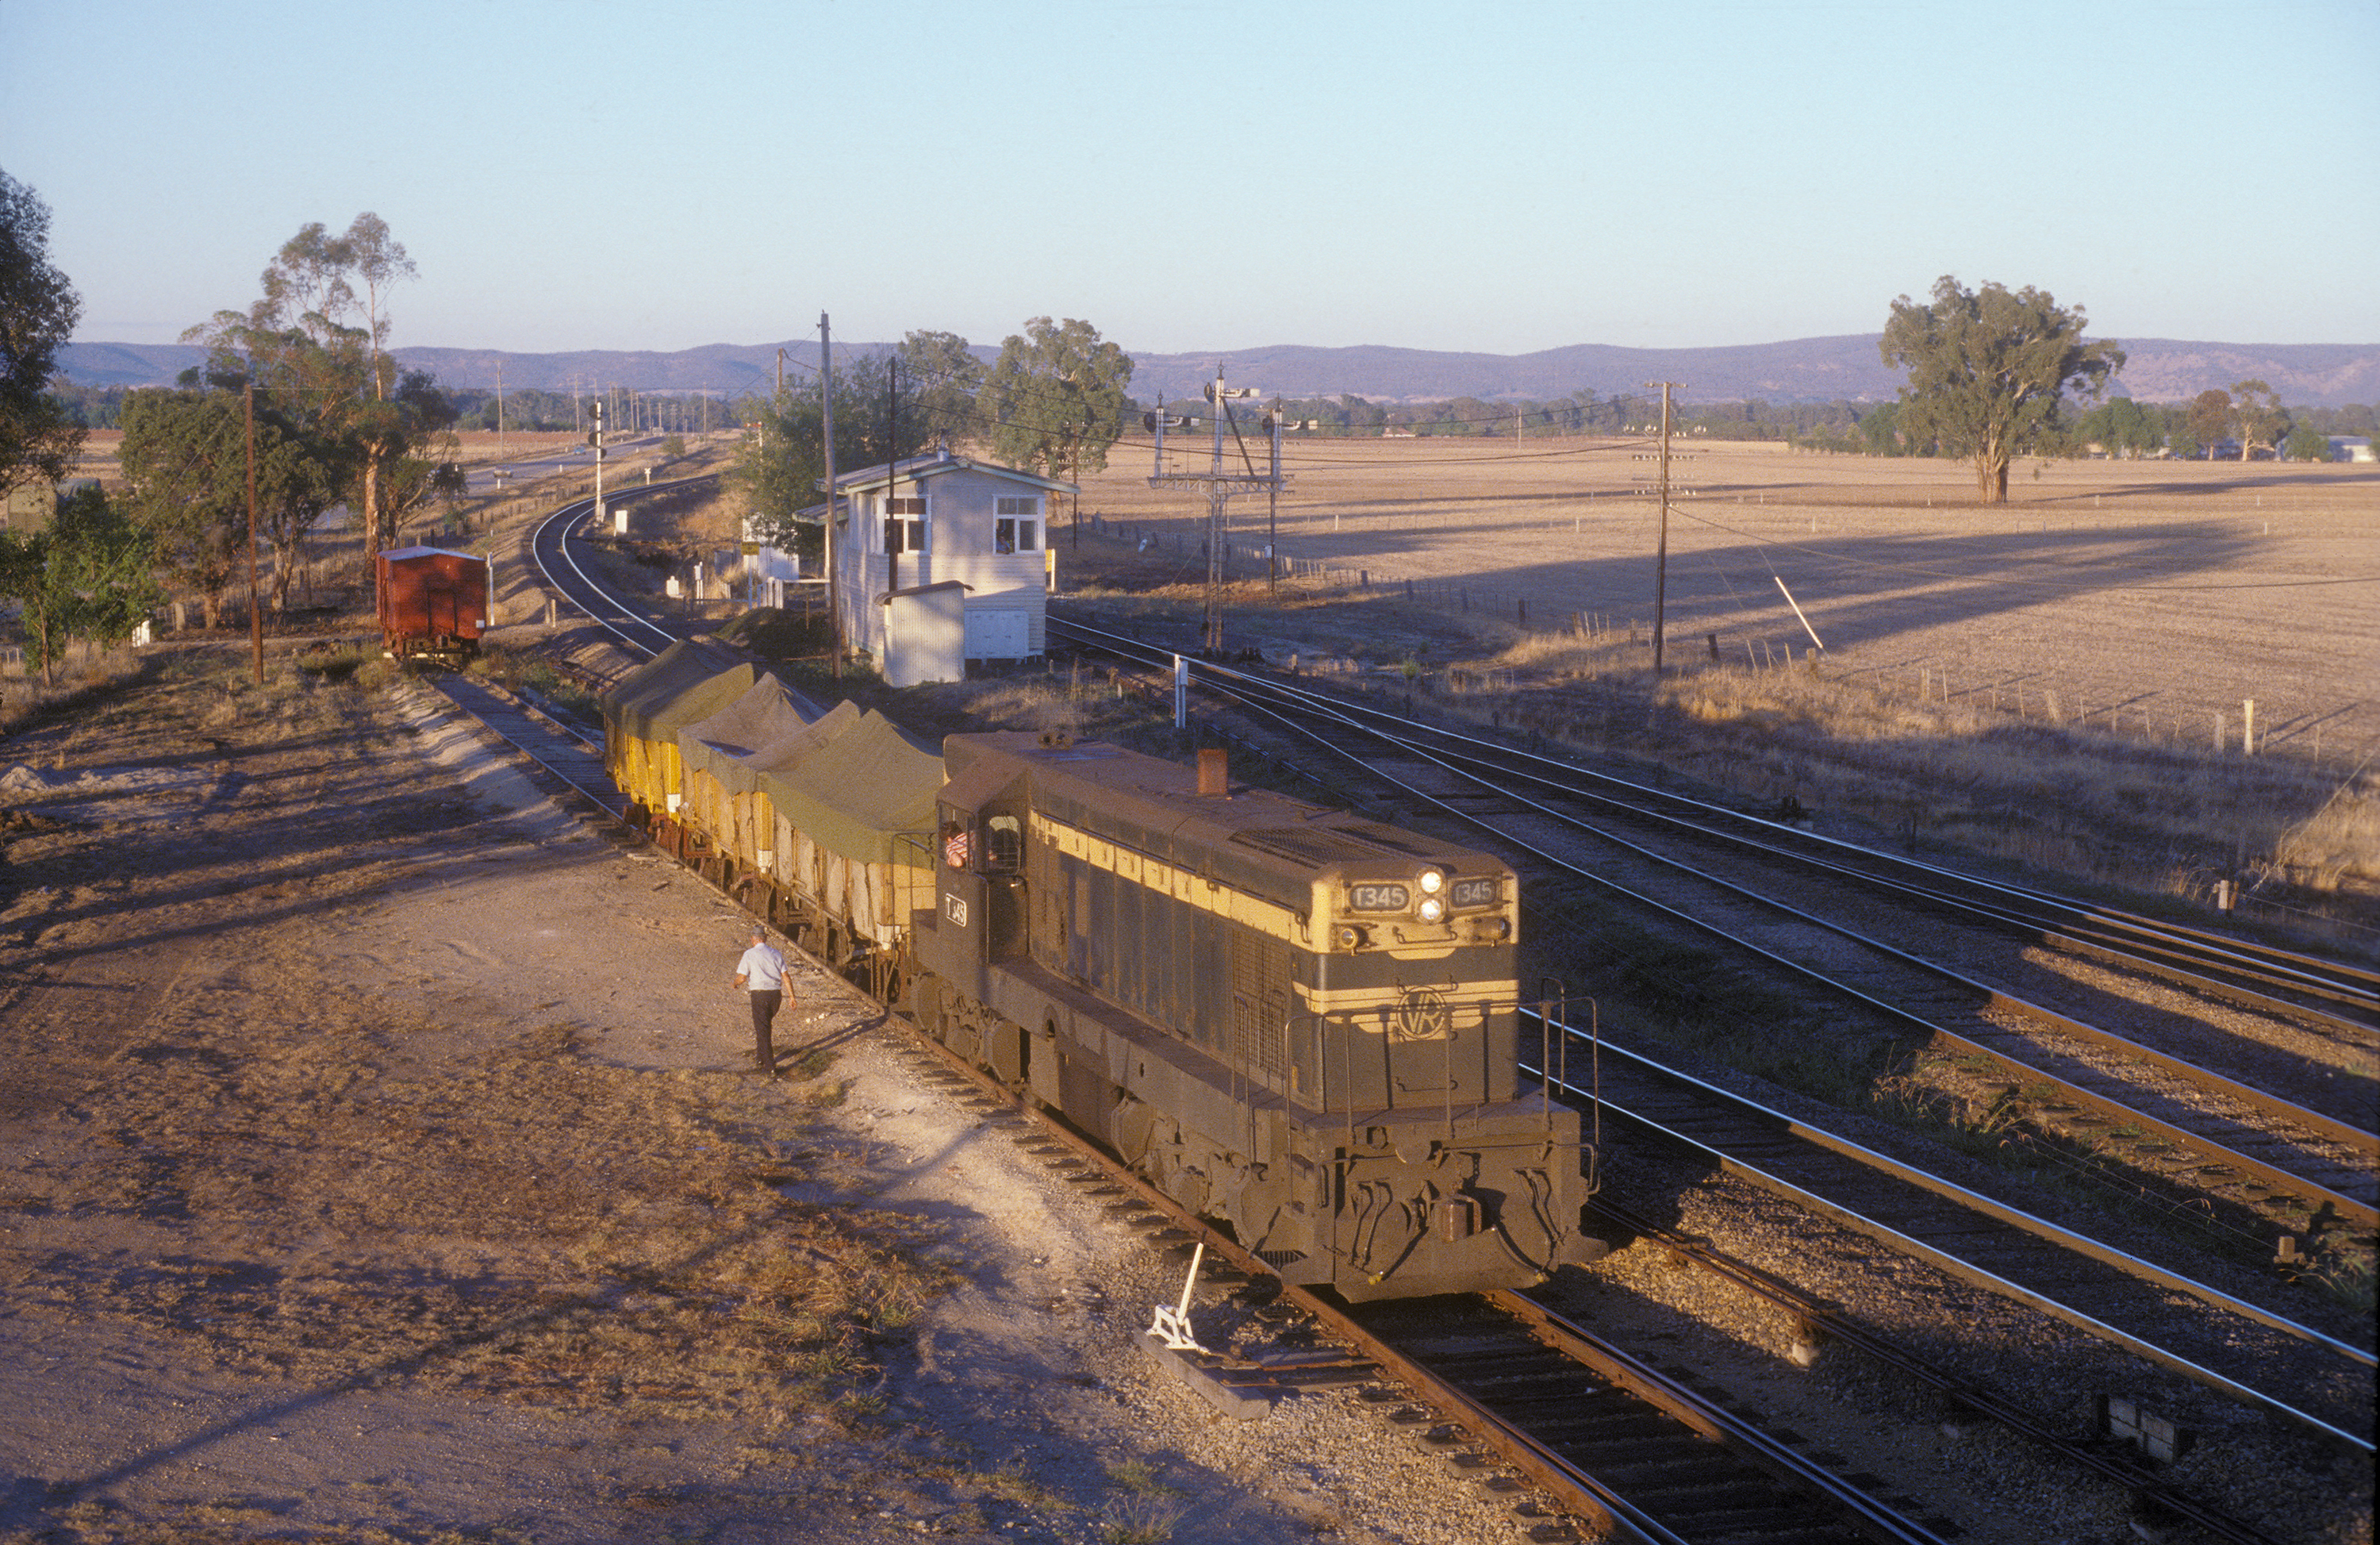
ABOVE: The shunting completed, T 345 has rejoined its train on the Main line and readies for a departure to Bright. 06:40 am on March 14, 1978.
(Photograph courtesy of Geoff Winkler).
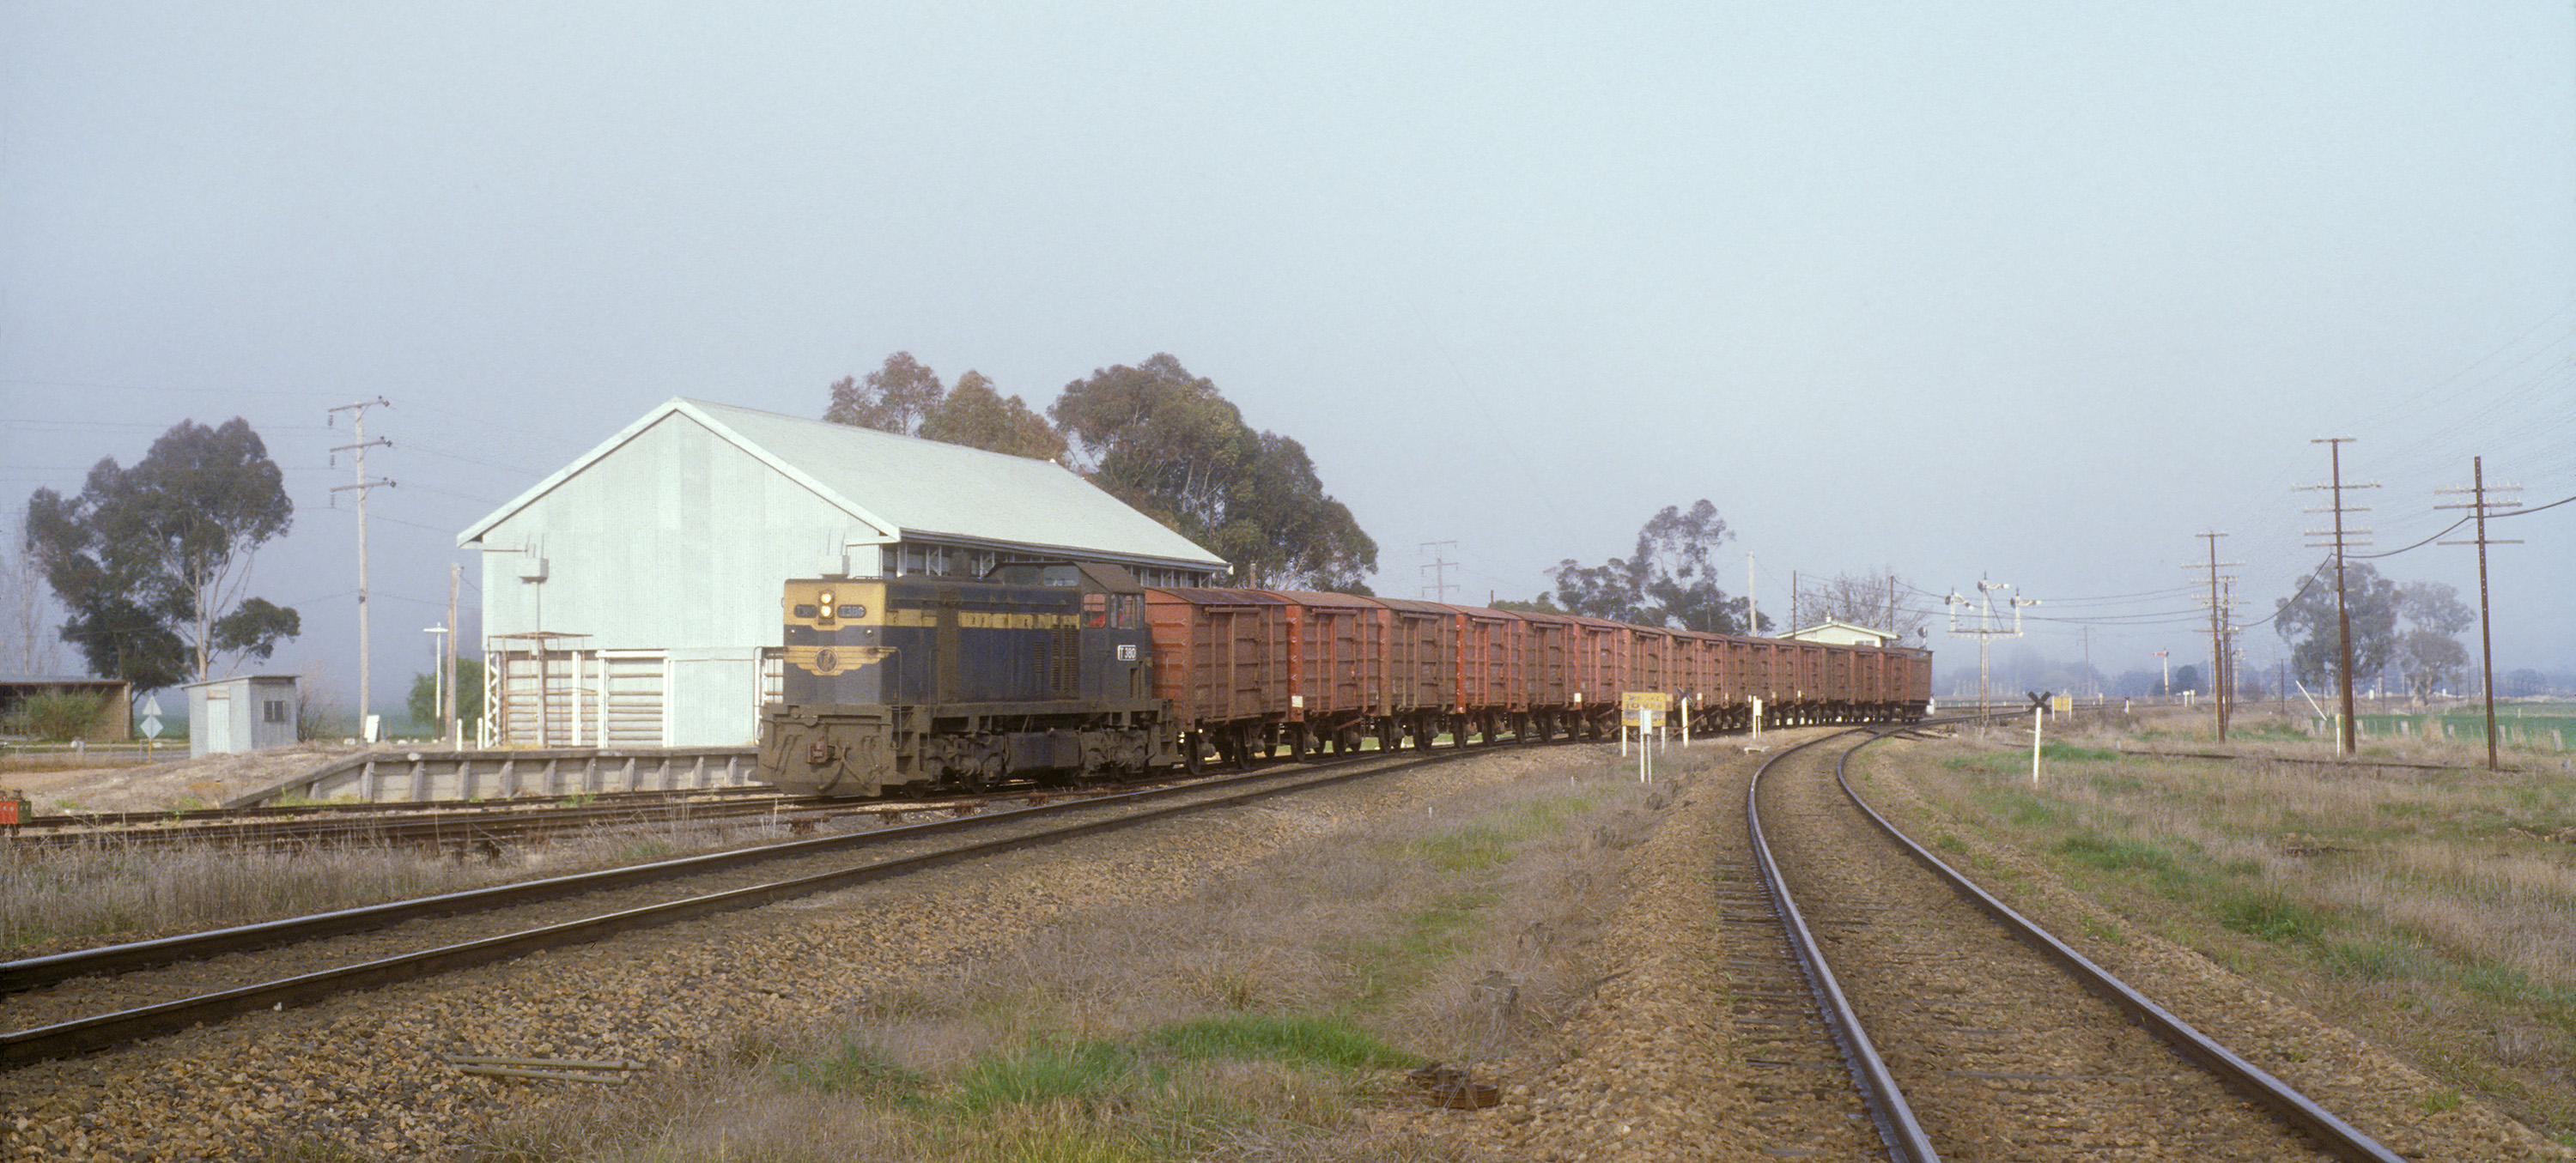
ABOVE: On a lovely but misty Winter's morning, T 380 diverges toward Everton with a consist of empty B vans. They will be deposited at stations right along the line to Bright for loading with the season's Tobacco harvest. 9:40 am on July 24, 1979.
(Photograph courtesy of Geoff Winkler).
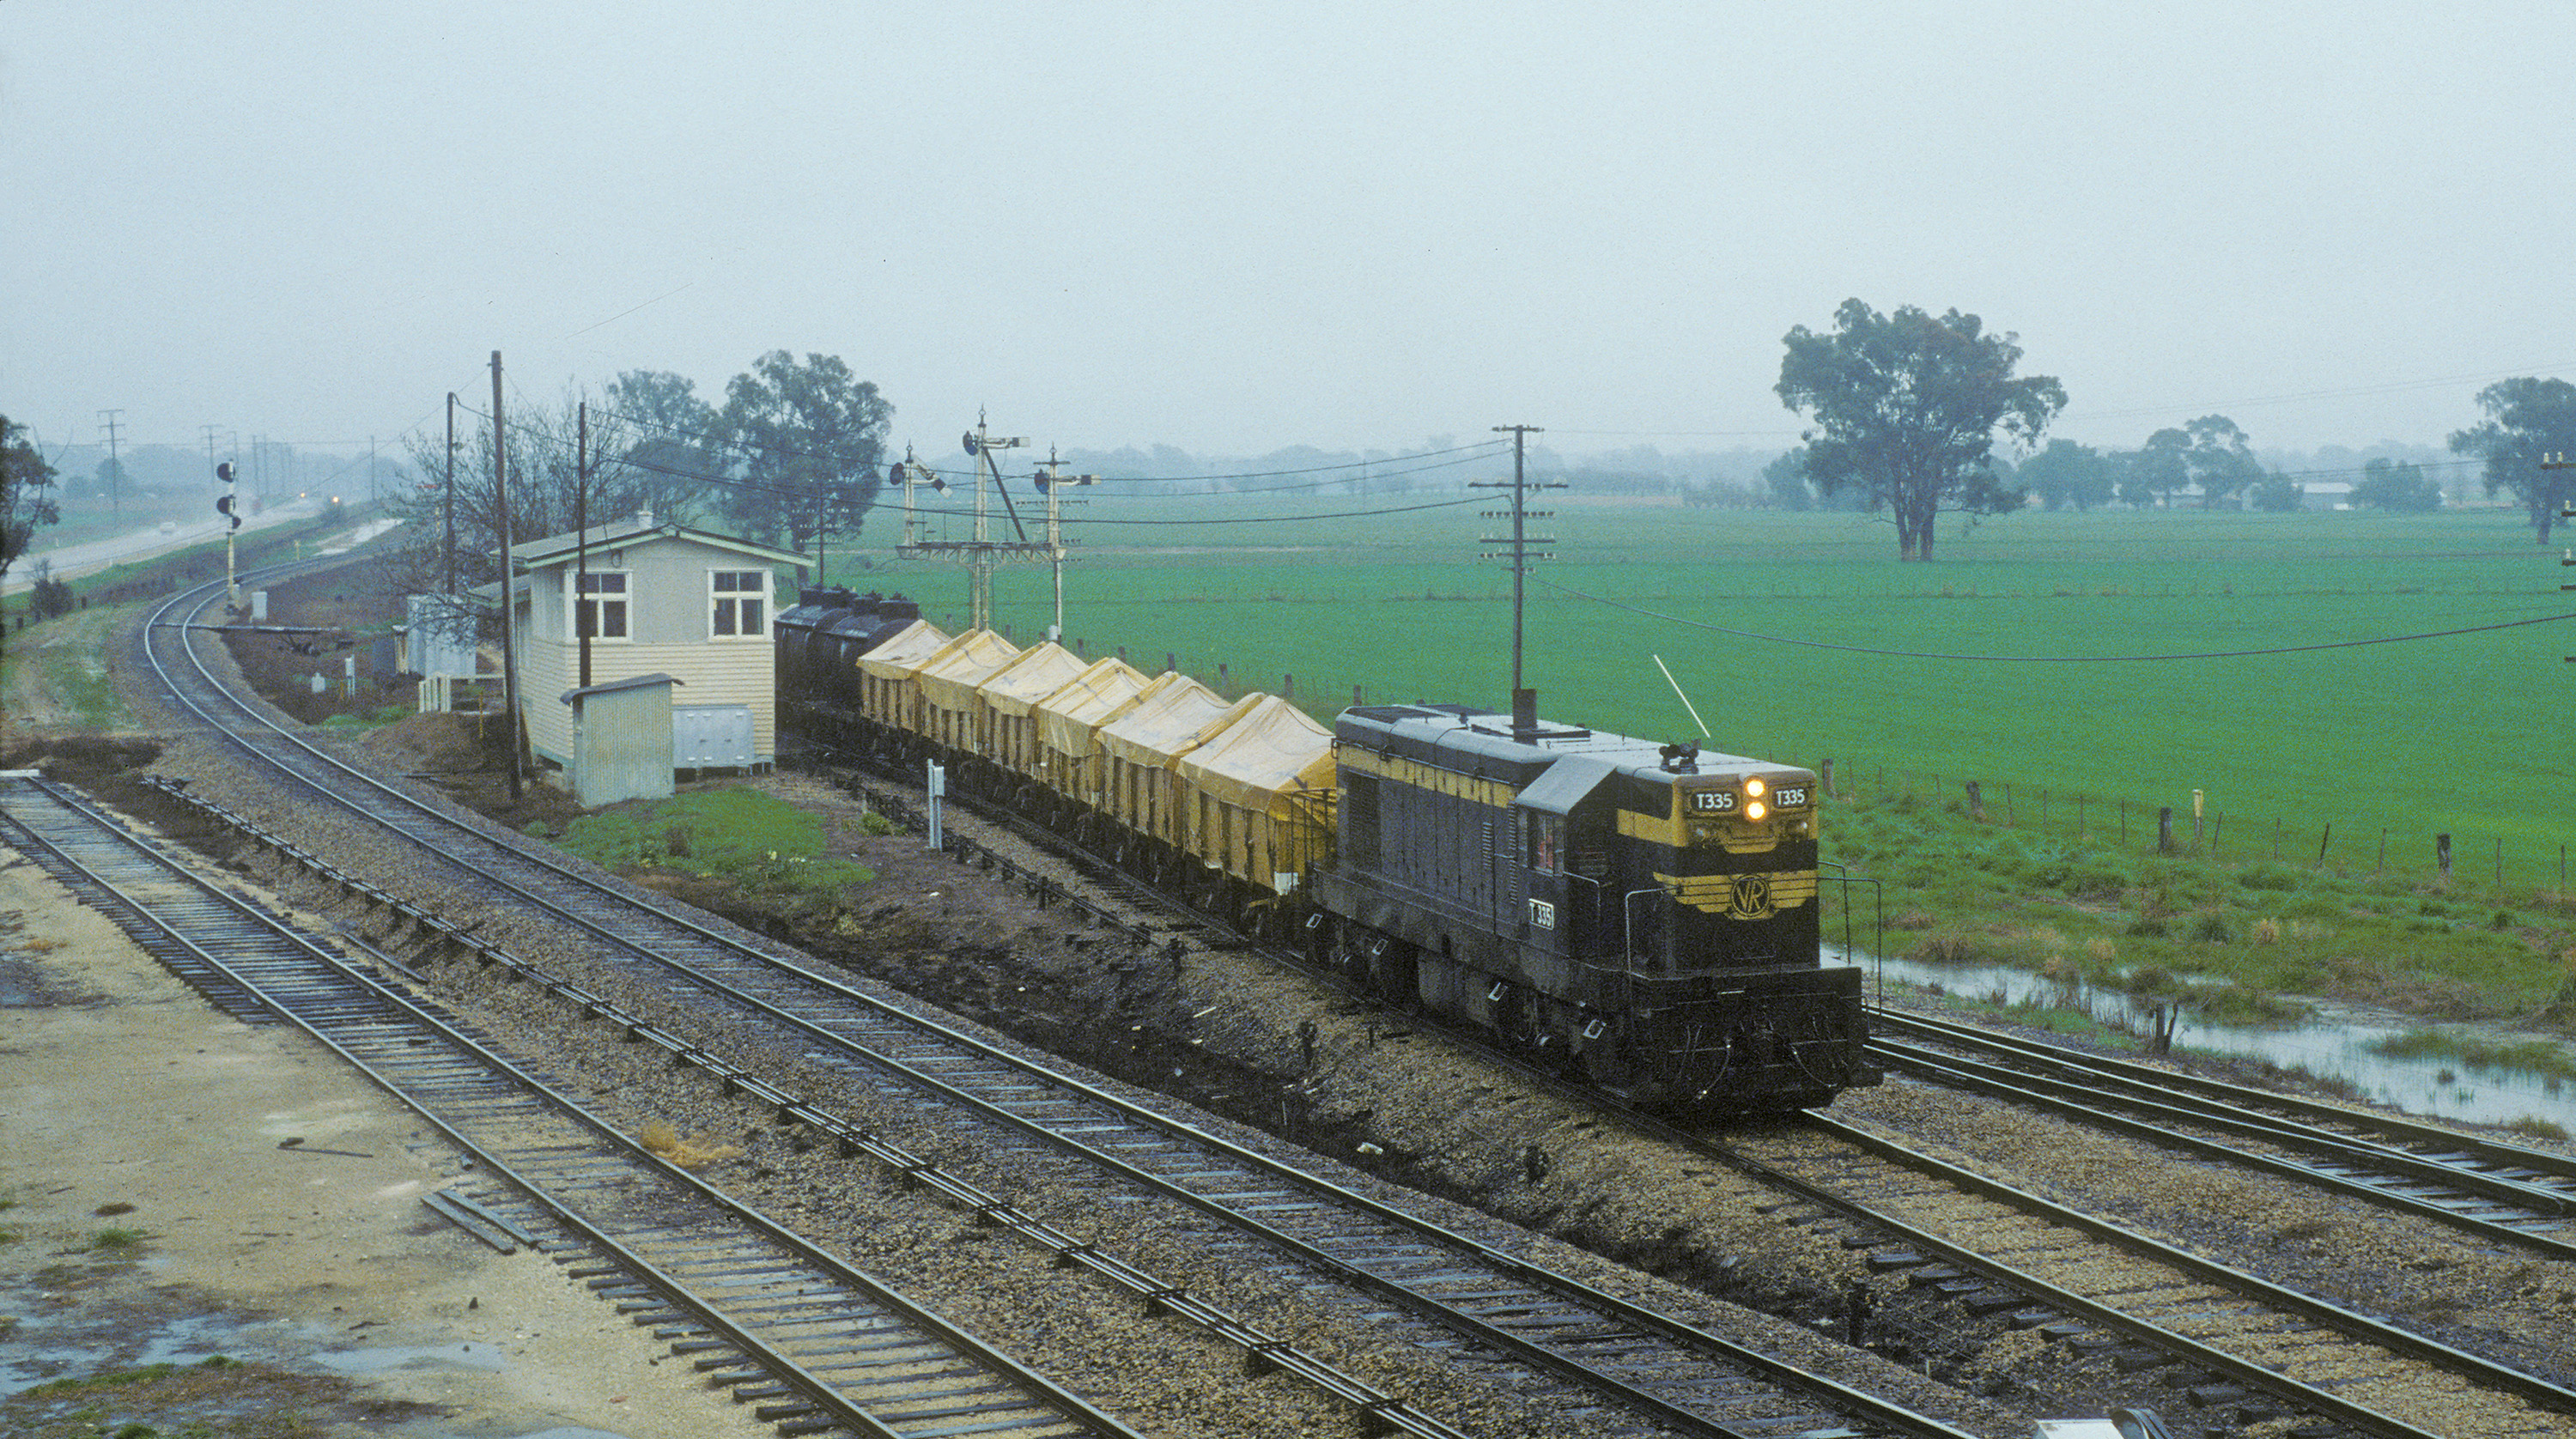
ABOVE: Winter hasn't quite gone away as T 335 swings onto the Bright branch with a down goods. September 3, 1979.
(Photograph courtesy of Geoff Winkler).
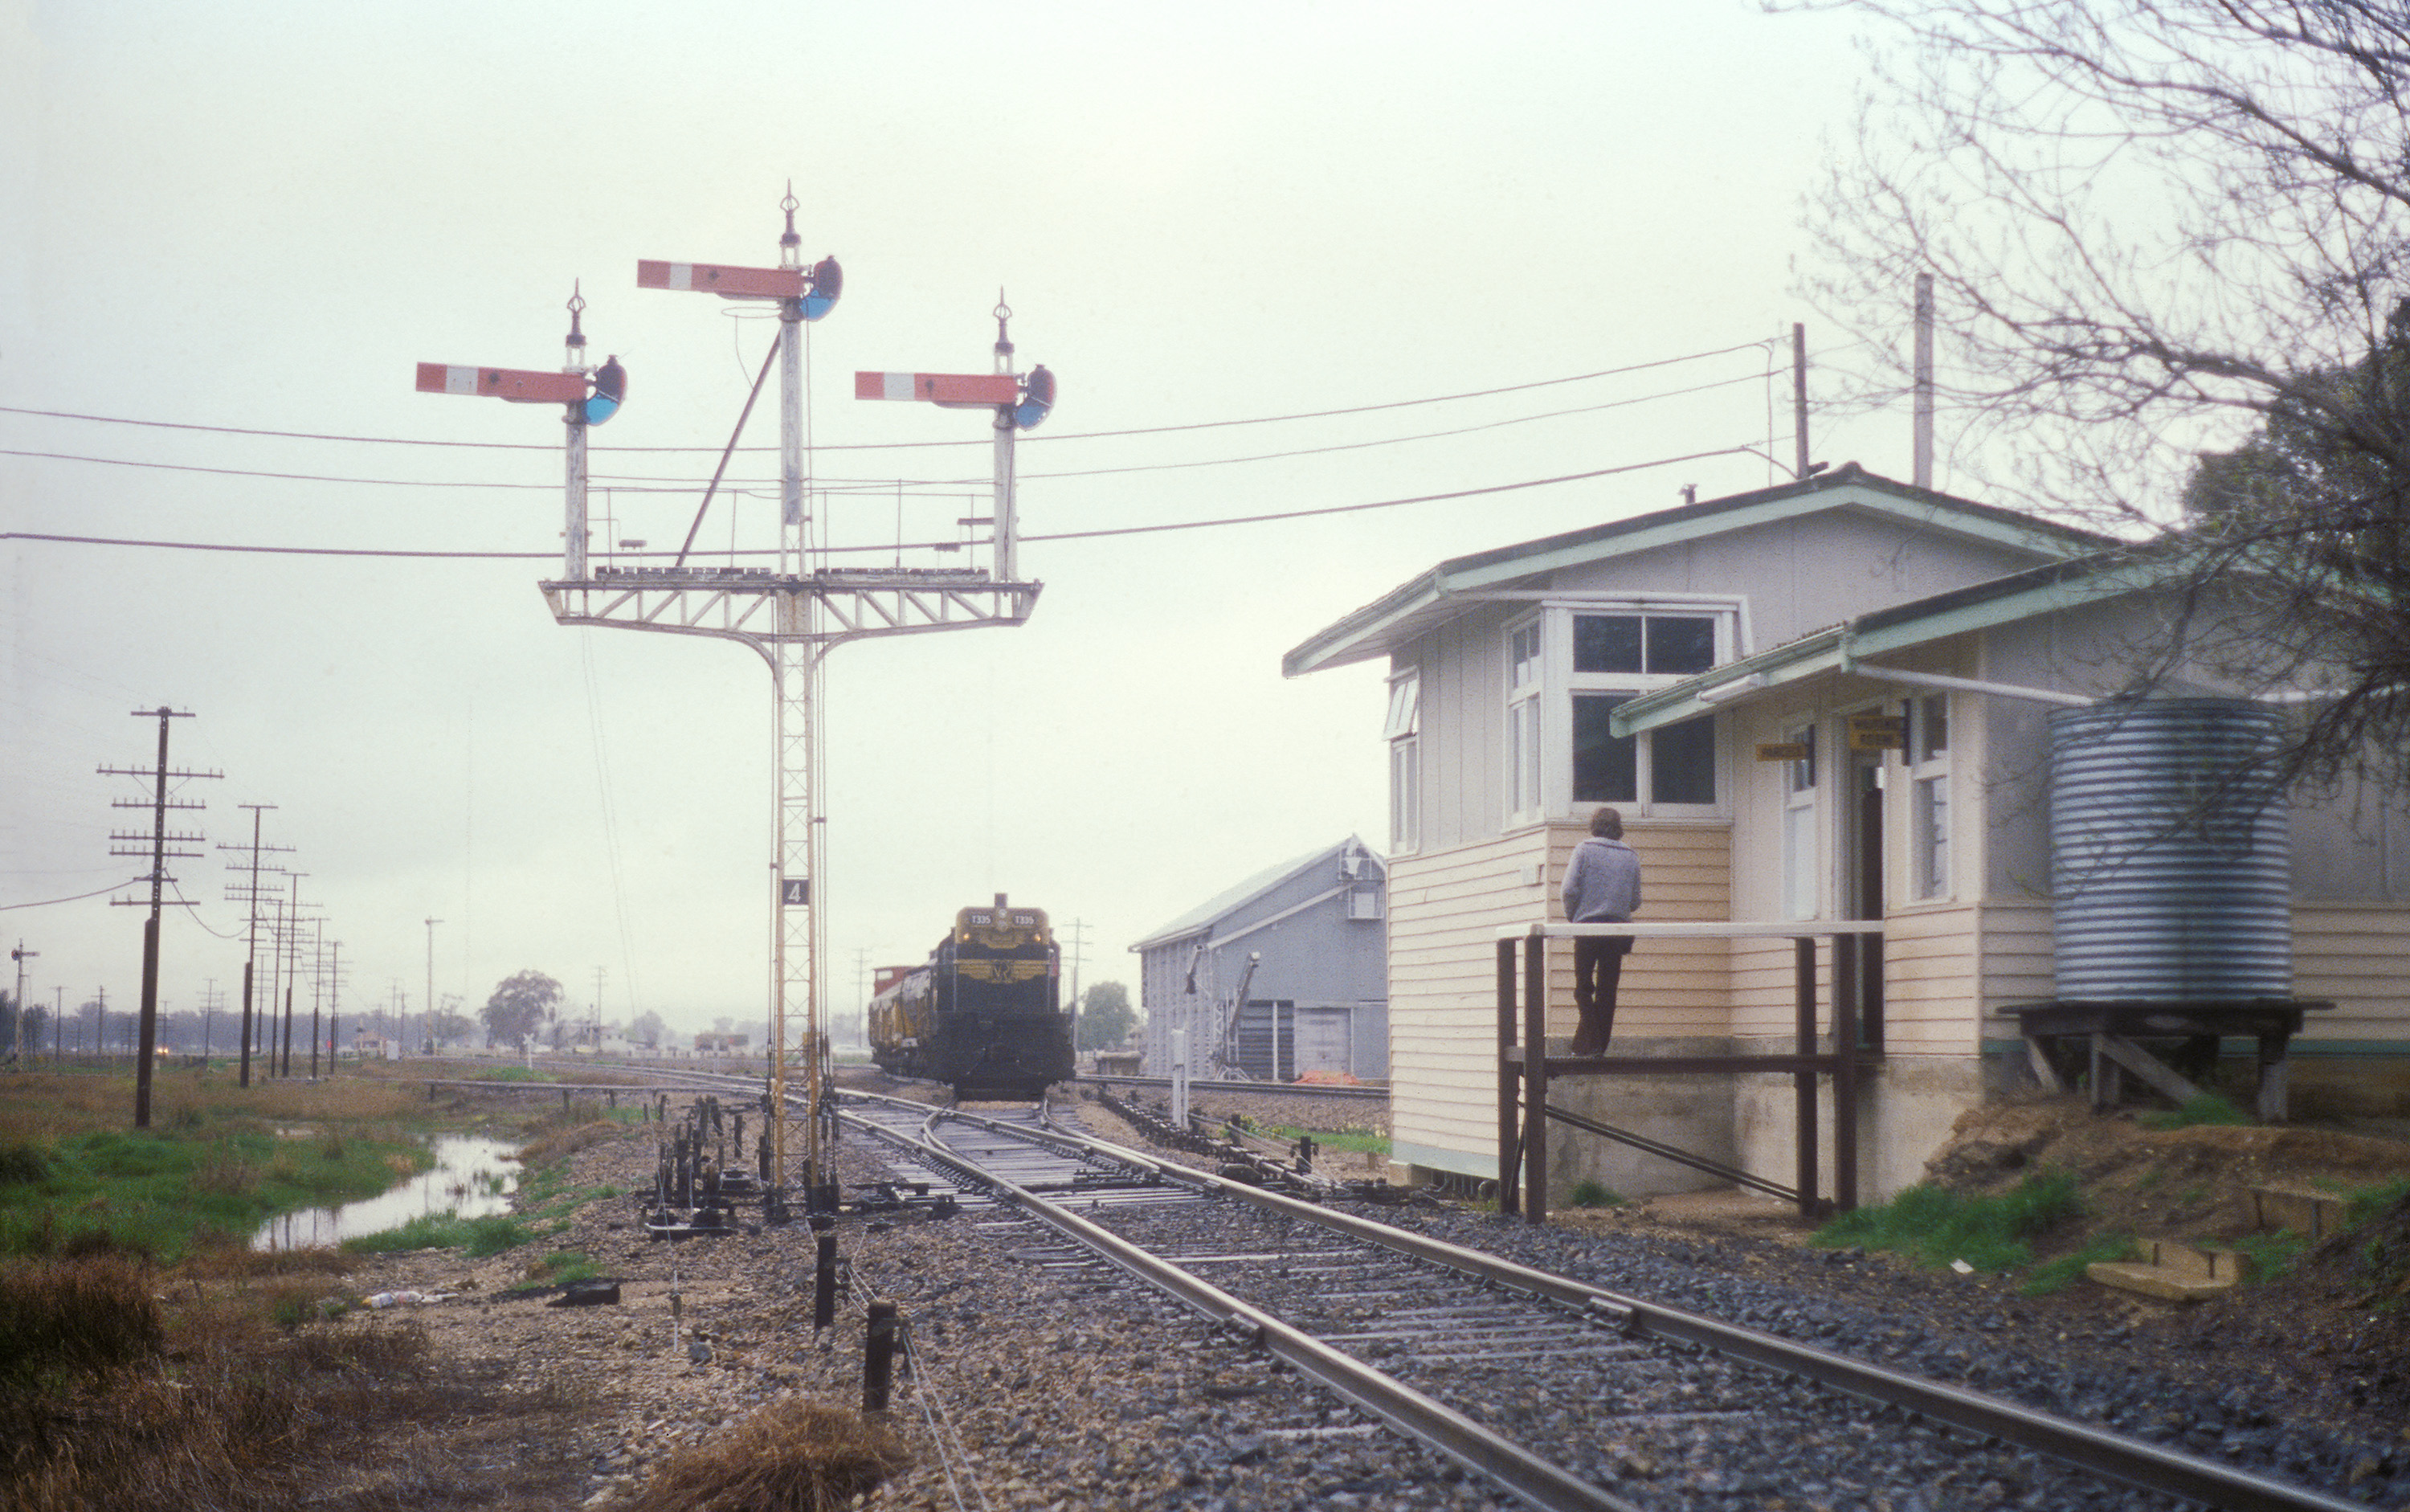
ABOVE: The weather still hasn't improved as the Signalman waits to exchange staffs with the crew on T 335 as they return from Bright later that same day. September 3, 1979
(Photograph courtesy of Geoff Winkler).

ABOVE: An interior view of the Bowser signal box and
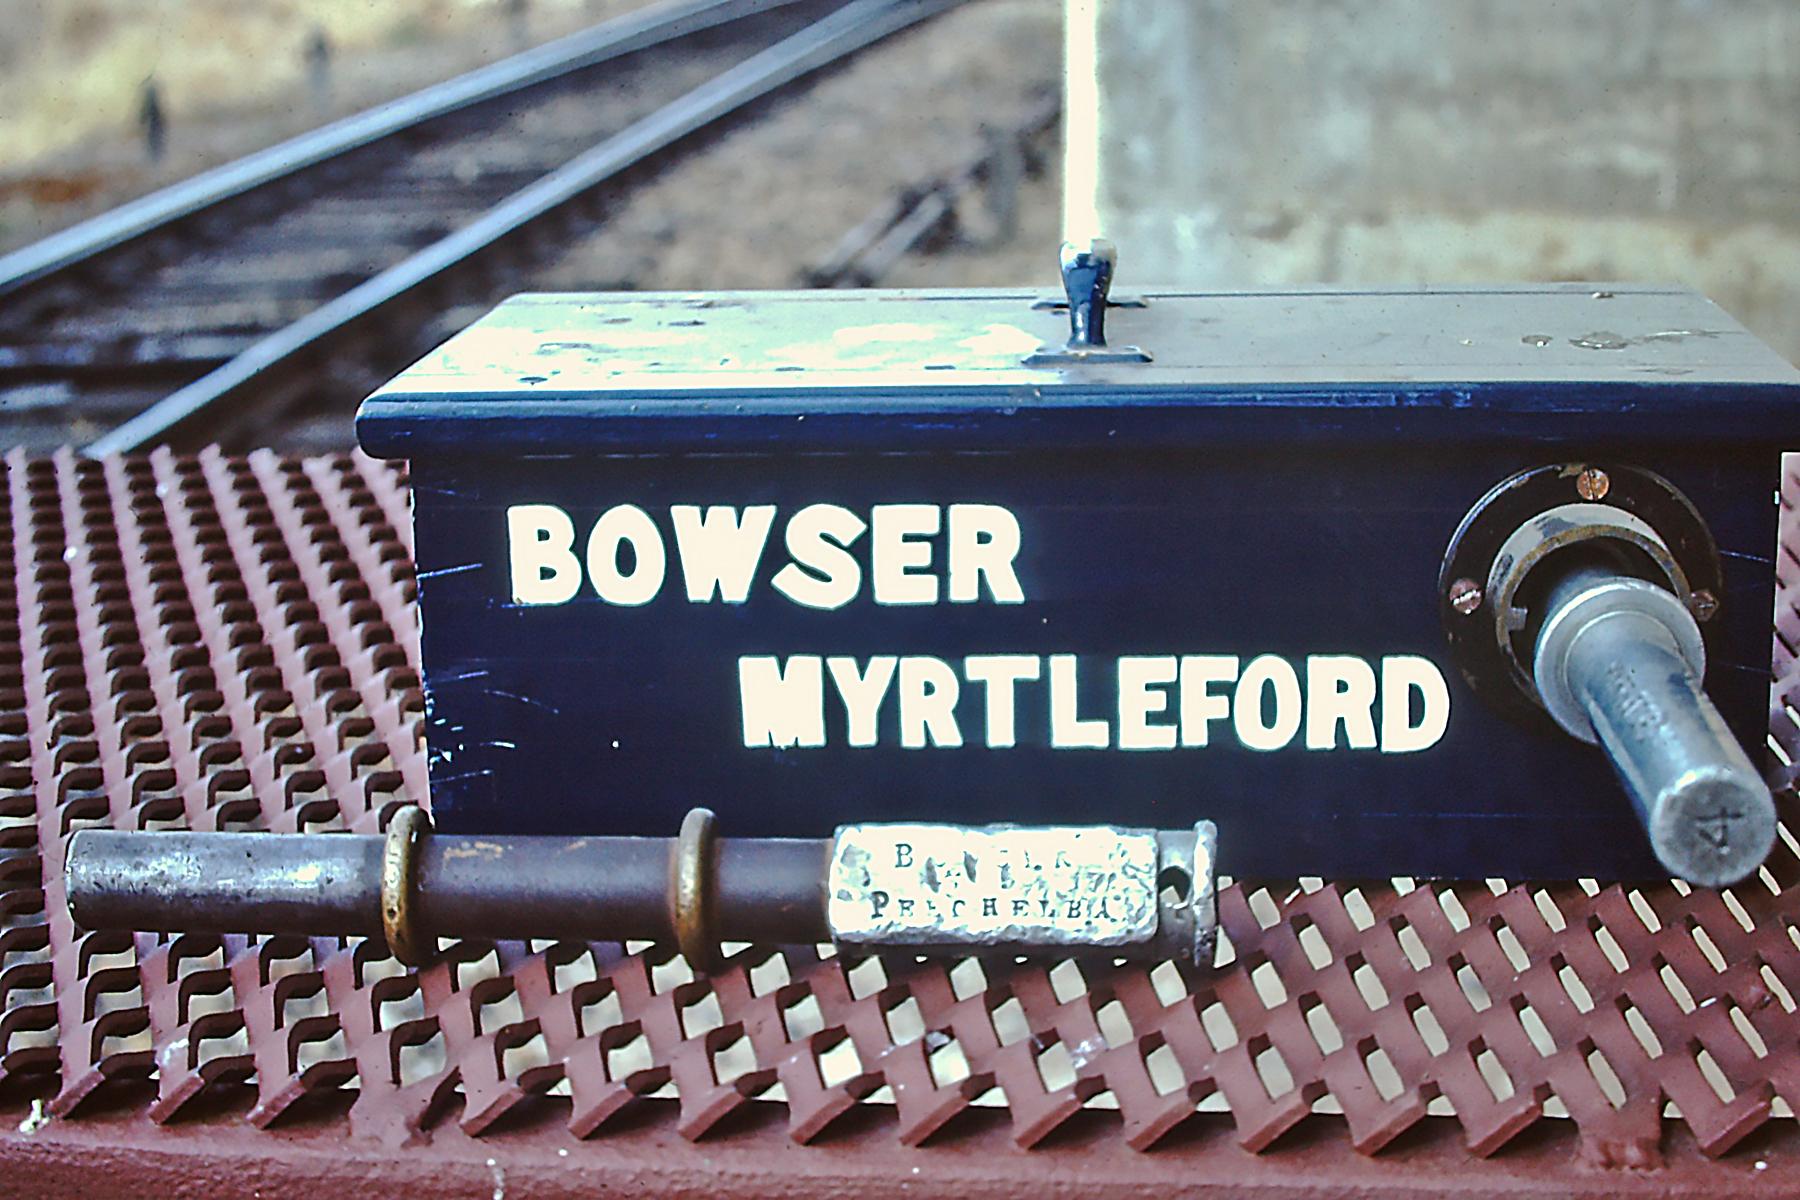
BELOW:The Staff and Ticket Box for the branch to Myrtleford and the Staff for Peechelba (East).
(Both photographs courtesy of David Harvey).
BORALMA
| Bowser | x Miles x Chains x Links / xkm | Springhurst |
Page under construction. Submissions of photographs, plans or information most welcome.

Feel free to email me with any corrections or comments
Page created Mar 4, 2022