Sunshine to Ballarat.

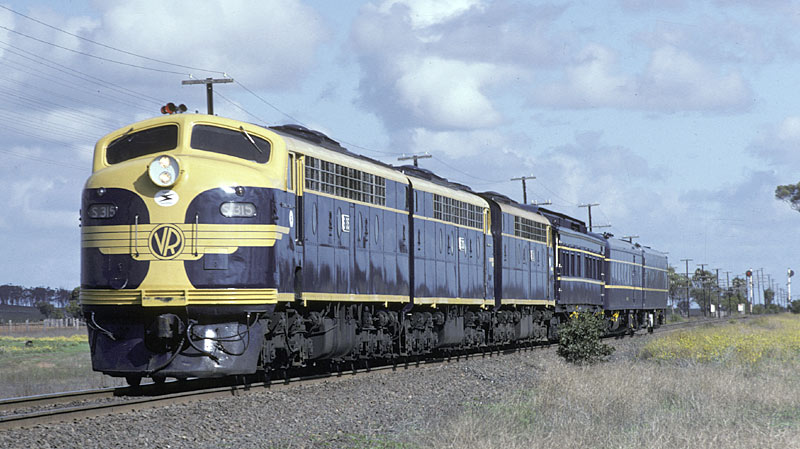
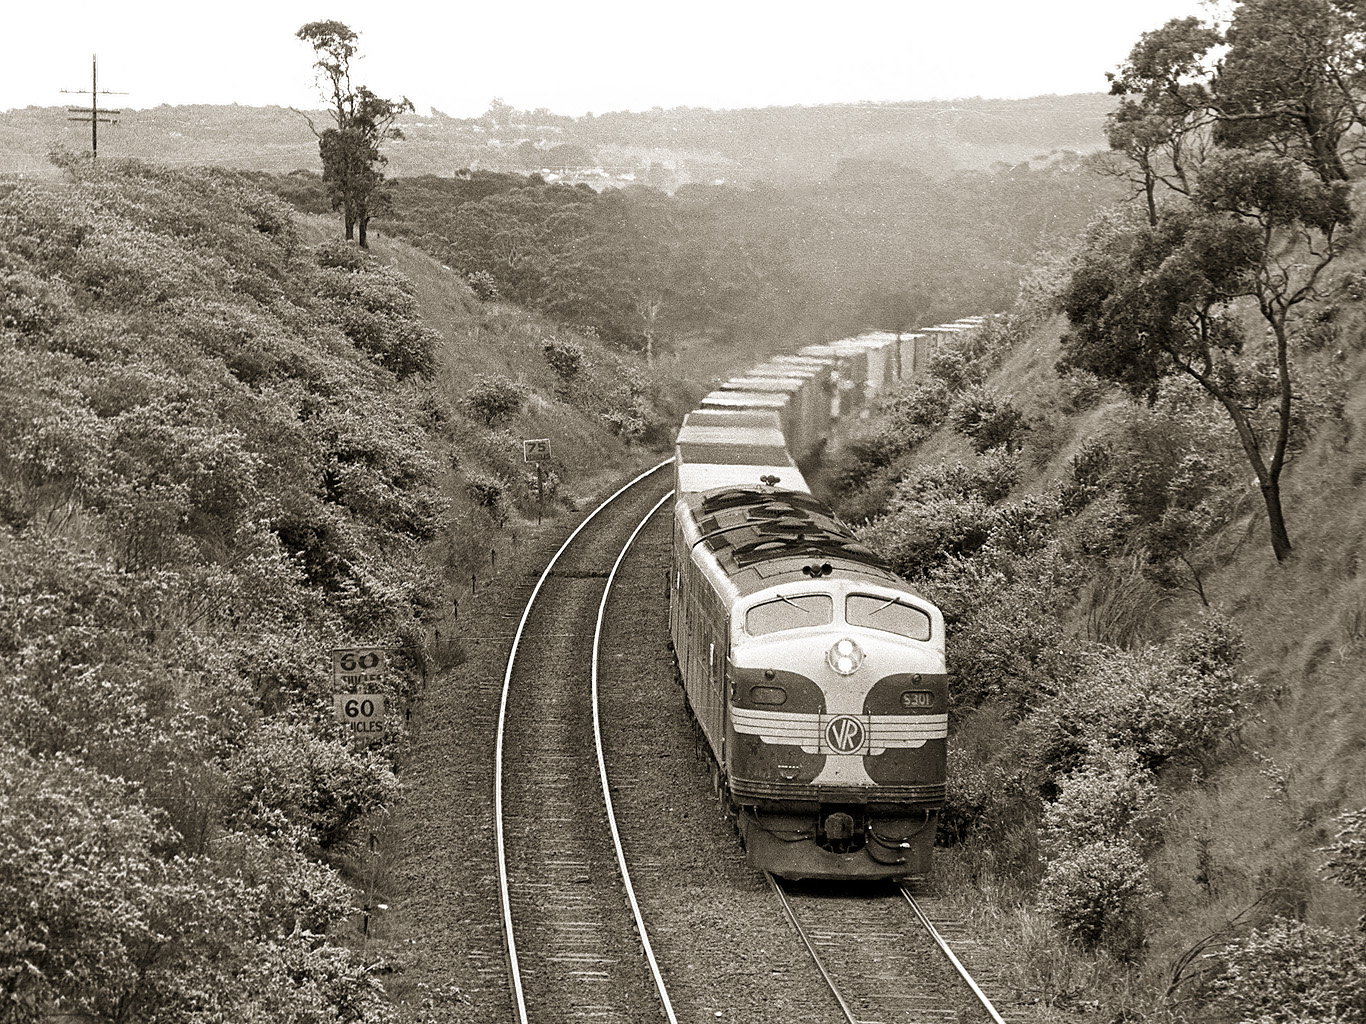
ABOVE: A down fast goods departs Sunshine with classic Western line power of two S class, Sunshine's up distant can be seen at the rear of the train. A pair of S class could take 1560 tons up Ingliston Bank. June 1968. Official VR photo PRC603.

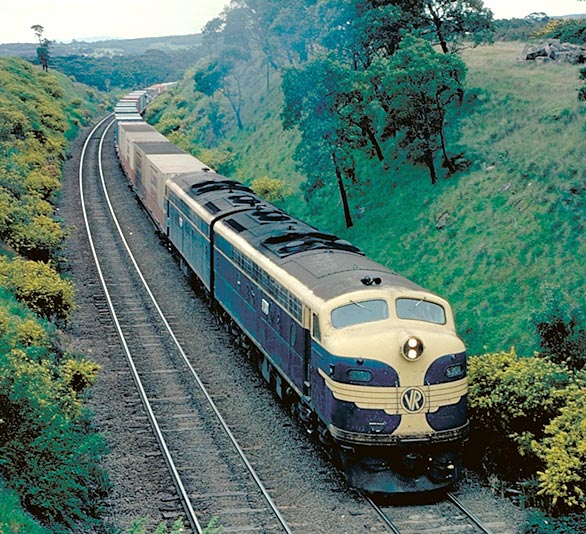
ABOVE: A pair of S class begin their journey westbound on an interstate goods at Ardeer, At this time, the new South track was yet to be brought into service and the train is on the original line, notice how the new line slews around Ardeer platform. The new south line was brought into service on Oct. 3 1976. circa 1976. (photo courtesy Chris Wurr)

ABOVE: RM 4 departs Rockbank on a down Bacchus Marsh service, Feb 3 1978. (photo courtesy Bob Wilson)

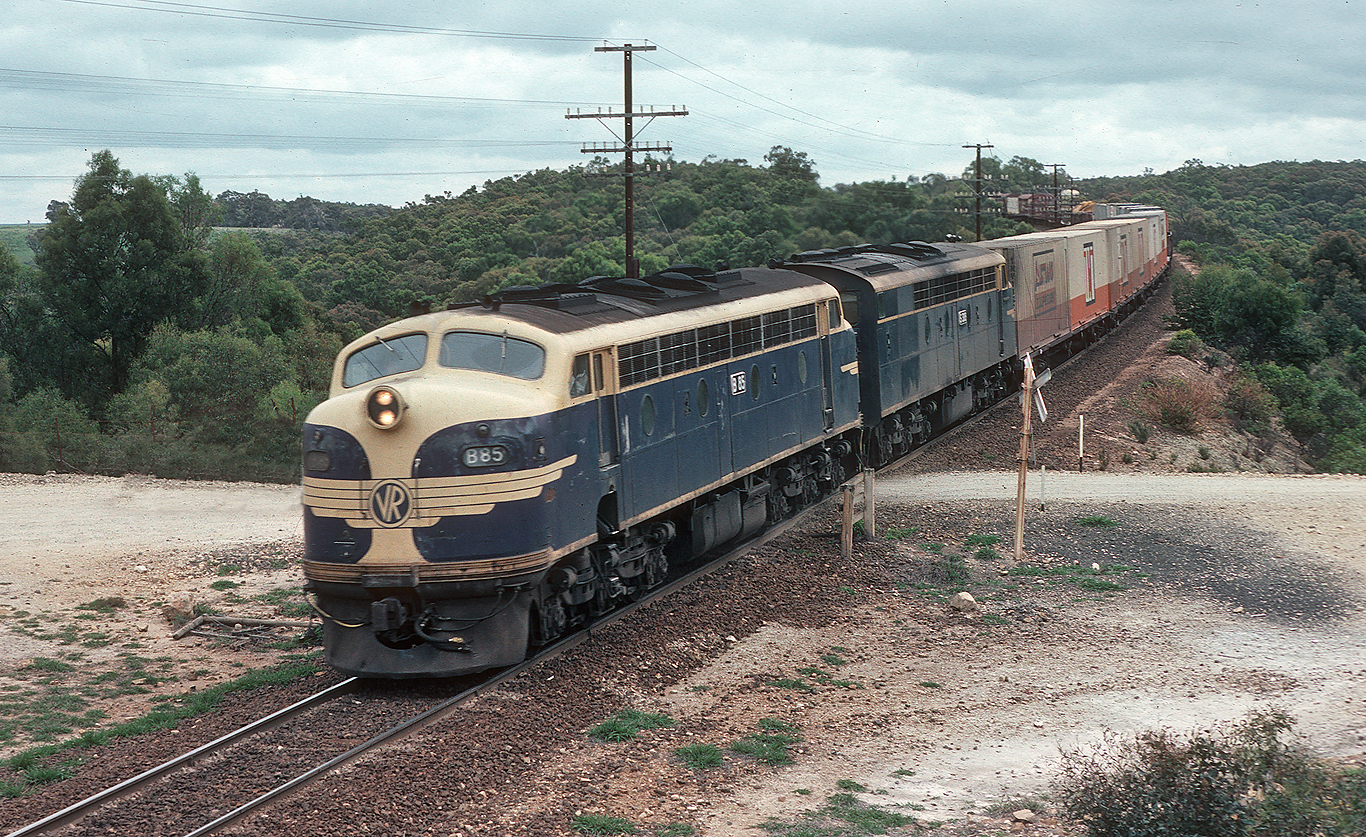
ABOVE: B 75 on a nicely matched set of wooden cars arrives at Rockbank whilst runing the 1538 down Bacchus Marsh, May 26 1983 Photo courtesy Warren Banfield

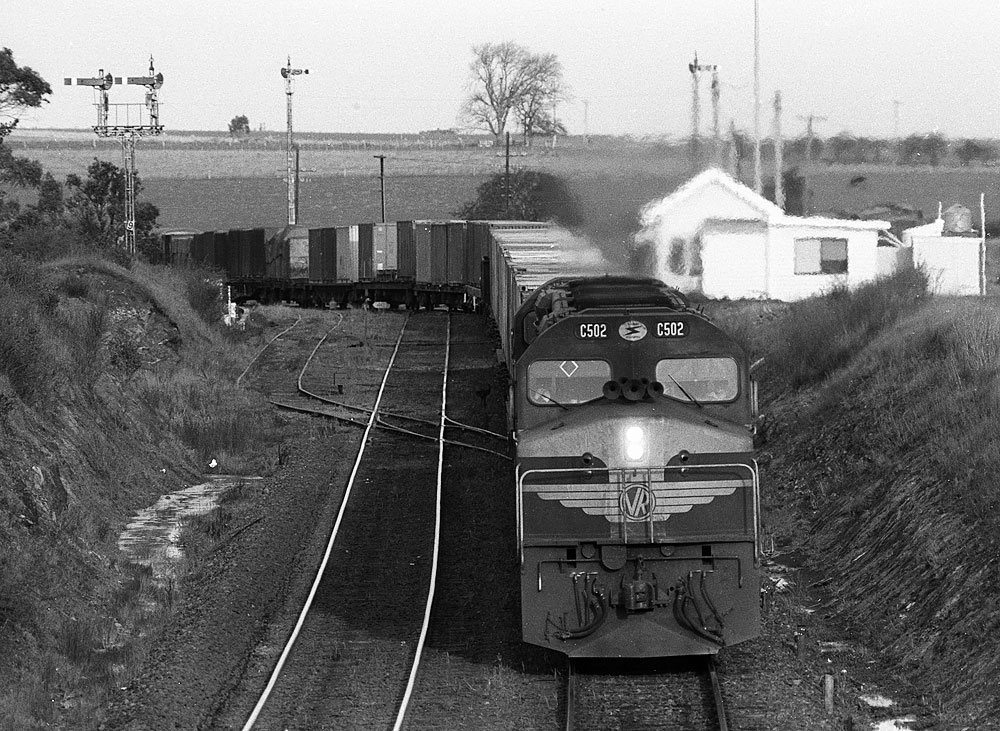
ABOVE: A down steel train at Rockbank with C 502 and X 51 in charge. Nov 23 1985
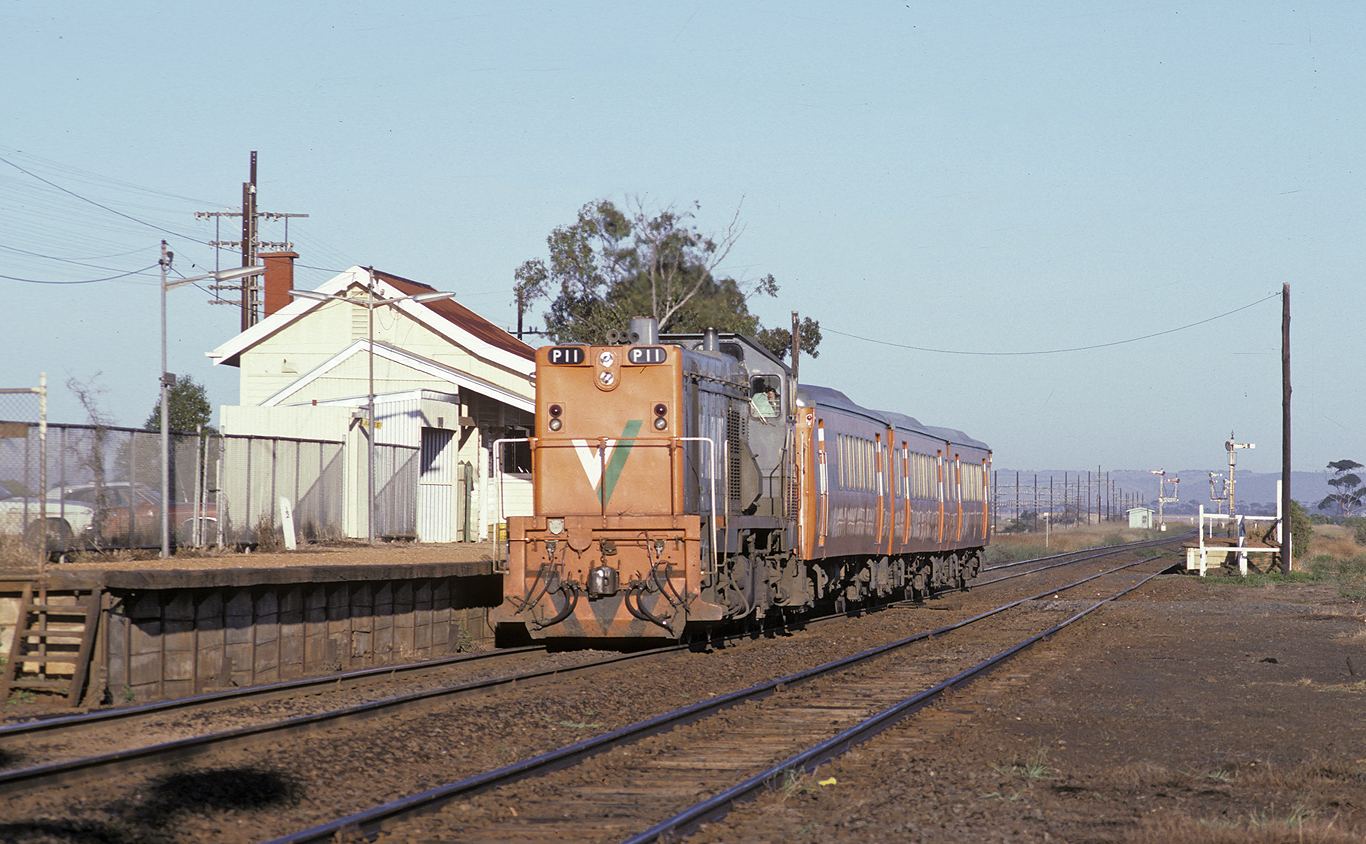
ABOVE: P 11 on an up Bacchus Marsh to Melbourne pass at Rockbank. Jan 7 1986.
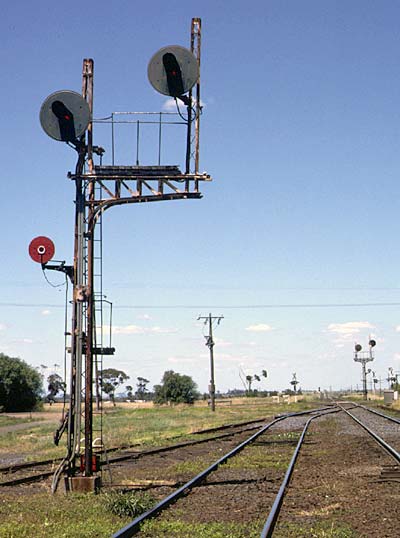
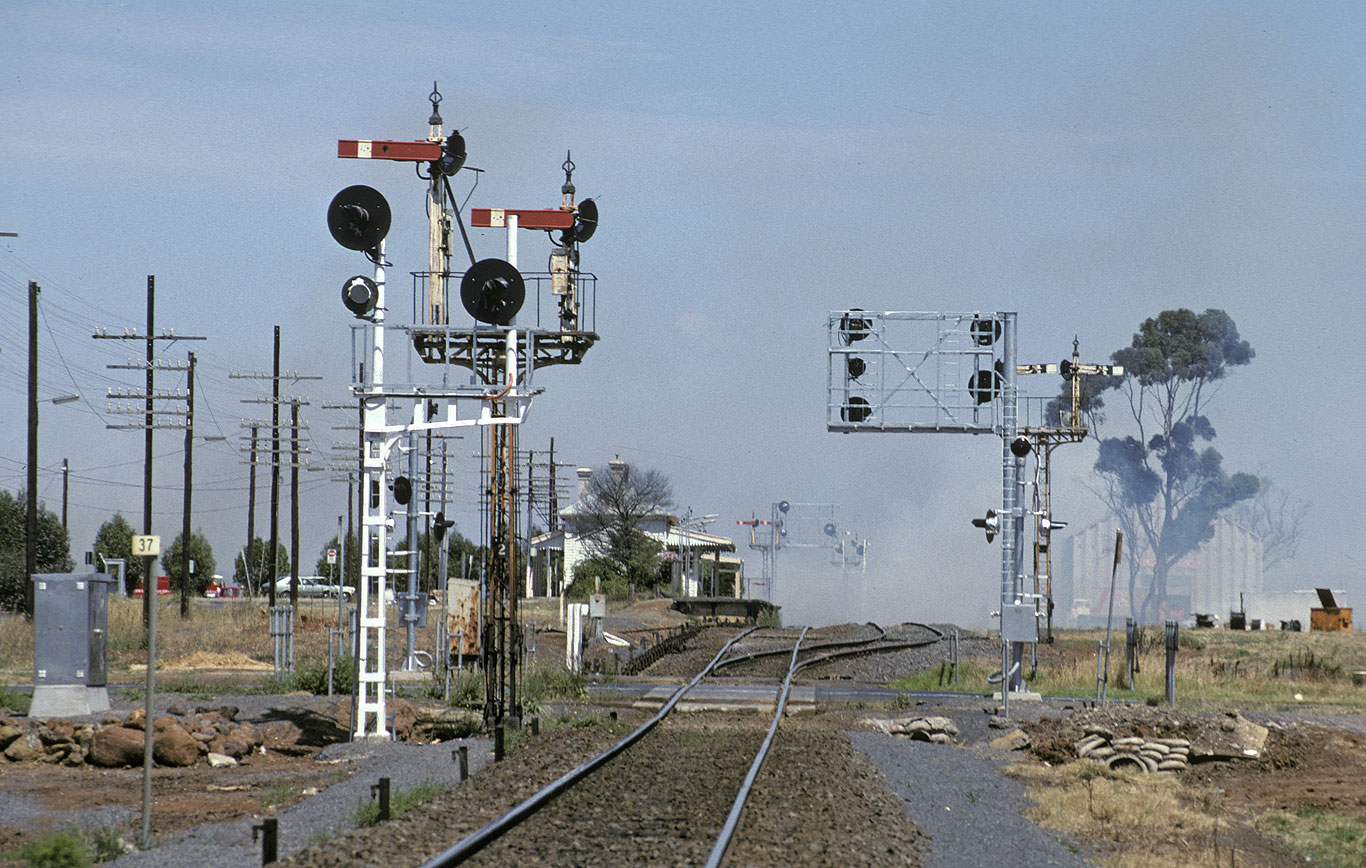
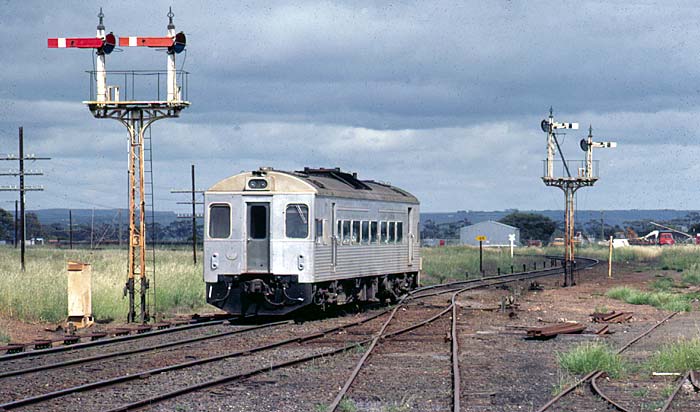
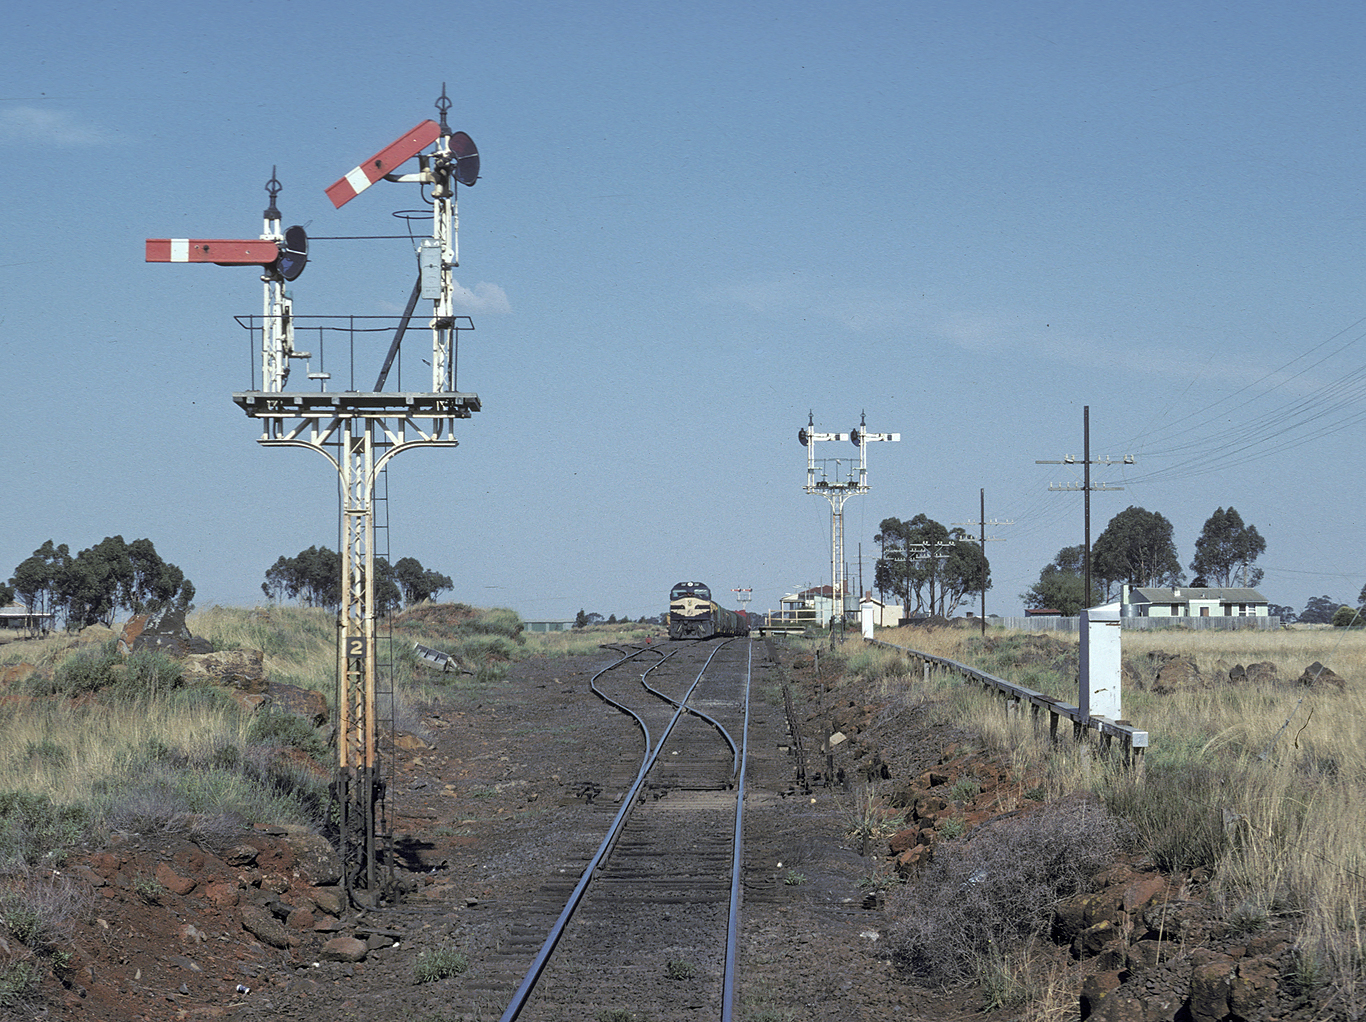
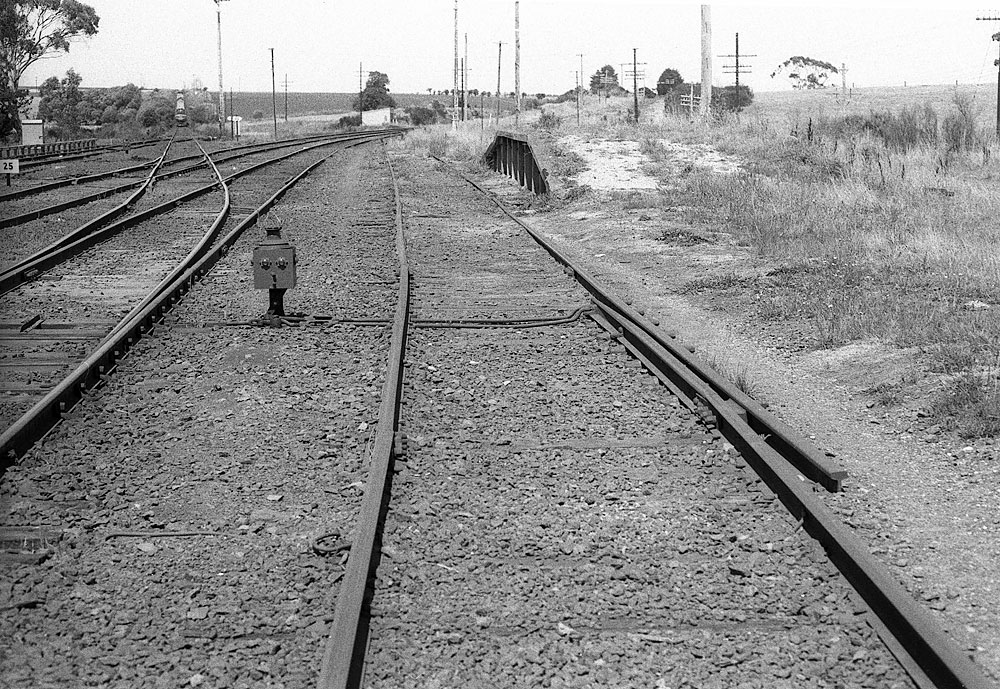
ABOVE: The up home deprture signals were converted to light signals in 1976 when the level crossing, seen in the distance, was equipped with flashing lights. The disc was provided at this time for movements out of #3 road, 1980.

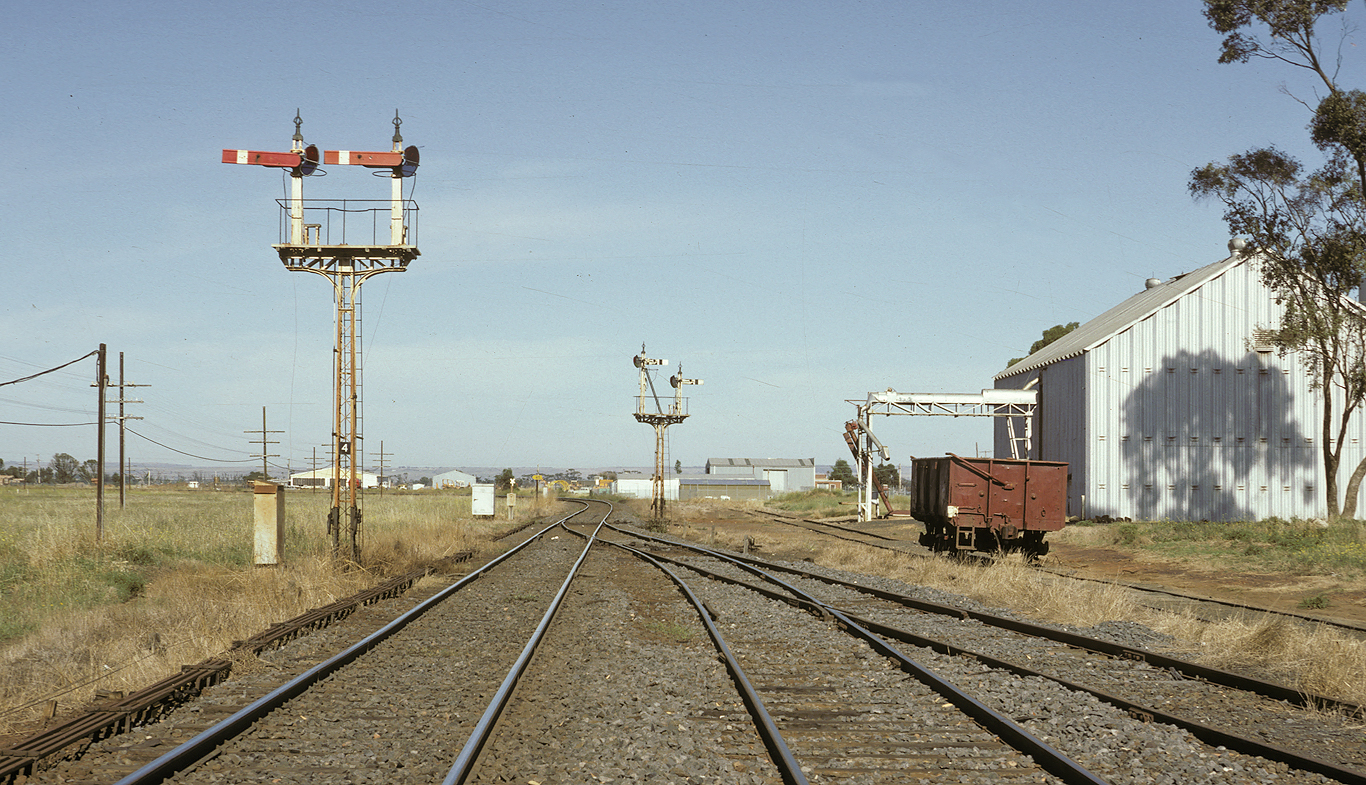
ABOVE: A down pass arrives Rockbank, by this time, No. 3 road had been abolished and the disc signal removed from the post on the left. Oct 7 1988
ABOVE: A down goods waits in No. 2 road at Rockbank. In 1960 No. 2 road was extended and the down end points were motor operated due to the distance to the signalbox, the hut on the right contained the relays for the points. Oct 7 1988.
ABOVE: The new down home departure signal mast is ready to be brought into use on Jan 21 when ATC will be commissioned between Deer Park West Junction and Melton, Jan 6 1990. (photo courtesy Noel Bamford)
ABOVE: A DERM on a down Bacchus Marsh service arrives at Melton. Jan 1983 (Photo courtesy Andrew Hennell)
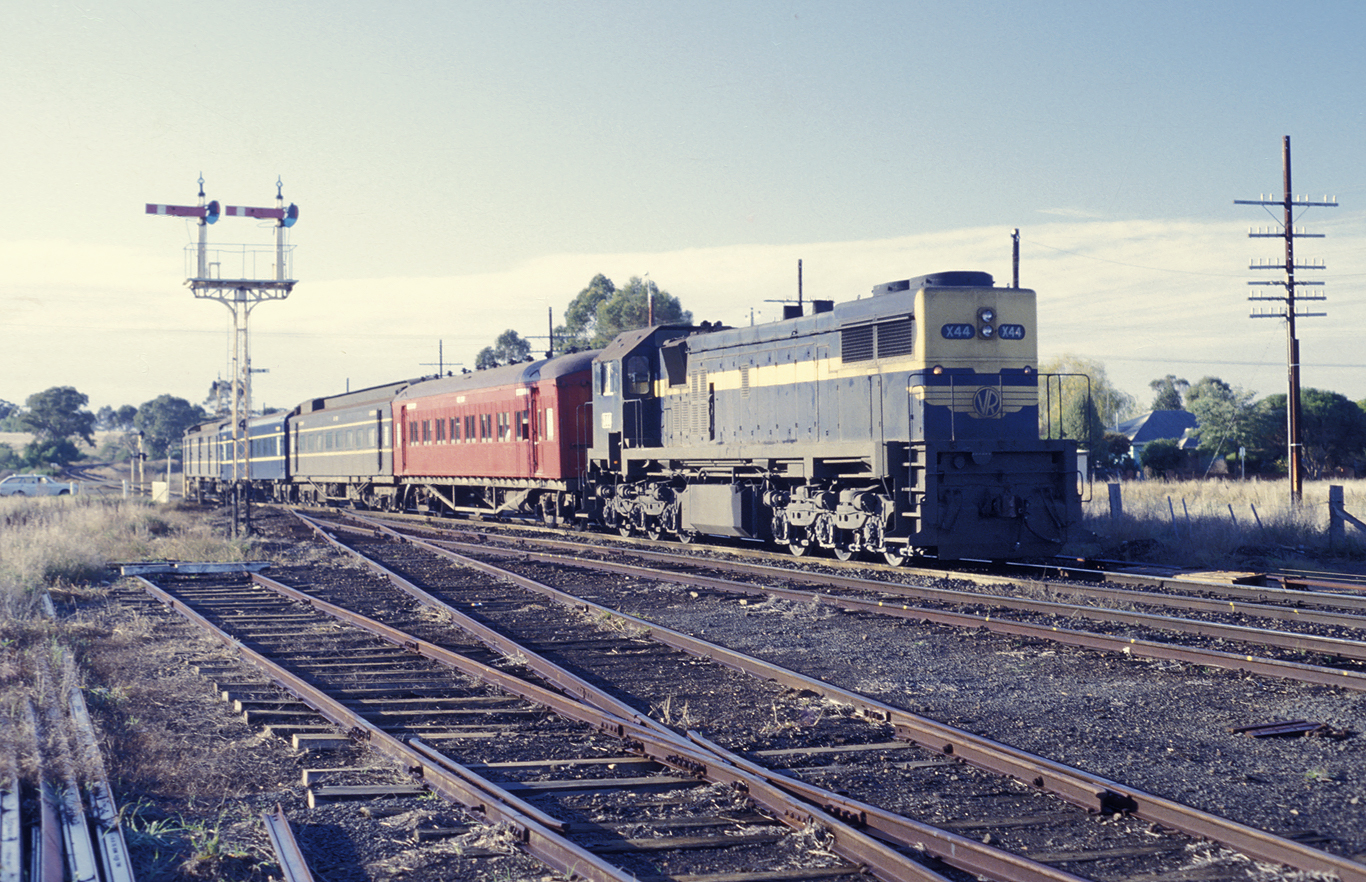
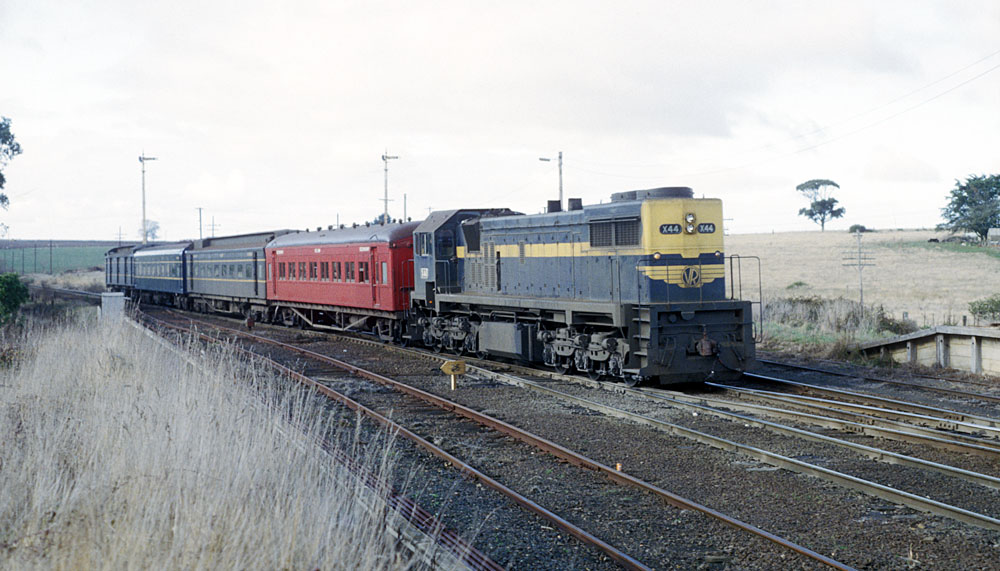
ABOVE: X 44 arrives at Melton on the 8.30am Spencer St to Horsham pass. 1978.
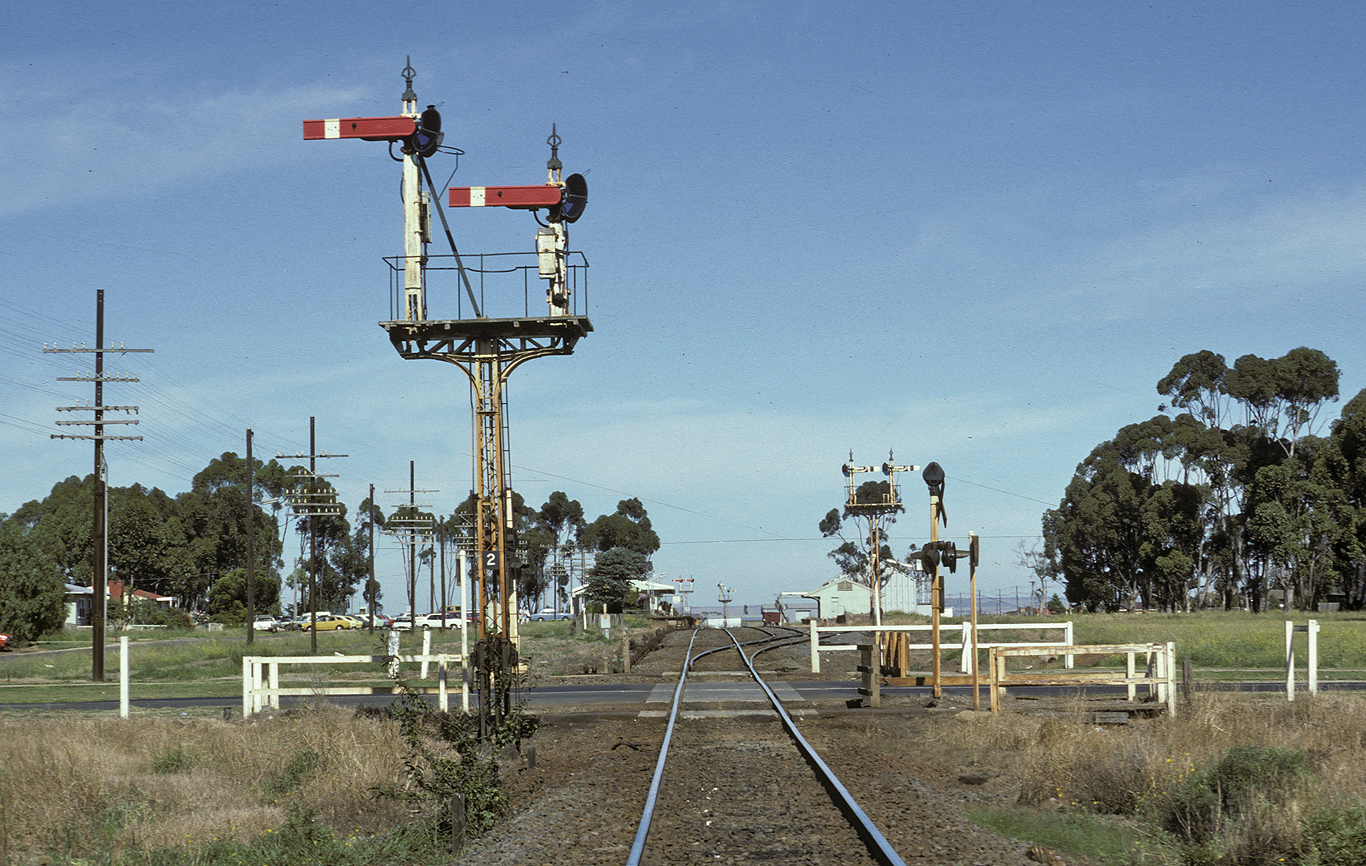
ABOVE: Post 2 at Melton, the down home arrivals looking west. Jan 7 1986. BELOW: A few weeks after this photo was taken the section Deer Park West Jct to Melton was converted to Automatic & Track Control and the new signals bought into use replacing the mechanical signals. Jan 6 1990. (photo courtesy Noel Bamford)
ABOVE: Post 4 at Melton, down home departures, looking west. Jan 7 1986
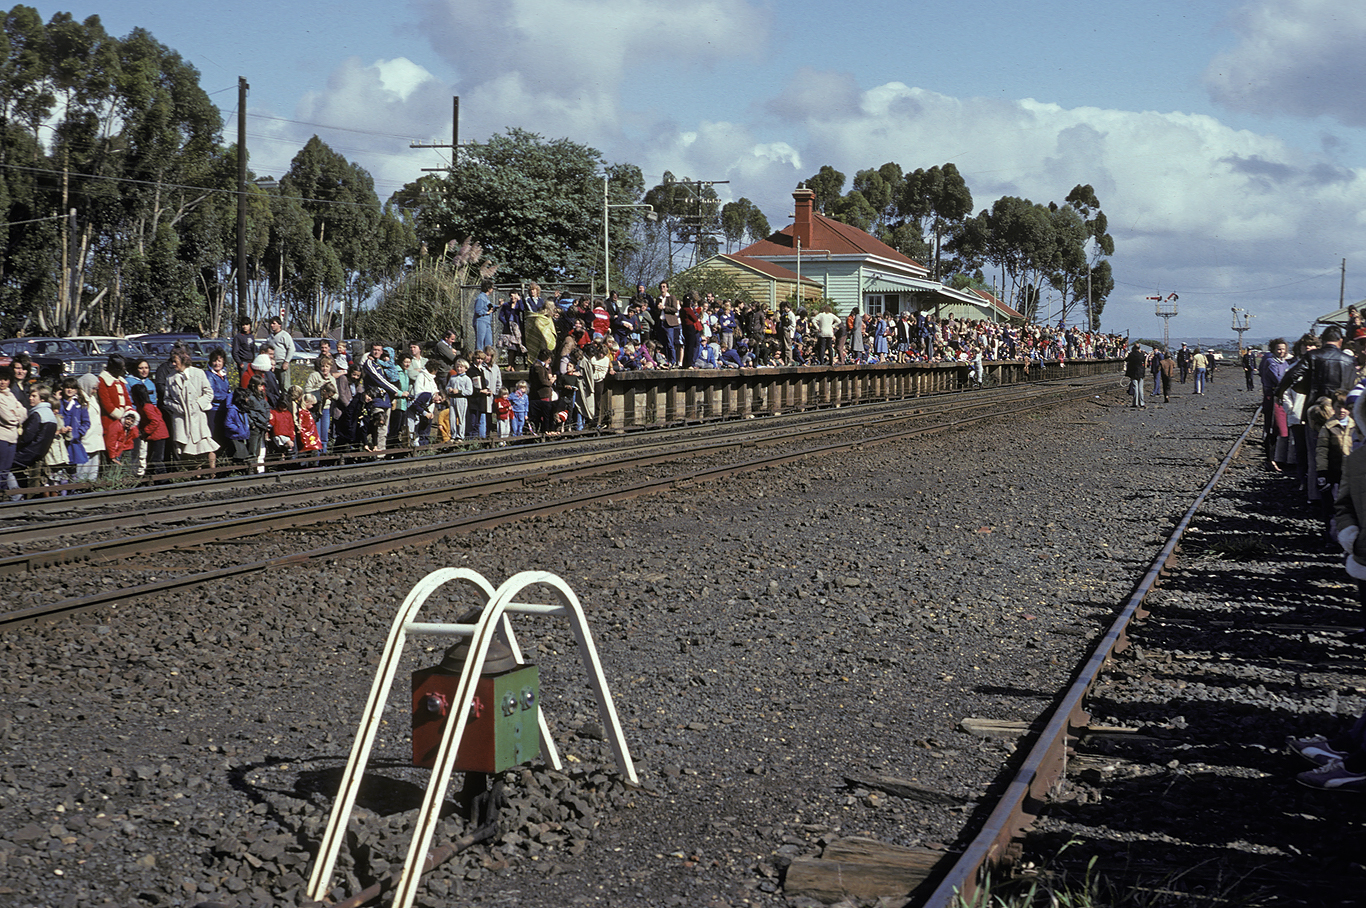
ABOVE: Melton at its busiest, most of the town are here to see the royal train carrying Charles and Diana pass through BELOW. April 15 1983
ABOVE: A Bacchus Marsh to Spencer St. DRC arrives Melton, Oct 31 1981.
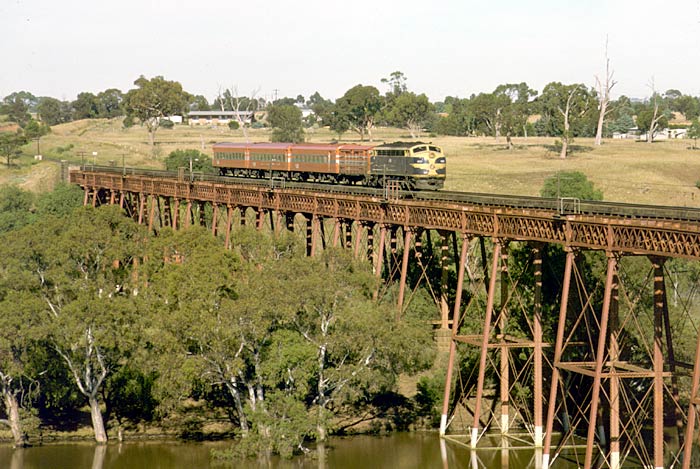
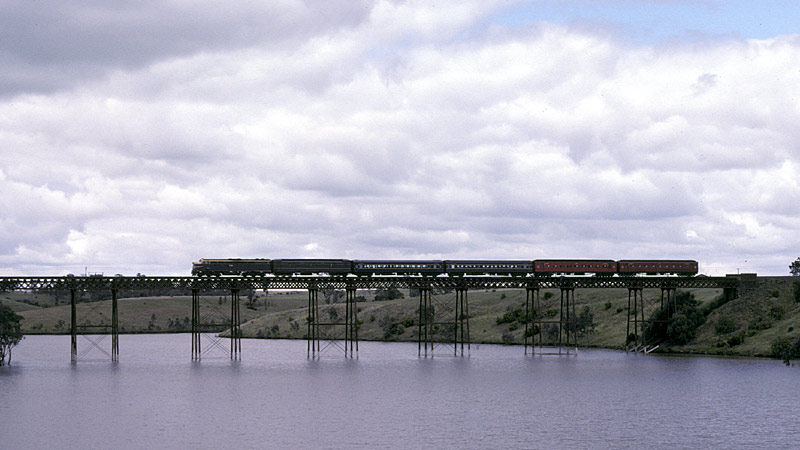
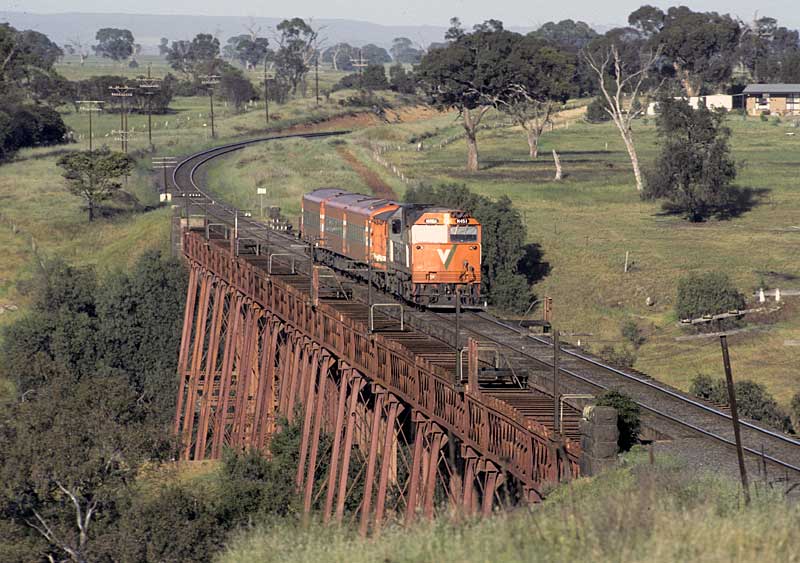
ABOVE: B 65 on an up Ballarat pass. passes over the Melton Weir viaduct in Jan. 7 1986.
ABOVE: S 317 and an X at the head of "The Overland" on the Melton weir viaduct. May 1988.
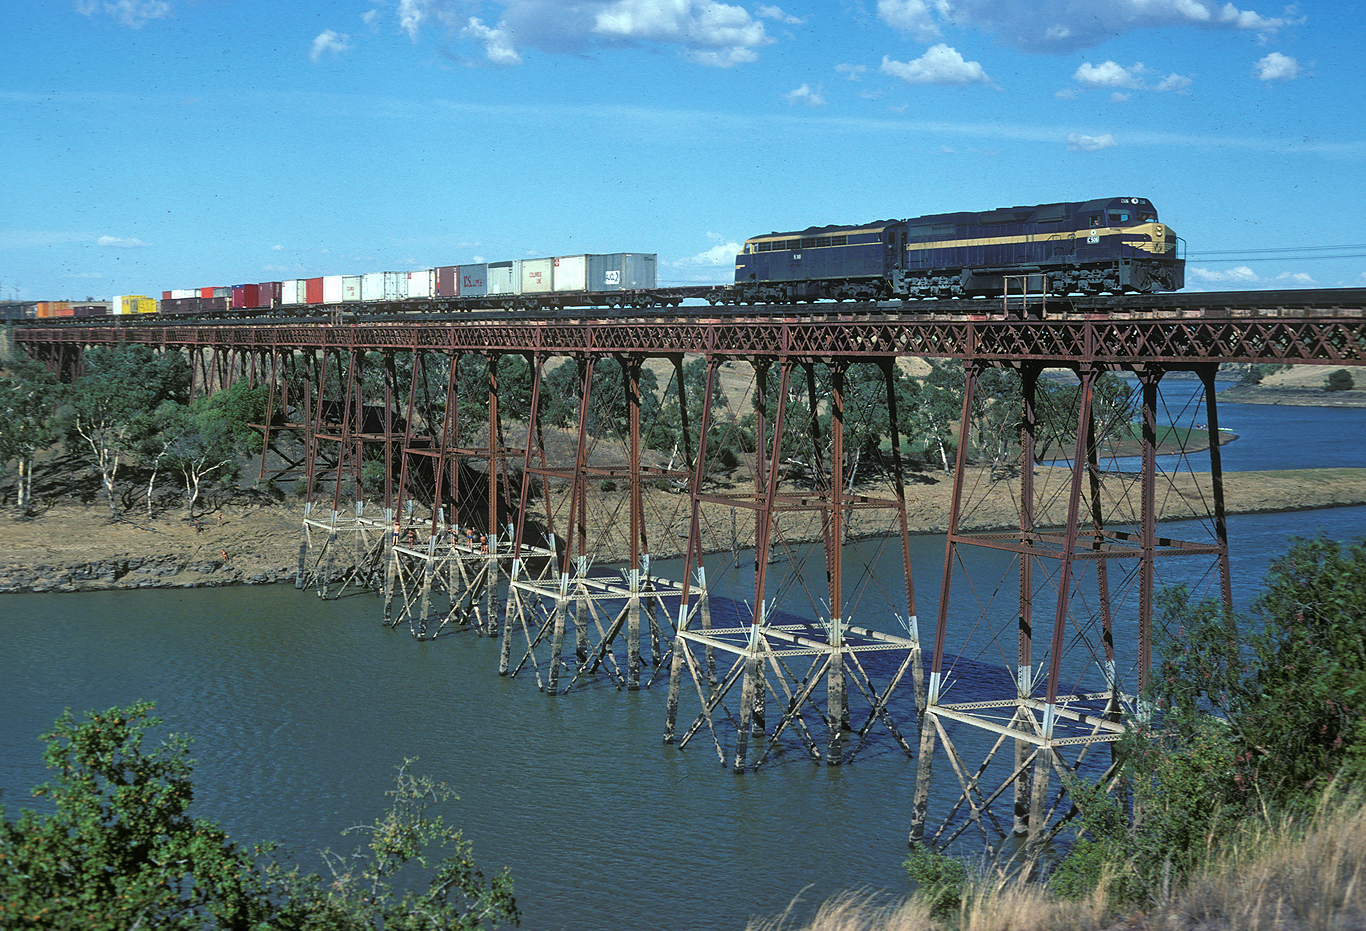
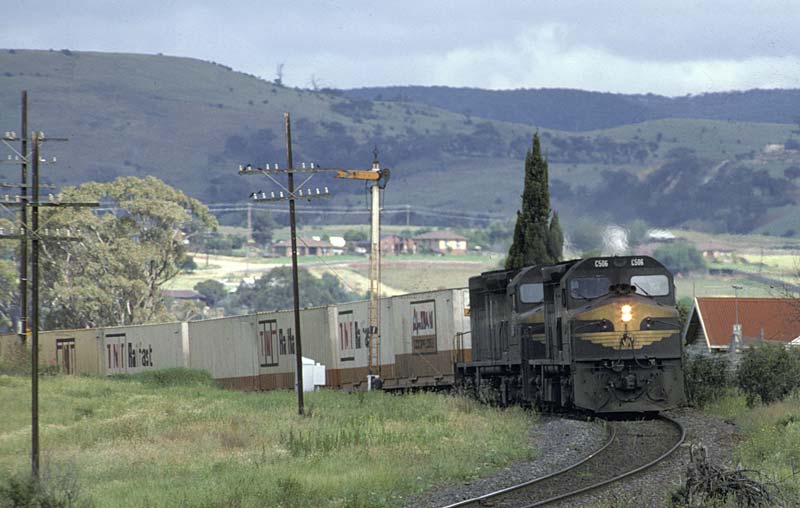
ABOVE: C 506 - S 310 on a down Adelaide bound "jet" cross the Melton weir viaduct, March 1982. (photo courtesy Warren Banfield)
ABOVE: An S class on the morning Dimboola to Spencer St. pass. races across the Melton Weir viaduct. Oct. 31 1981.
ABOVE: N 451 leads a Ballarat to Spencer St. pass. across the Melton weir viaduct. Nov. 1986

Parwan was disestablished as an electric staff station on Feb 4 1984, on the same day Parwan loop was established as an electric staff station.
ABOVE: S 302 leads an up goods around the Parwan curves in 1979. These curves were drastically realigned as part of the RFR project.
ABOVE: A down interstate "jet" (#9121) drops down the grade out of Parwan towards the Parwan curves, Oct 31 1981.
ABOVE: An up Bacchus Marsh pass sits in No 2 road waiting to cross a down train. Feb. 15 1982 (Photo courtesy Warren Banfield)
ABOVE: The modest station building/signalbox at Parwan as the signalman prepares to exchange the staff with a down train. Jan 1983. (Photo courtesy Andrew Hennell)
ABOVE: The view from the cab of an up goods arriving Parwan for a cross with a down goods. Feb 6 1982.
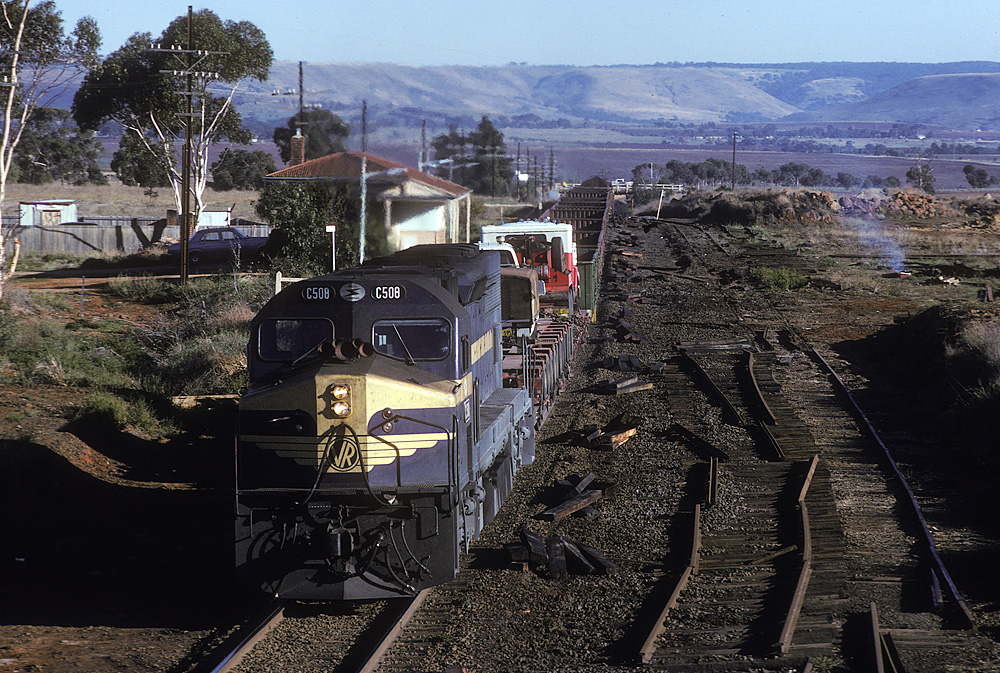
ABOVE: Parwan "ceased to be" on Feb 4 1984 when it was dis-established as an electric staff station and replaced by Parwan loop, here we see C 508 on an up jet a few weeks after, the removal of the yard tracks is well under way.

ABOVE: B 63 - X 36 on the up Overland at Parwan, this was the last time I saw a B class on the Overland. 1982
1919 Bacchus Marsh signal diagram
1954 Bacchus Marsh signal diagram
1963 Bacchus Marsh to Ballan signal diagram
1995 Bacchus Marsh signalling arrangements
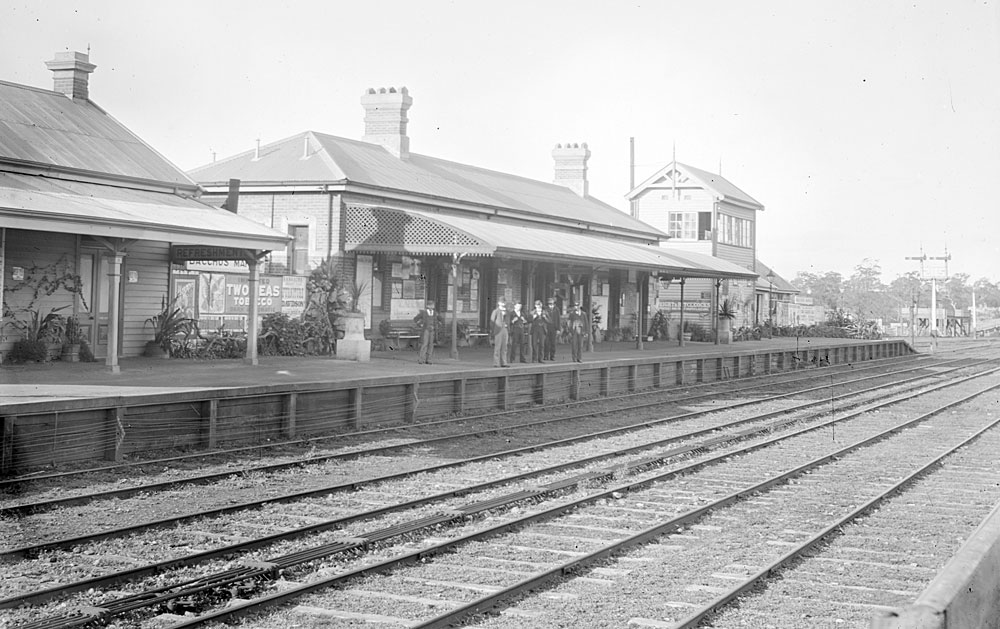
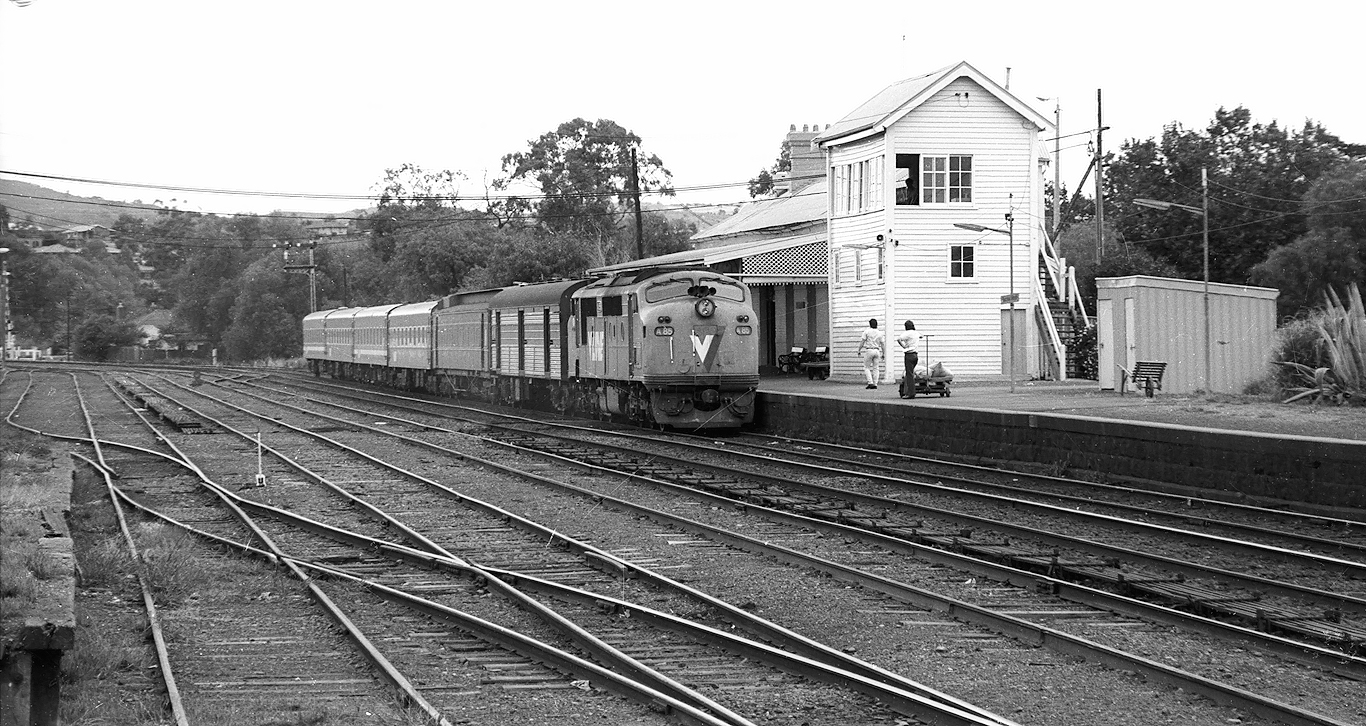
ABOVE: An early view of Bacchus Marsh looking towards Melbourne. (photo coutesy State Library Victoria)
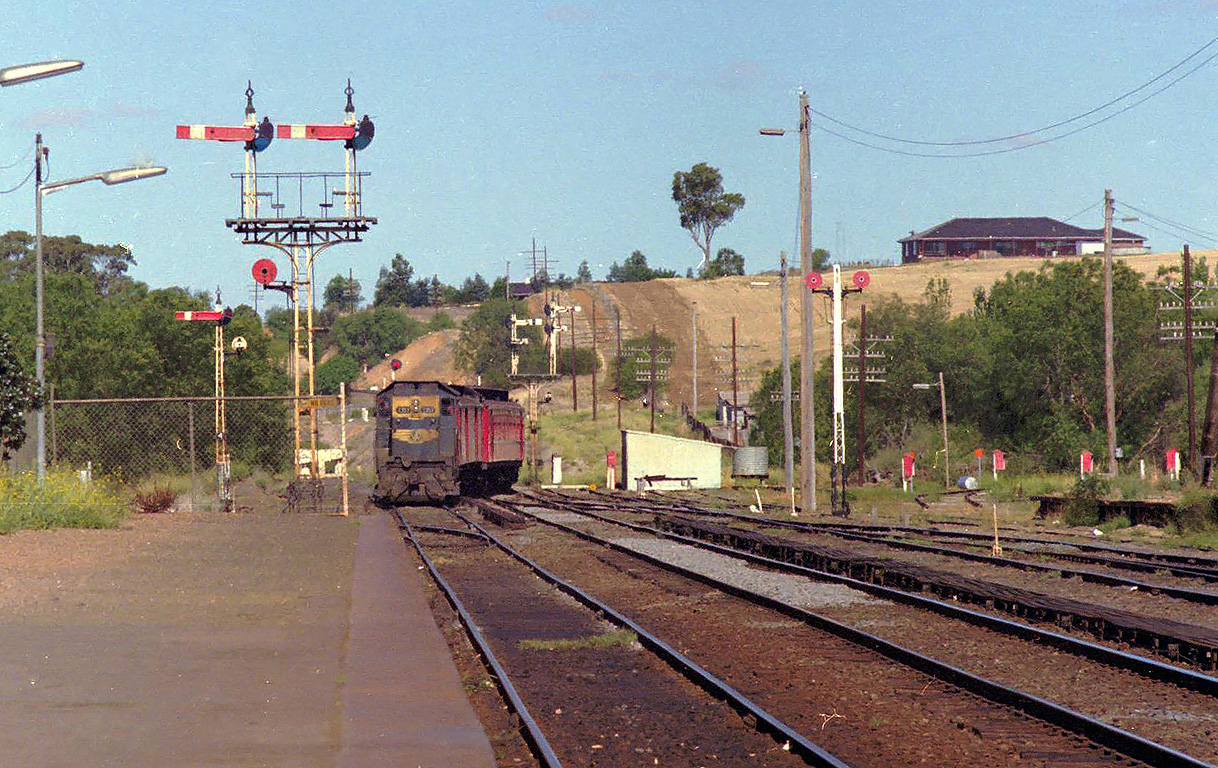
BELOW: The 1700 down Bacchus Marsh has reached its destination, the auto staff exchanger and up home are off for an impending up train, Nov 9 1984. (photo courtesy Noel Bamford)

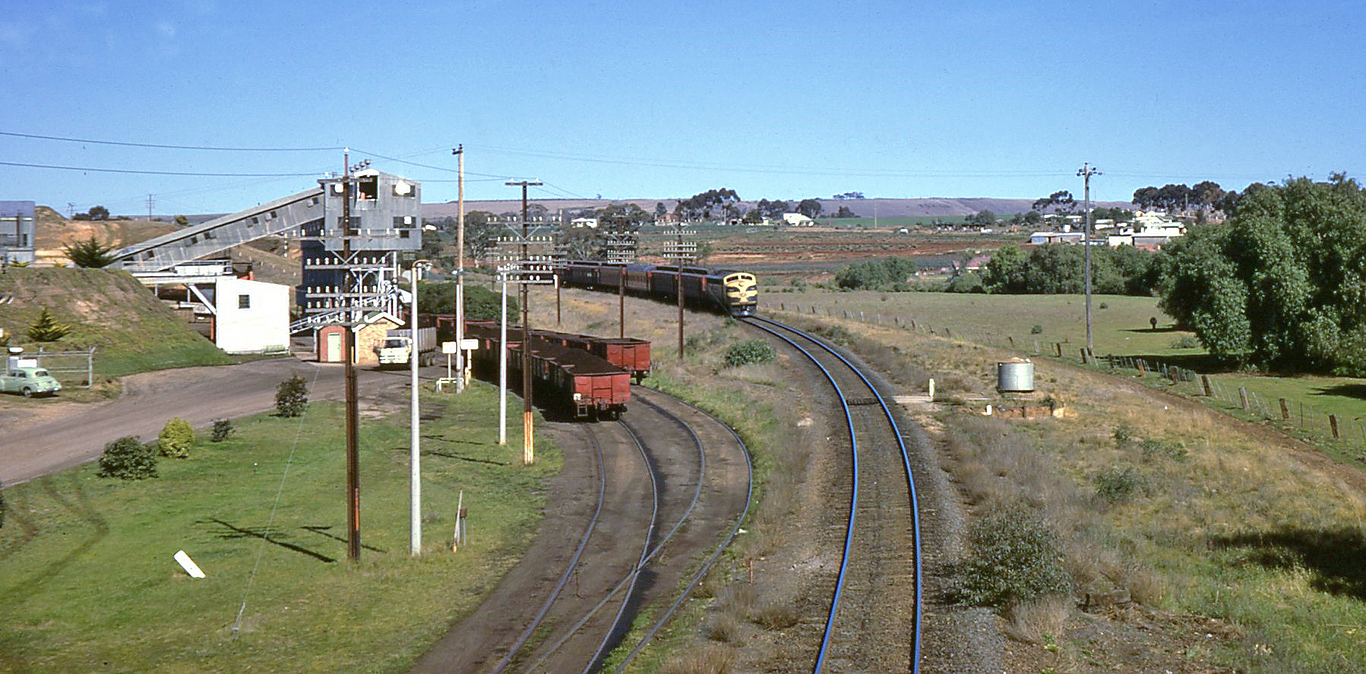
ABOVE & BELOW: The Maddingley brown coal mine at Bacchus Marsh generated a considerable amount of traffic for the VR (307,000 tons in 1964) most, if not all, going to the APM paper mill at Fairfield. Here we see B 66 on an up pass passing loaded and empty coal wagons as it arrives at Bacchus Marsh, Aug.1971. (photos courtesy Doug Miles)
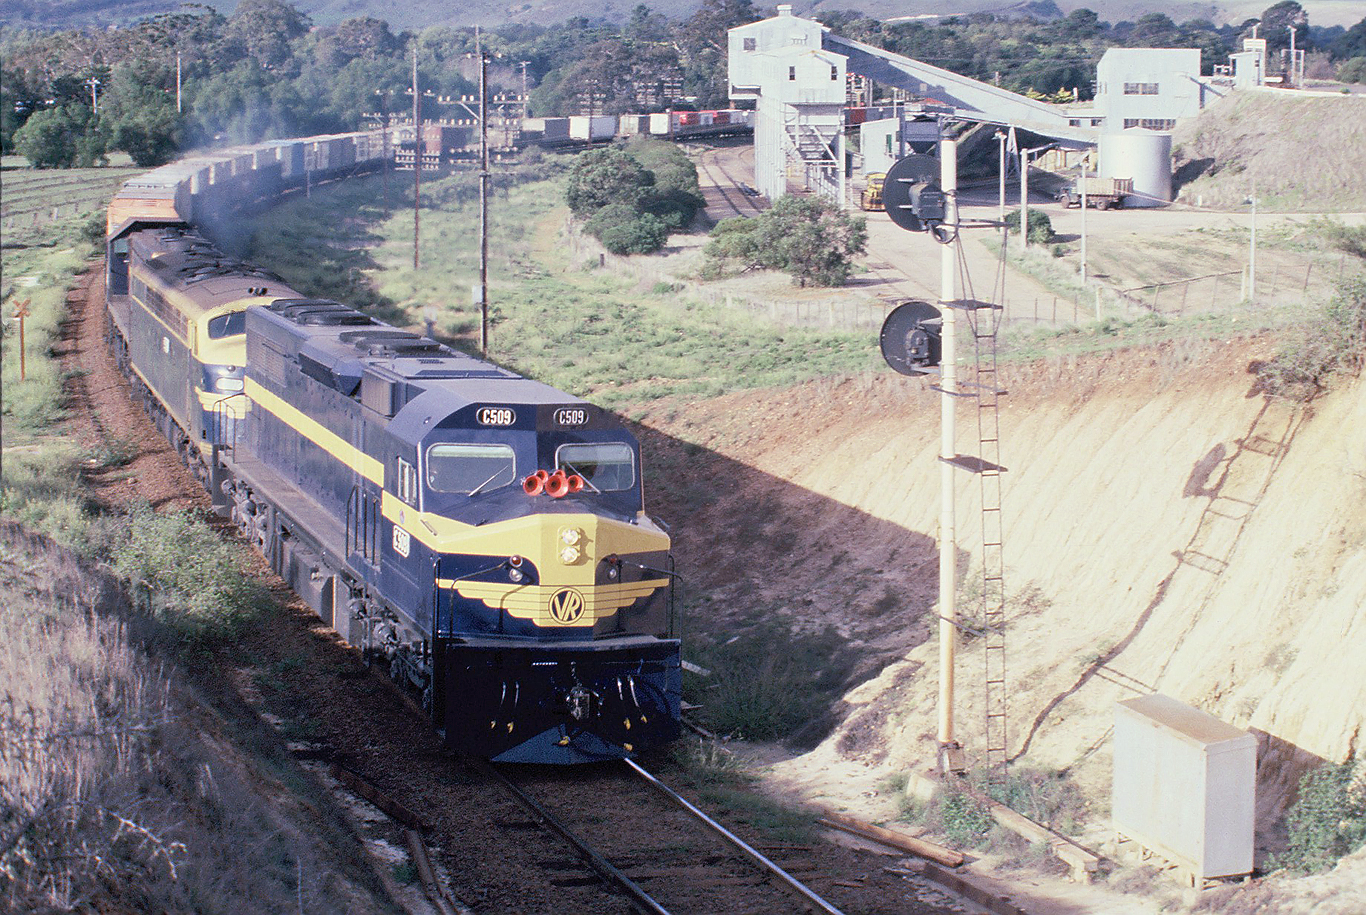
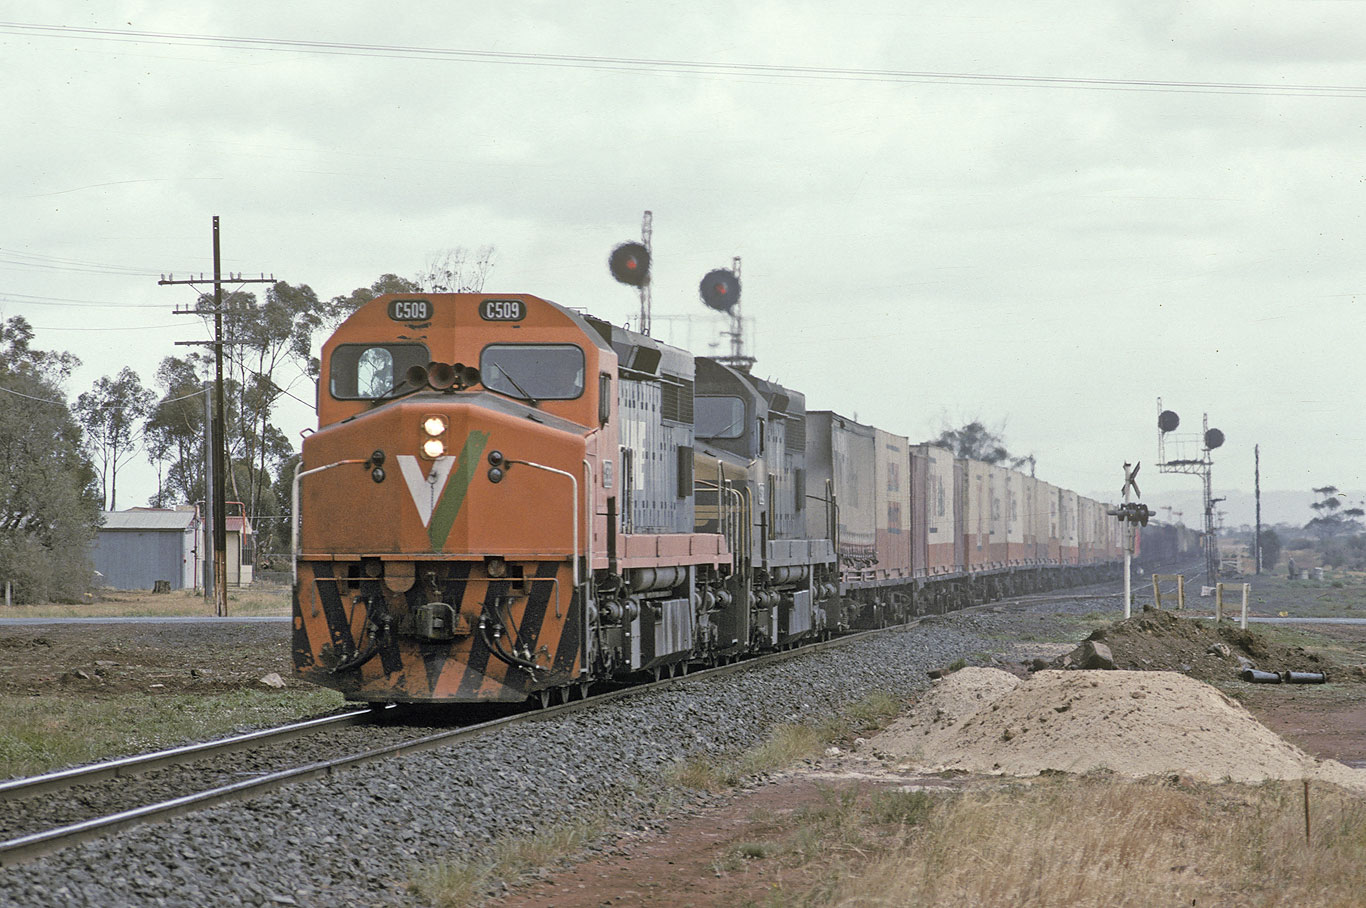
ABOVE: C509 + S302 + X48 lift a down "Jet" out of Bacchus Marsh on 27 March 1978. At the time, C509 had been in service for just 17 days. The signal on the right was the home departure into the ATC section to Bank Box Loop. (photo courtesy Ron Woods)
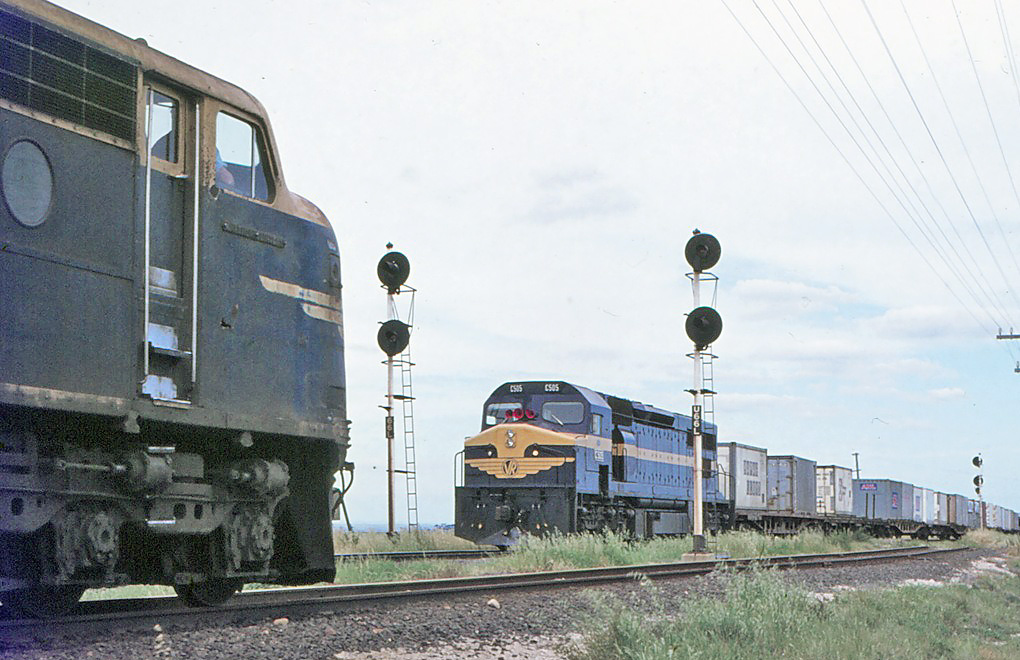
ABOVE: An up DRC on a Bacchus Marsh to Melbourne service waits in the platform road as C 505 on a down jet continues its westward journey, Oct 29 1977. (photo courtesy Bob Wilson)
ABOVE: S 307 with 2 T's on a down goods at Bacchus Marsh, 1979.
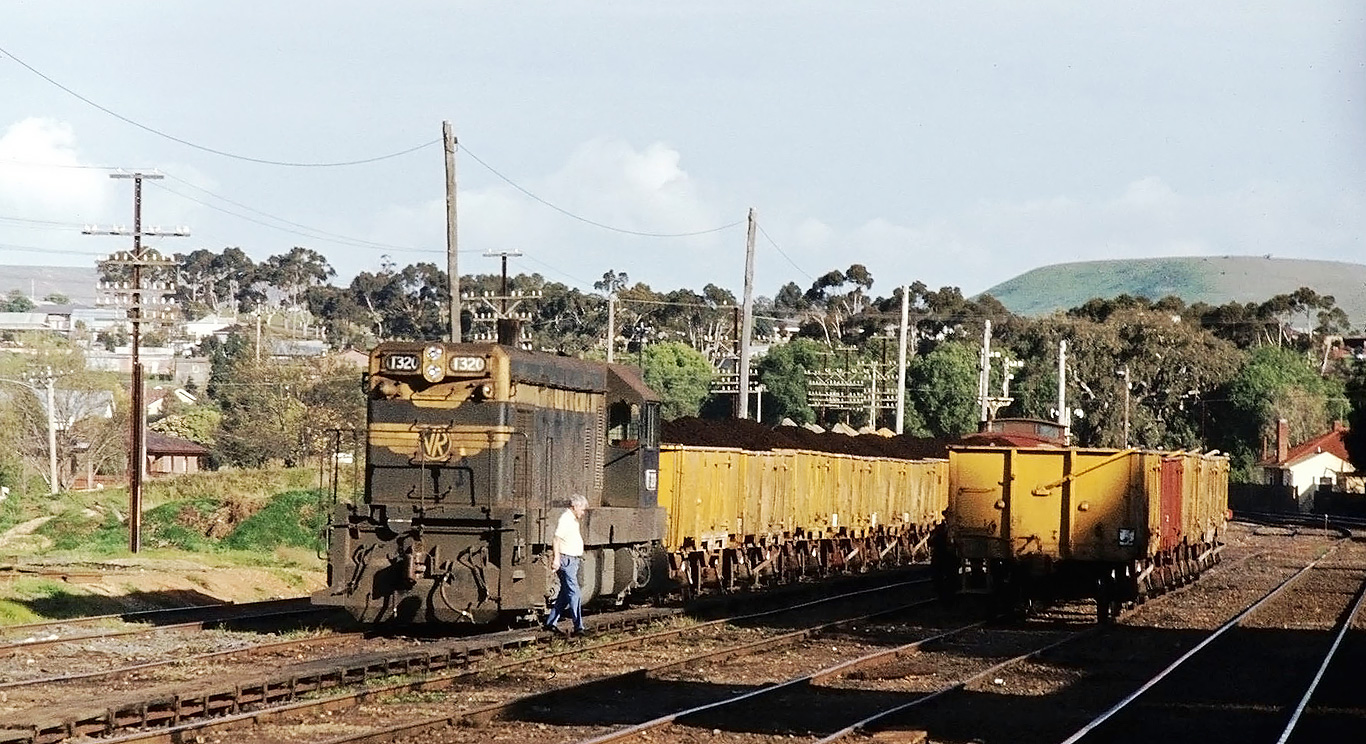
ABOVE: T 320 has pulled its load of Maddingley brown coal into the yard at Bacchus Marsh and awaits departure to Melbourne, circa 1980. (photo courtesy Barry Cooper)
ABOVE: A down Melbourne to Bacchus Marsh service diverges into the platform road at Bacchus Marsh, circa 1980. (photo courtesy Barry Cooper)
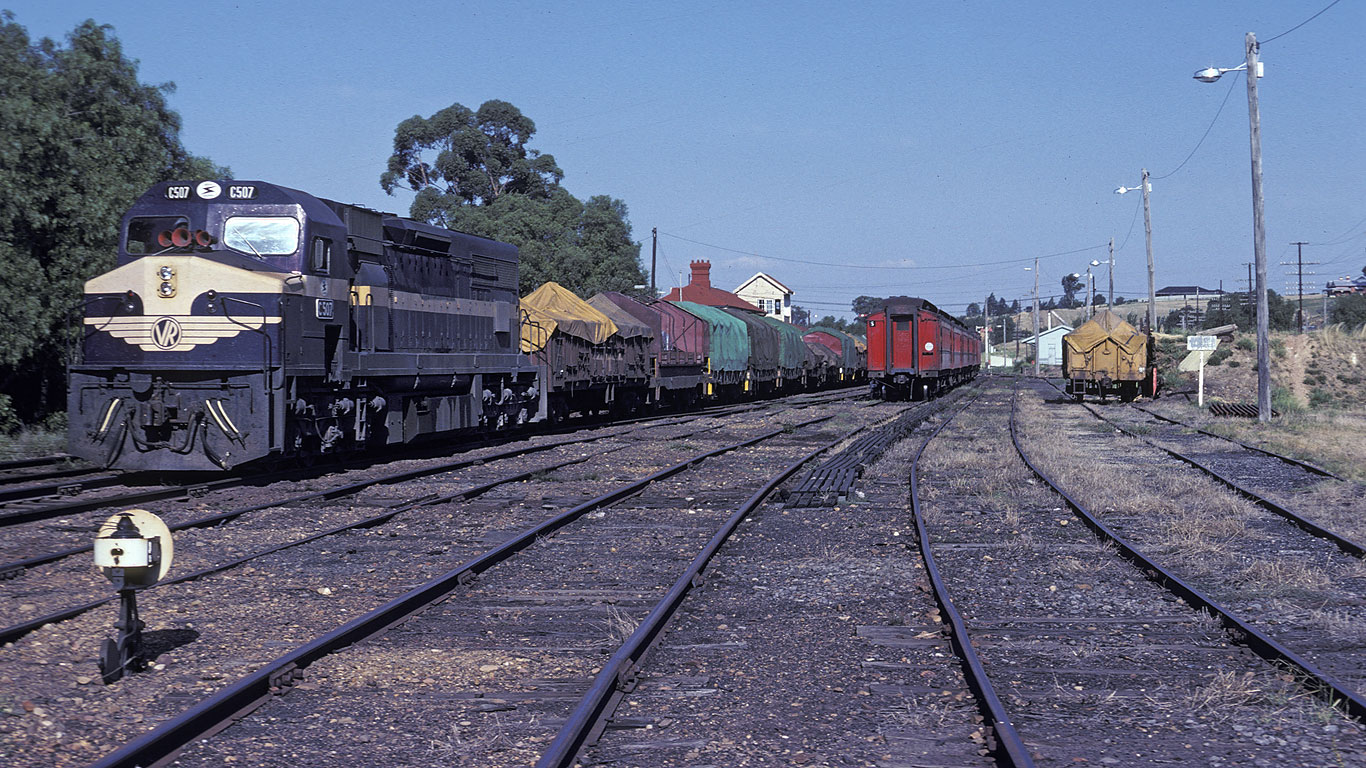
ABOVE: C 507 on 9121 Melbourne to Adelaide "jet" pauses at Bacchus Marsh, Feb 6 1982.
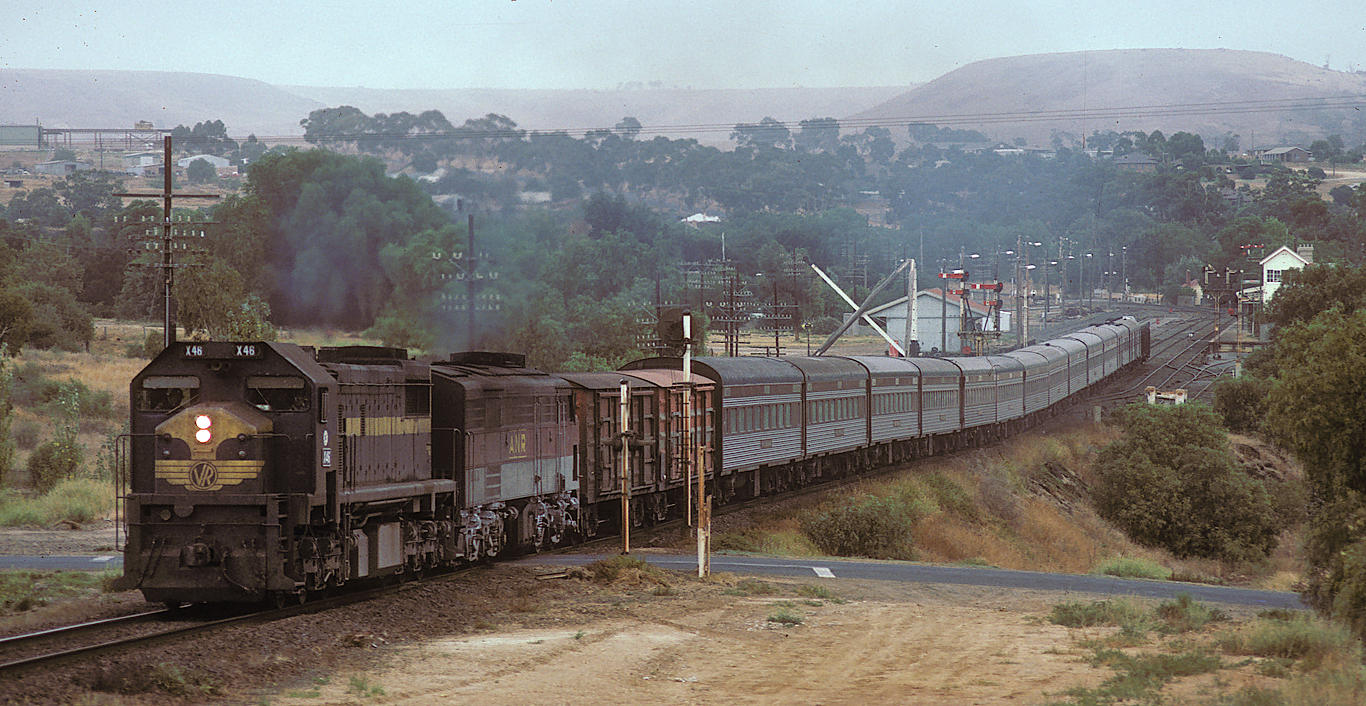
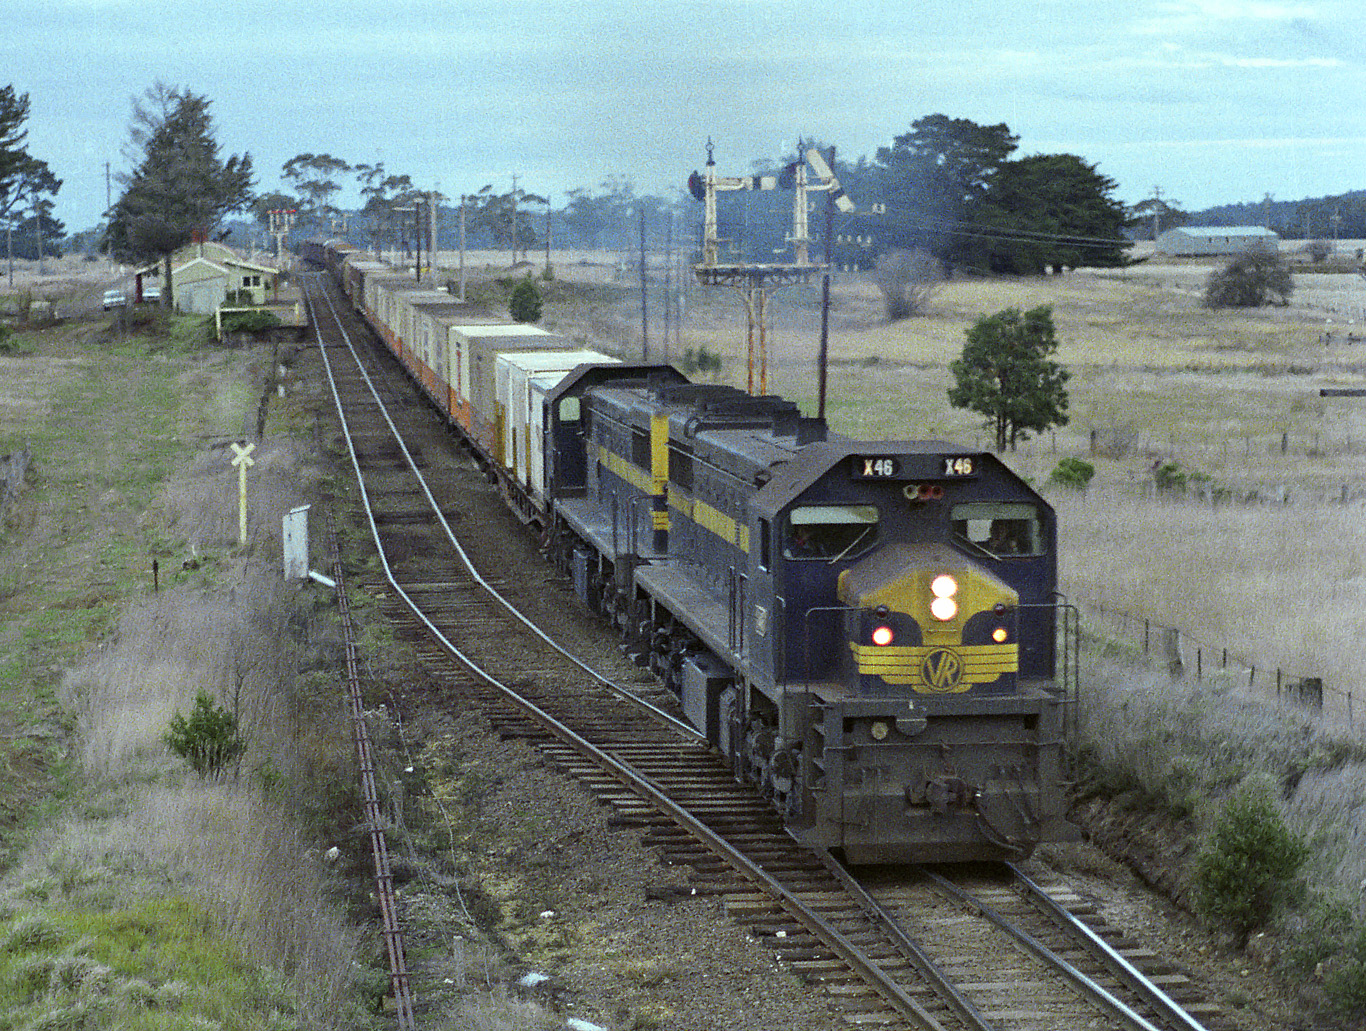
ABOVE: X 46 and 930 lead the Melbourne bound Overland through Bacchus Marsh, 1986.
ABOVE: X 48 and an S on the up Overland, March 14 1986.
ABOVE: C 506 on an up jet at Bacchus Marsh, 1978.
ABOVE: A V/Line X and an AN 930 head an Adelaide to Melbourne empty steel train through Bacchus Marsh Dec. 1986
ABOVE: The up Overland powers through Bacchus Marsh, 1986
ABOVE: 2 C's on an up "jet" power upgrade out of Bacchus Marsh. 1986
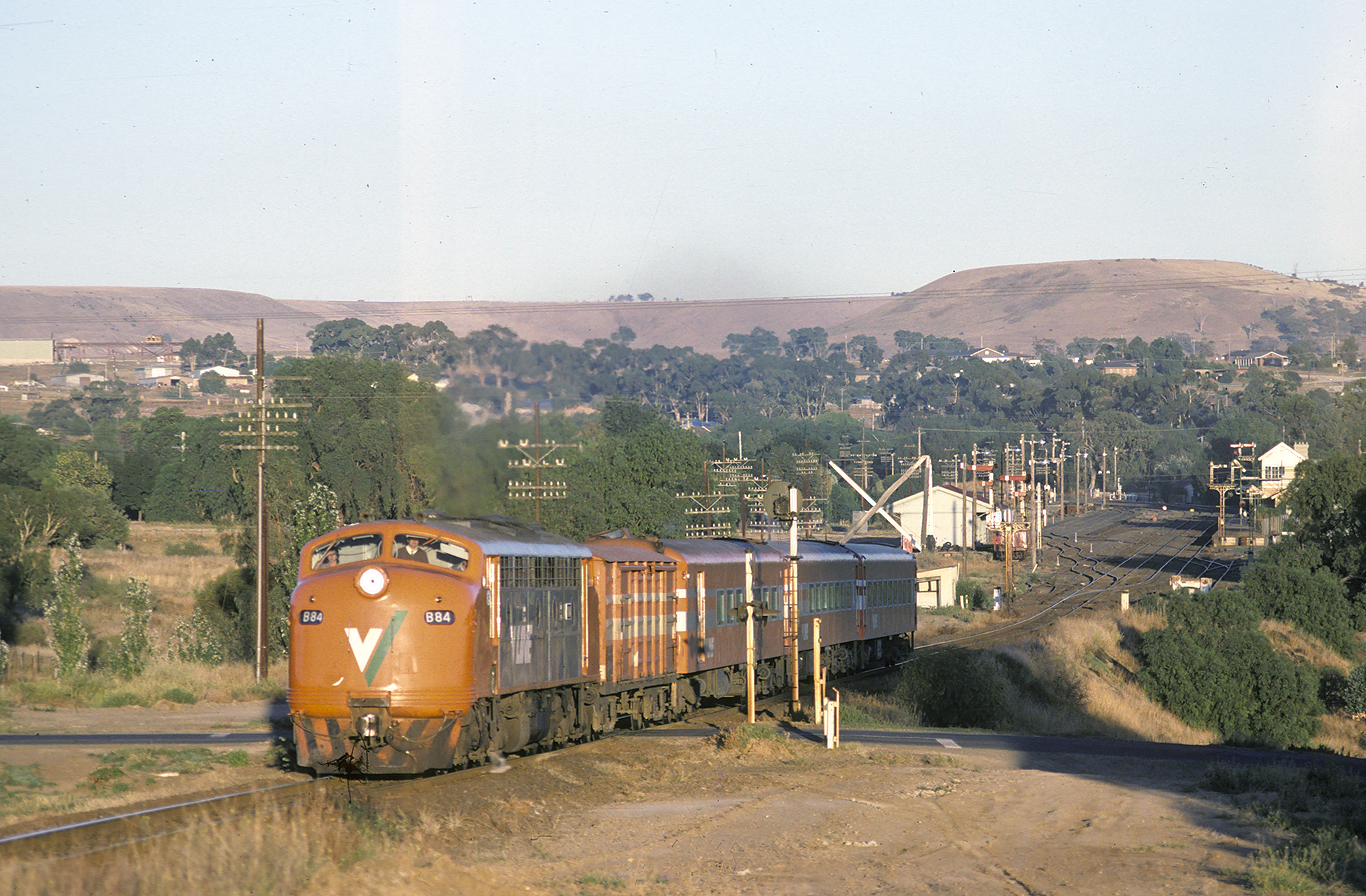
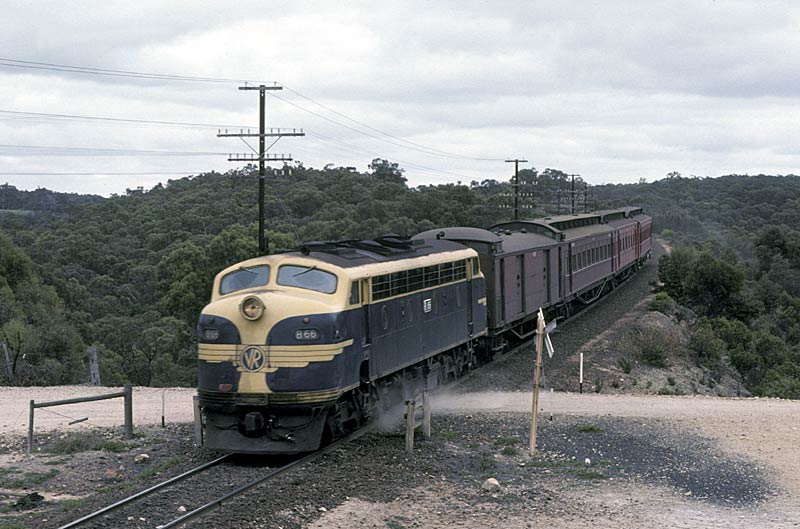
ABOVE: B 84 gets a Ballarat to Melbourne pass. away from the station stop at Bacchus Marsh. B 84 was withdrawn from service May 1988 and scrapped. March 4 1986
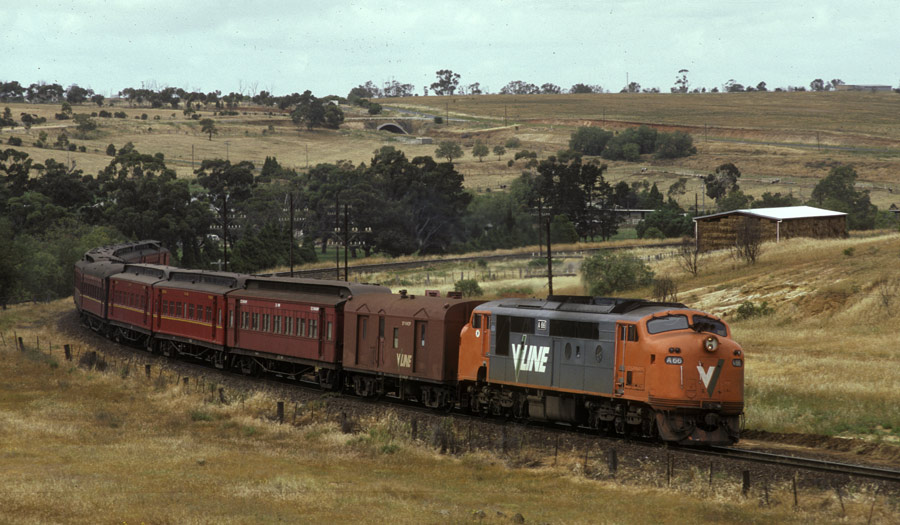
ABOVE: A 85 arrives at Bacchus Marsh on an up pass. 1988.
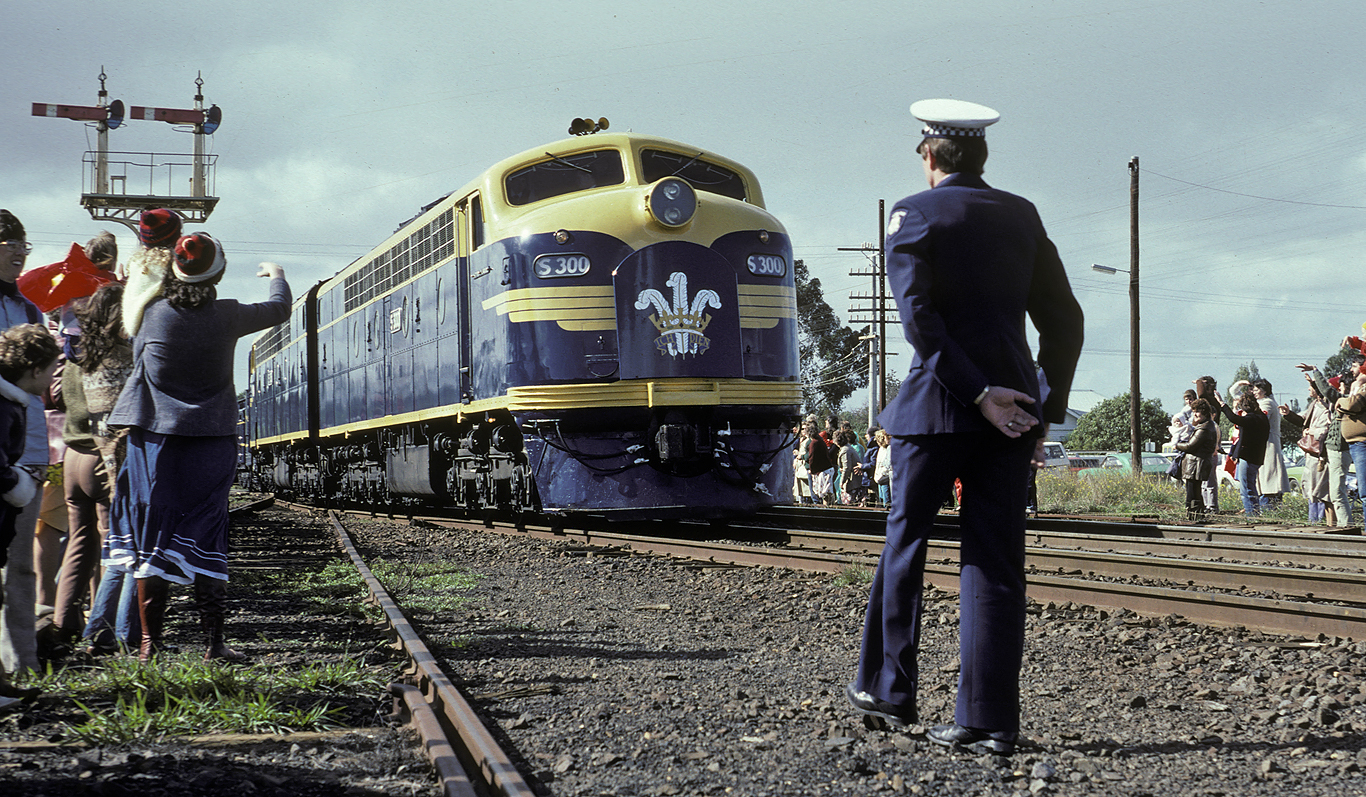
ABOVE: In some ways, this photo signifies the end of the VR as we knew it. This was the last royal train run by VR. The two leading S class had run the 3 car train from Spencer Street to Ballarat with Princess Diana and Prince Charles on board. The 3rd S had run ahead of the train as a pilot loco, this photo shows the empty return working near the old site of Rowsley between Bacchus Marsh and Bank Box loop. The 3 S's were repainted for the occasion and if not the last were among the very last loco's ever painted in the classic blue and gold. April 15 1983.The lead loco, S 315, would never look this good again. With little or no attention from when this photo was taken until it was withdrawn in 1988 it was cut up in April 1992.
==========
1963 Bacchus Marsh to Ballan signal diagram
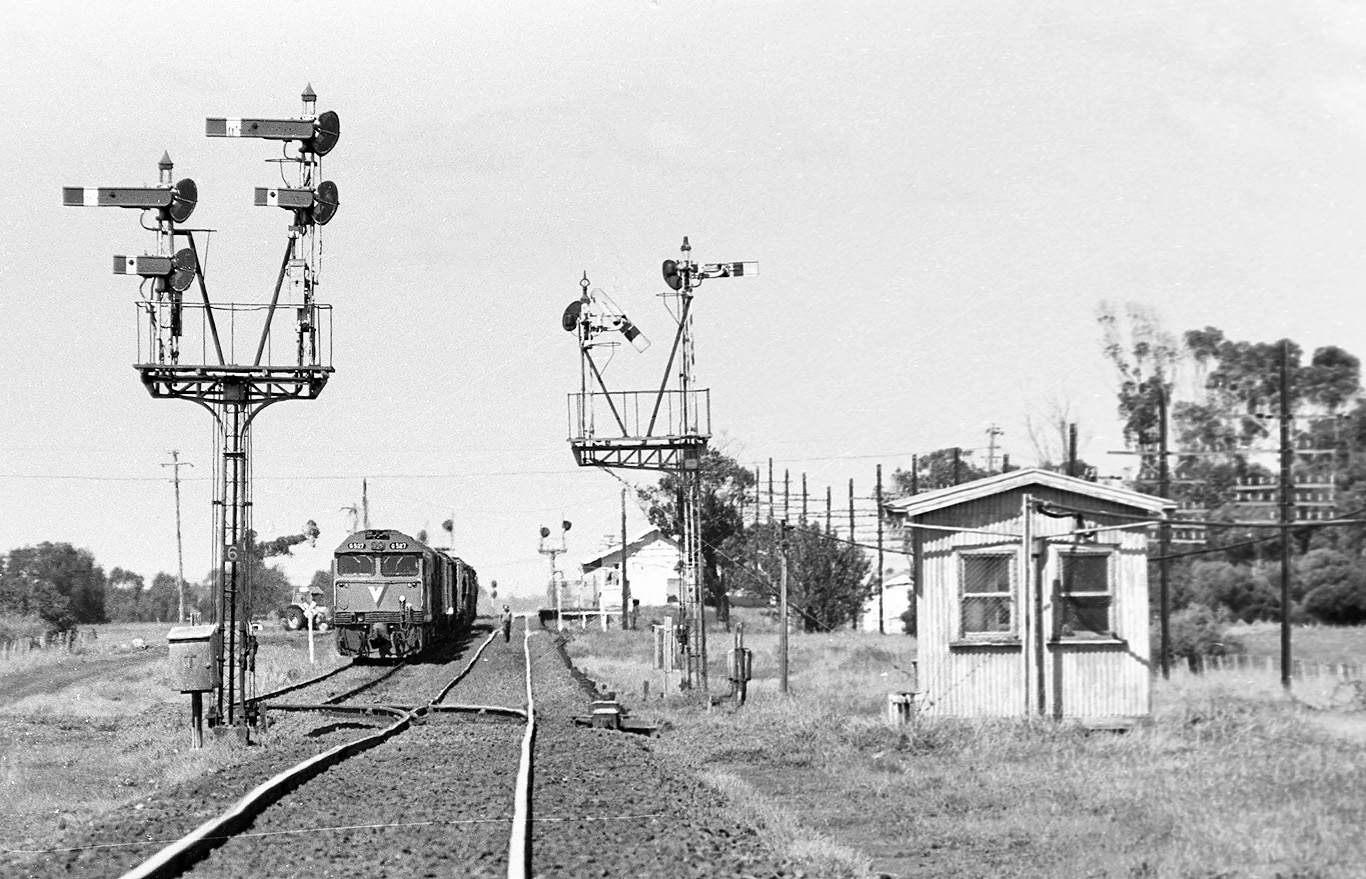
ABOVE: The longest crossing loop between Sunshine and Warrenheip was Bank Box loop, halfway up Ingliston bank. It was commissioned in 1963, Bacchus Marsh to Ballan was converted from electric staff to Automatic and Track Control as part of the project with the signalman at Bacchus Marsh controlling Bank Box loop. Here we see a very new C 505 on a down jet crossing an S class on an up goods, Oct 29 1977. (photo courtesy Bob Wilson)

ABOVE: A down pass waits on the mainline not long after the ATC from Bacchus Marsh to Ballan was commissioned, Nov 20 1963, official VR photo. BELOW: the same view 19 years later when Bank Box loop was being extended.
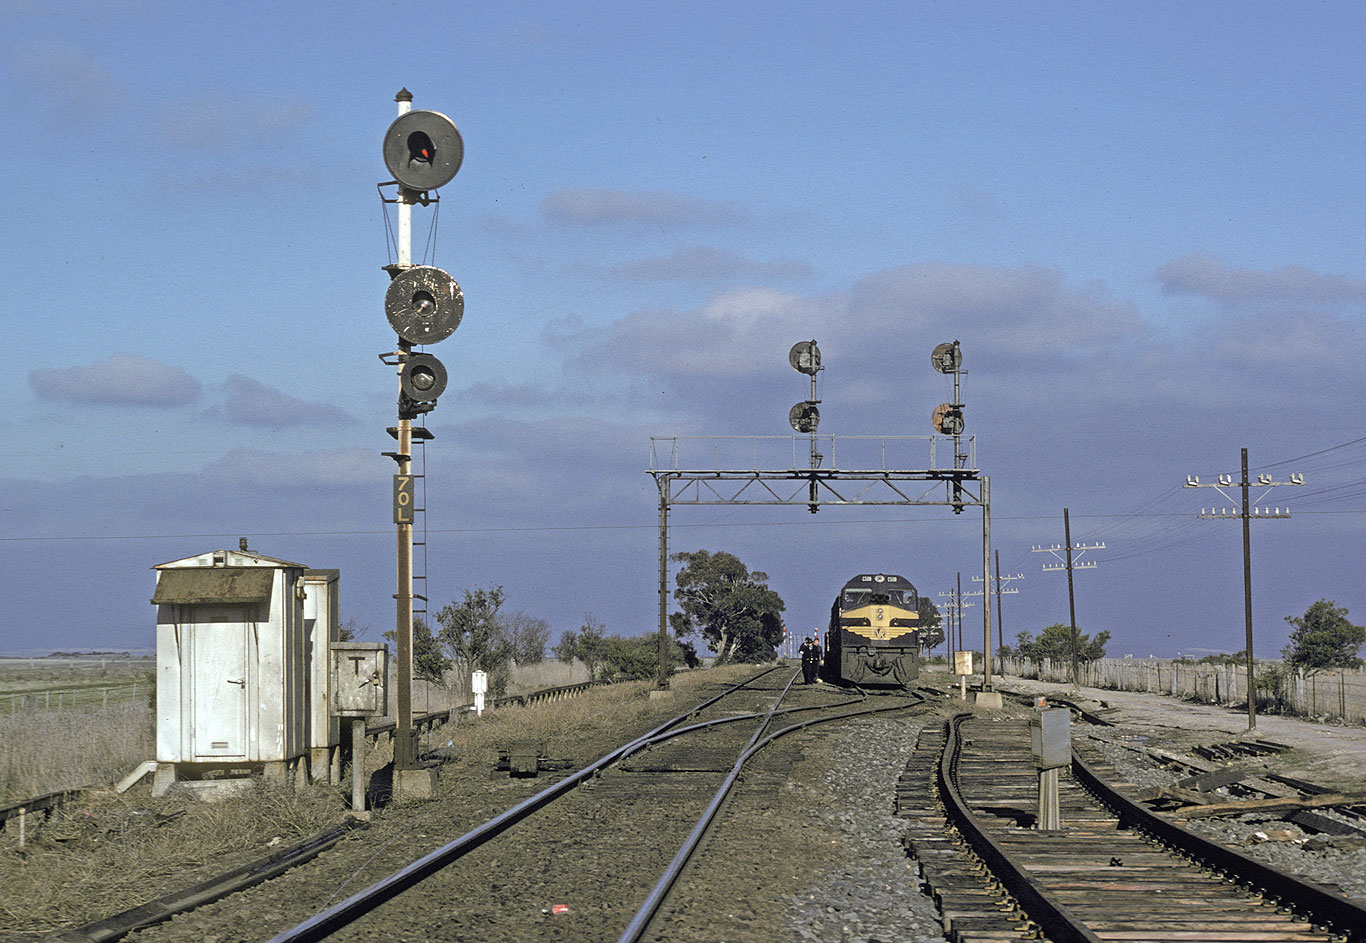
ABOVE: Bank Box loop came into existence when the section from Ballan to Bacchus Marsh was converted from Electric staff to Automatic & Track Control, ATC in 1963. In Dec 1982 it was extended which is what you can see here, prior to commissioning. Post 70L was the up home arrival, it is caked in brake dust from passing trains descending Ingliston bank. Aug 1982.
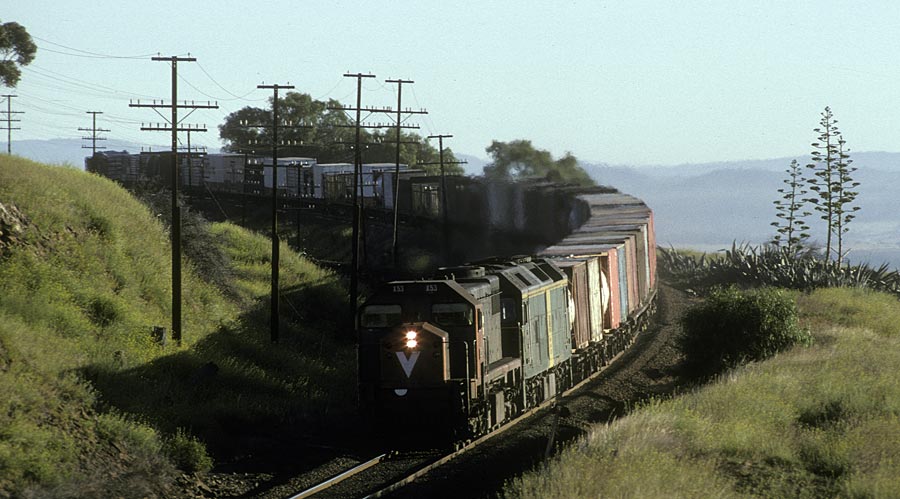
An up "jet" descends Ingliston bank on Oct. 31 1981. By this time B's on "jets" were quite uncommon although this was a typical "lash-up" on "jets" from the late 50's to late 70's.
Ingliston bank (between Ballan and Bacchus Marsh) had a fearsome reputation with VR enginemen. In reality it was only a 1:50 downgrade, the problem was the speeds allowed down the grade. NSW had worse mainline grades. In the late 80's a ballast train got into trouble down the bank and freight speeds were reduced to where they should have been years before.
ABOVE: B 66 brings an all wooden consist on a Ballarat to Spencer St. pass down Ingliston bank as it approaches Bank Box loop. Oct. 31 1981. B 66 was rebuilt as an A class in 1985
ABOVE: A pair of X's bring "The Overland" down Ingliston bank, Dec. 1986
ABOVE: An up "jet" with X 53 and a Australian National BL, descends Ingliston bank 1989

ABOVE: An up jet between Bank Box loop and Bacchus Marsh, photographed from the McCormacks Road overbridge. 1989.
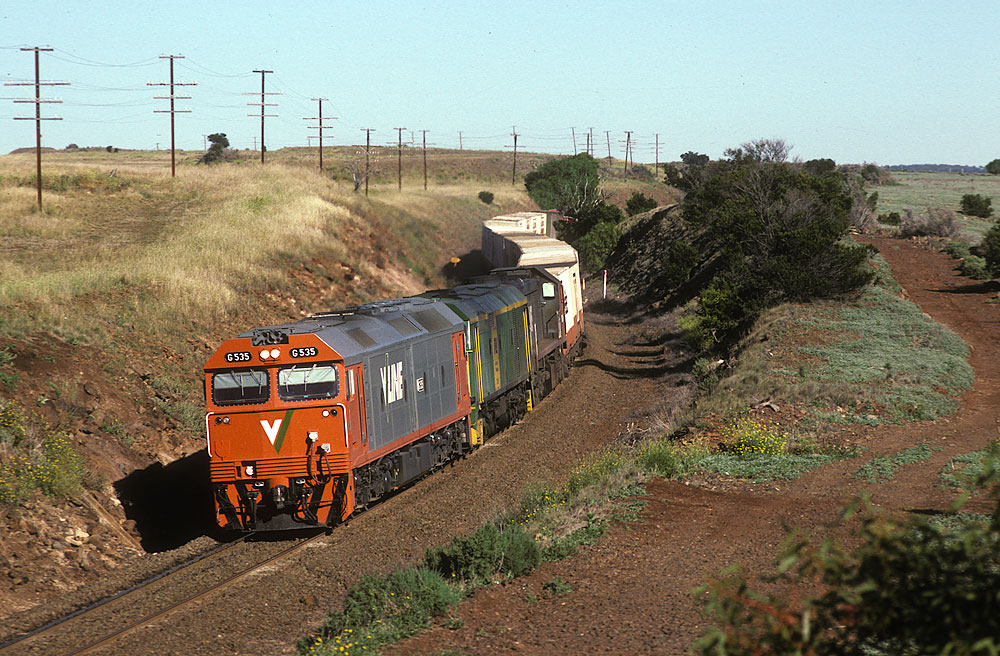
ABOVE: A very new G 535, Australian National 700 class and an X class descend Ingliston bank in 1989.
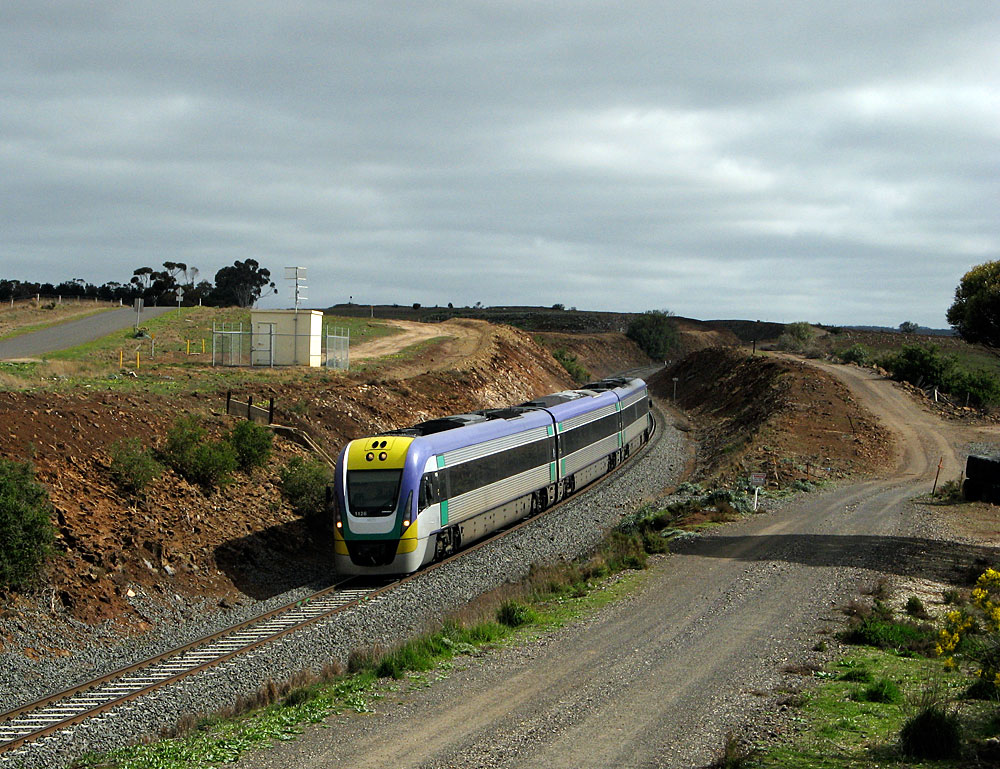
BELOW: In the days of Broad gauge to Adelaide and when we ran intrastate goods trains, Ingliston was somewhat of a Victorian railfan mecca. Now all you see are lots of railcars. Here a 3 car V/locity railcar descends Ingliston bank a few kilometres out of Bacchus Marsh. Aug 17 2009
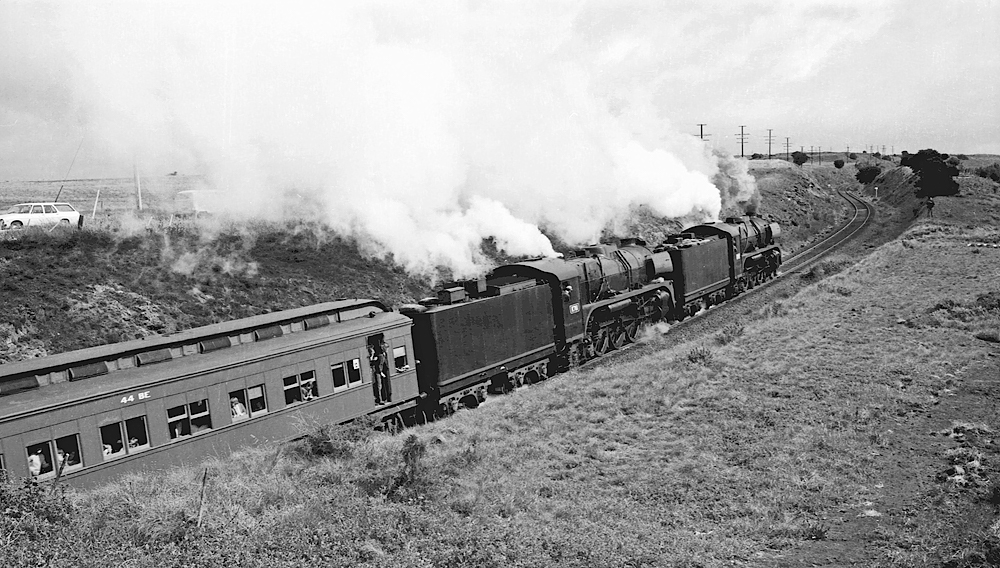
BELOW: 2 R's, on a special train attack Ingliston bank at the same location, 1973
==========

ABOVE: R 761 and 707 on a down enthusiast special at Ballan, July 24 1971. (photo courtesy Bob Wilson)

ABOVE: An up"Jet" drops off the staff at Ballan on Oct. 31 1981. The Melbourne to Serviceton mainline was worked under electric staff for almost its entire length. The section from Bacchus Marsh to Ballan however was worked under Automatic and Track Control (ATC) rules, introduced when Bank Box loop was built.

ABOVE: B 76 hauling a Spencer St. to Ballarat pass pauses at Ballan. 1978.
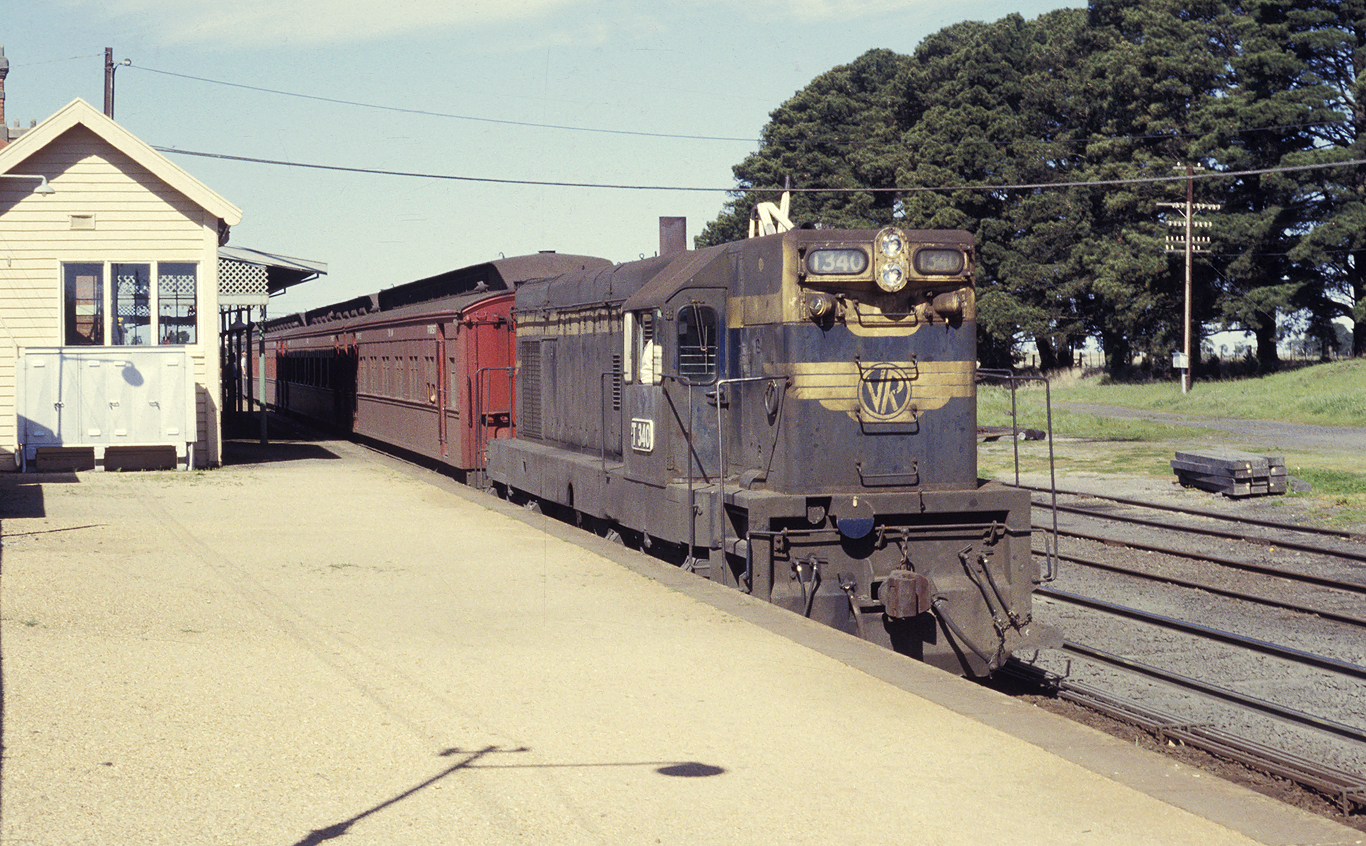
ABOVE: T 340 on a down Ballarat pass. at Ballan. 1978
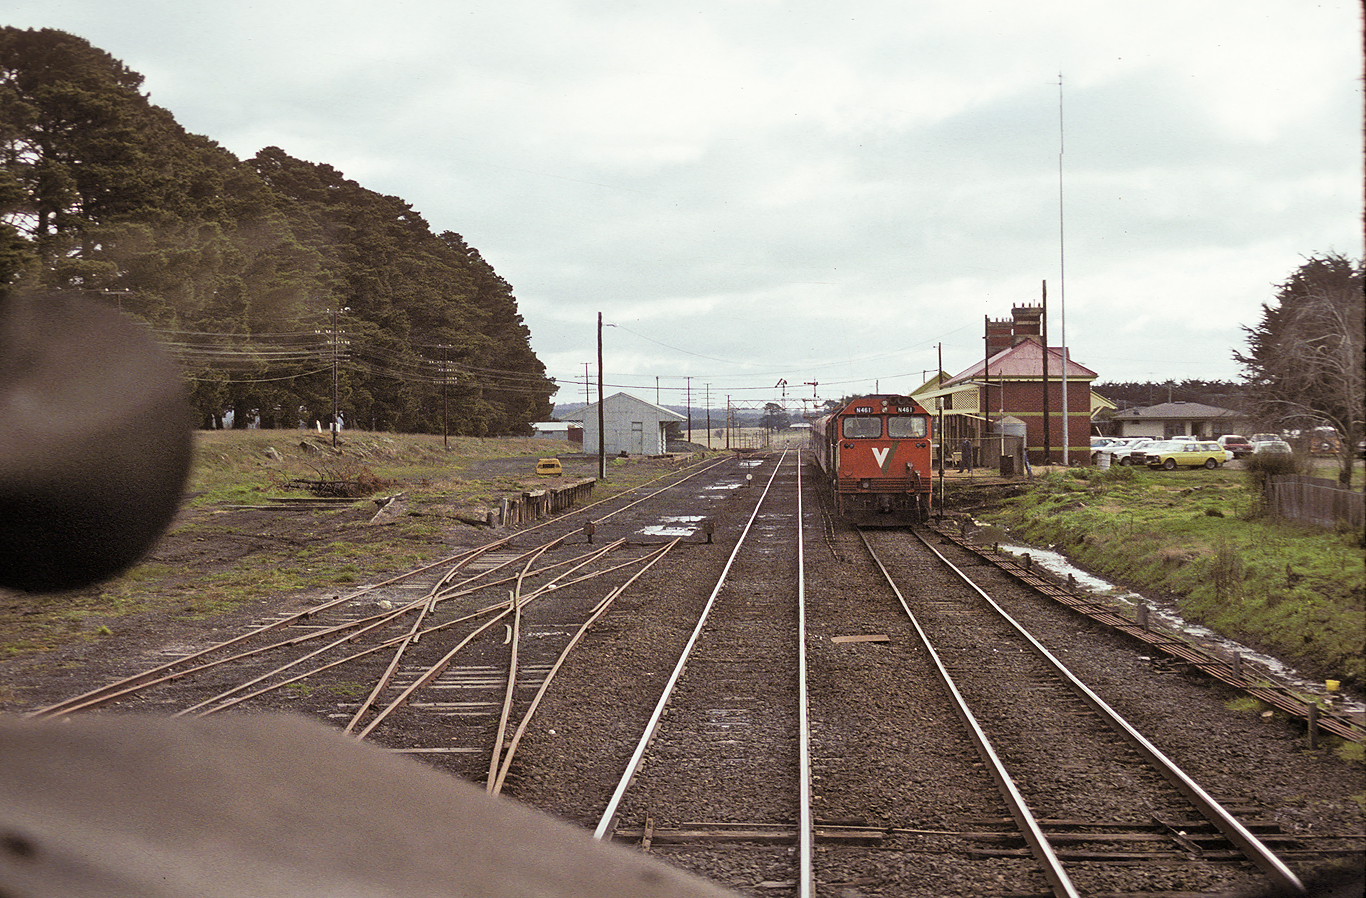
ABOVE: An up Ballarat to Melbourne service has the signal to diverge into the platform at Ballan, circa 1980. (photo courtesy Barry Cooper)
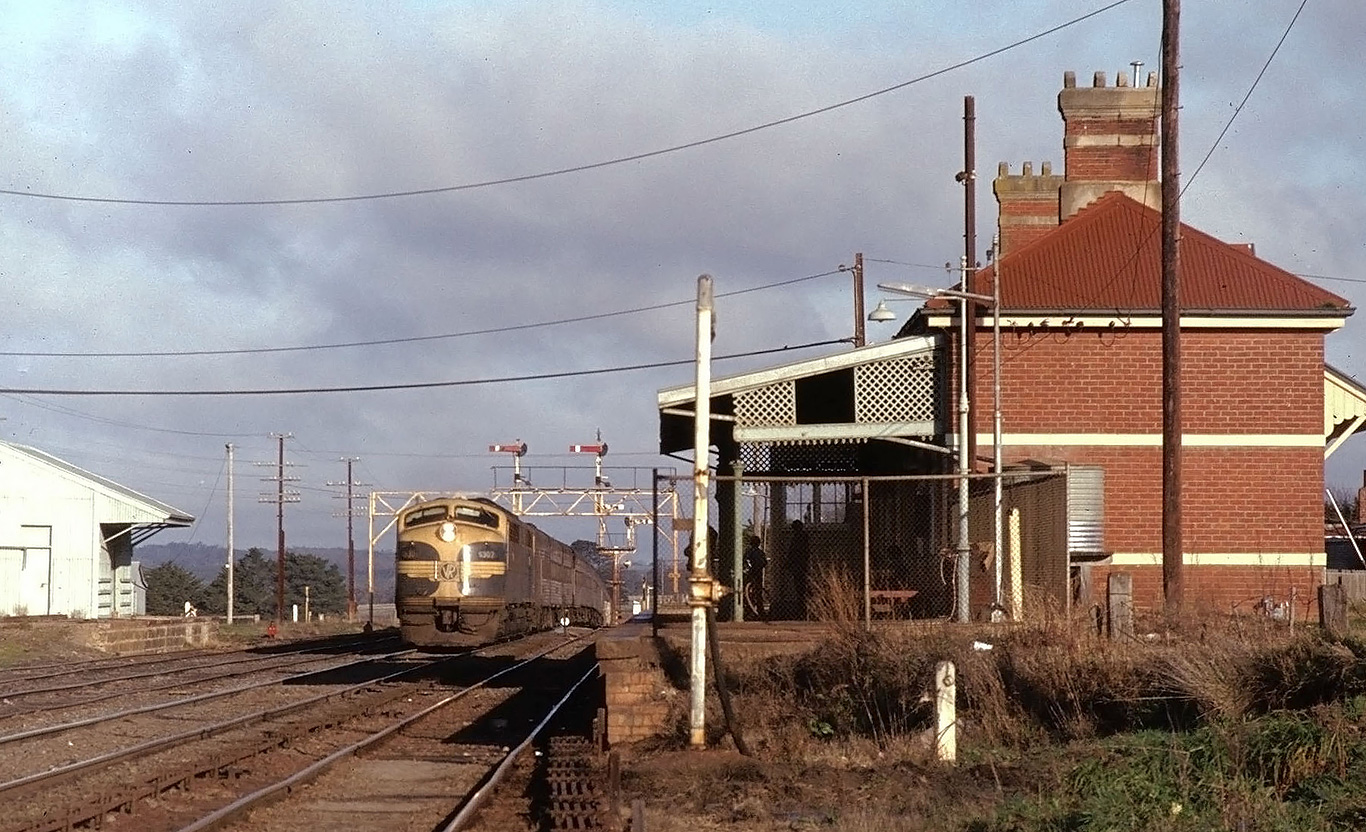
ABOVE: The up Overland has just dropped of the staff from the previous section as it enters the ATC section from Ballan to Bacchus Marsh, circa 1980. (photo courtesy Barry Cooper)

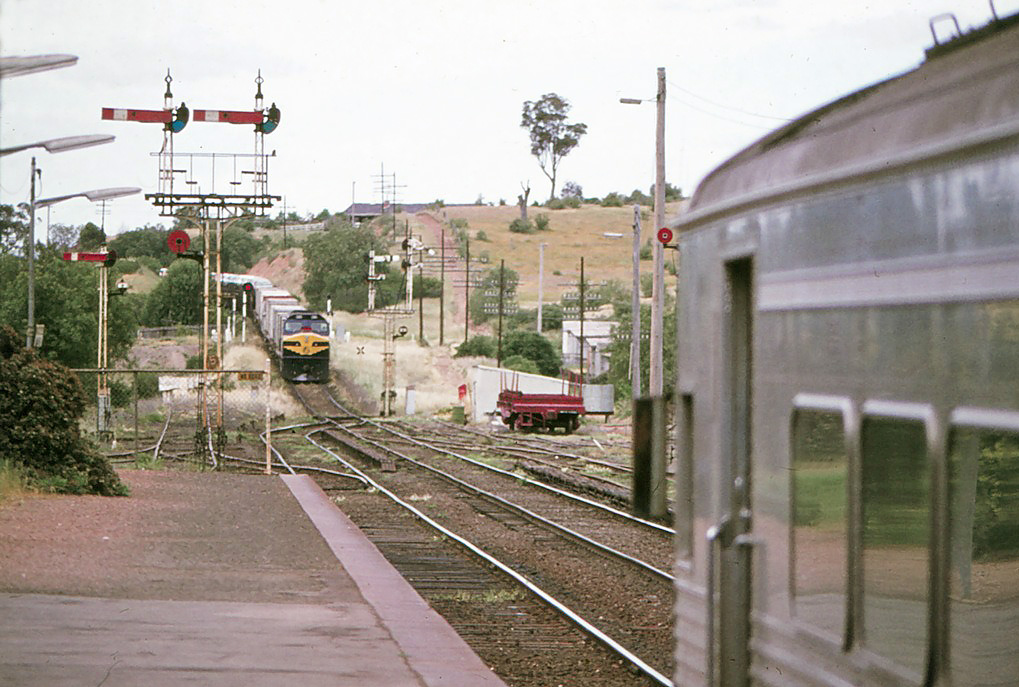
ABOVE & BELOW:The view from a down "jet" as we approach on the mainline with an up Ballarat pass waiting in the loop. Aug 7 1987
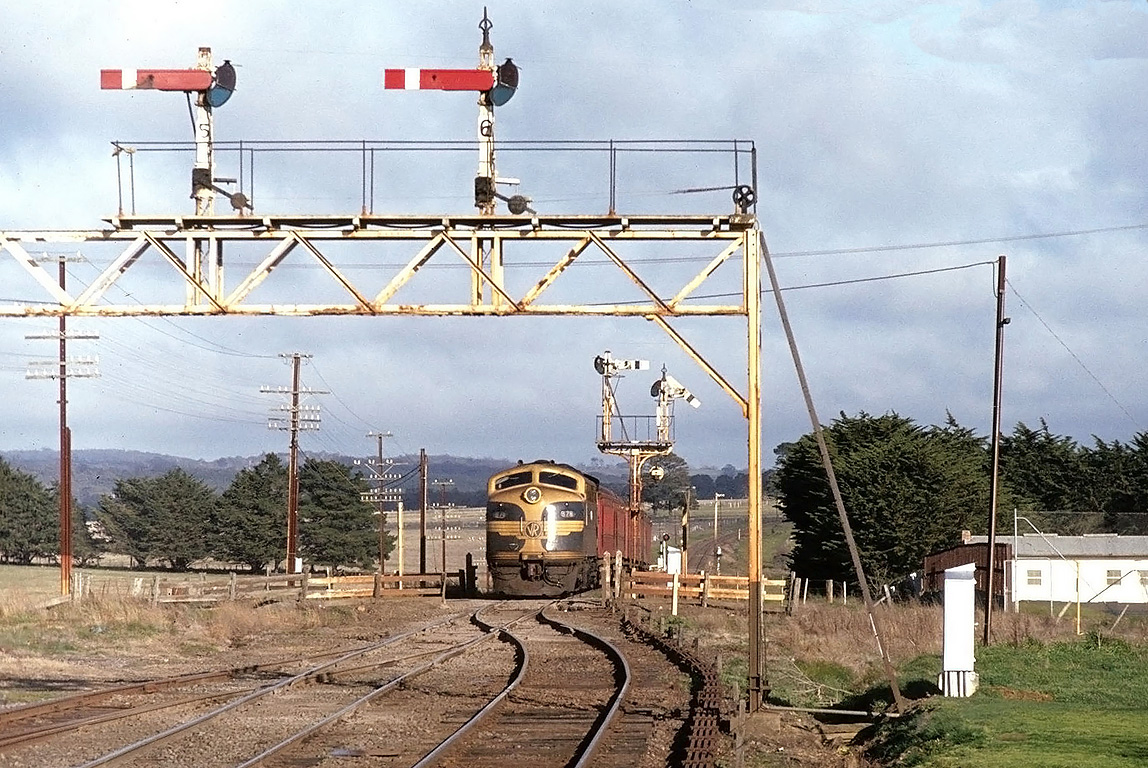
ABOVE: S 307 and a T are still powering hard as they blast under the signal bridge at Ballan on a winters day. 1980.
ABOVE: B 74 on a down Ballarat pass approaches Ballan, April 6 1986.
==========
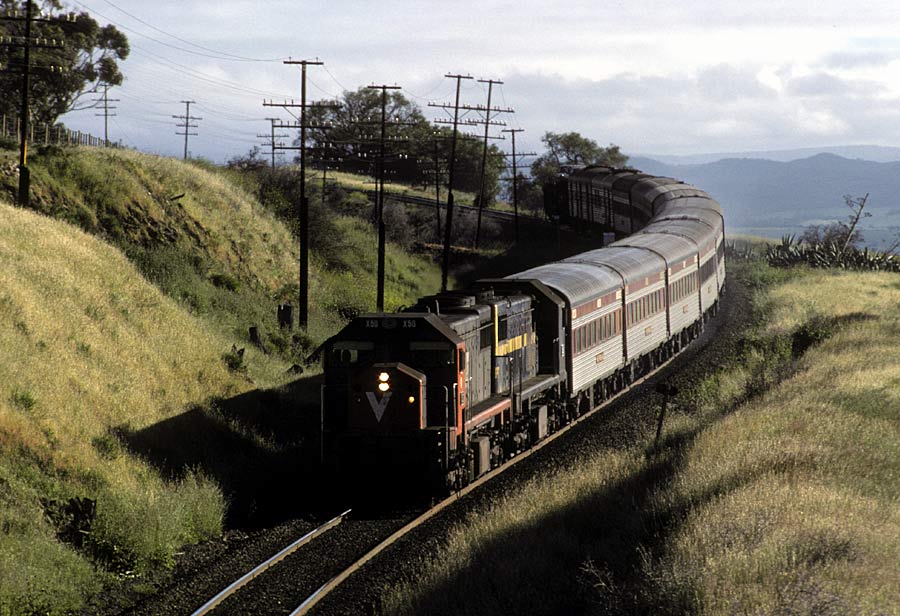
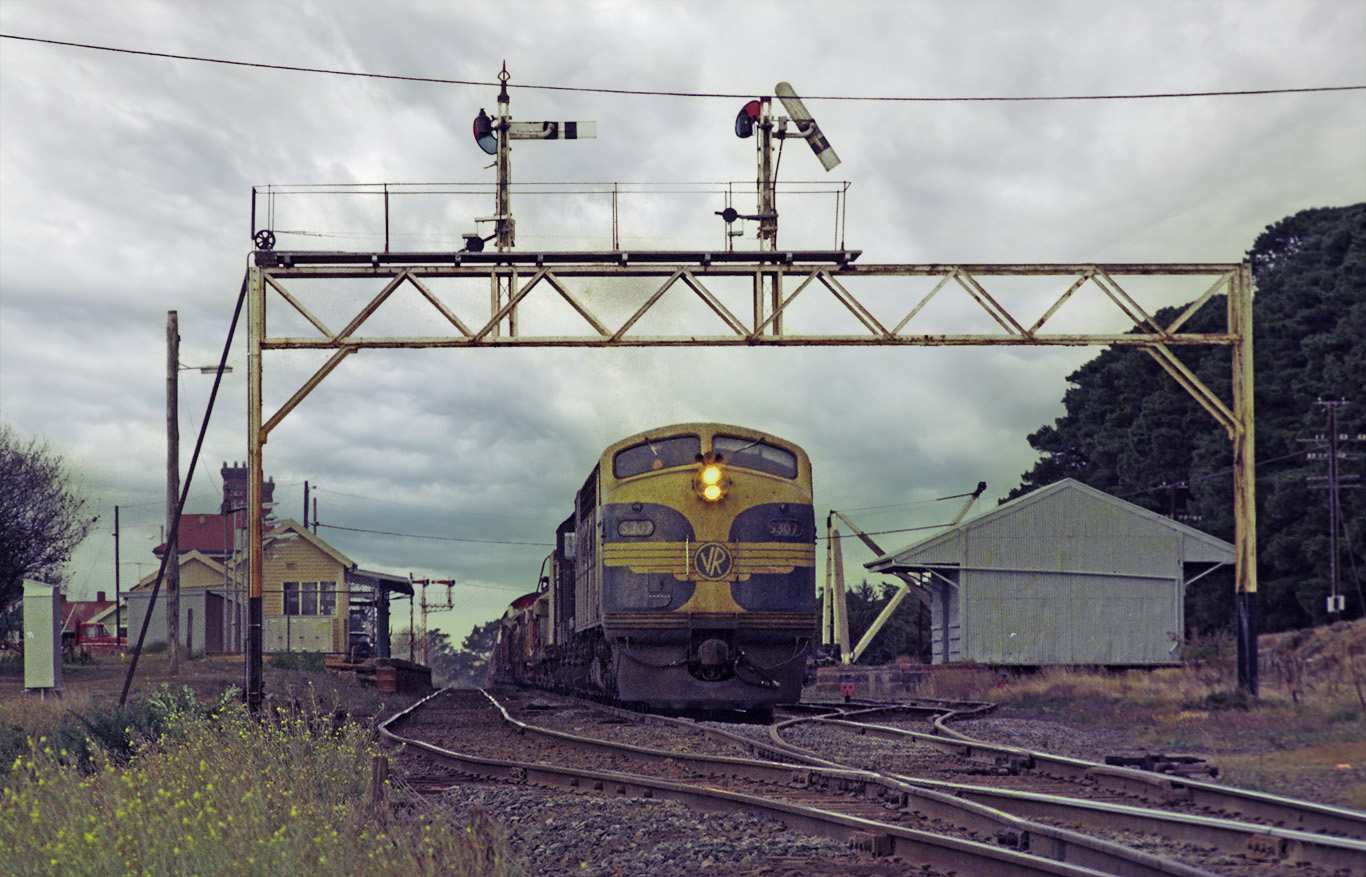
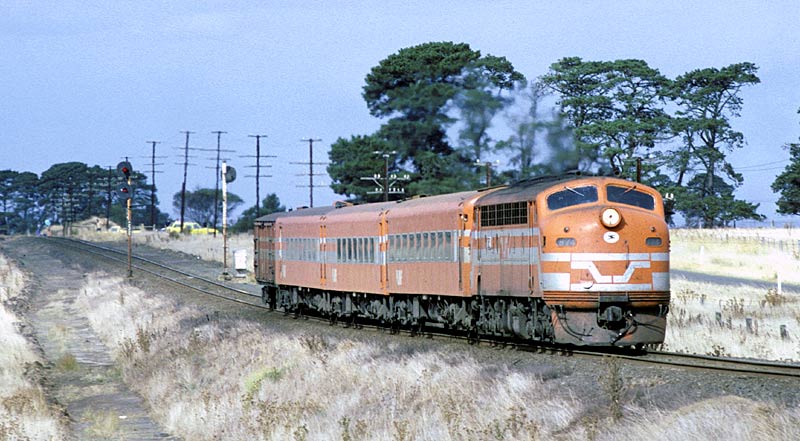
ABOVE: X 46 - X 45 lead a Melbourne to Adelaide "Jet" through Gordon in 1978. I had just purchased my first SLR camera, Pentax K1000, and tried this photo in very low light just before sunset on a heavily overcast winters day.
ABOVE: Looking west towards Ballarat
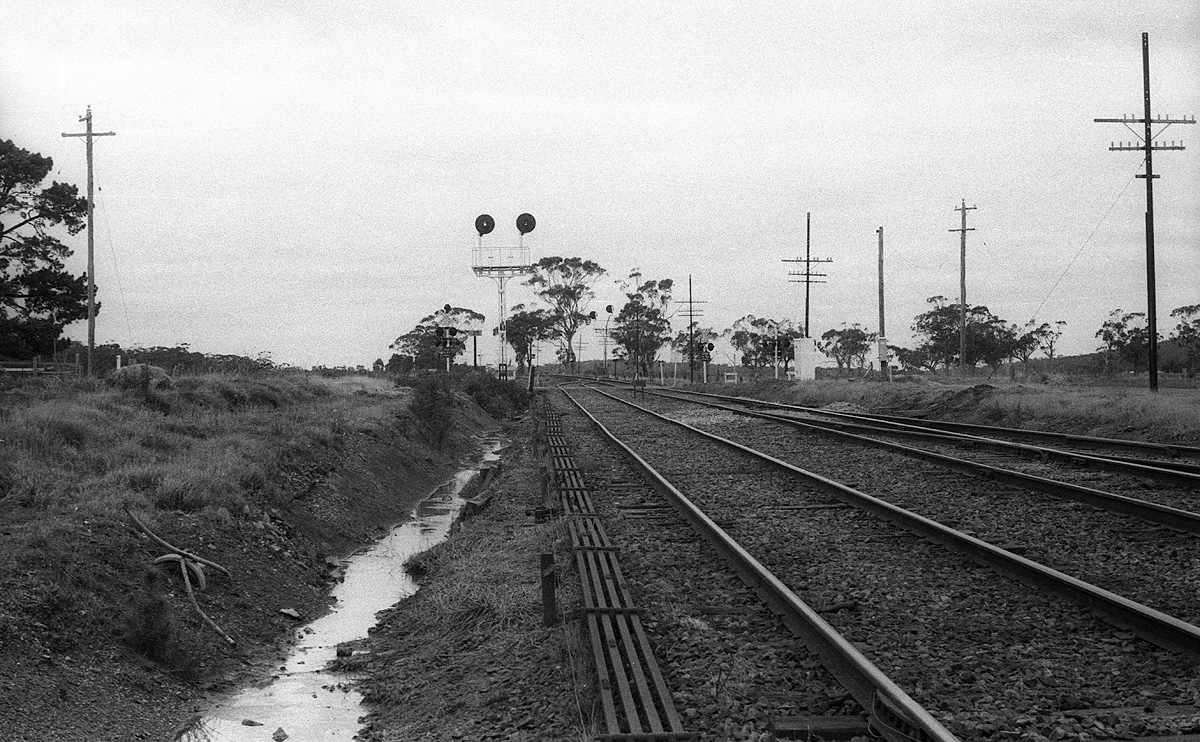
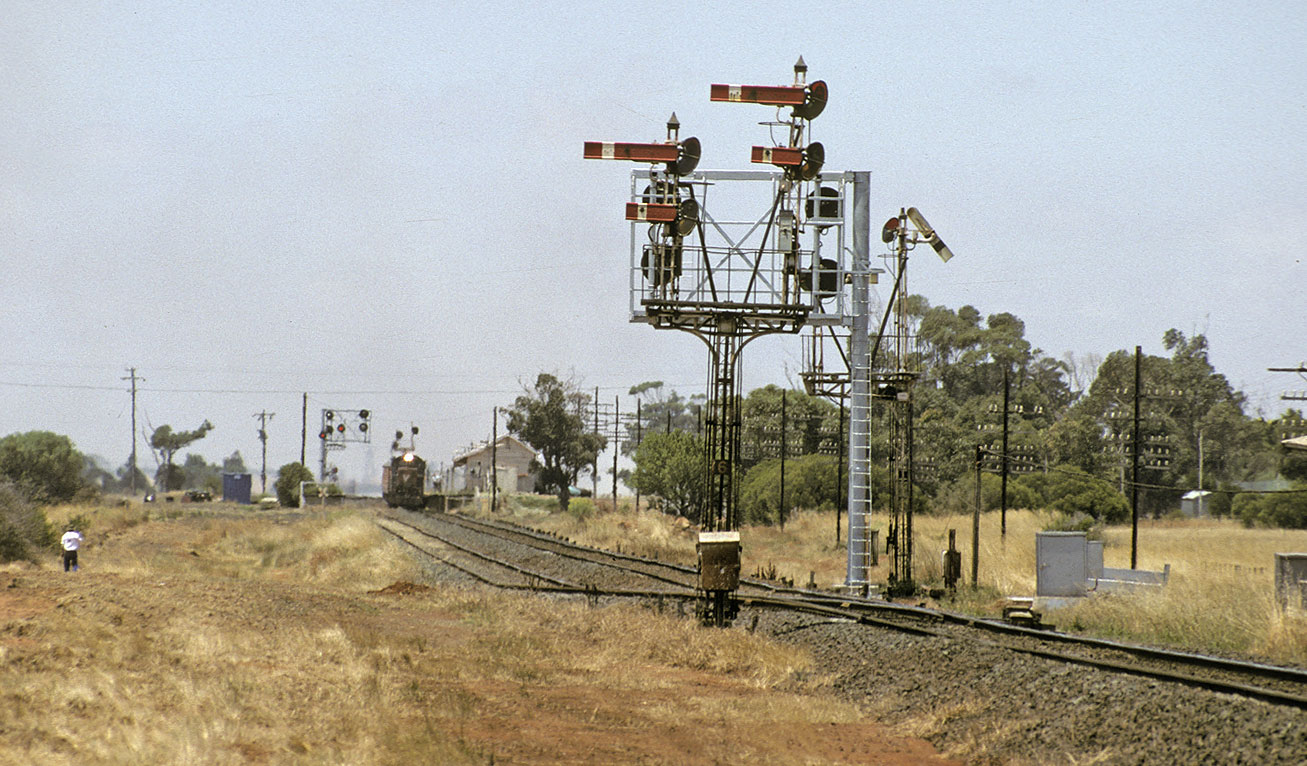
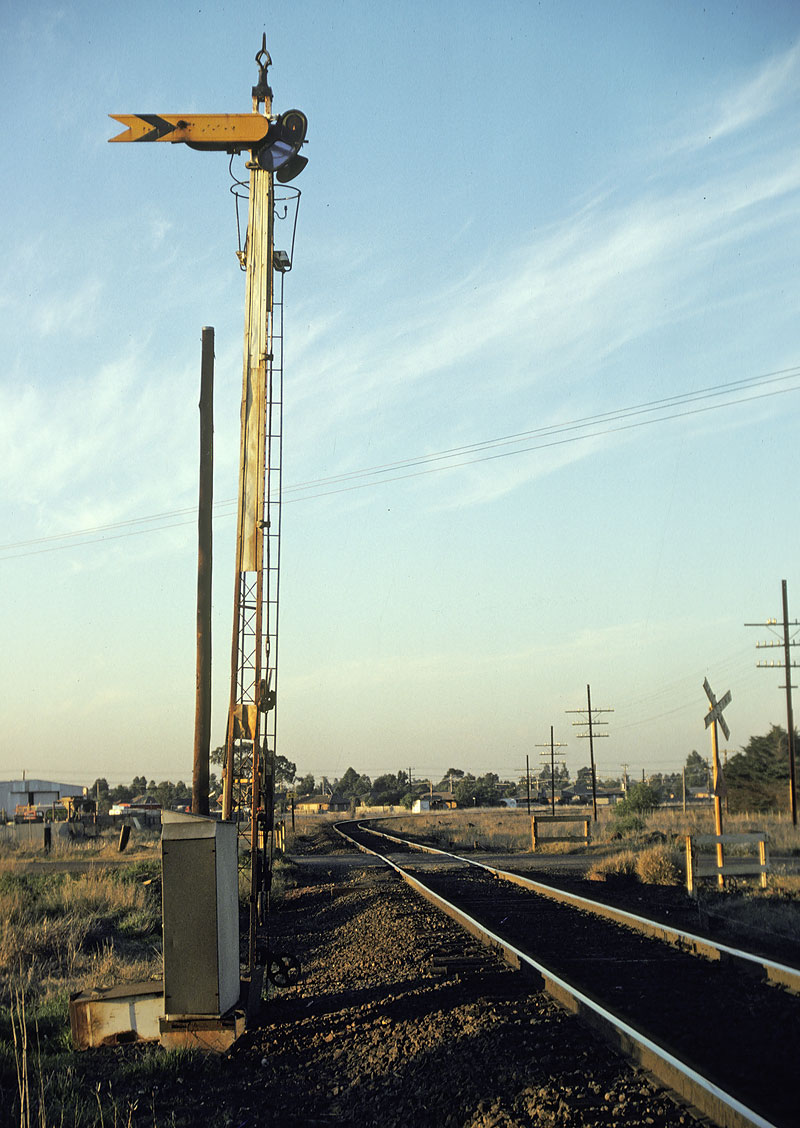
ABOVE: The up, light, home departures looking east towards Melbourne.
ABOVE: Looking west showing the station and the DR (Departmental Residence)
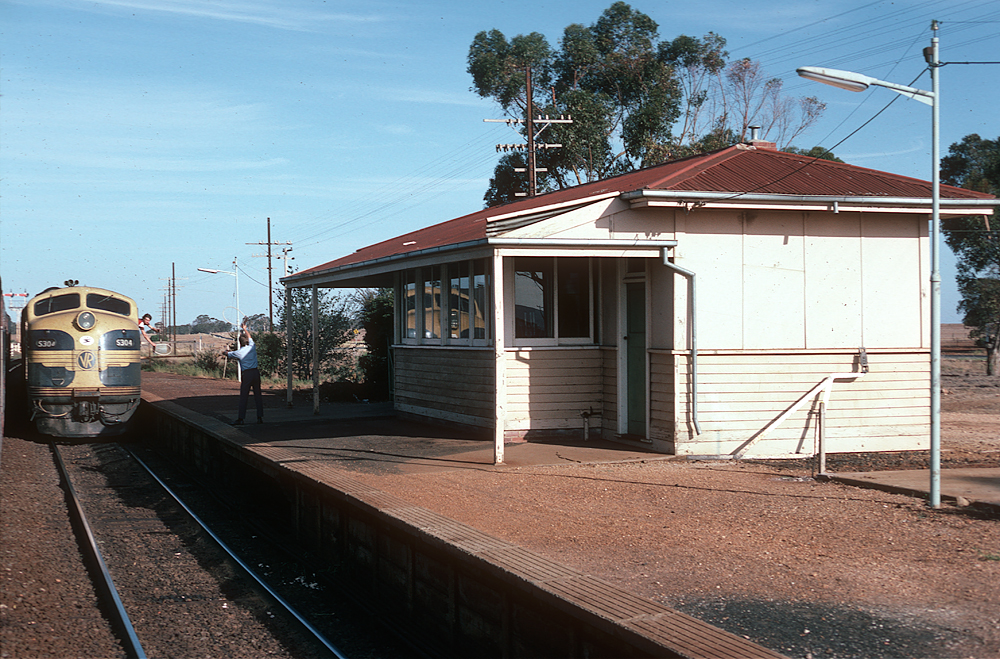
ABOVE: Showing the "add on" signal bay and the auto staff exchanger. Gordon had a 22 lever frame, 19 used, 3 spare. It was abolished as an electric staff station on March 29 1985.
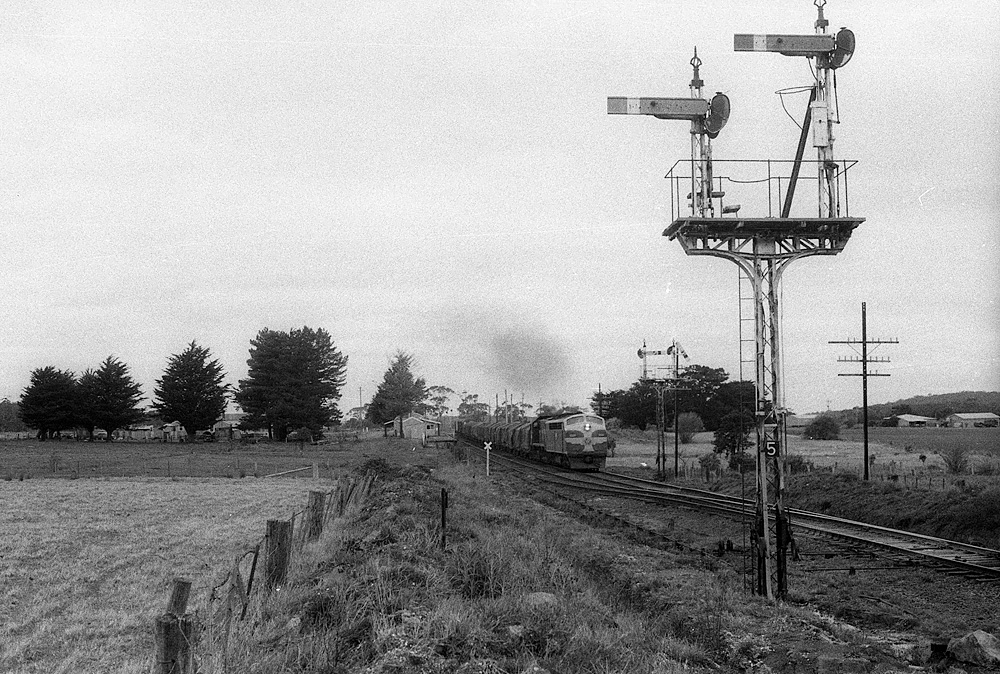
ABOVE: Post 5, up home arrivals with a down "Jet".
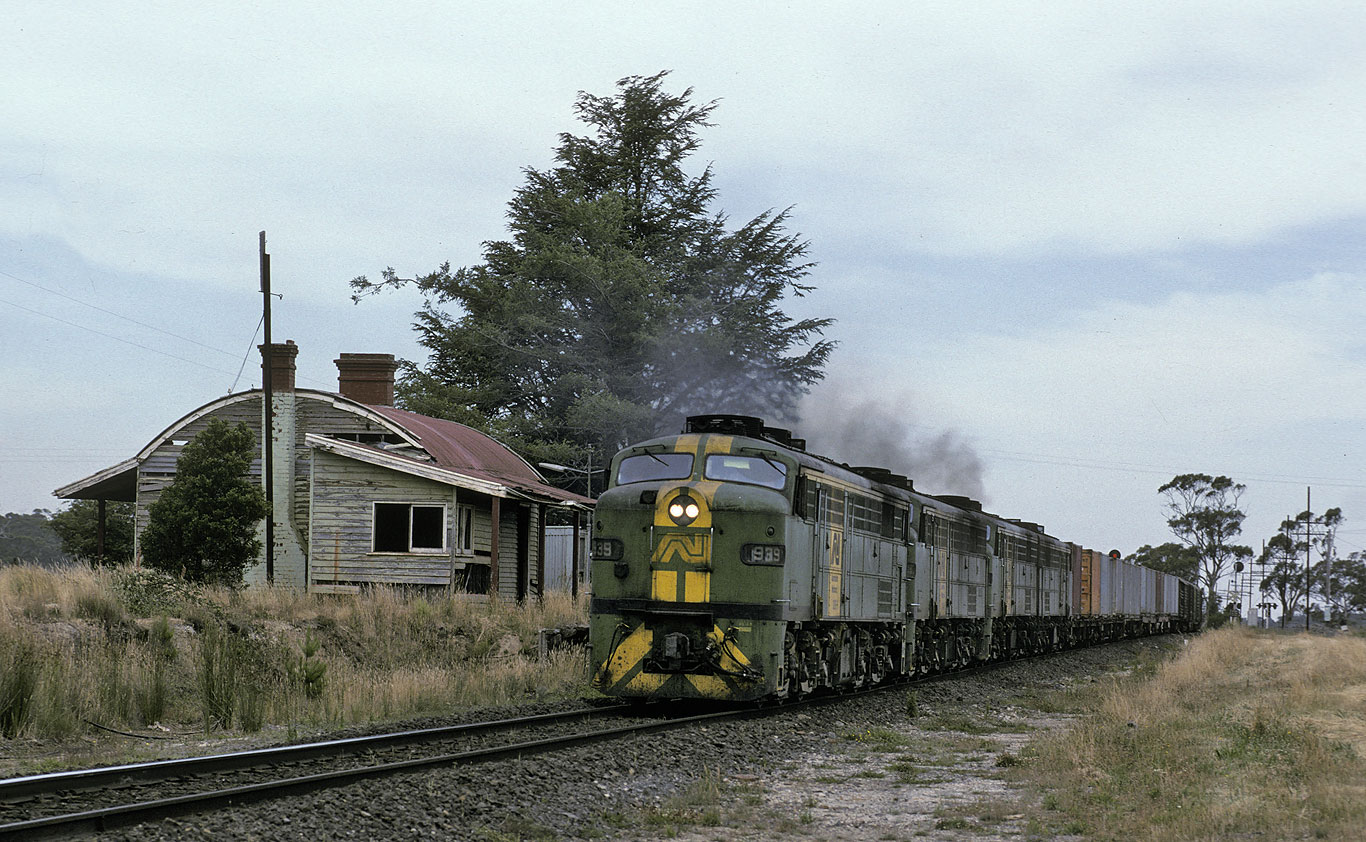
ABOVE: Gordon was dis-established as an electric staff station on March 29 1985 at which time the section became Ballan to Bungaree loop and all points and signals were removed. Four 930 class on a down jet pass the abandoned station buildings, Jan 6 1985. (photo courtesy Noel Bamford)
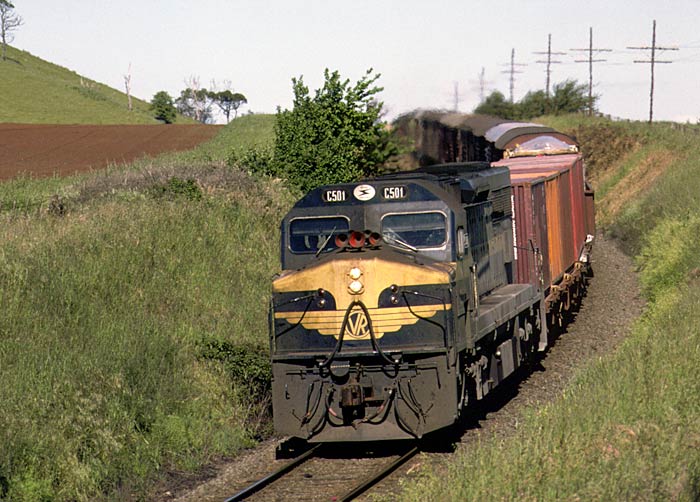
ABOVE: C 501 heads a down "jet" between Gordon and Bungaree on Nov. 23 1985.
==========
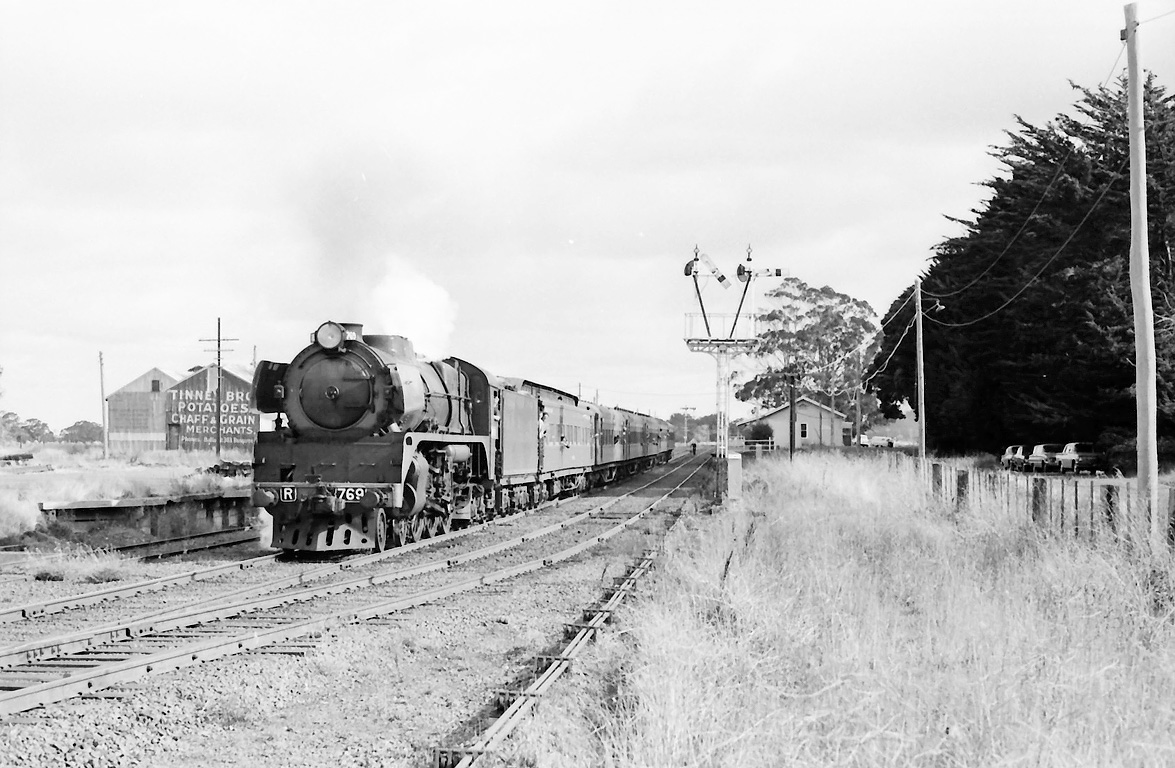
ABOVE: R 769 on an up enthusiast's special at Bungaree 1967 (Photo courtesy of Bob Wilson)

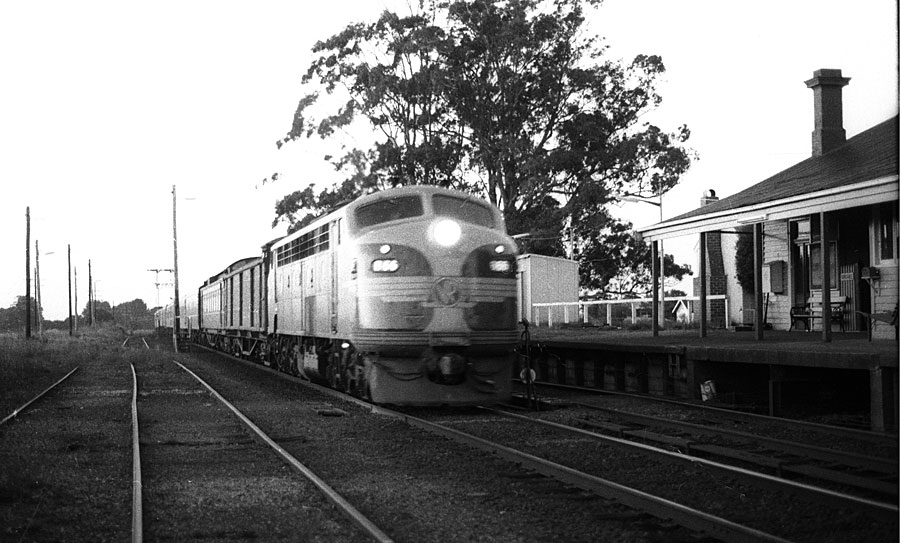
ABOVE: A pair of S Class on a very late running up Overland at Bungeree 1964 (Photo courtesy of Bob Wilson)
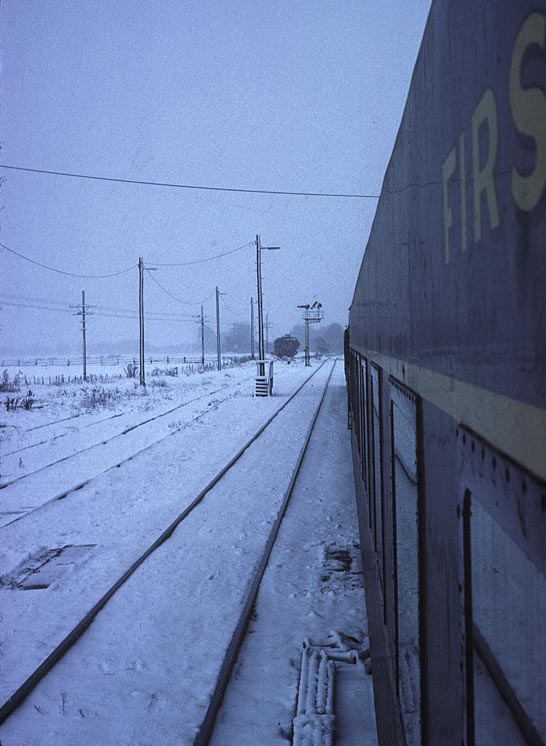
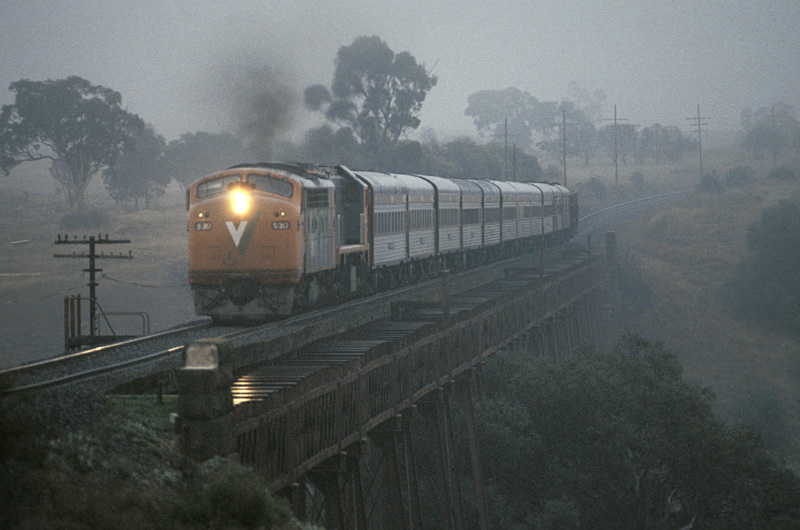
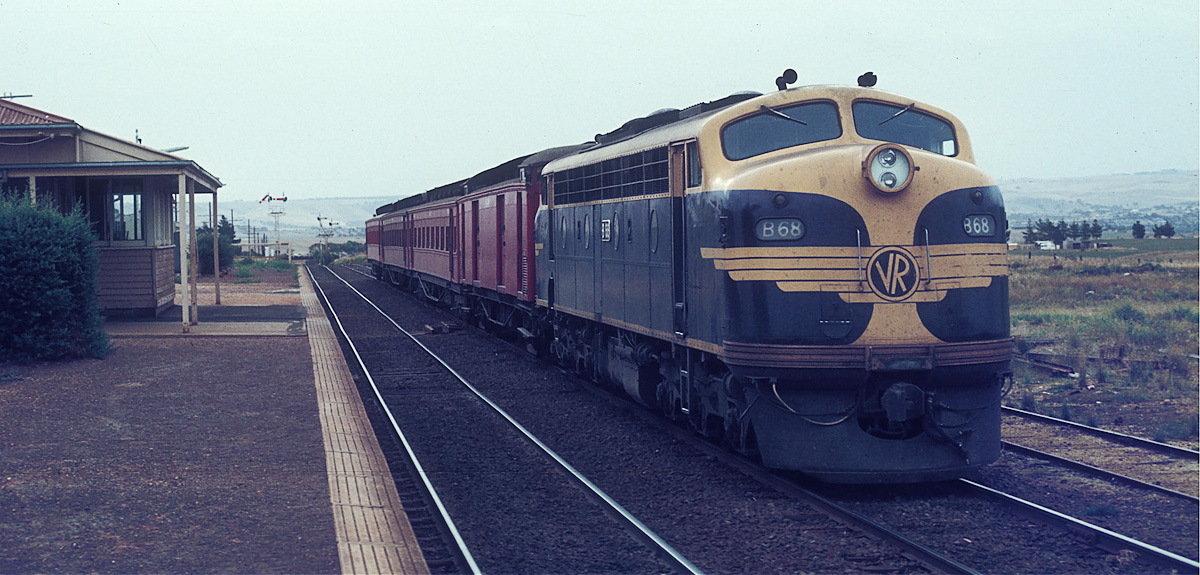
ABOVE: Whilst firing at Ararat I would often spend "off roster" weekends in Melbourne and catch the 8.30am Down Horsham pass. back to Ararat on Monday morning. After a little nap in the freezing BE, I awoke coming into Bungaree to be greeted to my first ever sight of snow! June 23 1981
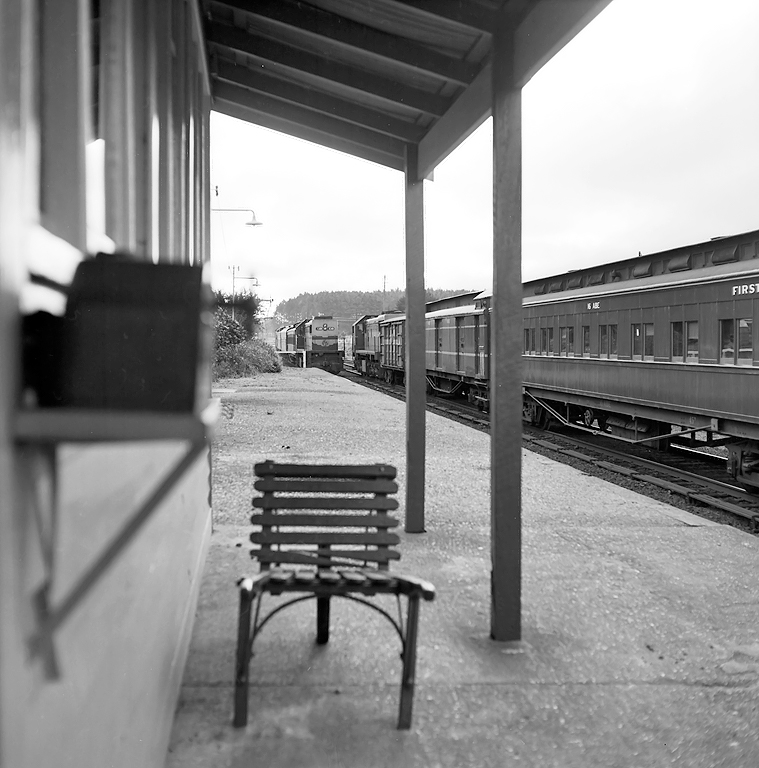
ABOVE: X 39 on a down pass. crosses an up pass. at Bungaree, July 26 1978 (photo courtesy Chris Wurr)

ABOVE: S 306 and an X bring the up "Overland" through Bungaree, 1982.
ABOVE: The up Vinelander on the auto staff exchanger at Bungaree, 1982
==========
Dunnstown was closed to passenger traffic Sept 12 1972 and closed to all traffic Feb 14 1977.
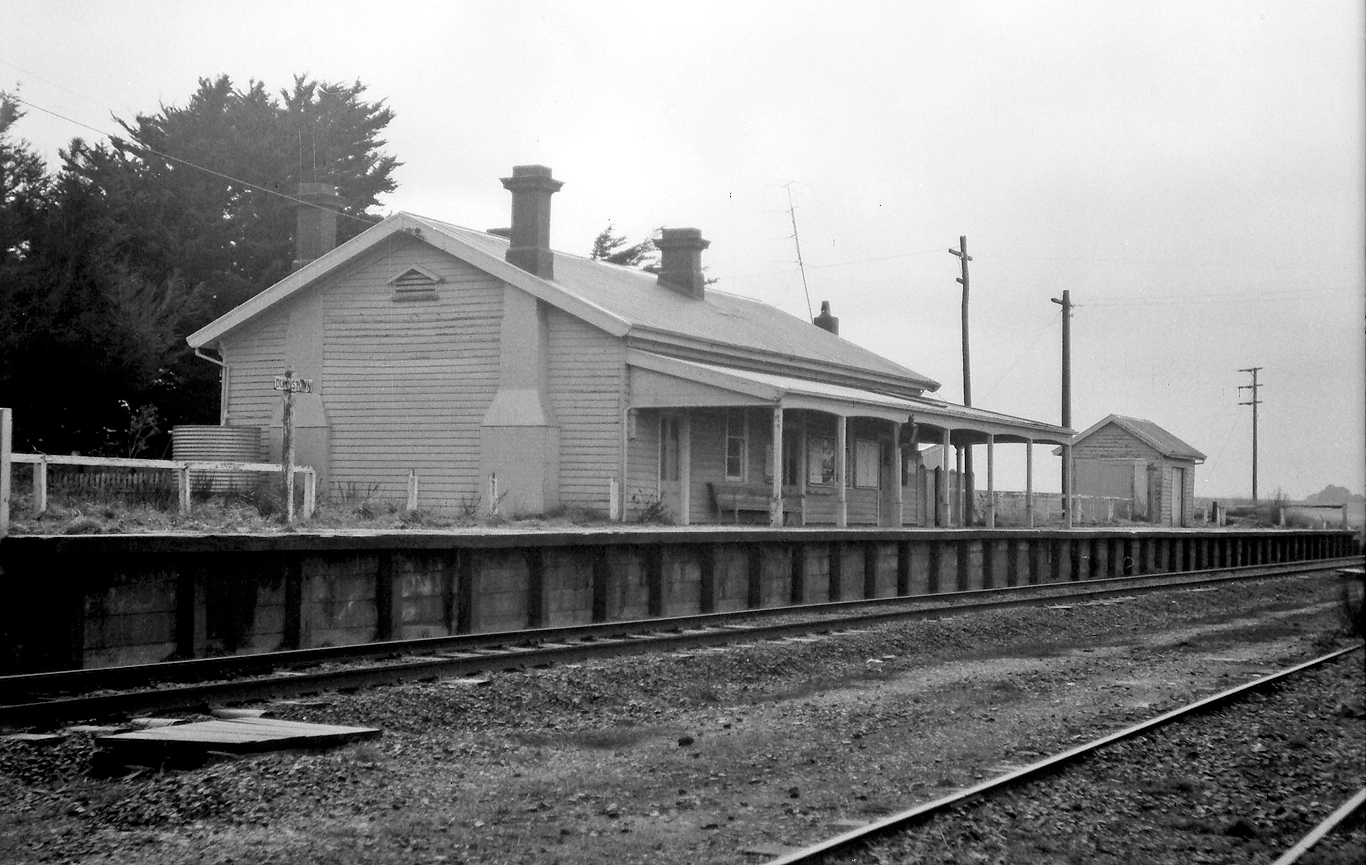
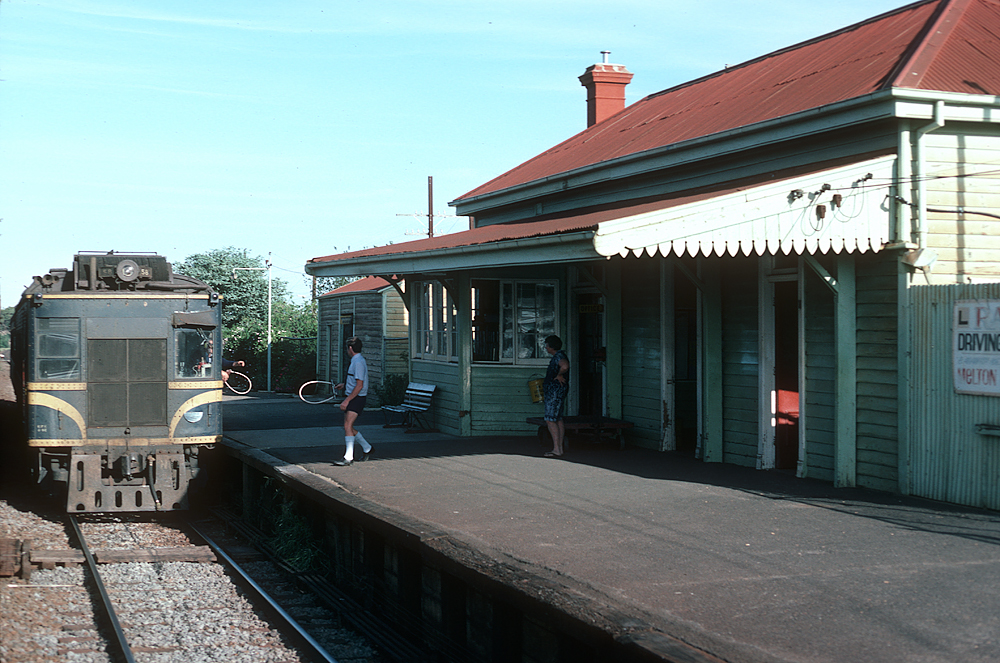
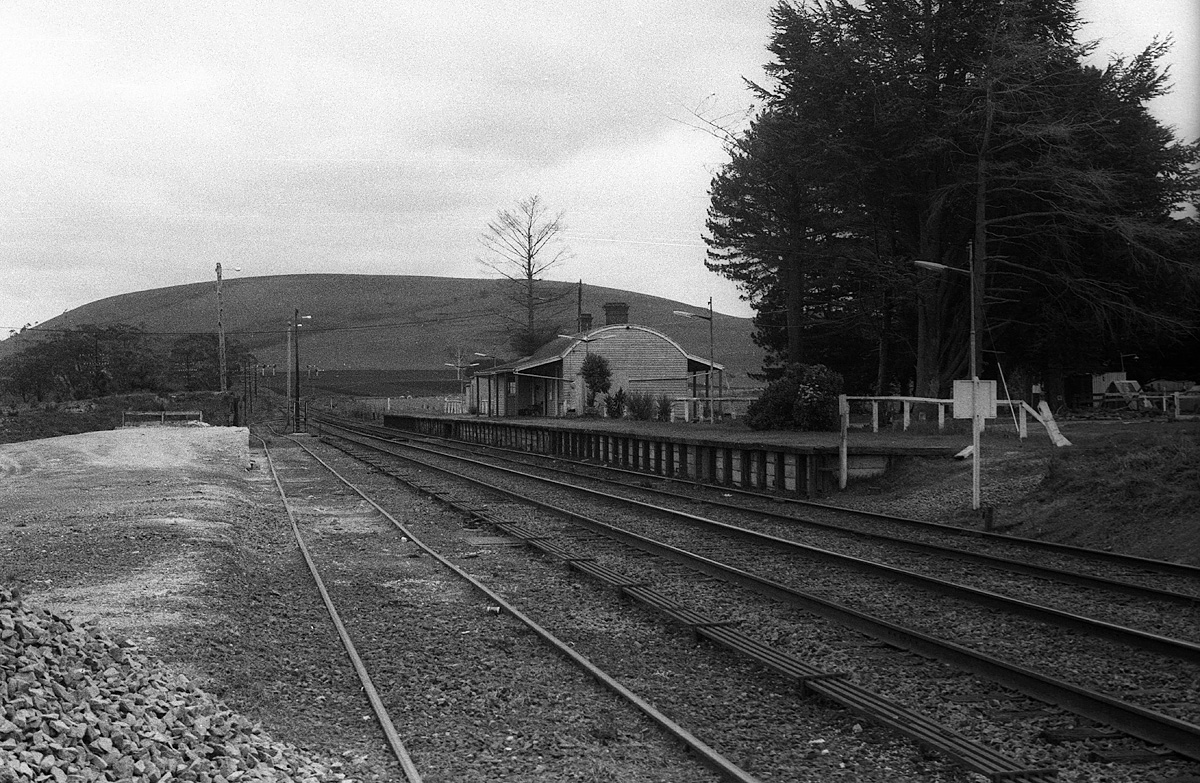
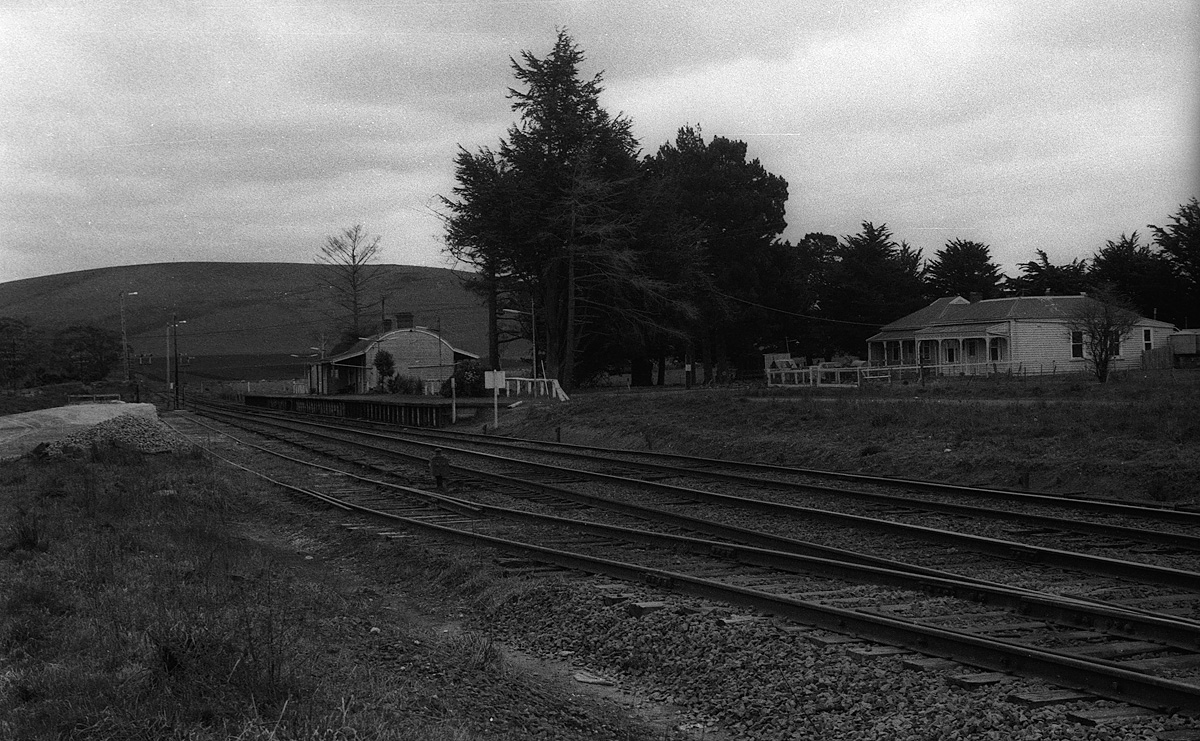
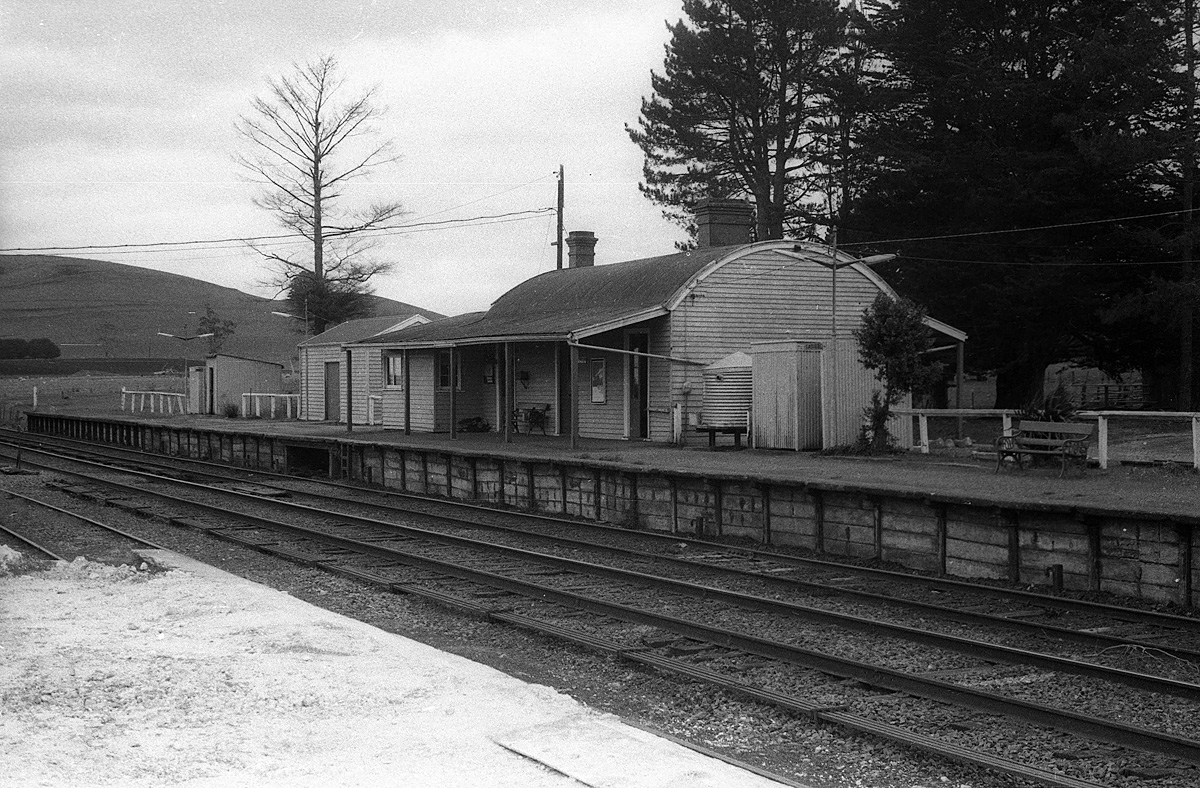
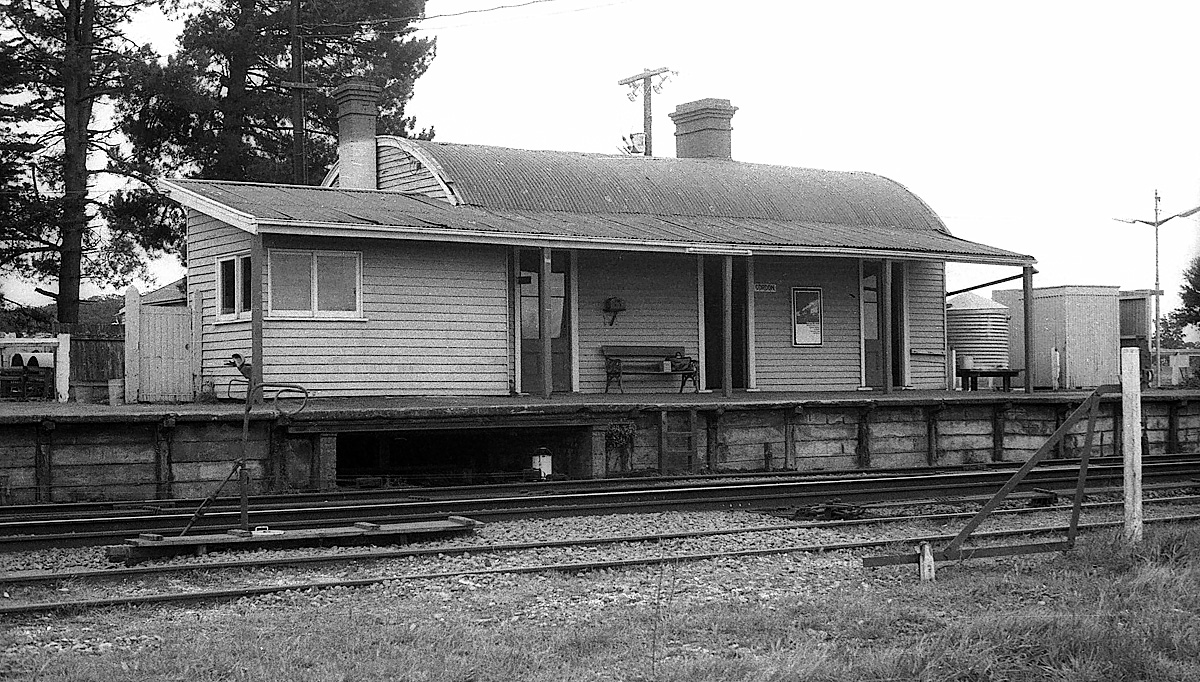
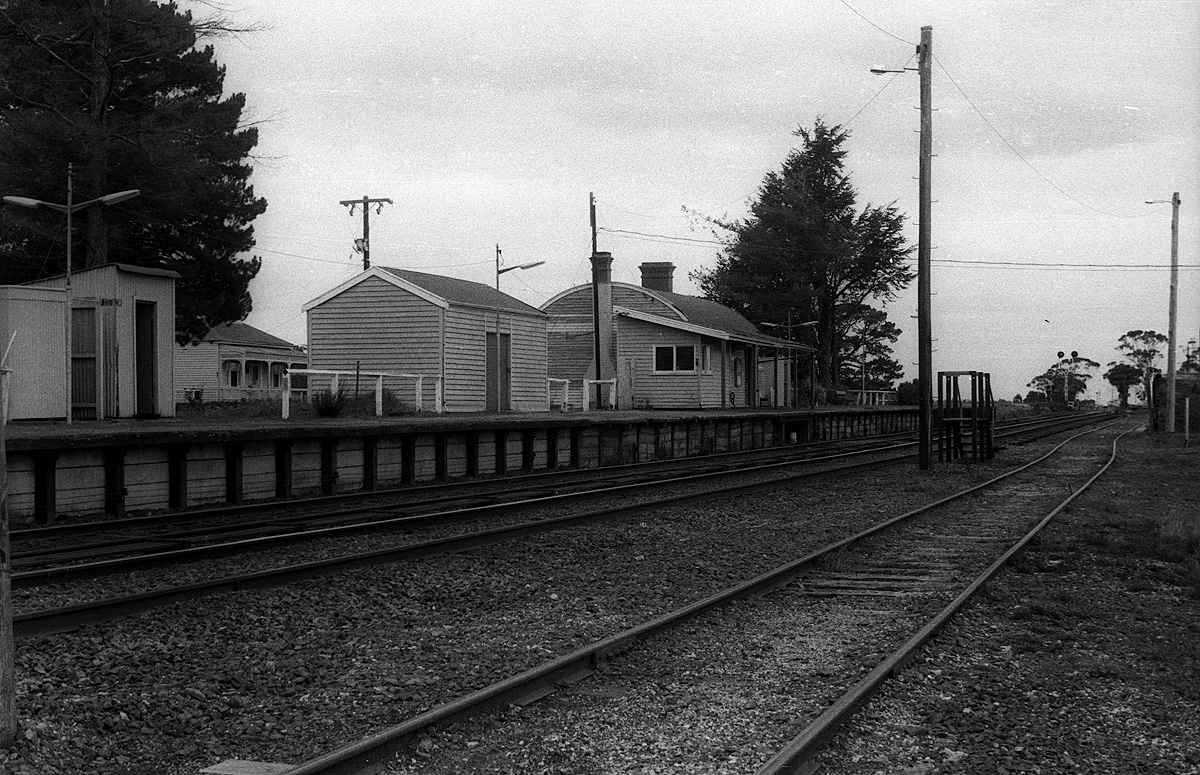
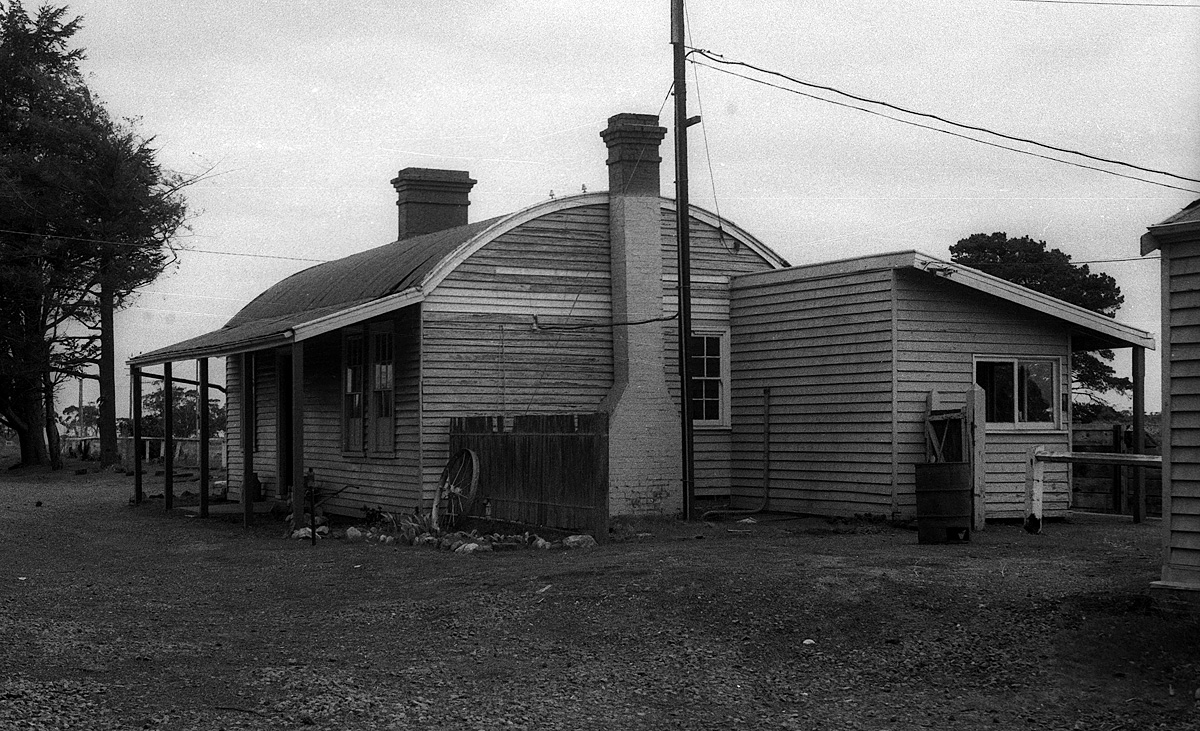
ABOVE: Dunnstown station building looking east. BELOW: the station sign. (both photos courtesy Chris Wurr)

==========
1919 Warrenheip signal diagram
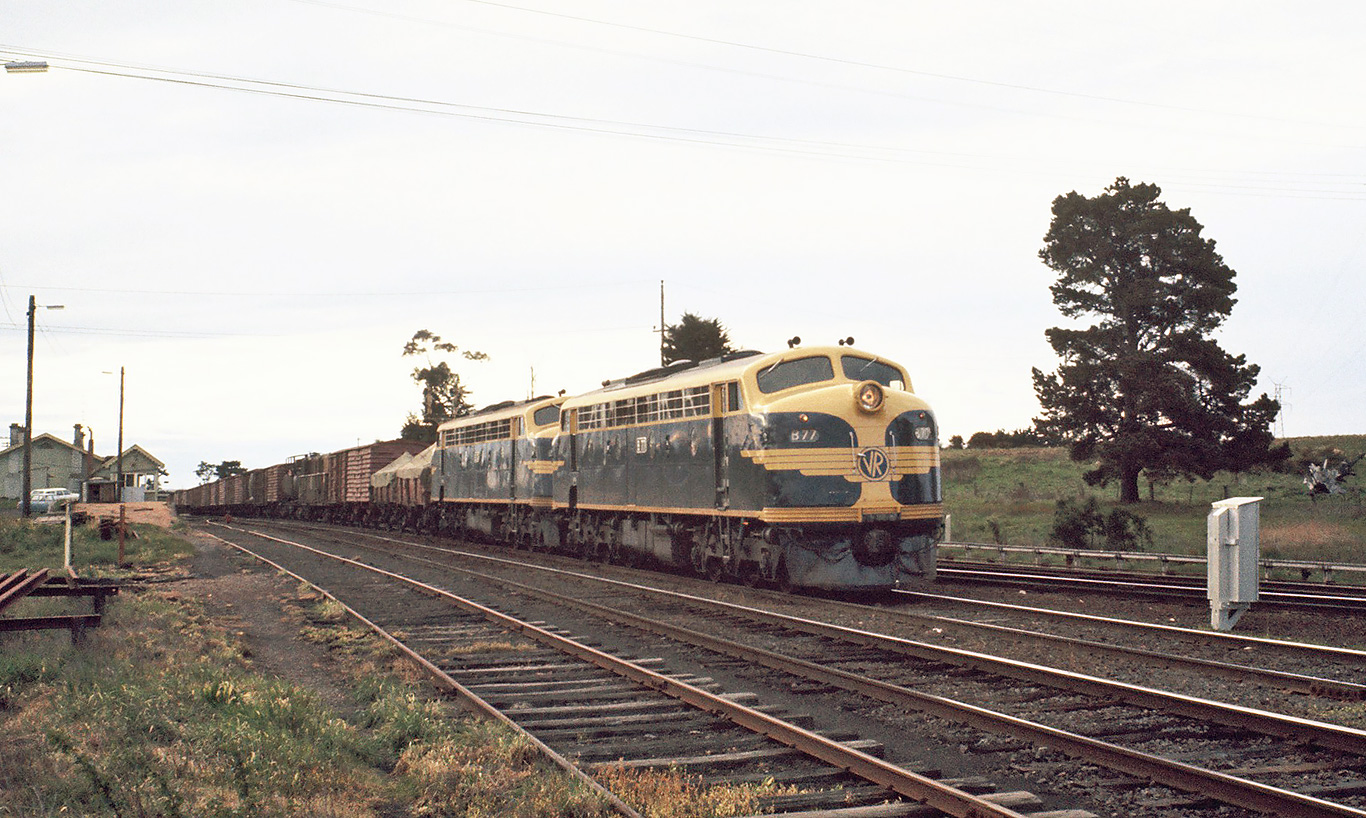
ABOVE: B77 + B70 depart Warrenheip with a long Ballarat - Geelong goods train on 7 October 1972. Even by this date, double B class workings were fairly rare in the Ballarat district. (photo courtesy Ron Wood)
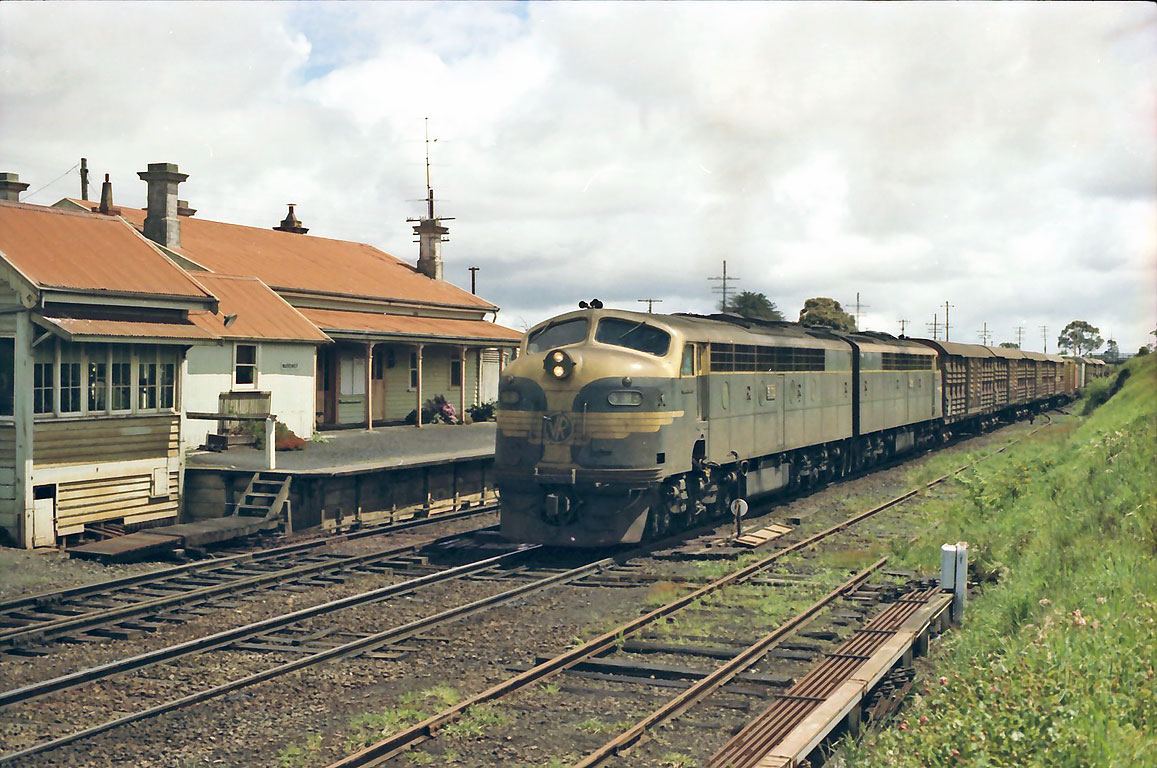
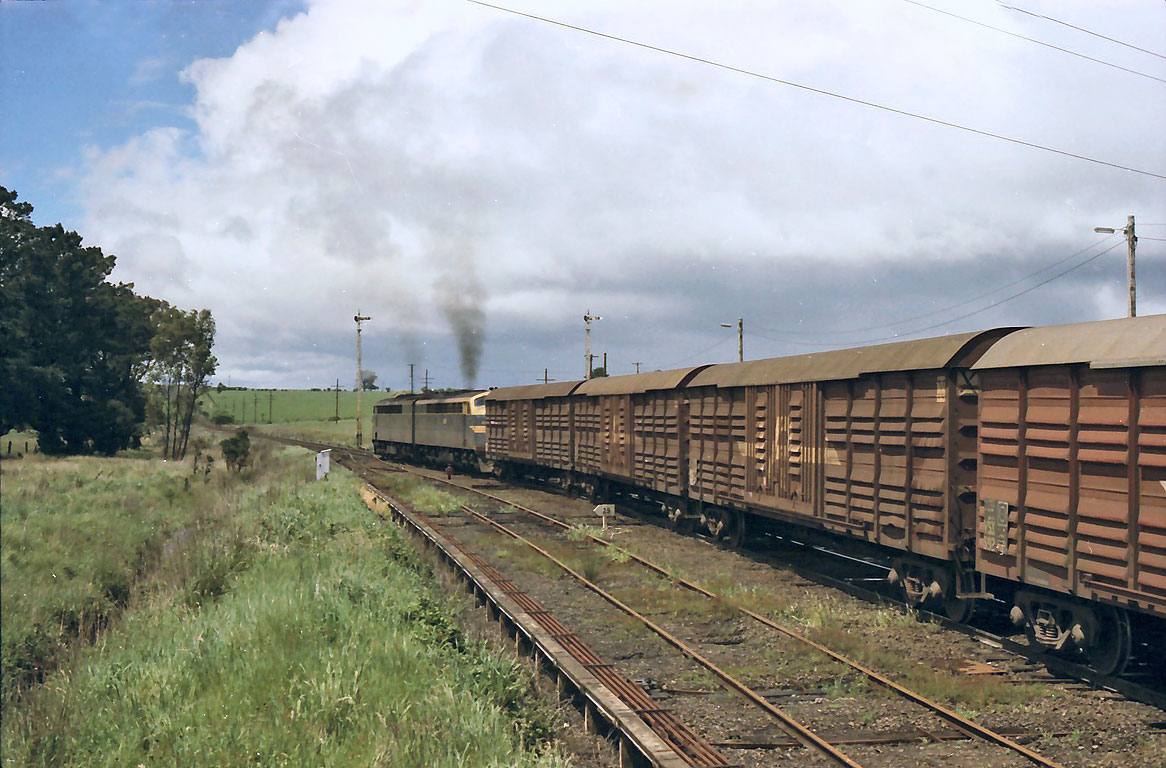
ABOVE & BELOW: A Melbourne bound "jet" picks up the staff at Warrenheip and swings onto the Bacchus Marsh line, Oct 31 1975. (photo courtesy Bob Wilson)
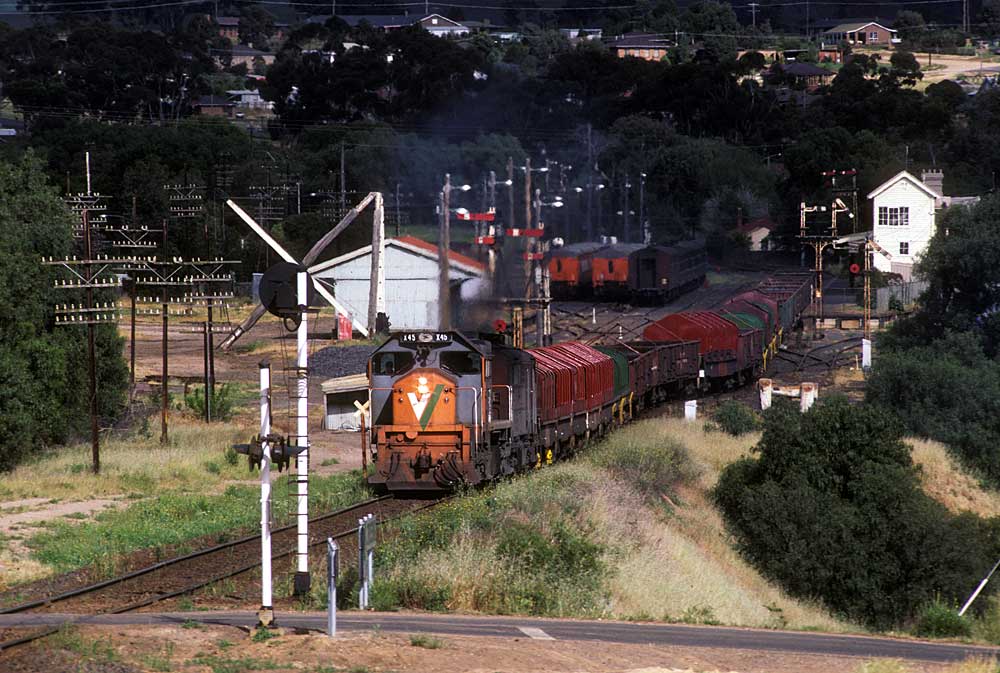
ABOVE: A pair of X's pick up the staff at Warrenheip on the 0655 Dimboola to Spencer St. pass. in 1978.
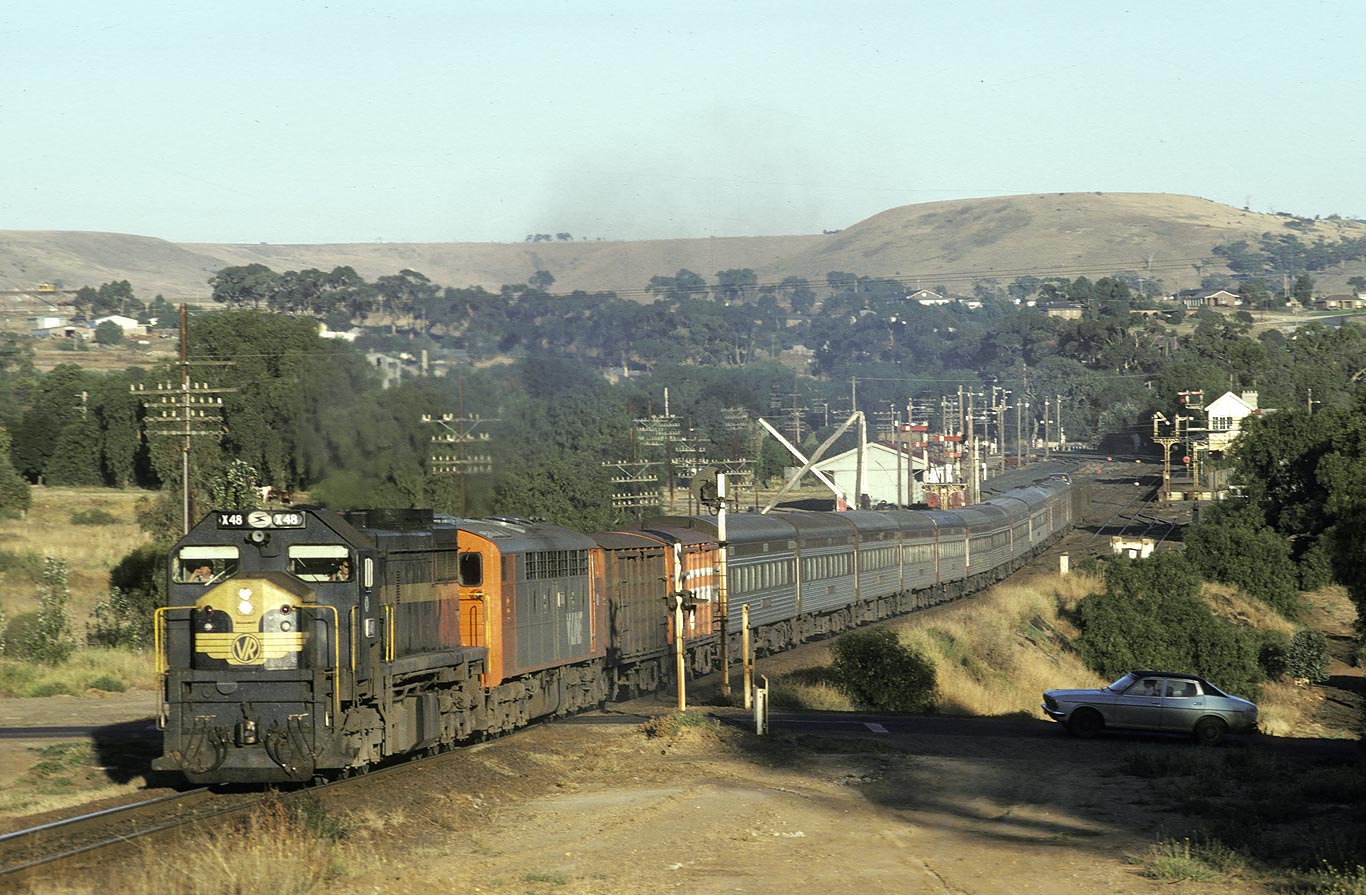
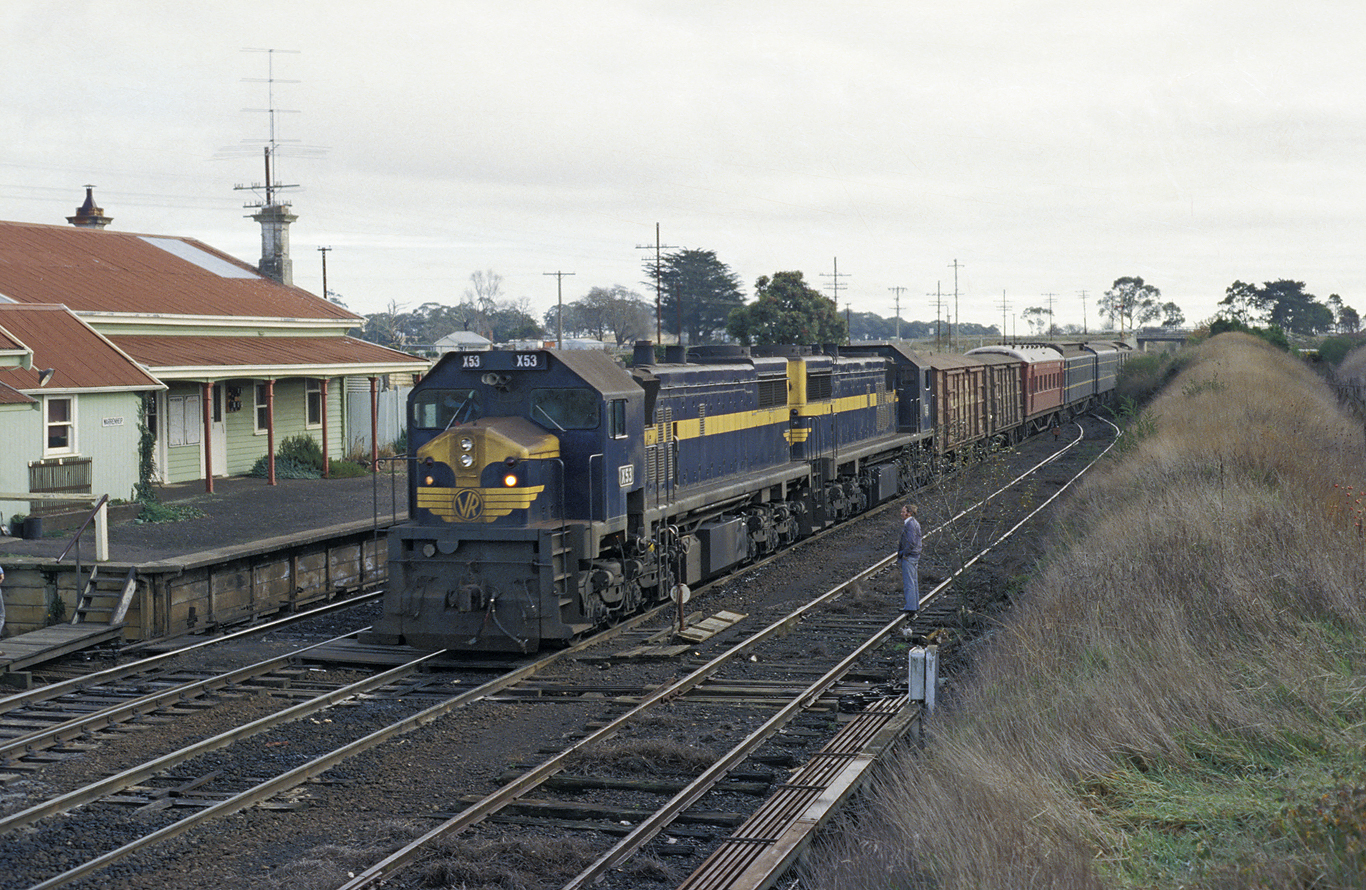
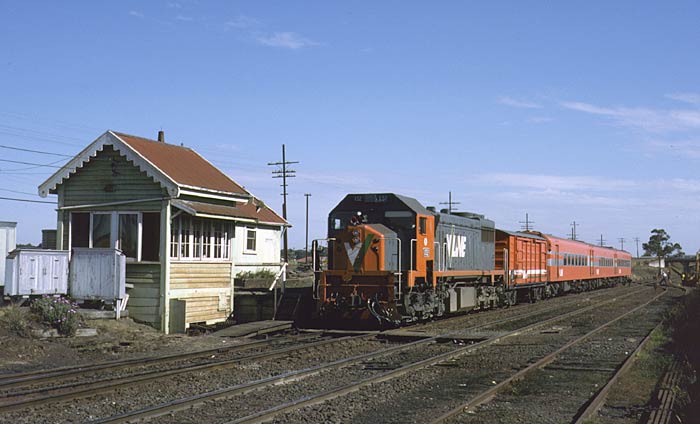
Compare this photo to the photo BELOW taken 8 years later, X 53 brings the up Dimboola pass through Warrenheip. April 3 1986. The whole train is painted in the V/Line colour scheme, the station building has been demolished and the train is now running to Melbourne via North Geelong.
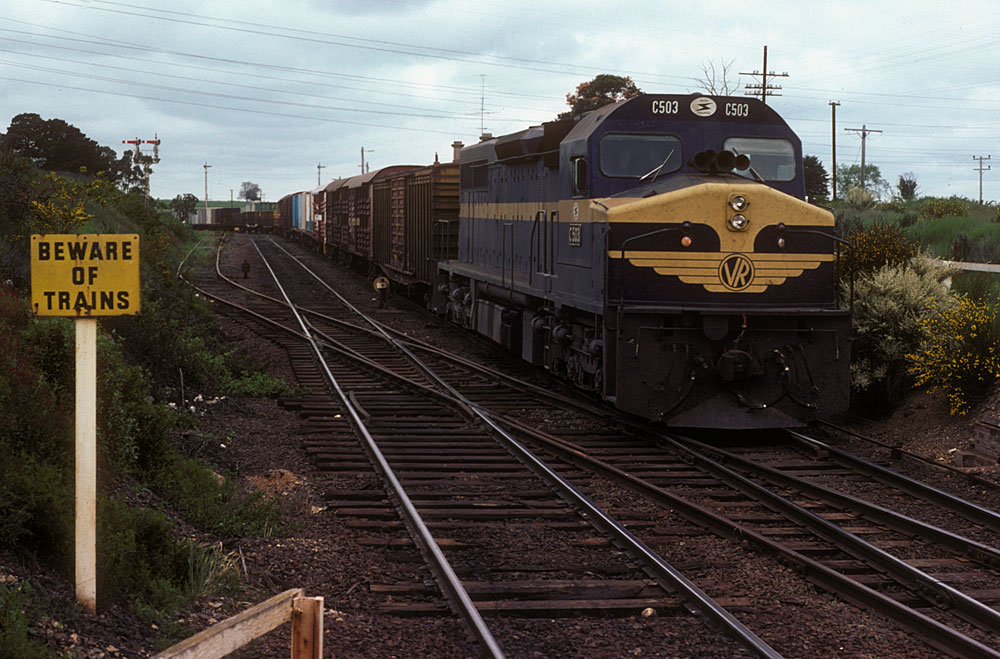
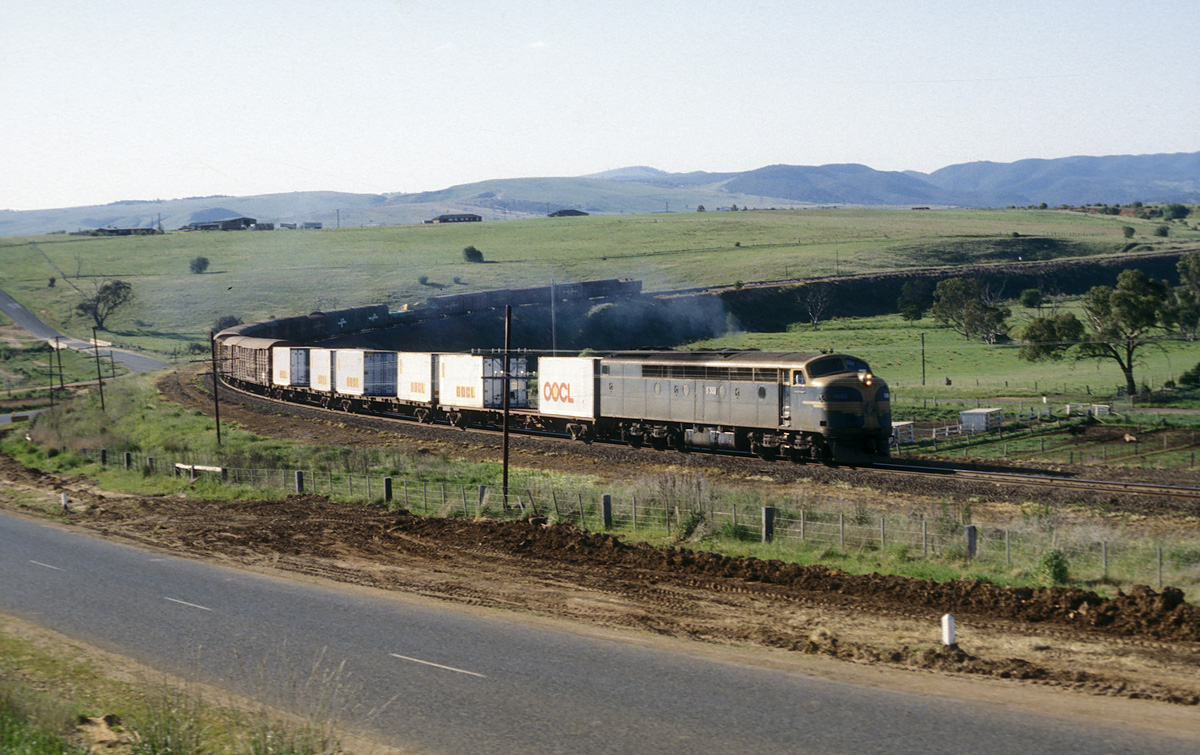
ABOVE: C 503 on a Adelaide bound "jet" passes through Warrenheip. 1980
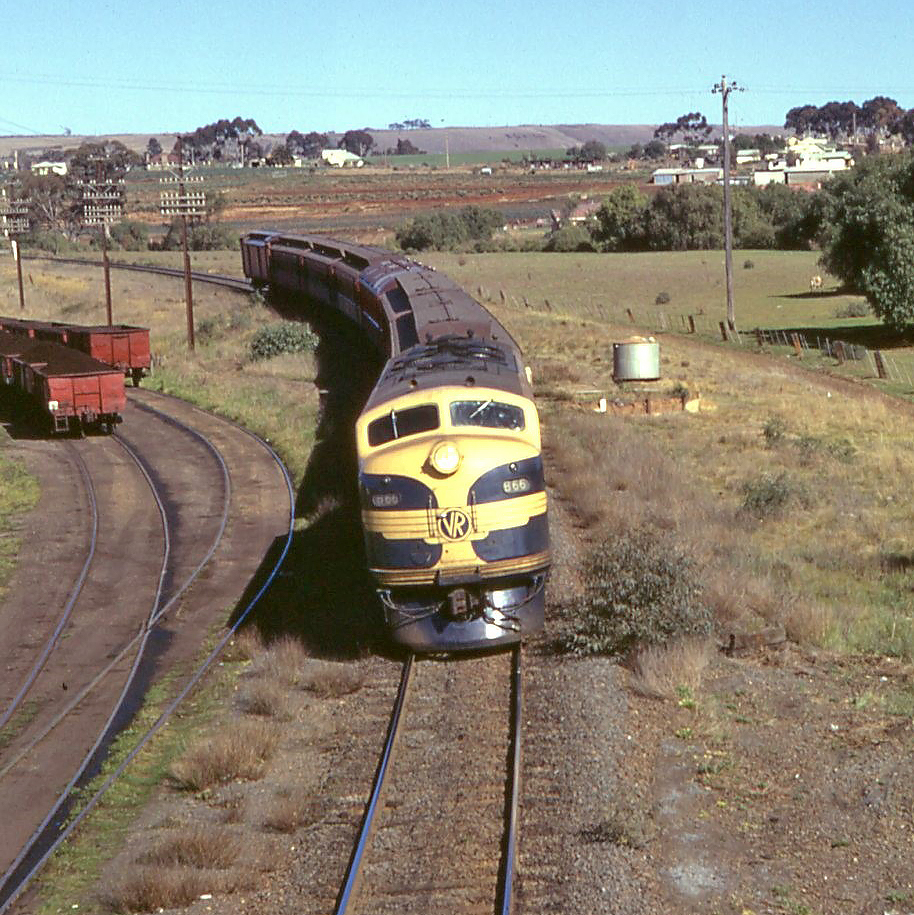
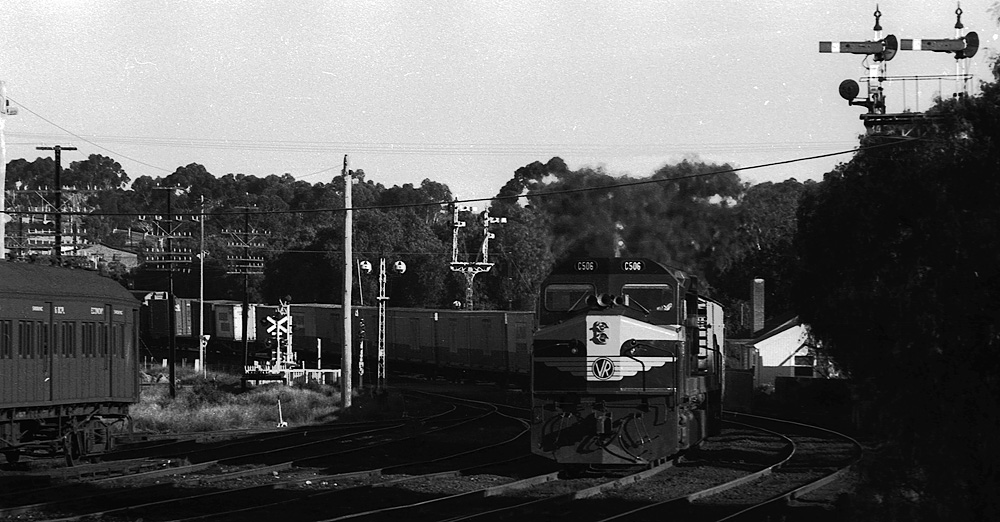
ABOVE: When I got my first camera one of the first photographic assignments I set myself was to replicate the famous shot of a B - T - R climbing Warrenheip bank. This shot is from the first roll of slide film through my new camera. I don't know why a dirty old S class was leading the brand new C class, presumeably the C had suffered some sort of failure. 1977
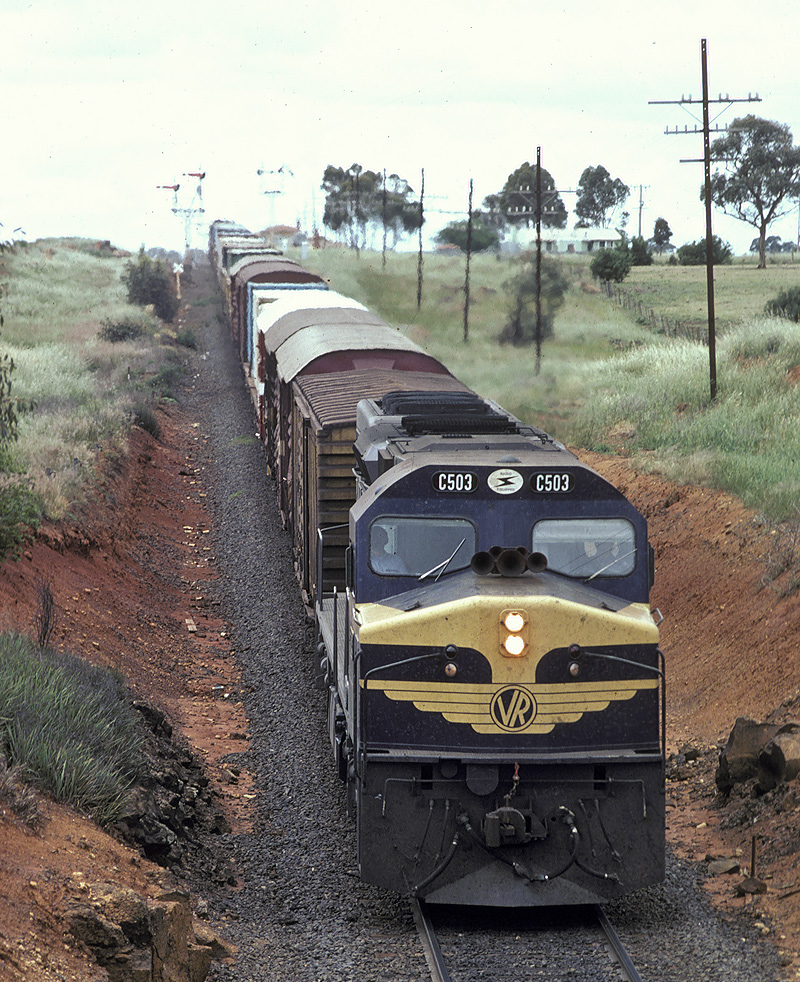
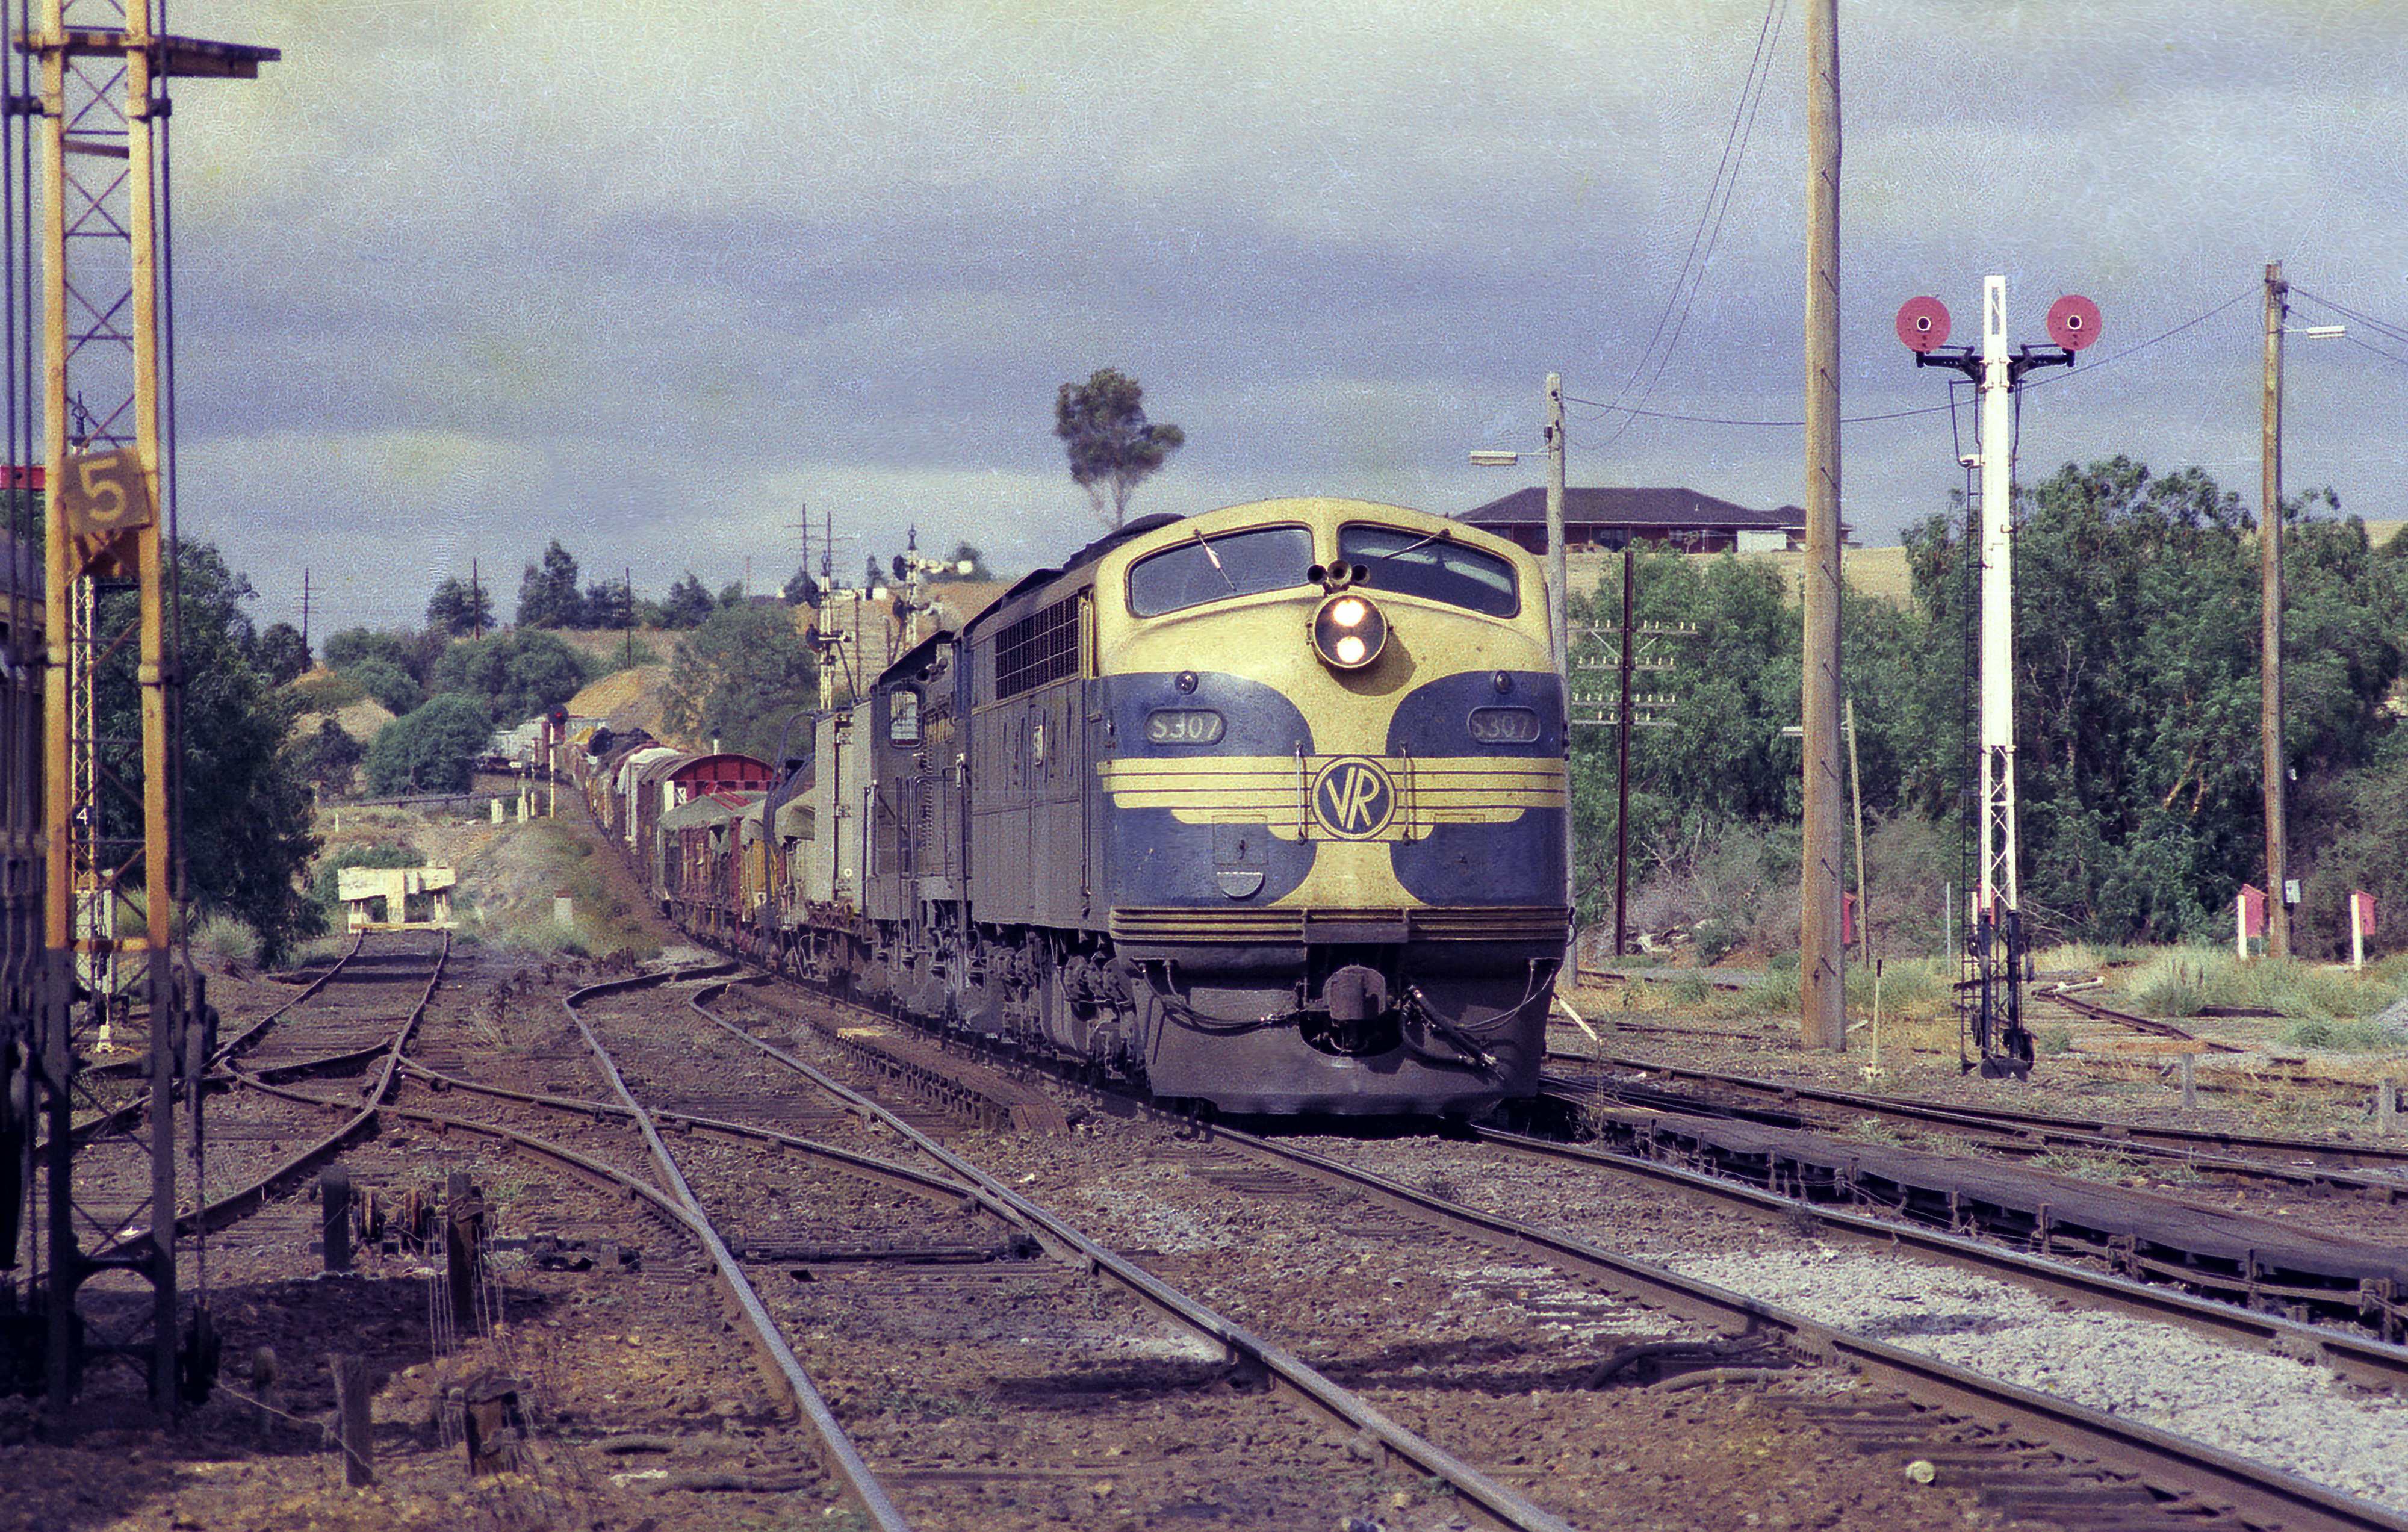
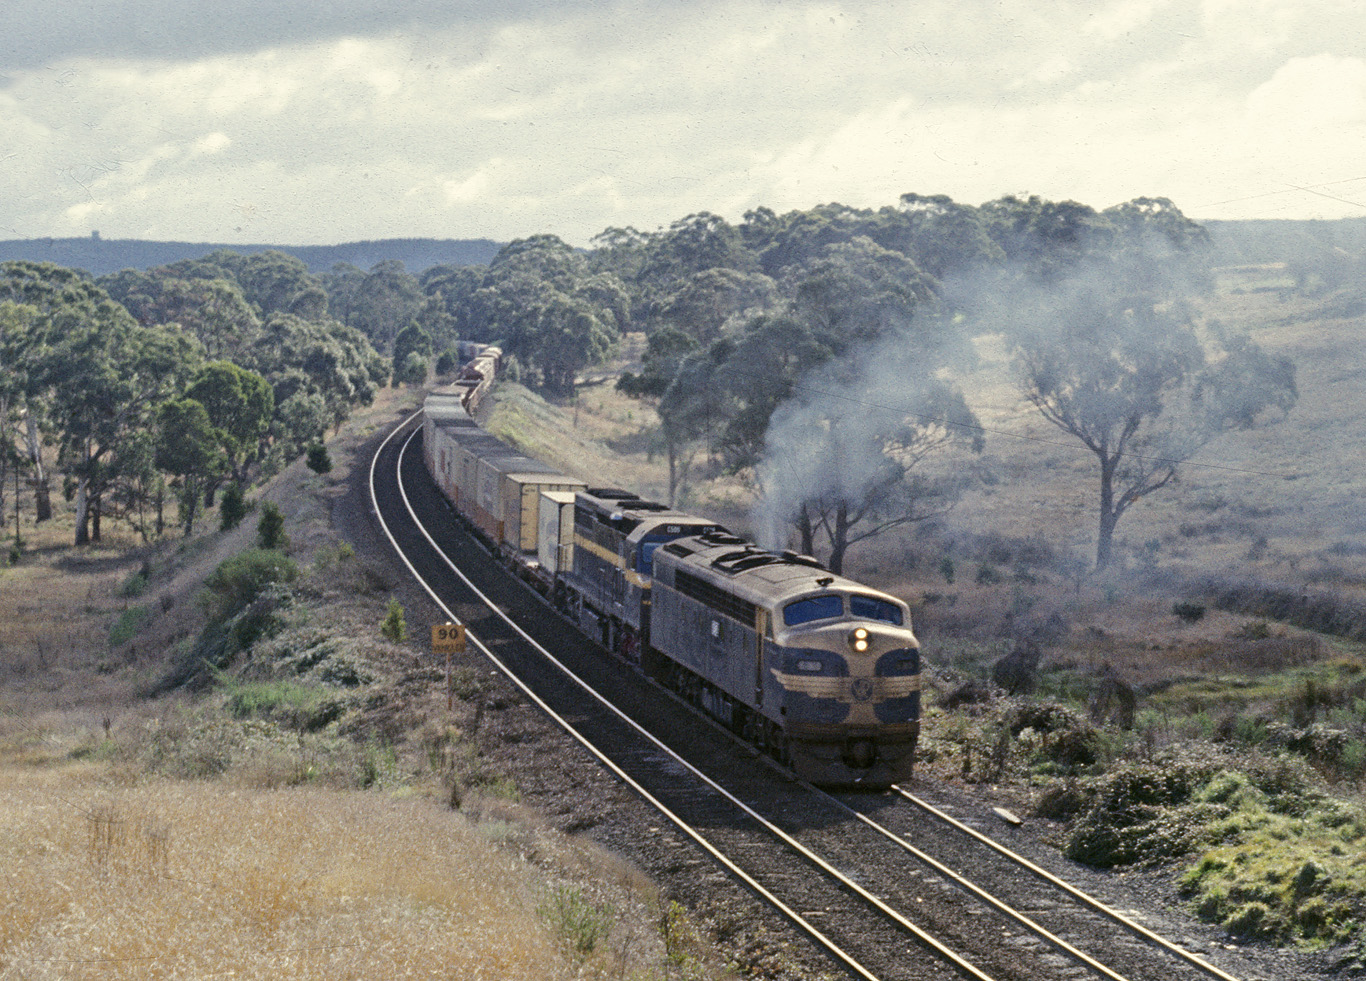
ABOVE & BELOW: Classic power on Melbourne to Serviceton "Jets" for many years was 2 S class back to back as seen here on an up"Jet" approaching Warrenheip, 1979.
ABOVE: X 44 on the 8.30am Melboure to Horsham pass, 1979.
ABOVE: An all wooden consist hauled by a B class prepares to descend Warrenheip bank on its way to Ballarat. 1979

ABOVE: S 315 picks up the electric staff at Warrenheip on the empty return working of the royal train. April 15 1983. (photo courtesy Noel Bamford)

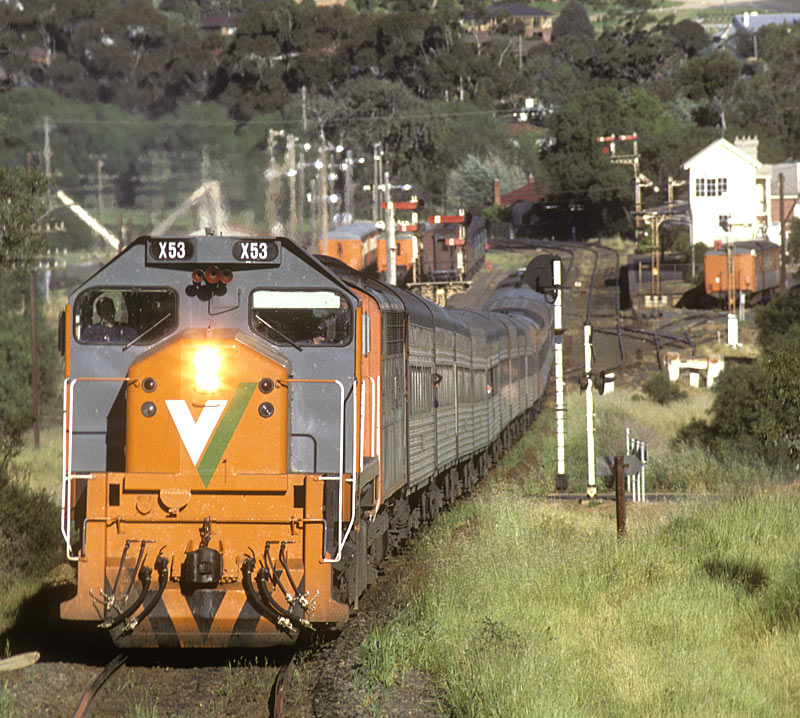
ABOVE: X 38 on a down pass. at Warrenheip. April 3 1986.
ABOVE: Looking east from the junction, a Melbourne to Adelaide train seen on the left, the line to Geelong curves away to the right. 1978.
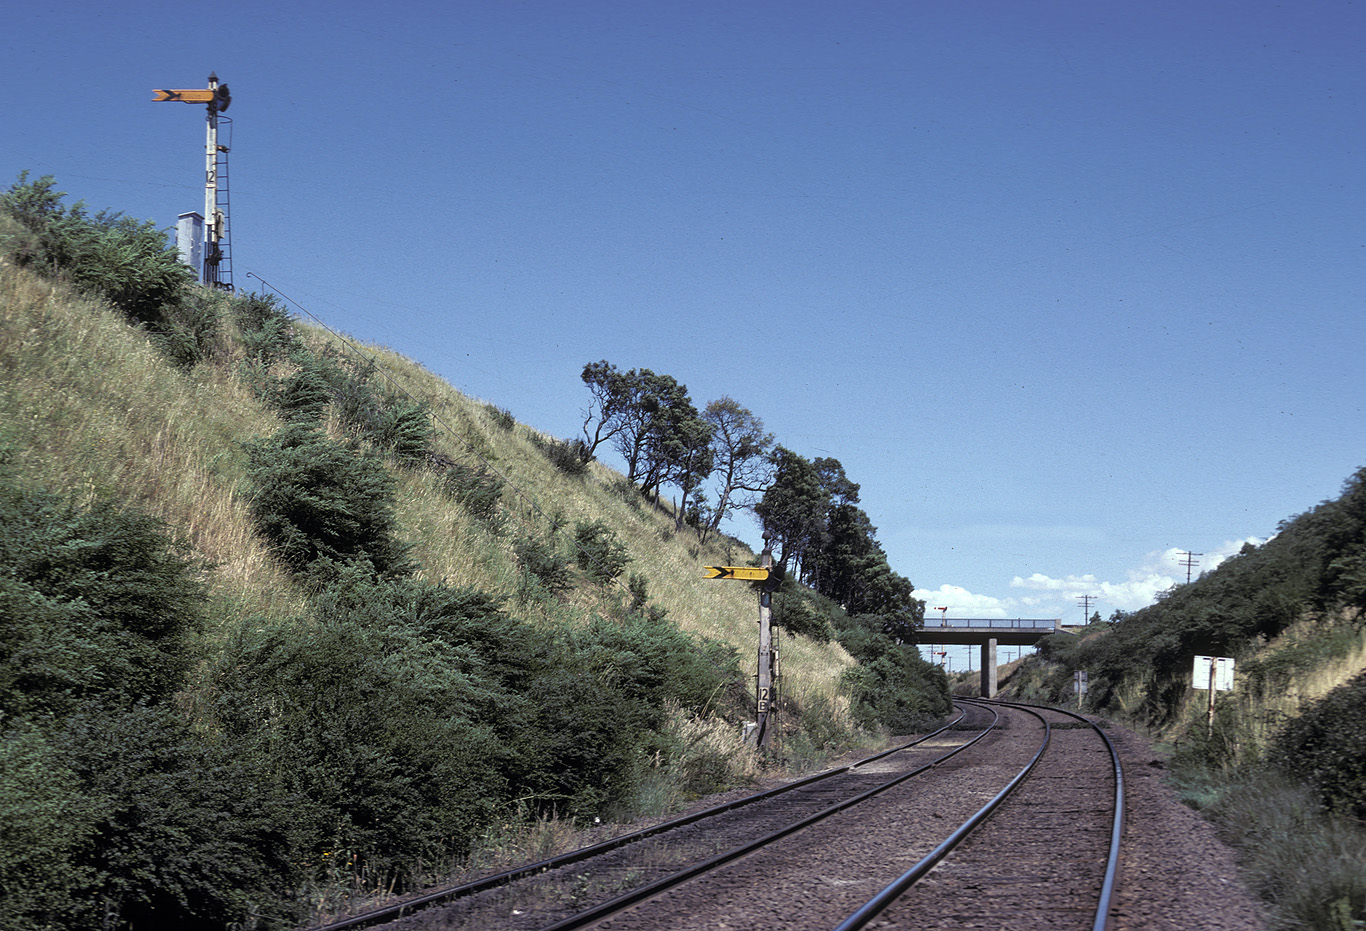
ABOVE: The co-acting up distant signal for Warrenheip, this distant could be placed to proceed for trains to Bacchus Marsh and Geelong. From 1985 it could only be placed to proceed for Geelong trains. The co-acting up arrival home can be seen behind the bridge. Jan 1984
